Last Updated on January 3, 2023 by Gaga
Nothing makes a woman feel more attractive than a fresh salon blowout. However, getting a gorgeous, shiny blowout doesn’t mean you have to go to a salon.
A salon pro blowout can be achieved at home if you have the right tools and you know how to blow dry your hair.
The following tips ensure the perfect at-home blowout that you can create on your own, which could save you money.
How to Give Yourself a Salon Blowout
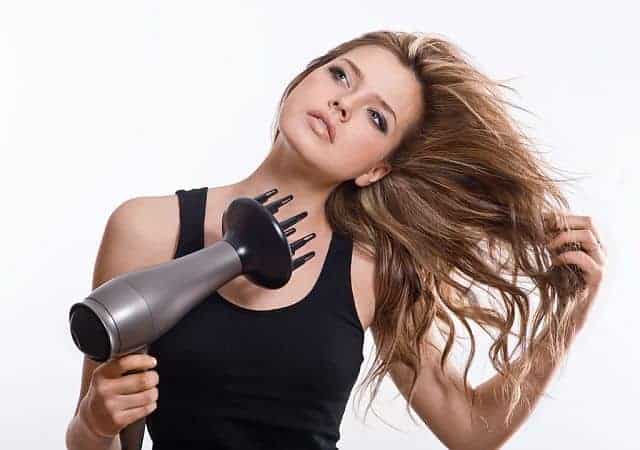
The most essential tool to do a salon blowout at home is a quality hair dryer. A quality hair dryer should have adjustable heat and speed settings including a cool shot button. This blow-dryer should also have the necessary attachments such as a diffuser and concentrator. A diffuser is an essential accessory for styling curly hair while the concentrator nozzle helps to create straight hairstyles.
1. Comb your hair before shampooing to make sure it is completely tangle-free. Tangles and knots can get worse with shampooing and can interfere with blow-drying and styling. Use a wide-toothed comb and gently start detangling from the ends and slowly work your way up.
2. Use a shampoo that best suits your hair needs. If you have oily and thin hair, do not use moisturizing shampoo which can make your hair feel flatter and heavier. Moisturizing shampoo works well for dry and processed hair. A moisturizing shampoo will lock in moisture and prevent the hair from over-drying when you blow-dry it.
However, oily hair needs a gentle, sulfate-free shampoo that will make your locks feel light and bouncy. Thin and fine hair needs a shampoo that gives lift and volume. Curly hair needs a smoothing shampoo that helps reduce frizz. If you have a buildup from using too many styling products, use a deep cleansing shampoo. If you have a problem with hard water or chlorine buildup, a chelating shampoo will be the perfect choice to give your hair a fresh start and restore its natural shine.
3. Apply a conditioner to the mid-lengths and ends of your hair. Avoid applying conditioner to your roots as it can leave your style looking flat. Also, make sure to thoroughly rinse away the conditioner as residues can weigh the hair down and ruin your blowout.
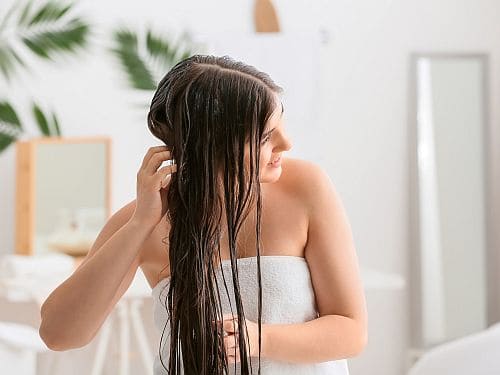
4. Towel dry your hair to absorb excess moisture. Use an ultra-absorbent microfiber towel that dries hair quicker than a cotton one, cutting down on the drying time. Simply cover your hair and allow it to dry for 15 minutes under a towel turban. Don’t rub the towel against your hair as the scrubbing movement can create friction resulting in frizzy hair.
5. Apply a blow-dry spray with heat-protective properties to prevent heat damage. Apply blow-dry spray while your hair is still damp to spread the product easier and more evenly.
6. Don’t blow dry your hair in the misty bathroom. High humidity can cause frizz. Open the bathroom door prior to drying or move to a room with a good mirror and no humidity.
7. Set your hair dryer on medium heat setting and rough-dry hair in circular motions. Massage the roots with your fingers to get them more lift. Continue with this finger massage until your hair is about 75% dry.
8. Divide your hair into four to six sections and use clips to hold it in place. Work with small sections, starting from the areas that are hardest to work with. Combine the section you have finished with the section that is still damp and blow-dry them together. Such blending will give a more natural appearance to your style.

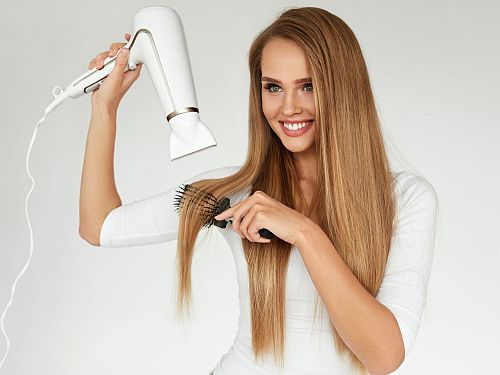
9. Use a brush made of heat-resistant material. Metal brushes heat up quickly and can damage the hair. A boar bristle brush has the right tension to make hair smooth and shiny. A round bristle brush works best for giving hair some lift and for creating volume. A paddle brush works better for straight and sleek hairstyles.
10. Keep the dryer at a distance of a minimum of 6 inches away from the hair to protect your hair and scalp from getting burnt. If you need to spend some extra time on certain areas of your hair, use the lower heat setting to avoid damage and prevent the hair from over-drying. Keep the blow-dryer in motion and avoid focusing on a single spot. This helps prevent over-drying and uneven texture.
11. Make sure to use the concentrator nozzle to focus the air stream for more targeted drying. The nozzle prevents hair from burning and helps reduce the appearance of frizz. Point the nozzle down and follow the natural direction of the hair, from root to tip. This helps to seal the cuticle for more smoothness and shine. In the opposite case, blow-drying hair upwards will ruffle the cuticle, causing a frizzy mess.
12. If your arms get tired easily, start the blow-drying process from the front part, because the front pieces are the most important for creating the perfect look.
13. Practice a mix of cool and hot air. The heat from the blow dryer causes the hair cuticle to open which allows you more control over your hair. Cold blasts tame static and seal the cuticle for an extra shiny finish.
Once you’ve finished drying, blast your hair with a shot of cold air while gently brushing it. This aligns the cuticle, adds extra shine, and helps the style to set.
Hair Dryer Brushes for a Salon-Style Blowout
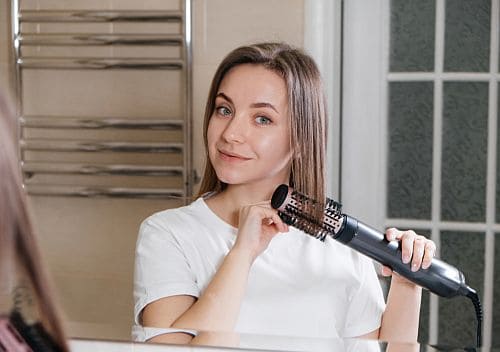
If you find that using a hair dryer and a round brush takes too much time and effort, you may want to try a hot airbrush. Hot air stylers dry your hair while styling it. The result is a voluminous, smooth, and shiny blow-out. To minimize the chances of heat damage, it would be best to air dry your hair a bit before using this tool. These brushes work best on medium-length hair.

Gaga is a blogger and founder of the Softer Hair website. She often says that insomnia is to blame for her first blogging attempts. Being the night owl, she hated the morning alarm. She left her office job and returned to what she loved most - writing.