What Type of Highlights is Low Maintenance and Budget-Friendly?

What is it we really need as we experience an economic recession here in 2023?

Is it to immediately get on a Dave Ramsey-level budget? Maybe change up skillsets quickly just in case the current job tanks? Or how about slashing the personal budget for any expense that doesn’t have to do with survival? Do we really have to reduce or diversify our stock portfolios while simultaneously letting our hair and nails grow out of whack?

balayage hair dyed hair in a beauty salon

This really doesn’t seem like the answer.

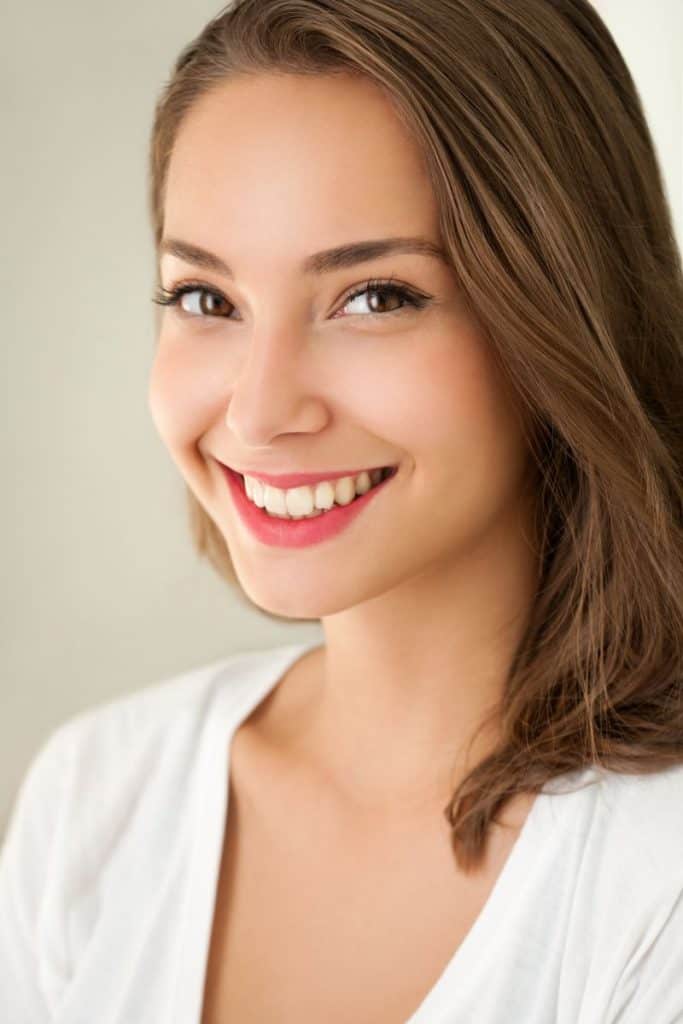
In fact, instead of slashing the budget on experiences like hair and nails, it might be better to think through allocating funds in new ways.

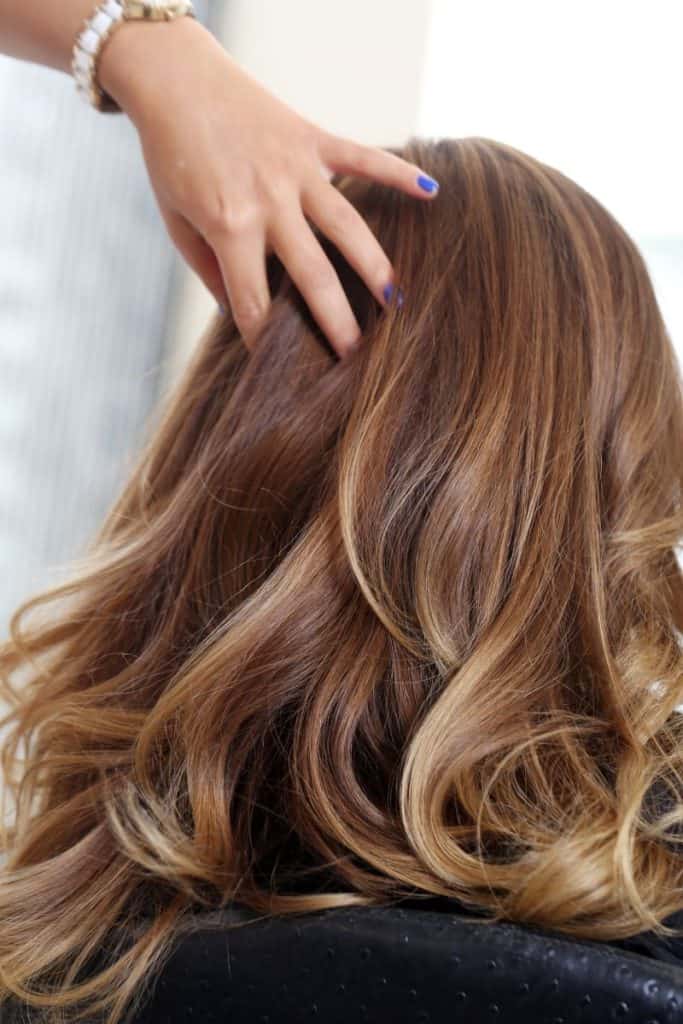
One way to do this is to invest in low-maintenance highlights. That way you can feel and look your best, which is a much-needed 2023 power move, while simultaneously supporting your budget in a healthy way.

What Type of Highlights Is The Easiest to Maintain?

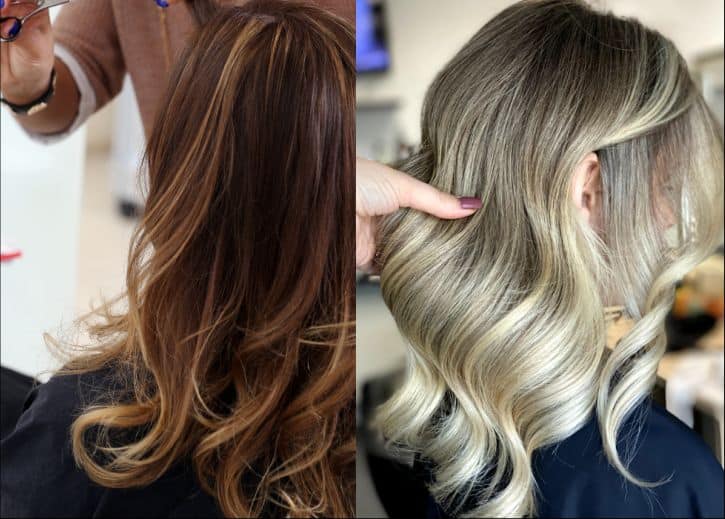
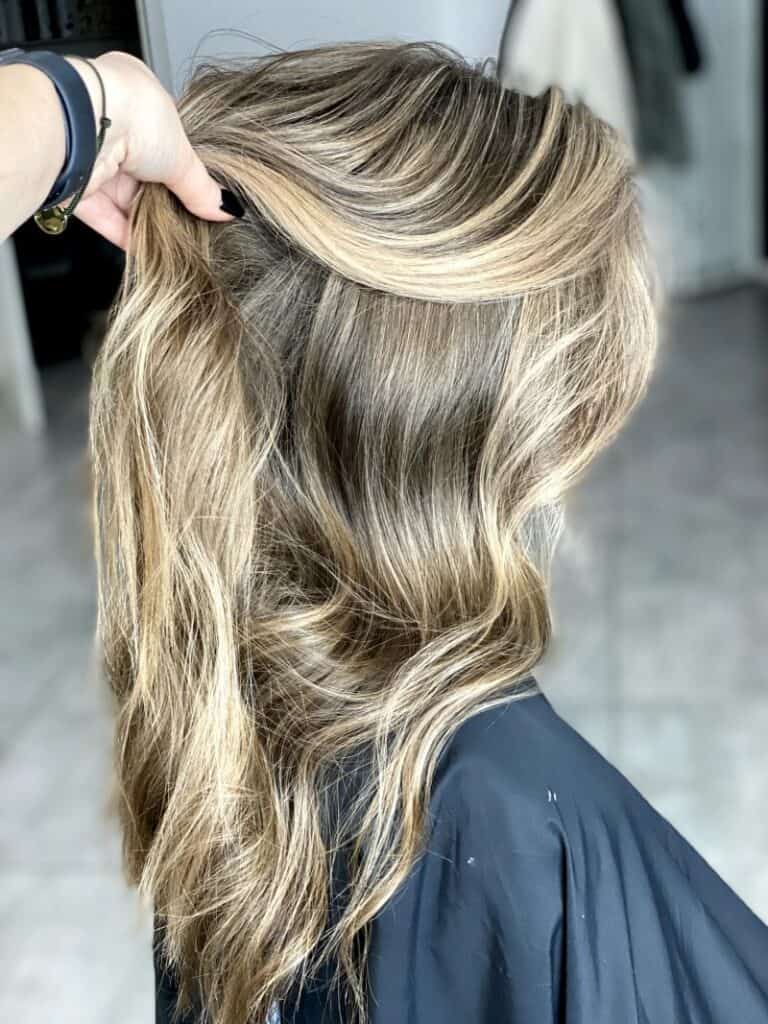
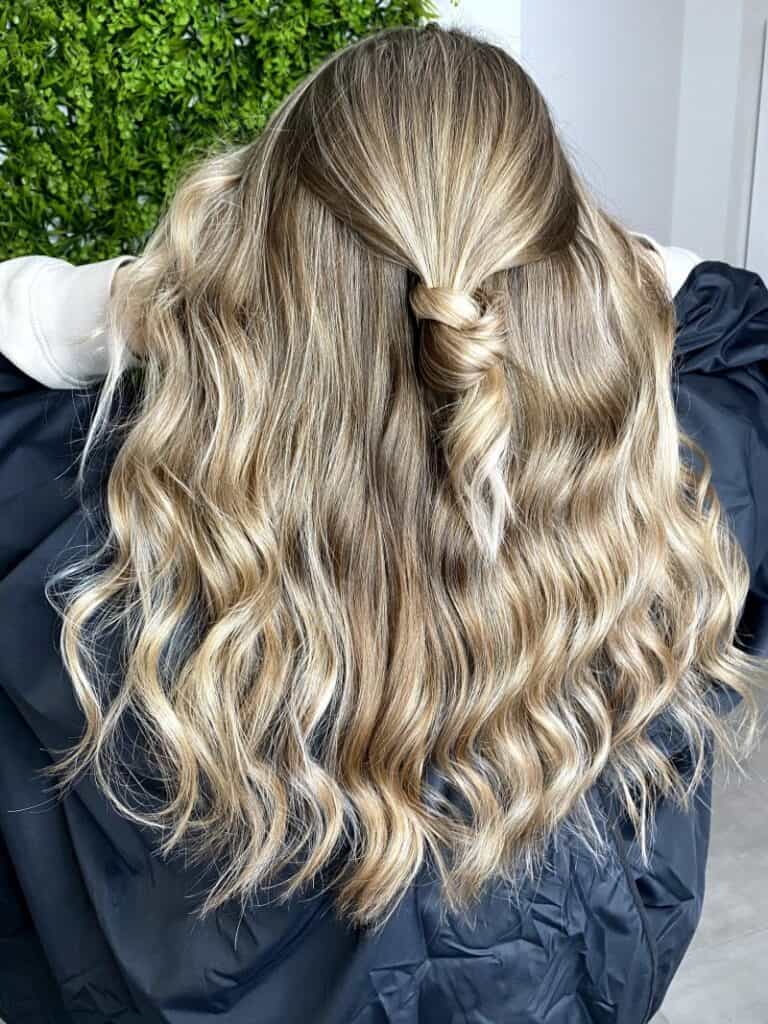
Balayage highlights don’t require regular visits to the salon for touch-ups and are by the far the easiest to maintain.

balayage highlights created hair in the salon

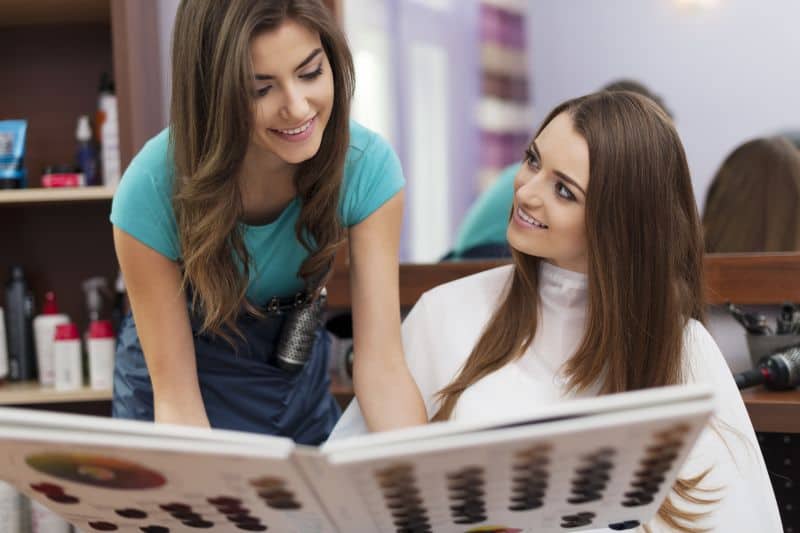
The best way to save money on highlights is to get the low-maintenance type that works with your budget and lifestyle. But discovering what type works best for you deserves consultation with your colorist. They can go over various types of balayage and foliage options that will suit your hair needs.

The balayage highlighting technique is pretty expensive. You can expect to pay for Balayage up to $300 if your hair is long. However, this hand-painted technique creates low-maintenance highlights that elevate your style and give you more time between appointments. The results last a long time which could save you some money.

And there are several types that give you that sun-kissed essence of color: V-shaped balayage, thick panels, French-style balayage, slanted panels of balayage, and more.

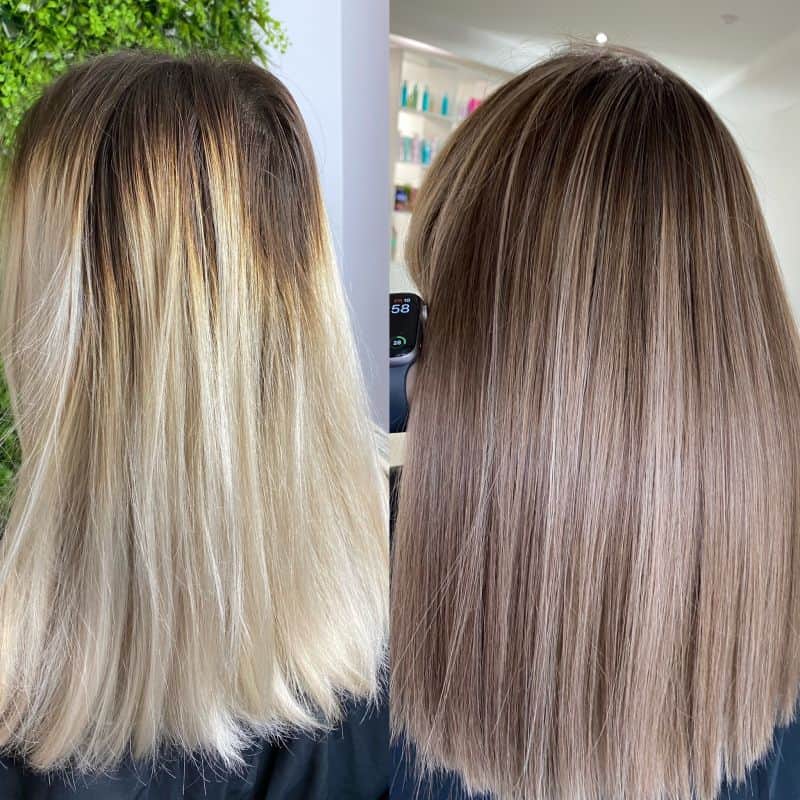
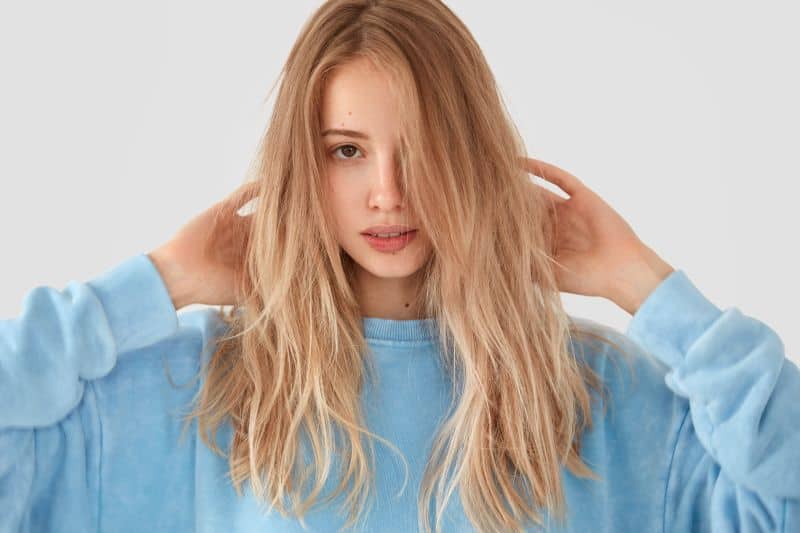
But the transition from high-maintenance blonding/highlights to low-maintenance can sometimes feel drastic. If you’re making the switch, but don’t want to lose pops of bright blonde, opt for foilyage instead of balayage.

This technique still gives a “rooted” look that grows out easily, but it provides higher contrast and brighter blonde pieces strewn throughout. Certain types of foliage can still provide low-maintenance highlights but with a brighter edge. 

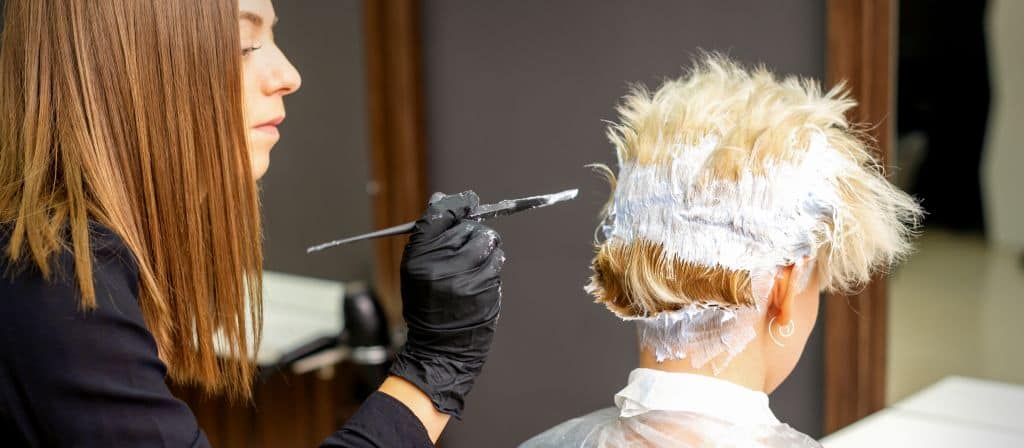
How To Create Low Maintenance Highlights

To save money, choose low-maintenance highlights but for the best results get the lightening job done by a professional colorist.

DIY balayage may save you money, but professional service will obtain better results with less damage to your hair.

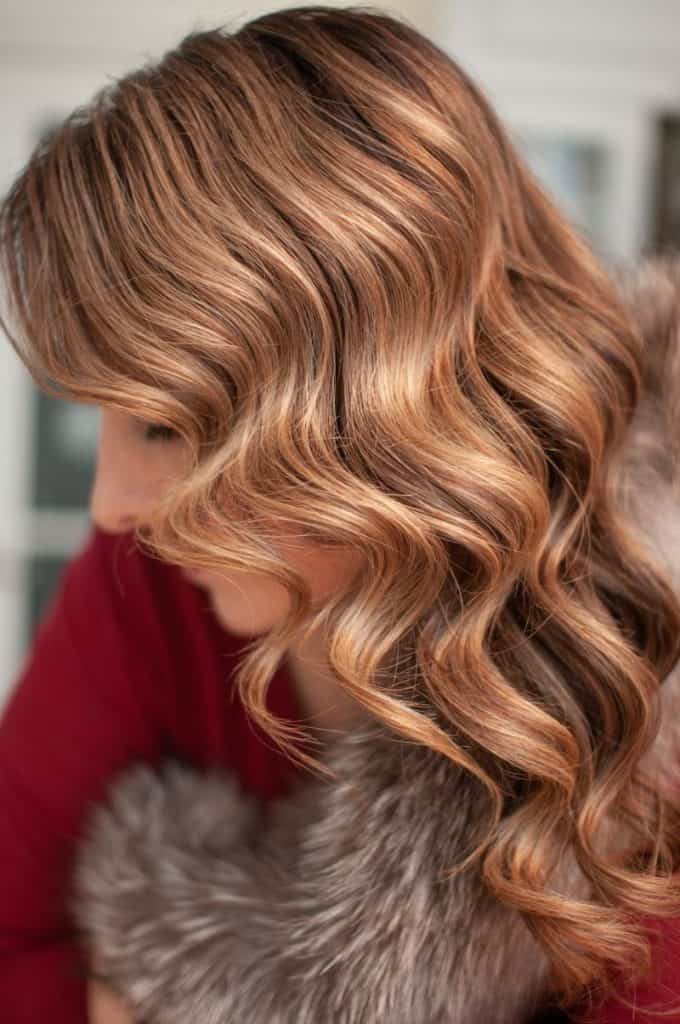
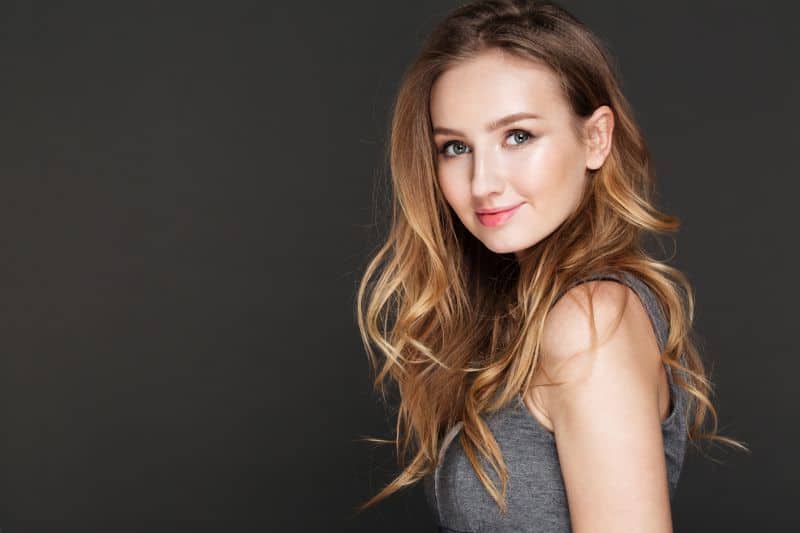
Balayage is a specialty color technique where the lightener is hand-painted in V-shapes, thick panels, slanted panels, and French style to create the illusion that the sun infused the highlights into the natural hair. It’s a beautiful, effortless technique that adds a lot to a look.

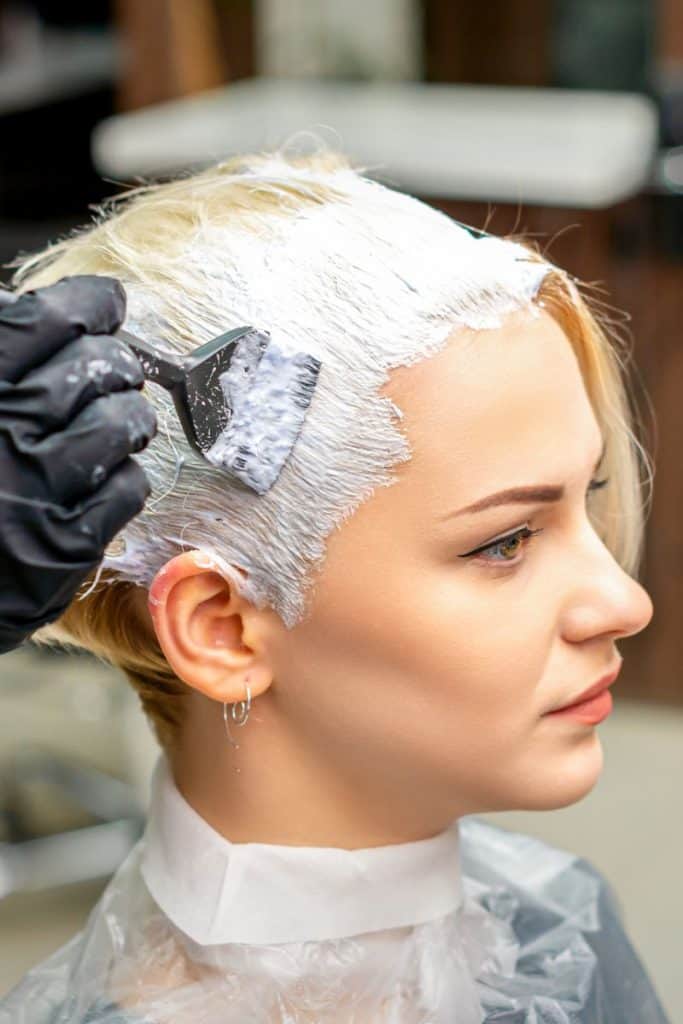
Your colorist will help you achieve the look you want by going over what level of lightness works best on your natural color. For less upkeep, your colorist will keep your base shade close to your natural color.

If your natural color is lifted 2 levels higher, the maintenance for your highlights is simple and easy to keep up. If it’s lifted 3-5 levels higher, some of the maintenance may include needing a toner.

How Often Do Balayage Highlights Need to be Refreshed?

To refresh the balayage, you need to go to a salon anywhere from 2-4 times per year.

A 6-month schedule is great for people who love a rooted look that moves into a grown-out look without the need to touch it up too early.

Usually, if the highlights are lifted 2 levels lighter than the natural hair, getting it done twice a year should be more than enough.

If the highlights are lightened 3-5 levels higher than the natural hair color, getting it refreshed 3-4 times per year works.

While the maintenance schedule for balayage highlights is simple, a toner might still be needed between highlight appointments if the color fades brassy. This can adjust the tone back into a range that’s softer and less warm.

What’s the Difference Between Foiled Highlights and Balayage?

  • Foiled highlights = high maintenance.
  • Balayage Highlights = Low maintenance.

One of the main differences has to do with the line of demarcation. This is the line that’s created from the alternating pattern the foils generate when they enclose the hair and meet the scalp. When the line grows out, it is stark, creating a strong horizontal line that is noticeable and looks unnatural.

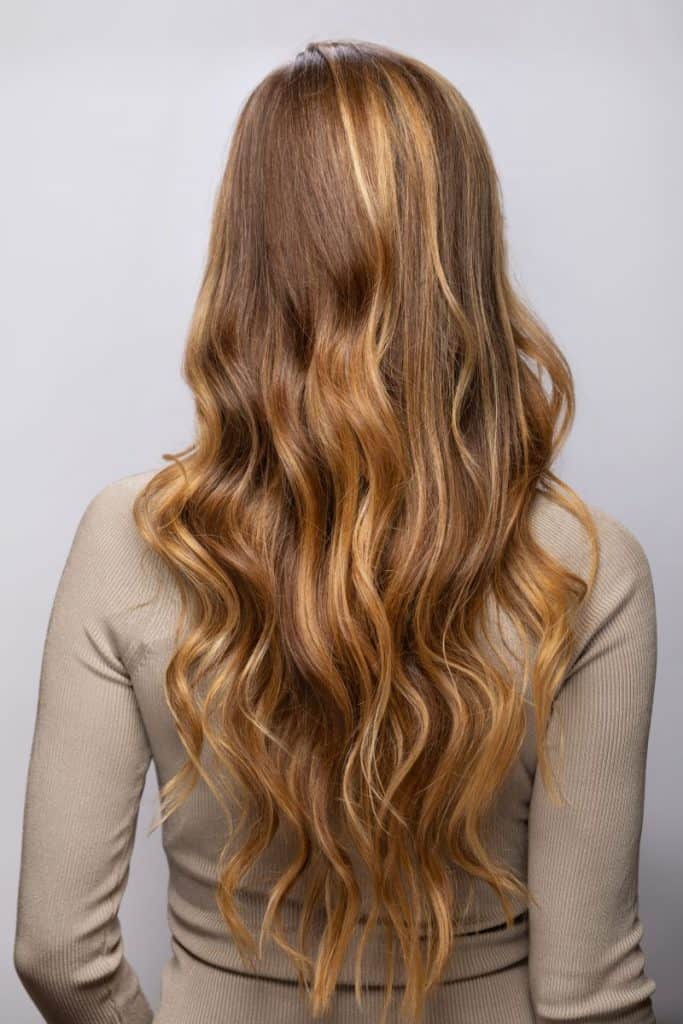
Balayage highlights don’t have a line of demarcation. Because each lightened piece is hand-painted, there is a variation to each one. This creates a natural-looking, staggered pattern that mimics the way the sun lightens hair. The growth is effortless and gentle, letting you go a long time between appointments.

Balayage Vs. Ombre. Which Style Is Esier to Maintain?

The Ombre hair color technique is budget-friendly and requires less maintenance than balayage.

beautiful girl with ombre hair wearing black t-shirt

The terms balayage and ombre have often been used interchangeably, but they are two different things.

Balayage is the technique of hand-painting highlights. Ombre is the look that’s created when there are 3 or more inches of darker hair that transition into lighter hair. You use the technique of balayage to create the look of ombre hair.

Typically, when people request a balayage, the colorist will figure out how much of their natural root the client wants to keep. It can range from no root at all to about 2 inches.

When an ombre is requested, it’s understood that the client wants a very rooted look, usually, 3+ inches of natural root growth is left in the hair before transitioning to the lighter color.  

Ombre hair color lasts anywhere from three to six months. Sometimes clients can go even a year without a touch-up. You need to use sulfate-free and color-safe shampoos and protect your hair from heat and environmental damage.

walking woman with ombre hair

Should You Dye Your Hair While It’s Wet or Dry?

Can You Dye Your Hair While It’s Wet?

Hair dye can be applied to both wet and dry hair, and which method works best depends on what type of dye you are going to use. Some types of hair dye can be used on wet hair, while others work best on dry hair.

There are some at-home box dyes that come with directions for applying the dye to wet hair. With these dyes, the hair should actually be towel-dried and damp since applying color to sopping wet hair will cause the dye to run. The dye should be left on as long as directed by the manufacturer. Put a shower cap on over your hair and do other things as you wait. Once the recommended amount of time has passed, rinse the dye from your hair thoroughly with lukewarm water.

 beautiful girl with ginger-colored hair posing at home

Note that if you decide to dye your hair yourself, you should always closely follow the directions that came with the product. Coloring products are formulated differently depending on the brand and product, and the instructions that apply to one product do not usually apply to another.

Can You Dye Damp Hair?

Yes, you can. There are a few things that make dying wet hair more convenient than dying dry hair:

1. When your hair is wet, color is easier to apply and distribute, especially if your hair is thick and coarse. You will also need less product to completely cover damp hair with dye.

2. When your hair is dry, you need to use a brush and tinting bowl. Applying dye to wet hair can be done in the shower, making the coloring process more straightforward and less messy.

ginger girl in pajama posing in morning

What Types of Hair Dye Work on Wet Hair?

Temporary dyes can be applied to wet hair, and you will usually get better results than when applying them to dry hair.

Semi-permanent dyes should be applied to wet hair as these dyes don’t contain ingredients like peroxide or ammonia, which are meant to lift the cuticles to allow pigments to adhere. When you wash and towel-dry your hair before color application, it will create the perfect base for semi-permanent coloring because the moisture in your hair will slightly raise the cuticles, making your hair more receptive to the color. If your hair is dry, the cuticles will stay closed and the color molecules will not be able to attach to the hair.

Demi-permanent colors can be applied to either wet or dry hair, but the color will absorb better into wet strands. Moisture in the hair lifts the cuticles, making it easier for the color pigments to wrap around and lightly penetrate the hair. Although it doesn’t fully penetrate the hair shaft, the demi-permanent color will absorb better and last longer than semi-permanent dyes. 

Wet balayage is a hair highlighting method in which a hairdresser applies a lightener to damp hair. The results of this method will show more dimension and a more natural look.

Henna dyes will show the best results if applied to freshly washed and towel-dried hair. You can also get good results if you apply henna to dry hair, but like other dyes, it is much easier to distribute the mixture when your hair is wet.

Interested pretty girl with ginger hair touching her face

What Types of Hair Dye Work on Dry Hair?

Permanent colors should be applied to dry hair. While dying wet hair with permanent color is possible, you may not get the exact results you want. The most commonly seen unwanted result of using permanent dye on dry hair is an uneven and dull color.

Why Should You Use Permanent Colors on Dry Hair?

 red-haired girl reading book beside window

There are several reasons why hairdressers practice applying permanent colors to dry hair.

  1. You do not need water to raise the cuticles like you do when using semi-permanent dyes. Ammonia and peroxide in permanent dyes lift the cuticles, allowing the dye molecules to penetrate deeper layers of your hair.
  2. When applying color to dry hair, your natural oils work to protect hair from chemical damage.  It is preferable that the hair is not freshly washed before dying and instead it is recommended that you wait for a day or two after your last shampoo before dying hair. During this period, natural oils will restore a protective oil barrier that helps to prevent chemical damage. Your hair is at its most fragile when it is wet as the cuticles of wet hair are open, leaving the hair prone to damage. Applying dye containing ammonia and peroxide to wet hair can therefore cause serious hair damage and may lead to breakage.
  3. Permanent dyes adhere better to dry hair, and the result is a more even, uniform, and vibrant color. When using permanent hair colors, water acts as a dilutant, limiting the amount of color that your hair can absorb and possibly causing the color to look uneven in some sections of your hair.

Takeaways

  • Permanent dyes require dry hair, while temporary and semi-permanent dyes work better on wet hair.
  • Having your hair colored by a professional will always be your best option if you are thinking about completely changing your color.
  • If you buy an at-home coloring kit, always read the full instructions that come with the product because application procedures will vary with every coloring product.
Beautiful ginger girl posing with smile beside window

How to Go Gray from Colored Hair

This one isn’t your average hair trend. You know, the kind that brings back looks from 2 decades past and recreates them with a modern twist.

Instead, this trending hair color carries more risk with it for a variety of reasons. From the initial decision to do it to the long process, it takes to get there, getting back to your natural grey hair color is no easy task. But it’s not impossible, and the rare value it can add back to your life will make it worth it.

So, what are the steps it takes to get back to your natural grey hair color? They may vary depending on the starting point. For example, the steps of getting back to natural grey after drying black or dark brown vs. blonde will be different. But expect to spend somewhere between 5-10 hours working on this transition.

Gray-haired woman speaking on the phone

Transitioning From Dyed Dark Brown Hair to Natural Grey

When the hair has been dyed dark brown or black for a long period of time, it may be necessary to get a color-removing treatment prior to beginning the actual service. Your colorist will know which type to choose and how to apply. Some, like the Malibu C CPR Color Pigment Remover, take 15-45 minutes to process.

The next step is highlighting or bleaching out the old color. Your colorist will usually use foils and paint the bleach only on the areas of the hair that have the dark dye. Depending on how dark the hair this, this may need to be done twice.

Then it will be washed out and a bond-builder applied. The famous @Jackmartincolorist uses the K18 repair system throughout the process to keep the hair healthy.

After the 1st  and/or 2nd rounds of bleaching have been completed, your colorist will need to match the color of the bleached hair to the natural grey root color pattern. To do this, they will use toners to get the yellow out and leave the right level of grey/silver to match your own natural grey hair. They may also need to add in some lowlights if the natural grey is salt-and-pepper. 8 hours is an average length of time to complete the full transition from dark brown/black to natural grey.

Transitioning From Dyed Dark Blonde Hair to Natural Grey

Transitioning from dyed blonde hair back to natural grey may take less time than going from dark brown back to grey, but it also depends on the health of the hair and if there are any banding issues.

If the hair is brittle and in poor condition, the colorist may need to use a lower-level developer to lift the dark blonde to a light blonde. Using a low-level developer will take a longer time to process, affecting the overall time of the service.

Once the hair has been lightened with bleach to a level 10, the colorist can then tone it to match the color of the natural grey pattern. 

Transitioning From Dyed Red Hair Back to Natural Grey

Gray-haired woman looking at the mirror

To go from dyed red hair to a natural grey, a lightener will have to be used to lift out the red color. Red hair color can be stubborn, especially if it’s dark red/auburn. It may take two sessions to extract it all with the lightener.

Then the grey-blending happens when the colorist chooses toners that match the natural grey pattern and applies them to the highlighted hair.

Make sure to use K18 Leave-In Repair Hair Mask after this intensive service. The strength of your hair depends on it!

Going Back to Natural Grey by Growing Out the Hair

If you prefer not to put your hair through the intensive highlighting process it takes to get it back to a natural grey, then you can simply grow it out.

The pros to this are 1. It keeps your hair healthy. 2. Inexpensive. 3. You don’t run the risk of having a mistake made during the massive color process.

But there are some cons. Depending on the length of your hair, it could take years and years to grow it all out if you’re not wanting to lose a lot of length during the cuts. The hair as it grows will have to pass through phases of looking unbalanced. Many women feel compelled to wear hats.

When your gray roots start to appear, you can use temporary gray root concealers for a while to hide them. These products commonly wash out with the next shampoo, so you have to apply them after each wash. As your hair continues to grow, root concealers will be less convenient.

Instead of taking the long route and letting your natural grey grow out while gradually cutting out the color, you can opt to go short and cut all of the color out. This leaves you natural grey in one cut session and lets you sport a lovely short new look.

attractive middle aged lady with short haircut

Maintenance and Color Schedule

The famous @Jackmartincolorist leads in transforming hair back to its original and natural grey state. He recommends getting blending touch-ups 3 times per year to maintain a beautiful grey look. Scheduling your regular color touchups is one of the best ways to experience gorgeous hair year-round.

To keep your natural grey tresses healthy, establish and maintain a foundational routine of care. Use a moisturizing shampoo and conditioner, a quality oil, and a cream-based heat protectant for best results. Use purple shampoo periodically to neutralize yellow tones.

Also, add in professional-grade glossing treatments to boost shine. Getting these seasonally can make all the difference when keeping your natural grey hair looking shiny and smooth.

Gray-haired woman in the park reading a book

Three Ways to Darken Highlights that Are too Light

Getting your hair highlighted can leave you feeling your best. But nothing drains that confidence faster than when those brassy, unwanted tones start to show up. You’re somewhere like 4-8 weeks out from your original appointment when you notice the color just isn’t the same.

Whether you’re a brunette or a blonde, brassy and yellow tones find a way to show up. It leaves you having to ask yourself, why does my color fade to such orange (or brassy) and yellow tones?

Or you may have ended up with highlights that are too bright for your liking and don’t blend nicely with your hair color. Highlights that appear way too bright may also be irritating. Then the follow-up question is always, what can you do about it?

Darken Your Highlights

hair highlighted hair in a beauty salon

It’s not just on-trend, but there’s something about the subtle dimension that makes people “look” at the same time it minimizes fading. When you get highlighted but only go a shade or two brighter than your natural color, the results are stunning and easy to maintain.

If you’re not quite sure what I mean, imagine you are a dark brunette wanting highlights. Instead of getting blonde highlights, you can a lighter brown. Play with the tone of it, that’s where the fun comes in.

What if your highlights are already light and you want to darken your highlights?

One amazing option is called a color melt. Color melts darken your highlights, can change the tone as well, and will leave you with an easier hair schedule to boot.

1. Color Melting

So, what exactly is a color melt? There are usually 3 colors involved in a melt and it’s designed to deepen your highlights or shift the tone or both. You’ll have the darkest color at your roots, a shade or two lighter for the mid-sections, then the ends are the brightest.

This creates a natural-looking gradient effect of color from darkest to light. When you darken your highlights using this method, the effect is seamless and natural.

How here’s the real catch, when you sport darker highlights, you will also keep them from fading to orange or yellow tones. There may be some fading, but it’s minimal.

color melt hair braon to blonde

Does a Color Melt Work When Darkening Highlighted Brunette Hair?

Yes! As mentioned before, instead of being a dark to medium brunette with light blonde highlights, darkening your highlights will give you the “bronde” effect. And color melting is a beautiful way to achieve this while maintaining highlights that are darker than your original. I suggest you leave color melting to a professional colorist. Talk to your colorist about it and see what you can come up with!

2. How to Darken Highlights with a Toner

highlights colored darker with hair dye

The easy way to temporarily tone down your highlights is to tone your hair using a toner. Toners work by depositing pigments on the surface of hair strands, so they can darken color that appears too light.  

When deepening your highlights at home, don’t go more than two shades darker than the original highlights. For example, a common bright blonde hair would be considered a level 9. Going two shades darker would put you at a 7 (a dark blonde). But if you’re original point is a 7, then you can come down to a 6 or a 5. A level 6 is considered the lightest brunette almost blonde. A level 5 is considered a medium brunette.

It’s important to determine your original starting point level. That way when you go to purchase your toner, you will accurately get a shade that is no darker than only 1 or two levels deeper than the highlights.

Things you will need:

  • Appropriate toner
  • A mixing bowl
  • 10 or 20-volume developer

Steps:

  1. Mix the toner with the developer.
  2. Apply the mixture to your hair. You can focus on your highlights or apply toner to your entire head. Toner will not affect the rest of your hair with a darker color.
  3. Let the mixture sit in your hair for up to 25 minutes. Check your hair every few minutes to ensure that you are on a good way to getting the desired results.  
  4. Once the time is up, rinse the toner out of your hair with lukewarm water.

Using a toner is a temporary solution as the molecules deplete over time and eventually, your highlights will return to their bright state. If you wish more permanent solution, consider applying a hair dye the same way you would use a toner.

3. Darkening Highlights at Home by Using Hair Dye

hair higlights darkened with a hair dye

Some of you are just good with your hair and may take it on yourself to darken your highlights at home without losing them completely.

Using hair dye just in the way you would use a toner is one of the easiest ways to darken your highlights. The results last much longer than when you use a toner for the same purpose.  

Make sure you have all things necessary for the dying job including a bowl, dye brush, and gloves. You will also need a 20-volume developer.

Steps:

  • Detangle your hair and slightly dampen it
  • Mix the dye with the developer.
  • Apply the mixture to your entire head of hair.
  • Let the mixture sit for 20 minutes. You can check on your hair occasionally to make sure the color is changing in the way you want it to. Rinse thoroughly with lukewarm water and wash with a color-safe shampoo.

The procedure is similar to normal coloring, but there are some differences. You’ll leave the dye to process for 20 minutes, instead of letting it sit for 30 + minutes. Another difference from regular coloring is that you apply dye to damp hair instead of applying it to dry hair. 

Pro Tips

One thing to avoid when darkening your blonde highlights at home is buying dark brown or black and covering over very light, blonde highlights. There are many things that can go wrong on a chemical level, but just know that without a filler, your hair can turn a murky, dark greenish brown. Then you’ll be left with getting a color correction by a professional and it’s very expensive.

Another tip for darkening your highlights at home is to make sure the color you put on your hair is distributed evenly. Saturate each section of hair to the fullest, then very gently comb everything through and re-saturate. If your ends are damaged or brittle, do the roots and mid-section first, let it process, then pull the color down and saturate your ends for the last 10 minutes.

Cute lady with blonde highlights

How to Prepare for Hair Color Appointment to Ensure the Best Outcome

Nowadays, hair dyes are less harmful than they used to be containing nourishing ingredients to counteract the damaging effect of ammonia and other chemicals. On the other hand, beauty companies are innovating protective products that reduce the harmful effects of dye chemicals and minimize the negative effects of regular coloring.

However, there are still some protective steps you can take to ensure the coloring process is completed with minimal damage to your hair and get the best possible results. Before any new color adventure, give your hair enough time to recover from previous color processing or any other chemical treatment. You can’t get the hair color of your dreams on overprocessed, lifeless hair.

In this post, we will explore how to achieve your desired hair color while maintaining your hair’s health.

A woman choosing a shade of color to dye hair

1. Don’t Wash Your Hair Two Days Before Coloring

Natural oils in your scalp and hair act as a barrier offering protection against harsh hair products. If you apply color to freshly washed hair, chemicals in hair dye can irritate your scalp and dry out your hair. That is why you shouldn’t dye your hair when it is squeaky clean. Alternatively, if you apply it to excessively oily or dirty hair the hair may not support the distribution of the dye. Leave your hair unwashed two days before coloring to allow natural oils to form a protective coating on your scalp.

2. Clarify Your Hair

If you use many styling products, they can create build-up on your hair which may interfere with the coloring process. Another kind of buildup can be caused by using hard water for washing your hair. To ensure your hair is acceptive of your chosen color, remove any buildup before applying the dye. The easiest way to remove buildup is to use a clarifying shampoo. If you have hard water in your shower a chelating shampoo is a better choice. Chelating shampoos are formulated to remove any kind of build-up, such as that from hard water, while most clarifying shampoos are made to remove only product build-up. Wash your hair with a clarifying or chelating shampoo anywhere from several days to two days before coloring. Do not use many styling products before your coloring session.

3. Use Coconut Oil Before a Color Job

Woman applying coconut oil before coloring hair

Coconut oil is a great hair moisturizer that penetrates the hair shaft and protects your hair from chemical damage. Apply coconut oil the night before or at least several hours before coloring to allow your hair to fully absorb the oil. Rub the oil into the midshaft and ends of your hair. Your ends are the driest part of your hair and need the most protection. You don’t have to apply oil close to your roots as they are protected by the scalp’s natural oils and haven’t suffered from chemical damage by the previous coloring. Several hours after applying coconut oil, you can apply the dye with the coconut oil still in the hair.  Your hair will be softer and healthier than usual.

4. Use Bond Repairing Products

In recent years it has become a practice to protect the hair during the coloring process to minimize chemical damage. Your stylist will ask you to “upgrade” offering you a higher level of protection. If you make the color appointment, make sure that your colorist uses Olaplex or another bond builder to preserve the integrity of your hair. If you are going to do the coloring job on your own, use at-home bond repairing products to minimize the damage and repair broken and damaged bonds in your hair.  

5. Conduct Patch and Strand Tests

Patch Test: You should always conduct a patch test before dyeing your hair to see how your skin will react to the chemicals in the dye. Apply a small amount of the color mixture to the area of skin on the inside of your elbow with a cotton swab. If you notice any itching, swelling, or redness, this could be a sign of an allergic reaction and you shouldn’t apply the product. If you haven’t noticed anything strange in the tested area after 48 hours then you are not allergic to the hair dye and you may apply it.

Strand test: A strand test involves dyeing a small section of your hair to see what the color will look like and can be completed at the same time as the patch test.  Use tin foil to wrap around the section to keep it from the rest of your hair. Leave the dye as long as directed on the box. Rinse and blow-dry it to see the effects. If you love what you see, continue dyeing. If you aren’t satisfied, adjust the type of dye, shade, timing, etc. The strand test is key if you are going to try a new shade. Everyone’s hair takes to dye differently. This way you can be sure that you get the exact shade you want.

How-To Do a Strand Test by Splat Hair Dye

6. Equalize Your Hair’s Porosity

How to Prepare High Porosity Hair for Color Treatment

Hair of high porosity is likely to dye unevenly. This is because most of the cuticles of the hair are lifted, allowing pigments to enter the cortex more easily. If your hair is overly porous, discuss the problem with your stylist. Hair colorists use porosity equalizers to even hair porosity before coloring. If you are going to dye your hair at home, make sure to use a neutral protein filler or a similar product to even your hair porosity and ensure the best outcome.

How to Prep Low Porosity Hair for Coloring

Low-porosity hair is likely to take longer to process color. This is because most of the cuticles of the hair are tightly closed, preventing hair products from penetrating the hair shaft. You may need more time than is directed on the box to get the desired color. Clarifying step is important to remove the product buildup that sits on the surface. It would be helpful if you apply a pre-color treatment such as Ion Pre-Color Treatment to prime your low-porosity hair for color and ensure even absorption.

a woman with freshly colored hair enjoying freedom on a sunny day

Partial vs Full Balayage – Which One Is Right for You?

So, you’ve decided to either get a balayage for the first time or to switch from foiling to the more lived-in color look. Great, but that’s just the beginning. What happens next is in the details and will leave you wondering, what type of balayage do I get and how much of it?

Thinking through the nuances of your balayage is a good first step before you find yourself sitting in your colorist’s chair utterly confused. Because everyone has had that moment when face-to-face with a colorist where they hear the words “would you like a full balayage or a partial balayage?” The responses can range from sitting tongue-tied with confusion to declaring “just do what you think is best,” only to be disappointed with the results.

So, here’s what you need to know about this beautiful color service and how much of it to get.

partial balayage vs full balayage photo

What is a Partial Balayage?

A partial balayage means you’re getting less of your hair colored. The general areas revolve around the face, the part line (or inches from it for the rooted look), and the crown of the head. Lightening only these areas will leave you with less of an overall blonde look, and more of a rooted, dimensional feel with higher contrast.

Should I Get a Full Balayage of a Partial Balayage?

To answer this, think through just how blonde you want to be and how much contrast between your natural color and the highlighted blonde you want to have. If you love seeing that “swirl” of colors when you wave your hair, stick with a partial balayage. If you want a more overall blonde look, shoot for the full balayage.

What is the Difference Between a Full Balayage and a Partial Balayage?

Largely it’s the placements of the highlights. A full Balayage will cover everything from face-framing to all of the interior portions of your hair in the back and on the sides, including the nape of the neck. This means when you pull it up into a ponytail, you’ll see blonde.

A partial balayage does not cover the interior portions of the hair. Partial Balayage primarily covers the crown, pieces around the face, and the top outermost layer of the hair. This means when you pull up the ponytail, you’ll see your natural color in the back and a mixture of natural and blonde in the front.

smiling woman with partial balayage

Is a Partial Balayage Worth It?

A partial balayage is worth it if you’re after dimension. Blonding this way means contrast. If you love contrast and don’t want to be too blonde, a partial balayage is the perfect service for you. The grow-out is amazing as well, so you’ll find yourself in the salon less and with a natural look until your next appointment.

How Do I Care for my Hair after a Balayage Service?

There are so many wonderful ways to care for your partial or full balayage post service. For starters, wait to wash your hair for about 24 hours. This way the color molecules have time to lock into your hair. Then when you go to wash with a color-safe and high-quality shampoo/conditioner, your hair will be ready for it.

The next care method for preserving your color is creating a foundation of products you trust. This means your shampoo, conditioner, heat protectant, and your oil. Other items can be added in later but creating a good package of 4 quality items will preserve your partial balayage.

Next is keratins. These treatments can build keratin protein back into the hair from root to tip. By filling in the porous spaces in your hair, it means your hair can receive a full or partial balayage with even, healthy coverage. Getting these treatments is one way to ensure your colorist is happy doing your hair!

back view of woman with partial balayage hair

How to Lighten Hair Dyed Too Dark

Written by Evelyn Davies

So, you’re interested in professional color remover, and hairdresser tips for dark hair color removal? Well, you have just stumbled across some color correction advice straight from a professional hair colorist and hair blogger.

Removing dark hair color from your hair can be super challenging, even for hairstylists. So, I’ve put together a guide for different scenarios, helping you know how to fix too-dark hair dye. Maybe you want to know if you can lighten your hair after dying it dark, or how to fade hair color that is too dark, depending if you have permanent dark, temporary hair color, or toner, we have detailed how to fix hair color that is a too dark guide below.

How to Fix Hair Color That Is Too Dark

Frustrated girl with dark hair color

So, my rules are, to try to use the gentlest form of hair color removal for the scenario, removing dark hair color can really damage your hair.

If it’s permanent dark hair color, and it’s your only choice, use a bond rebuilder with bleach. You can color it all or gradually highlight the hair. Is it a one-off dark color/semi-permanent color pigment remover that could help remove tone without too much aggression? If it’s a toner, temporary or semi-permanent – shampoo, waiting, or a clear demi can help remove darker tones. But my number one rule is, always go to a hair professional, it could save your hair, and give you the best results. Read my reasons for this advice below –

How to Lighten Hair That Is Dyed Too Permanent Dark

In this scenario, I would judge what to do by 2 things. If the hair has been repetitively dyed dark over dark and if the canvas underneath is bleached/porous and possibly light.

If the dark hair dye is a buildup of years and years of dark permanent hair color applications, it will be super difficult to remove. It can be done but requires patience and money. As a stylist, I like to try and remove color in the gentlest way possible. For me, I like to use everything that could lift out a permanent dark color, before resulting in using bleaches. This is to keep the health of your hair, as removing color/lightening from permanent dark hair color is very invasive to the structure of the hair.

Use Hair Lightener to Remove Permanent Dark Color

So, you’ve tried everything to remove dark from your hair but lightening bleaches and it’s your last resort? Sometimes bleach is the only way to go with permanent hair color removal.

If you have to use a lightener, please consider working with a bond rebuilder while lightening the hair. This will help push the results further and avoid compromising the condition too much. My favorite on the market is Olaplex, I notice a significant difference in the condition of the lightened hair whilst using this bond rebuilder. Bleaches can lift color up to 9 levels, depending on color history so bleach is a powerful product.

Hairdresser correcting dark hair color

Using a Bond Rebuilder while Removing Hair Color That’s Dyed Too Dark

There are many bond rebuilders on the market, usually, they are added into a color formula or lightening bleach to help keep the hair in good condition while treating them with chemicals.

 It replaces broken bonds whilst coloring, so perfect to counteract aggressive bleaches. Please remember that using bond re-builders helps the process they are not a magic formula that means you can defy the laws of hair color, speak to your hair colorist about your hair lightening options. Also, bond rebuilders sometimes have a treatment-only option so you can top up the broken bonds in-between color treatments or, take a top-up product home to keep on top of your hair condition.

How to Lighten Hair Dyed Too Dark

If the hair Has been colored dark as a one-off and you were previously light, you may be able to use some more gentle forms of hair color removal, also if your hair is slightly porous, this can help with the color fading.

So, you tried something new and you can’t get on with it. Removal of darker colors is still difficult, but you may get away with the use of a color pigment remover. These claim to remove the artificial color pigment and leave the hair’s natural pigment. However, if you have used permanent color, that process sometimes removes your natural pigment slightly and replaces artificial tones in the hair. So, what’s left underneath may not be your natural tone. I recommend booking a color removal with a second color process to tone the results you get. Actually, with any color removal, I recommend 2 appointments in one sitting as it is color correction.

How to Remove Toner That Went Too Dark

Sometimes this can be a simple fix that requires patience. You can use more aggressive shampoos, or semi-permanent dyes, or wait for the natural fade of a toner.

It happens from time to time we experiment, and our results are not as expected. If you’re thinking toner made my hair too dark, I usually recommend a clarifying shampoo and a good hair treatment. Continual use of a clarifying shampoo can remove toners, but also remove moisture in the hair so please balance this with a good moisture treatment to keep your hair shiny and smooth. Toners are a semi-permanent tone, that usually fades out and lasts 2-5 weeks, so I would consider waiting it out too.

How to Correct Too Dark or Bright Hair Color That’s More Temporary

So, if your hair color is way too intense, but it’s a toner, semi-permanent or temporary color, I have seen hairdressers use an alternative technique with demi-permanent clear color.

The place where hair color particles sit determines if hair color is temporary, semi, or permanent. The stronger the color the deeper it goes into the hair structure. By using a demi-permanent, it can push out temporary or semi-color. Not always, but it’s worth a try, I have used a demi clear so it has no tone but gives the shine effect to hair and if you use this over light tones, can pull the toner out.

How to Avoid Hot Roots when Coloring Hair

Written by Evelyn Davies

Hot roots, what are they? How to avoid hot roots and a hair color guide directly written by a hairdresser. Maybe you need a little color correction advice or just need a slight formula tweak.

So, the term hot roots is an easy way to describe a color that has not quite gone the way you or your stylist was planning. I also refer to hot roots as root glow. It basically means the root of the hair is warmer, lighter, or brighter than the rest of your color, and it can happen for a number of reasons.

Hot Roots when Bleaching Hair

So, if you have bleached your hair with a lightener and your hair was previously natural, you can end up with a brighter cleaner blonde on the root and not throughout the mid-ends. Hot roots on a super light blonde may look like your mid-lengths are golden/warm, but it could be down to timing.

Hairdresser coloring hair roots of bleached hair

Why Did the Hot Roots Happen?

When lightening hair, heat speeds up the process, giving a stronger/lighter/brighter effect. So, if you apply a lightener to the scalp first before ends, you can end up with a “hot roots” effect. This is an example on virgin hair, un-chemically processed. The heat from the scalp will accelerate the lightening process, leaving you with uneven brighter blonde hot roots.

If the hot roots are bright and the ends appear warmer, the issue was – the application would have given a more consistent result if the lightener was applied around 1″ away from the scalp, focusing on the areas where it takes longer to lift bright. Then going back in on the root to lift the areas later. Reapplying bleaches on the mid-lengths and ends is not an advisable thing to do, so if you can avoid hot roots when lightening your hair, please try to.

Hot Roots on Colored Dark Hair

So, this example is when you colored your hair dark in the past, and originally it was great, but now you get hot roots and don’t know why. This can be one of two things.

1 – Permanent dark color reapplied over permanent dark color until it has built up over time in the ends, giving the desired lighter look on the roots but making them look like hot roots.

2 – trying to go a lighter shade over dark permanent hair color.

Scenario number 1 is maybe more for the home hair dye readers. Reapplication of dark over dark can create a dark build-up in the ends. Sometimes almost looking black. Making the roots stand out and hot. Coloring hair permanently dark adds tone to the hair, so if you continue over the same strands the color becomes dense. However, the roots have no previous color, so they can go the desired color, or glow brighter depending on the natural color.

Scenario 2 is going to require more knowledge than putting a lighter shade over a dark one. I wish coloring hair was that easy but it is not. You need a clean canvas to go lighter, so you will need to remove permanent color before going lighter, otherwise, you will just continue to get hot roots.

Roots Look Hot but Just Warmer

So maybe this situation isn’t a level of darkness issue and is more tonal. You have possibly decided to change your color to something warmer, but the color history in the rest of the hair dulled the effect, and the clean roots glowed and became hot roots.

How to fix the hot roots? For this example, it’s a little easier, you’re not looking to lift or darken the hair, but to just neutralize the hot roots. You could add what we hairdressers call a base tone, or natural tone to take the edge off the glowing roots.

How to Avoid Hot Roots Altogether

Well, if you’re not going for a color change and you know the possibility of hot roots can be an issue for you, I recommend balancing the color. By this what I mean is using a demi/semi-permanent on the mid-ends, and only permanent at the root. This way you avoid build-up and then avoid hot roots, so long as you stick to the same/similar shades.

My Advice for Your Hot Roots Research

Go to the salon. Speak to a colorist. This stuff isn’t as easy as putting paint on the hair and it magically changes, this is a study we have done for years. Researching the color wheel, and learning about chemicals, the structure of hair, and the laws of color, it isn’t easy for a stylist to correct, let alone somebody with no study in this field. This guide is to give you answers, not to encourage you to home color.

What Is the Best Semi-Permanent Hair Color to Cover Gray?

When you first start going gray, it might seem like your only options are to embrace it gracefully or to commit to regular upkeep with permanent coloring.  However, semi-permanent hair dyes are a great alternative, providing users with more flexibility to camouflage their strands of salt and pepper.  These hair dyes can be used on their own or in combination with permanent hair dyes to reduce exposure to some of the harsh chemicals often found in permanent dyes. 

Semi-permanent dyes are gentler on hair and wash out more quickly than permanent dyes do; this makes for a less harsh look when roots grow out, and it provides users with more opportunity to experiment with their look without the commitment to a permanent dye color.

Adult Asian woman with Gray Hair

Pros and Cons of Semi-Permanent Hair Dye

Using semi-permanent colors to cover grays has its advantages and limitations.

Pros

  1. The biggest advantage of using semi-permanent paints is the absence of harsh chemicals that you will find in permanent dyes. Not only do semi-permanent colors not damage the hair, but they also condition your locks and add softness and shine.
  2. Semi-permanent dyes are easier to use without the help of professionals because they come ready to use and you only need to follow the instruction.
  3. Applying a semi-permanent color does not make the commitment to regular dyeing in a certain shade because the color will fade after a few shampoos, and you can replace it with a different shade. Semi-permanent color is a good choice for special occasions when you want to refresh your hair color without committing.
  4. If you are planning to transition to gray hair, and are reluctant to commit to permanent color, you can experiment with semi-permanent colors and test different shades.

Apart from these advantages, semi-permanent colors also have some limitations and cons.

Cons

  1. For the color to show on the hair, it is necessary to lighten the hair, especially if your hair is dark and you want to go lighter or use a fashion color.
  2. Semi-permanent dyes only deposit pigment on the outside of the hair shaft, so they wash out with shampooing and need to be applied more often than permanent dyes.
  3. Semi-permanent colors are not always efficient at covering gray hair, especially if your hair is of low porosity and does not absorb dyes well.
  4. Although the dying product comes ready to use, the application can be messy. Most semi-permanent colors tend to stain your towels and pillowcases.

Does Semi-Permanent Color Cover Grays?

How well the semi-permanent color will cover gray hair depends on the color and the type of your hair.

Porous gray hair can be a good canvas for semi-permanent dyes. If your hair is porous, the color will be absorbed more easily and may last longer.

If you have fewer gray hairs, it will be easier to achieve the effect of coverage and blending with the rest of your hair.

If you have a lot of grays and the rest of your hair is light, it will be easier to find a shade that will color both your gray hair and the rest of your hair.

If you have dark hair that’s starting to grey semi-permanent color can be a fun way to camouflage your grays. It will look like you have vivid highlights instead of your grey streaks. If you like changing your look, this can bring some freshness into your everyday life. Go ahead, you deserve some fun these days.

Best Semi-Permanent Hair Colors for Gray Coverage

This post contains links to Amazon. The publisher may get paid if You purchase something through the links without additional costs to You.

When purchasing a semi-permanent dye, you should stick to reputable brands and stay away from cheap unknown brands. Some so-called semi-permanent days can burn your scalp. I learned it the hard way (B…..).

1. Clairol Professional Beautiful Advanced Gray Solutions, Semi-Permanent Hair Color for Gray Coverage

Be aware that this semi-permanent color is not intended to cover hair that is 100% gray. This product will successfully cover and blend grays if you have up to 50% gray hair. For a higher percentage of gray, it will be hard to obtain the desired blending effect.

This mild semi-permanent dye does not contain ammonia and peroxide. You also do not need to apply heat to activate the desired color. The color develops with the help of oxygen from the air. Finally, instead of drying out the hair, it will leave your locks feeling soft and shiny.

Additional plusses are that the product doesn’t have an unpleasant smell and won’t make a huge mess in your bathroom.

The shades are marked by numbers from 1 to 10 starting from black as the darkest to platinum blonde as the lightest one. Shades are inter-mixable.

The achieved gray coverage lasts up to 12 shampoos. If you wash your hair frequently, the color may fade faster. Rain and sweat will not cause the color to bleed.

How to Use

The dye comes ready to use which is very convenient. It is advisable to wear gloves as the dye will stain your hands and nails.

The color should be applied to freshly washed and towel-dried hair. The hair must be damp to accept the color. Leave the product on for 25 minutes and then rinse thoroughly with lukewarm water without using shampoo.

If you have long, thick hair, you may need to purchase 2 bottles. If you don’t use all the content from the bottle, you can save leftovers. Just close the bottle well and store it in a dry and cool place.

2. WELLA Color Charm Paints Semi-Permanent Hair Dye

The product comes in 18 semi-permanent inter-mixable shades, including a clear one. This semi-permanent dye will cover greys. How the color will look on the rest of the hair depends on your current color. If you have dark hair and want to cover gray, this could be a fun way to camouflage your greys. The color will show through on gray hair so you can have colored highlights. If you use Chrome shade it can color your grays in shiny silver color.

If you want the color to show on the rest of your hair, you will need to pre-lighten your dark hair, like with any other fashion colors. If you do not bleach dark hair, the color will not be visible on it.

The color will last up to 12 washes if you use mild shampoos and don’t wash your hair frequently.

How to Use

Put the dye in a bowl and use gloves. Apply the product to clean dry hair with a color brush. Comb through if you want to distribute dye evenly through your entire hair. Leave on for 20 minutes or a bit longer for gray hair. Rinse until the water is clear. Apply conditioner and rinse it thoroughly.

3 ARCTIC FOX Vegan and Cruelty-Free Semi-Permanent Hair Color Dye

ARCTIC FOX color is formulated with vegan ingredients that won’t dry or damage your hair. This dye can be used often because it conditions the hair and restores shine. The product is ready to use without mixing or adding other ingredients.

Although the dyes are not intended specifically for gray hair, it is possible to cover gray hair or blend your grays, making them less visible. There is also the option to dye your grays in vibrant colors so that they look like brightly colored highlights.

To achieve better coverage, use darker and more pigmented dyes, that can deposit color on unbleached gray hair. ARCTIC FOX has a line of colors for unbleached hair.

If you have dark hair with some grays and use vivid color, the dye will leave a subtle tint in your dark hair and color your grays in vivid color. This can look cool if you like this kind of color adventure. With washing, your grays will turn pastel, giving your hair lots of dimensions.

The color may last between 4-8 weeks on bleached hair and 2-6 weeks on unbleached hair. The color longevity depends on washing frequency and your hair care regimen. 

How to Use

Since the product comes ready to use, it is easy to apply it. Use gloves and protect the hairline with coconut oil. Use a color brush and apply the dye to clean the dried hair. Wrap your hair in a plastic cap and leave the product to work for half an hour or longer. Rinse your hair well and use a conditioner.

attractive middle-aged Asian woman with long silver hair

How to Make Semi-Permanent Color to Hold on Gray Hair

Unbleached hair doesn’t take the color well. Here are some basic recommendations on how to make your gray hair take color and how to make the color last longer.

  1. Wash your hair with a clarifying shampoo before applying the dye. Oil and product build-up can interfere with the dying process, and you can get uneven color. Clean hair will be more ready to absorb the color.
  2. After rinsing the dye from the hair, do not wash your hair with shampoo. Just rinse the dye thoroughly with lukewarm water and apply the conditioner. Then rinse the conditioner thoroughly with lukewarm to cool water.
  3. After dying, wait a few days before washing your hair with shampoo. Use a mild shampoo and wash your hair only when necessary. Make sure that the water you use to wash your hair is not hot.
  4. Use a dry shampoo in between shampooing as it doesn’t encourage color fading like a liquid shampoo.
middleaged woman with grey hair

Color Remover vs Bleach: Which One is Better for Your Hair?

Color correction can be one of the most essential yet time-consuming and expensive services. There are costly steps to take when something has gone awry with your hair color.

But we’ve all been there. Maybe the advertising for that new black hair dye caught your attention “want perfect hair? Try the new black silk color line and leave of legacy of envy behind you …” Black silk? Envy? Sounds perfect, except in the end you’re crying in your colorist’s chair. 

Is Color Remover Better Than Bleach?

salon hair coloring service

In this situation and many more like it, one of the first steps to correct color is to remove what was put on that caused the problem i.e. the infamous “black silk.”

You might be wondering how do you remove hair dye? The two most common ways are either color remover or bleach.

So, what’s better, bleach or color remover? One reason many professionals turn to color remover instead of bleach for dye removal is that color remover is good at just binding to the dye molecules to remove them while leaving your natural color pigments alone in the hair.

Bleach on the other hand strips everything out of your hair, even the naturally occurring color pigments and not just the dye molecules.

Consequently, color removal is a gentler approach than bleaching. You should opt for a color stripper whenever it could provide you with the base for a new, desired color. You will get a kind of pre-bleached look which you then can re-color. Keep in mind that color removers can’t reverse the effects of the bleaching process.  

If you want to go lighter than your natural color, color removers won’t do the job. Since color removers can’t lighten the natural color, fake blondes still need bleach to lighten regrown roots and maintain their blonde shade.

smiling girl after using color remover for semi-permanent dyes

What Kinds of Color Removers are There?

Some color strippers are supposed to remove permanent/oxidative hair dyes, while others work for removing direct dyes which just stain the outermost layer of your hair.

One of the most popular permanent dye removers is the Malibu CPR Color Pigment Remover. It’s a professional-grade color remover that contains ingredients that use natural properties to remove unwanted color pigments. It removes mineral buildup and permanent dye from hair while preserving the integrity of your hair. Generally speaking, this brand is trusted for its ability to do the job.

Another permanent dye stripper is the Color Oops Extra Strength Remover. It’s specifically designed to target permanent hair color removing dye molecules from your hair shaft, although it’s not the best option for removing vivid colors. This bleach-free formula leaves hair ready to immediately take a new color. Most other removers ask you to wait to reapply.

Some color removers are formulated to strip semi-permanent colors. Color X-Change Phase-Out Gentle Dye Decolorizer is a mild vitamin C-based decolorizer that is supposed to be left in your hair overnight. You may need several applications until you reach a good base for your desired new color shade.  

How Bleach Removes Hair Color?

hairdresser using bleach to lighten hair regrowth

The way bleach works is by entering the hair cuticle with the help of another ingredient (the developer). Once it’s inside, it can attach to the natural hair pigments and change them, making them colorless.

The result of this process means dark hair can get lighter. Or medium hair can get lighter. Or light hair can get lighter until a certain point called “platinum,” where there are no more natural pigments to change.

But with the change in those natural pigments, you also deplete the integrity and strength of the hair. This is why bleach is a more drastic measure to take when considering color removal.

How Does Color Remover Work?

Blonde woman with stripped hair color

Color removers are definitely a gentler way to get rid of unwanted color. Most color removers don’t contain peroxide and won’t damage your hair in any way. Color strippers dissolve artificial color pigments, allowing you to wash them away.

Some mild color lifters are more like hair masks and need multiple applications to get the results you are aiming for. If your natural hair doesn’t need lightening a color remover is a safer way to go. They are generally safe for use at home, although a hair color specialist will easier get you back to your natural hue.

Unlike a color remover, bleach is a strong chemical that should be only used by hair professionals. Applying bleach improperly can damage the hair cuticles and leave your strands dry and overly porous. If you decide to remove unwanted colors yourself, a color stripper is a safer option.

Can You Use Bleach After Color Removal?

Since color removers only reverse the effects of hair coloring, the integrity of your hair won’t be compromised due color removal process. However, it is not recommended to bleach hair immediately after color removal. Wait at least one week and do deep conditioning treatment to restore lost moisture. If your hair is generally in good condition, it will be ready for bleaching service after a week. To stay on the safe side, let a professional colorist lighten your hair.

Hair bleaching at a salon

How to Moisturize Dry Hair After Bleaching or Color Removal

Moisture is one of the best ways to maintain the health of your hair after a more intense service like bleaching. Here are some ways to increase and/or maintain a healthy amount of moisture after using bleach:

  1. Don’t use shampoos that contain sulfates, parabens, sodium chloride, or drying alcohol.
  2. Invest in quality conditioners, leave-in conditioners, and hair masks. Be sure to use them regularly.
  3. Always use a quality heat protectant after shampoo and conditioner.
  4. Use Olaplex or other bond-repairing products to revitalize and strengthen hair and minimize the chances of breakage.

Although milder than bleach, color removers can also leave your hair dry. Use a hydrating hair mask to restore lost moisture and make the new color shade look more glamorous.

Charming brunette woman with freshly colored hair

How Long Does Toner Last and How Often Should You Tone Your Hair?

There’s this crucial step when you change your hair color that comes right after the highlight but just before the blow-dry style.

It’s the kind of step that makes all the difference for the blonde who wants to look icy platinum versus the blonde who wants to be ash grey. Or the brunette who wants to be mushroom brown versus the brunette who’s going for a cool violet undertone – get it right, and your hair exudes a perfect, shiny hue.

So, what is it?

What is Hair Toner?

young girl with toned blode hair

Usually a semi-permanent hair dye, a toner deposits color back into the hair that has been previously highlighted. Highlighting lifts the darker pigments out of the hair by breaking them down. The toner can then come in and add color back in to create a shift in hue. If your hair looks yellow, you can shift it to a pale, icy blonde. Or if your color isn’t golden enough, you can tone it to reflect warmer light by increasing the gold in the toner.

They are wonderful, incredible tools. So how often and when should you tone your hair? It all depends on what you’re going for.

When to Tone Your Hair?

If you get highlights that are too warm naturally, you’ll want to add in a toner. The darker your hair is naturally, the more warmth you’ll get when you highlight it. Just after getting your highlights is a good time to tone. But there are other times it comes in handy as well.

Toners are only semi-permanent hair dyes, so they fade after a certain amount of time. A good time frame for a toner refreshment is about 6 weeks after your initial appointment. Stay consistent with these and your highlight schedule. Your hair is getting trained and the more regular you are with appointments, the better it will look.

Getting a toner to deepen your color is a good option as well. If you are a lighter color and are going dark again, toning it down can maintain a nice level of dimension while deepening your color to the level you want it.

Another good option for when to tone would be using a clear gloss/toner to add shine after your regular color appointment. This looks incredible on single-process color, especially on dark hair. It seals down your cuticle, adds shine, and leaves you feeling refreshed.

How To Brighten And Tone Your Hair In One Easy Step with WELLA Colorcharm Toners by ellebangs

How Long Does a Toner Last?

Toner can last about 6 to 8 weeks. But many factors affect this duration and there are some things you should avoid to prevent stripping. For example, if you are using low-quality shampoo, your color can get stripped faster. Typically, with chlorides and sulfates, you’ll see these kinds of negative results.

It’s not fiction, there are plenty of products that strip your toner. Some of these include salt and sulfate-based shampoos, clarifying shampoos, chlorine in pools, direct prolonged sunlight, porous hair, drugstore shampoos with “extra strength” on the label, lack of moisture, and more.

The moisture piece is incredibly important for locking in color. Using quality shampoos and conditioners, oils, and heat protectants will protect your strands and keep your hair cuticles healthy. Healthy cuticles can receive color and hold onto it better than very dry ones.

Creating a foundation in your routine consists of a quality shampoo and conditioner, oil, and a heat protectant. Staying consistent with these will maintain your toner!

To protect your toner from the sun in the summer months, consider purchasing a sunscreen product designed for your hair. Always apply the product according to the directions and your color will be preserved. For chlorine, slather your dry hair in a moisture-rich conditioner and tie it in a high bun before entering the pool. The conditioner will act as a natural barrier to the water.

Related Article

Happy girl with toned blonde hair

How Often Should You Tone?

I recommend sticking to the 6-8 week toning schedule for most types of highlights or when deepening your color. When going darker though, after several sessions, you’ll be able to space it out further to 10-12 weeks and add permanent dyes to your schedule.

If you had to get corrective color done, toning may be required more frequently in the beginning, like every 3-4 weeks.

Does Toner Damage the Hair?

Toners add a lot of shine and help seal down your cuticle. When using professional products, toners can be good for your hair.

However, some toners may contain a high alcohol content which increases shine but can affect the hair’s health negatively. Make sure you work with a trusted professional for applying quality toners if you’re worried about the health of your hair. They can guide you in the right direction, keeping your hair safe and healthy while combating yellow and orange strands left by the bleach.

a French girl with beautifully toned highlights

How Often to Touch up Gray Roots and what Volume Developer to Use

Gray Hair is the decorative tinsel you wish you could put on your Christmas tree and get off your head. Instead, these dust-colored strands make sure to shine right in the most obvious places, like your part line and hairline perimeter.

In the early stages, you may have resorted to plucking each newcomer. That was short-lived. It only seemed to drive their growth in droves. This is when you realized these aren’t shreds of demur, pretty tinsel trying to enhance your shine, nay-nay, these are well-organized multipliers ready to take over your entire head’s color palette, one strand at a time.

So, What Can You Do?

a woman with red hair showing her gray roots

For starters, get educated on how to address your spreading grey color using the right color, developer level, and techniques. There are a variety of dying methods that can keep your brunette rich and fresh looking. Or maybe you’re a solid natural blonde and you want to stay that way; Natural redheads are left in a vulnerable place when attempting to keep their rare color from fading out due to grey.

Let’s take a look at your options no matter what color your hair is.

How Often to Recolor/Touch-Up Gray Hair?

Since the rate of hair growth differs from to person, some people need more frequent rout touch-ups than others. When your natural roots become longer than an inch it is hard to ignore them.

If you have a few gray hairs, then the best option would be to use temporary root color products to mask grays between color touch-ups. This way you can reduce the use of chemicals in your hair care. If you have more salt than pepper, it would be best to opt for permanent root coverage.

If your hair grows at the average speed, the amount of time between dye sessions will hinge on the percentage of grey you have in your hair. If you’re 20-40% grey, you’ll be re-dying the grey every 8 weeks. If you’re 50% or more grey, it will be closer to every 6 weeks. And if you’re 70-100% grey it may be closer to every 4 weeks.

DIY Grey Coverage and Developer Level for Brunettes

If it’s just your root growth that needs to be dyed with a single color, you can go to any Sally’s Store or local beauty store and pick up quality permanent dye that matches your natural color. Try to avoid drugstore hair dye. It contains metallic salts, which yield unpredictable results.

There’s the most important piece of advice I want to share with you: always read and perform the color instructions on the packaging exactly. Taking matters into your own hands and changing the amounts of either the dye or the developer can result in unfortunate colors you did not expect. Then correcting the mistake can add up to hundreds of dollars. 

Typically, you’ll mix your color according to the ratio on the packaging. 20 Volume developer is standard for good grey coverage, but again make sure to follow the instructions.

Anything less than a 20-volume developer won’t yield quality results for your grey hair, which is more difficult to penetrate than non-grey hair.

redheared woman showing her gray roots

If you’re around 20% grey (See Pinterest for how to know what percentage grey color you are), you can apply the color near your roots first, let it process for 30 minutes, then drag the color down and cover the rest of the hair if the grey shows up below the roots. Process for another 15 minutes. If it’s only showing at the root, just do that area. 45 minutes is the standard processing time for most grey coverage. 

Grey Hair Coverage and Developer Level for Solid Blondes and Natural Redheads

Color matching gets more specific and intricate for medium blondes and redheads. The levels tend to hover between 6 and 9 (depending on if there are additional highlights), where exact matching can be more difficult. It can be a good idea to get help with color-matching.

Madison Reed Color Bar can be a great tool for people who want to do their own color but need help with the formula.

You’ll start by taking a simple quiz about your hair. It asks what you’re looking to cover, what the texture of your hair is, if there are any additional color goals, whether your hair already has dye on it or not, if you do it yourself and how often, the color of your eyes, skin tone, and what your comfort level is doing this yourself, and how grey you are. It’s a pretty thorough quiz to get you started on the right track.

Based on your quiz results, there is a how-to guide for color application. It targets the roots if there’s grey hair color, but it also addresses the shine level of the rest of the hair if you’re looking to boost shine and the overall health of all your hair with a lovely gloss. 

Grey Hair Coverage with a Colorist

The most surefire way to enjoy your hair dye and the right developer volume is to leave it in the hands of color experts. Hair and the process of covering grey are intricate and very difficult, even if at first glance it seems easy.

Covering grey hair with dye has certain nuances that only education and experience can tackle. In addition to this, each person’s hair is different so there are tricks of the trade a knowledgeable colorist can use if you’re having difficulty covering the grey.

Seeing a colorist also prevents common mistakes like regular overlapping which can cause banding and color buildup. Waiting too long for root touch-up and then doing it on your own can result in color banding. If you apply the color over the gray and it overlaps the darker natural color below it, over time this can create an unwanted color band that’s darker than the rest of your hair. These are difficult to fix and will stay as your hair continues to grow.

Some undertones need to be considered and without expert knowledge on the subject, this can get tricky. For example, if your brunette color has too much ash in it, over time your hair may begin to take on a green hue. This can take time, and a lot of money to correct.

By finding a knowledgeable colorist, you greatly decrease the risk of needing to get a future color correction service. Anyone who has been through this knows the dread. 

Enjoy the beautiful results only an expert colorist can give. They can also add in extra fun details like highlights that complement the overall color you’re trying to achieve. 

a woman with red hair after having root touch-up