Hair Accessories That May Damage Hair or Cause Hair Loss

Do Hair Accessories Damage Hair?

The main purpose of hair accessories is to move hair out of your face and keep your hairstyle in place. In addition, they can add style and glamour to your hairstyle. Unfortunately, some cheap and low-quality hair accessories can weaken the hair shaft, leading to breakage and hair loss. This can happen for two reasons. The first is a poorly designed product, and the second reason is not using the hair product correctly.

The most damaging hair accessories include hair ties, bobby pins, and hair barrettes.

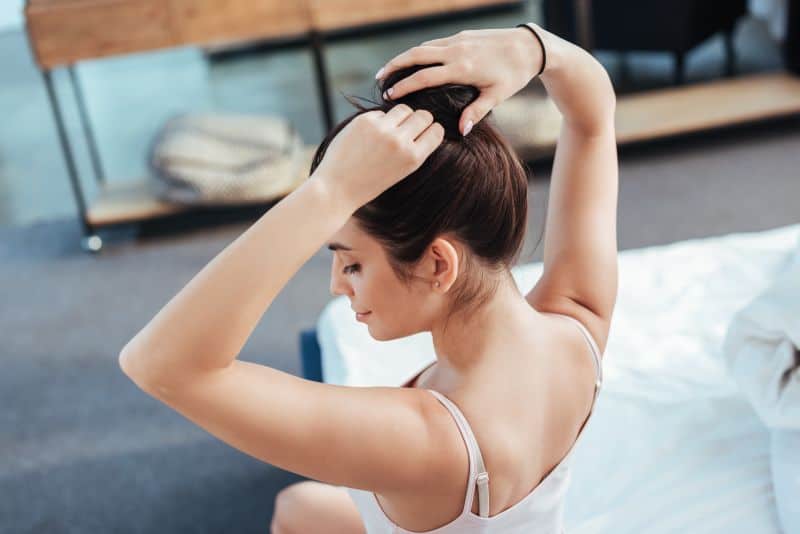
a women using hair tie to lift her hair in a ponytail

Hair Ties

Can Hair Ties Damage Hair?

Hair elastics are usually used when we want to lift our hair and tie it in a ponytail. Hair ties can leave a crease, create tension, and tangle the hair. Using hair elastics can damage your hair especially if the elastics are cheap and of poor quality. The possibility of damage increases if you use these hair ties too frequently.

Can Hair Ties Cause Hair Loss?

Tying and wearing a ponytail pulls out hair and can weaken it at the root, causing you to lose a few strands of hair every time you untie your ponytail. Additionally, persistent pulling can damage hair follicles and lead to hair thinning. Thinning commonly occurs along the hairline since this area is most exposed to the stress caused by tight hairstyles.

How to Avoid the Damage from Using Hair Elastics

You should not buy cheap hair accessories, because such savings can do more harm than good. Low-quality hair ties lead to tangled hair and hair breakage. Quality hair accessories are worth the expense. It is also recommended that you avoid putting your hair in a ponytail every day.

And when you do tie up your hair in a ponytail, wear a loser version and try to wear it at different heights.  Finally, never tie up your hair when wet as wet hair is extremely fragile and will damage easily.

When you untie the ponytail, do it slowly, and gently remove the elastics without pulling and tugging.

Instead of using traditional rubber bands, look for elastics that are covered with a soft material that won’t snag or damage your hair. The silk cover is the best choice when you want to protect fine and thin hair from tension and breakage.

Bobby Pins

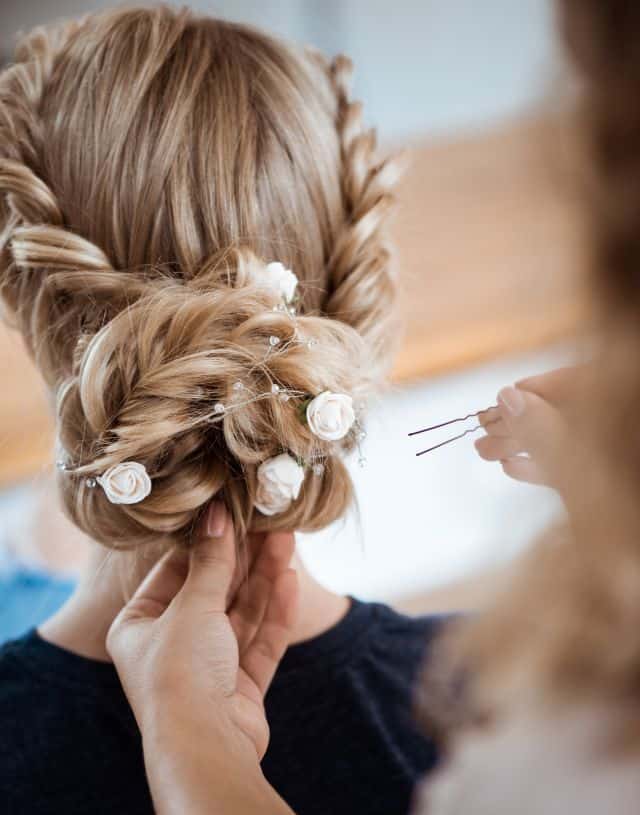
hairresser using hair pins to hold hairstyle

Do Hair Pins Damage Hair?

Bobby pins are used to keep the hair in place, where a sleek look is desired. They are great for styling your hair, but they also have the potential to damage hair, especially if you are not careful about inserting them on and taking them off. Sharp edges of cheap hairpins can accidentally scrape your scalp or snap hairs. The possibility of damage is greater if you sleep with hairpins because the movement can cause pins to pull out hair and break the hair shaft.

Can Bobby Pins Cause Hair Loss?

Prolonged wearing of bobby pins on the same spot on your head can cause hair loss. Persistent pulling on the same area can damage follicles and cause bald spots in your hair.

How to Avoid Hair Damage from Using Bobby Pins.

Be very careful when inserting bobby pins and taking them out. Make sure not to put the hair pin in the same place every time, as this increases the chances of damaging the hair shaft. When you wash your hair, be sure to remove the hairpins because they can pull out and tangle hair during the washing process. Also, make sure to remove all bobby pins while blow drying your hair.

Avoid using bobby pins too often, especially if your hair is fragile.

Never crisscross them because crisscrossed pins can put too much pressure on one spot and may cause hair breakage.

Use hair pins that have a rounded tip with a smooth coating to prevent hair from encountering sharp edges. Throw away damaged hair pins to avoid the chances of hair breakage or scraping your scalp.

Headbands

a young blonde woman wearing a headband

Can Headbands Damage Hair?

Headbands are used to move the hair back from your face. Metal or plastic headbands and headbands with built-in combs put a lot of pressure on your hair and scalp and can negatively affect your hairline and temples. Silicone grip bands have a strong grip that can be potentially damaging to the hair. Those with built-in combs put pressure on your hair and can break your strands when removed.

There is no evidence that wearing headbands made of fabric will damage hair. Many people agree that their hair looks neater and that headbands help absorb sweat during sports activities. However, a tight headband made of uncomfortable material can harm the hair by causing frizz and breakage.

Do Headbands Cause Hair Loss?

Constantly wearing an uncomfortable headband is associated with hair loss around the hairline. A tight and uncomfortable band tightens the hair and is associated with increased hair loss in men.

How to Prevent Hair Loss from Wearing Headbands?

If you decide to wear headbands, choose one made of smooth material such as satin or silk and make sure that it is not too tight.

If you need a headband for exercising, choose velvet bands that are much gentler and won’t tag your hair.

Hair Barrettes

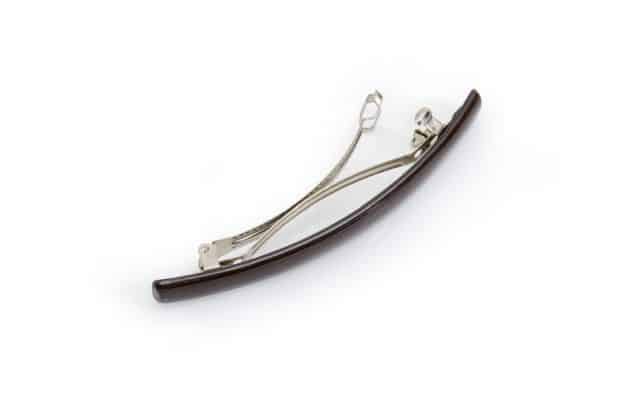
hair barrette

Are Barrettes Bad for Your Hair?

Barrettes serve to hold smaller sections of hair in place and may also be decorative. Since they are made of metal or have metal parts, there is a possibility of harming hair and scalp. Hair often gets caught in the clasp. In addition, this accessory doesn’t remain stable on the hair and may need frequent adjustments, which additionally increases the possibility of tearing off the hair, as well as injury to the scalp.

How to Minimize Damage to Hair and Scalp from Using Barrettes?

Always try to clip the correct amount of hair. Grabbing more hair than optimal increases the chances of hair damage and breakage. On the other hand, too little hair makes the barrette unstable, and it won’t stay in place throughout the day.

If possible, check the metal parts by touching them before buying. If you feel sharp edges and rough spots, do not buy the item.

Be careful not to pull your hair too tight when clasping it in a barrette, as this will increase the chances of pulling and tearing.

Claw Clips

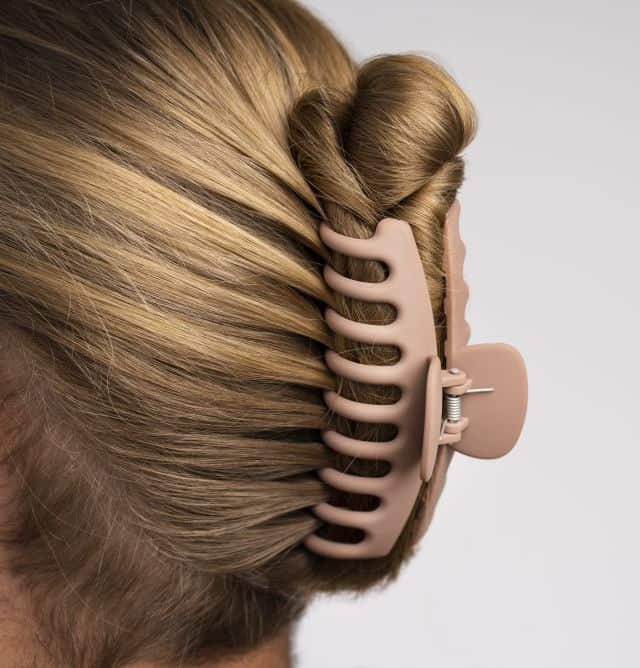
a women with claw clip in her hair

Do Hair Clips Damage Hair?

Claw clips are much gentler on the hair than rubber bands and bobby pins, which makes them popular among people with fine and thin hair. With claw clips, you can effortlessly lift your hair to create different hairstyles with minimal hair damage. However, claw clips can cause hair damage if they have sharp spots or if the mechanism that closes the clip does not work well. Like other accessories, they must be used properly.

How to Prevent Hair Damage from Using Claw Clips

Use only quality clips that have a perfectly smooth surface and rounded edges. Use clips that have a secure gripping mechanism that doesn’t catch and snag the hair.

Clip it in a slightly different place every day to avoid putting the pressure on same spot on your hair or scalp.

a woman inserting bobby pins in her hair

What Type of Highlights is Low Maintenance and Budget-Friendly?

What is it we really need as we experience an economic recession here in 2023?

Is it to immediately get on a Dave Ramsey-level budget? Maybe change up skillsets quickly just in case the current job tanks? Or how about slashing the personal budget for any expense that doesn’t have to do with survival? Do we really have to reduce or diversify our stock portfolios while simultaneously letting our hair and nails grow out of whack?

balayage hair dyed hair in a beauty salon

This really doesn’t seem like the answer.

In fact, instead of slashing the budget on experiences like hair and nails, it might be better to think through allocating funds in new ways.

One way to do this is to invest in low-maintenance highlights. That way you can feel and look your best, which is a much-needed 2023 power move, while simultaneously supporting your budget in a healthy way.

What Type of Highlights Is The Easiest to Maintain?

Balayage highlights don’t require regular visits to the salon for touch-ups and are by the far the easiest to maintain.

balayage highlights created hair in the salon

The best way to save money on highlights is to get the low-maintenance type that works with your budget and lifestyle. But discovering what type works best for you deserves consultation with your colorist. They can go over various types of balayage and foliage options that will suit your hair needs.

The balayage highlighting technique is pretty expensive. You can expect to pay for Balayage up to $300 if your hair is long. However, this hand-painted technique creates low-maintenance highlights that elevate your style and give you more time between appointments. The results last a long time which could save you some money.

And there are several types that give you that sun-kissed essence of color: V-shaped balayage, thick panels, French-style balayage, slanted panels of balayage, and more.

But the transition from high-maintenance blonding/highlights to low-maintenance can sometimes feel drastic. If you’re making the switch, but don’t want to lose pops of bright blonde, opt for foilyage instead of balayage.

This technique still gives a “rooted” look that grows out easily, but it provides higher contrast and brighter blonde pieces strewn throughout. Certain types of foliage can still provide low-maintenance highlights but with a brighter edge. 

How To Create Low Maintenance Highlights

To save money, choose low-maintenance highlights but for the best results get the lightening job done by a professional colorist.

DIY balayage may save you money, but professional service will obtain better results with less damage to your hair.

Balayage is a specialty color technique where the lightener is hand-painted in V-shapes, thick panels, slanted panels, and French style to create the illusion that the sun infused the highlights into the natural hair. It’s a beautiful, effortless technique that adds a lot to a look.

Your colorist will help you achieve the look you want by going over what level of lightness works best on your natural color. For less upkeep, your colorist will keep your base shade close to your natural color.

If your natural color is lifted 2 levels higher, the maintenance for your highlights is simple and easy to keep up. If it’s lifted 3-5 levels higher, some of the maintenance may include needing a toner.

How Often Do Balayage Highlights Need to be Refreshed?

To refresh the balayage, you need to go to a salon anywhere from 2-4 times per year.

A 6-month schedule is great for people who love a rooted look that moves into a grown-out look without the need to touch it up too early.

Usually, if the highlights are lifted 2 levels lighter than the natural hair, getting it done twice a year should be more than enough.

If the highlights are lightened 3-5 levels higher than the natural hair color, getting it refreshed 3-4 times per year works.

While the maintenance schedule for balayage highlights is simple, a toner might still be needed between highlight appointments if the color fades brassy. This can adjust the tone back into a range that’s softer and less warm.

What’s the Difference Between Foiled Highlights and Balayage?

  • Foiled highlights = high maintenance.
  • Balayage Highlights = Low maintenance.

One of the main differences has to do with the line of demarcation. This is the line that’s created from the alternating pattern the foils generate when they enclose the hair and meet the scalp. When the line grows out, it is stark, creating a strong horizontal line that is noticeable and looks unnatural.

Balayage highlights don’t have a line of demarcation. Because each lightened piece is hand-painted, there is a variation to each one. This creates a natural-looking, staggered pattern that mimics the way the sun lightens hair. The growth is effortless and gentle, letting you go a long time between appointments.

Balayage Vs. Ombre. Which Style Is Esier to Maintain?

The Ombre hair color technique is budget-friendly and requires less maintenance than balayage.

beautiful girl with ombre hair wearing black t-shirt

The terms balayage and ombre have often been used interchangeably, but they are two different things.

Balayage is the technique of hand-painting highlights. Ombre is the look that’s created when there are 3 or more inches of darker hair that transition into lighter hair. You use the technique of balayage to create the look of ombre hair.

Typically, when people request a balayage, the colorist will figure out how much of their natural root the client wants to keep. It can range from no root at all to about 2 inches.

When an ombre is requested, it’s understood that the client wants a very rooted look, usually, 3+ inches of natural root growth is left in the hair before transitioning to the lighter color.  

Ombre hair color lasts anywhere from three to six months. Sometimes clients can go even a year without a touch-up. You need to use sulfate-free and color-safe shampoos and protect your hair from heat and environmental damage.

walking woman with ombre hair

6 Sealing Oils for Hair and How to Use Them for the Best Results

What is Sealing Oil?

Sealing oils, also known as coating hair oils, don’t readily penetrate the hair shaft. This type of oil sits on the hair surface forming a water-proof barrier that prevents moisture from evaporating quickly. Sealing oils make hair shiny, frizz-free, and easy to comb through.

Oils that partially penetrate the hair, while partly staying on the outside of the cuticle layer, also have sealing abilities and can be used for both conditioning and sealing the hair. By understanding which oils have sealing properties, you will be better equipped to incorporate the right oils into your hair care routine.

beautiful youngwoman applies oil to her hair 1

Penetrating vs Sealing Oils

Neither penetrating nor sealing oils contain water. Oils are emollients which means they help your hair retain moisture from water or water-based products for a longer period of time.

Sealing oils have large-sized molecules that can’t penetrate the hair shaft. Instead, these oils form a protective coating around the hair strand that locks in moisture and prevents hair from damage.

On the contrary, penetrating oils are smaller in molecular size and can pass through the cuticle layer as a result. They also temporarily coat hair strands, but this coating is absorbed fast by the hair. Both penetrating and sealing oils help hair retain water content longer.

There is no clear distinction between penetrating and sealing oils. For example, many oils can partially penetrate the hair despite some oil content remaining outside of the hair strands. 

 young woman applying sealing oil on hair

How to Know what Kind of Hair Oil to Use?

Knowing what kind of hair oil to use depends on the condition of the hair and the reason you plan to use the oil.

If you are aiming to keep your hair well-conditioned, reduce friction, or minimize the appearance of tangles, a sealing oil is the best option for your hair goals. This type of oil lubricates the hair to make combing effortless while reducing frizz and making hair smooth and shiny. Since oils don’t contain water, you should apply sealing oils only after you’ve moisturized your hair.

If your goal is to protect the inner hair structure from the negative effects of frequent shampooing, high heat, and chemical damage, opt for a penetrating oil. This type of oil is a good choice for pre-washing because it protects the hair from the drying effects caused by shampoo and prevents your hair from absorbing excessive amounts of water.

young woman sealing her hair with oil

How to Seal Your Hair with Oil

Since the purpose of sealing is to lock moisture inside the hair shaft, your hair must be slightly wet before you apply coating oil. To do so, wet your hair with water or apply a water-based hair product.

Apply a few drops of oil to your damp hair and rub the oil through the hair to its ends with your fingertips or use a comb to distribute it.

People commonly seal their hair after washing, but those with dry hair may need to seal their hair more often, especially the hair ends which are more prone to dryness. Hair ends are the oldest and most dry part of the hair and thus need the most attention. It takes some time for the oil to settle after application and during this time, the hair should be touched and manipulated in other ways.

What Oils Work for Sealing Moisture in the Hair?

1. Jojoba Oil for Sealing Hair

Jojoba oil has a waxy texture, and it closely resembles the sebum produced by sebaceous glands which keep hair moist and shiny. This oil does not have a high penetration power, but it works well as a sealant to protect hair against dryness. It also balances your scalp’s pH, dissolves sebum build-up, and helps combat dandruff. Jojoba oil is an ideal oil for dry and curly hair. Because curly hair slowly distributes natural oil along the length of hair strands, the use of jojoba oil can compensate for the lack of sebum.

How to use: The simplest way to use jojoba oil for sealing purposes is by adding a few drops of oil to your conditioner. You can also use pure jojoba oil as a leave-in conditioner by applying a small amount to damp hair with your fingertips. If you have thick and coarse hair you can use more oil, while people with fine hair should apply less oil and concentrate its use on the ends of the hair.

2. Grapeseed Oil

Grapeseed oil is a lighter oil that boosts hair shine and calms static and frizz. Its lubricating properties help prevent tangles and make the hair easy to comb through. This oil doesn’t leave hair looking greasy which makes it ideal for sealing hair. It is suitable for all hair types and is a common ingredient in a variety of hair products.

Thanks to the high proportion of linoleic acid and the low content of monosaturated lipids, grapeseed oil remains on the surface of the hair – retaining moisture and improving shine. When you use pure grapeseed oil as a leave-in product, it preserves moisture and protects hair from breakage. When applied to the ends of your hair, it instantly polishes split ends.

How to use: To reduce frizz, tame flyaways, and increase shine, apply a nickel-sized amount of oil to damp hair and comb through.

woman applies sealing oil to her hair

3. Almond Oil

Because it is lightweight, almond oil is suitable for use as a finishing oil. It can be used as a sealant for all types of hair, notably on fine hair which doesn’t tolerate most other oils. The high content of fatty acids repels UV rays, protecting hair from damage while the high content of polyphenols, vitamins, and minerals makes it suitable for scalp massages and boosting the circulation of the scalp.

If you want to restore shine and softness to overprocessed and lifeless hair, almond oil is an excellent choice. This oil is an effective hair sealant after washing and can be applied to the ends of the hair the next day as well.

To keep your scalp healthy and stimulate hair growth, apply oil to the scalp and let it sit for some time before washing.

How to use almond oil to seal hair: To remove frizz and protect hair from damage during combing and hot styling, it is best to use almond oil after washing and before styling your hair. If your hair is thick and frizzy, applying oil to the ends more frequently will offer the most benefit.

4. Avocado Oil

Avocado oil has a slight penetrating capability, so it can be successfully used as both a sealant and an ingredient in hair masks. The protective film that avocado oil forms around the hair preserves moisture, reduces the possibility of hair breakage, and protects the hair from damage.

To alleviate scalp dryness and flaking, add a few drops of avocado oil to your shampoo.

When used on dry, curly hair, apply oil to the entire length of the hair, braid it, and leave it in overnight.

How to use: Apply the oil through the mid-shaft focusing on the ends of your hair. Your hair will be softer, shinier, and easier to comb through.

5. Castor Oil

Castor oil is extremely versatile and is highly valued as a hair oil. Although there is limited research on the benefits of castor oil, it is traditionally used to stimulate hair growth. It is rich in omega 6 and 9 fatty acids and vitamin E.  It has antifungal and anti-inflammatory properties which help keep the scalp healthy and reduce the appearance of dandruff. Due to the large size of its molecules, this oil is suitable for use as a hair sealant. Castor oil has a high viscosity and is not suitable for fine hair that is more prone to looking greasy and weighted down. However, castor oil is an excellent sealant for thick, curly, or processed hair and works to prevent dryness and keep curls soft and shiny.

How to use castor oil as a sealant: Apply a small amount of oil to damp hair after using shampoo and conditioner. Focus on the ends of the hair as this oil can weigh down hair if you use it heavily on the scalp.

6. Coconut Oil

Coconut oil is both a penetrating and coating oil because of its limited ability to penetrate the hair. This property causes excess oil to remain on the surface while coating the hair. Coconut oil has a wide variety of uses for the hair and scalp. Most notably, it can protect hair from protein loss when hair is exposed to chemical treatments.

As a pre-shampoo treatment, coconut oil prevents hair from drying out and soaking in excessive amounts of water that may cause damage to the hair.

By coating hair after washing, coconut oil reduces friction, makes combing easier, and hair softer. To make your hair look shiny, healthy, and frizz-free, apply a small amount of coconut oil after using shampoo and conditioner. Focus on the ends of your hair to minimize the appearance of split ends and reduce the need for frequent trimming.

model with beautiful long hair combs hair through

How to Make Splat Hair Color Last Longer and Stay Vibrant

beautiful young woman with vivid Splat hair color

What Is Splat Hair Dye? 

Bold shades that don’t wash out easily define Splat semi-permanent hair dye. One of the world’s most popular brands, Splat uses their highly pigmented formula to enliven hair with characteristically standout colors while adding ultra-softness and shine. Splat is ideal for individuals who love experimenting with different hair colors and prefer DIY color jobs. 

These semi-permanent dyes are 100% vegan and cruelty-free. Likewise, you won’t find bleach, parabens, sulfates, or fragrance in them. Since they have no lifting power, however, the color only comes out vibrantly in medium blonde or lighter hair. Darker hair won’t show any color at all, or at best allows a subtle reflection that washes out quickly. But if your hair is on the darker end of the scale, don’t fret! You can still achieve the same vivid shades as your lighter-haired friends, but bleaching will be necessary. Results also depend on your hair’s condition and porosity. For all its benefits, Splat isn’t without a downside. You’re facing a runnier and messier process in the shower than the usual bleeding from other semi-permanent hair dye brands.

girl with semi-permanent Splat hair color

How Long Does Splat Hair Color Last?

Semi-permanent Splat hair color lasts up to 6 weeks, approximately 23 shampoos, and fades gradually with every wash. This longevity varies based on a number of factors, many of which you can influence or outright control.  Damaged and overly porous hair is unable to retain pigmentation for long, for example. And you’ll get better results by keeping your hair healthy. Ultimately, you’ll want to keep three main factors in mind when determining how long Splat hair color will last.

  • Formulation of dye: Splat’s permanent line makes a promise for longer-lasting color than the semi-permanent dyes. And it keeps that promise. Splat’s NEW Double Lift Permanent Color Kits come with bleach and permanent dye for lifting and dyeing respectively. The bold and beautiful color that results can last up to 30 washes. Permanent dyes work best on high-porosity hair, which tends to lose pigments fast.  However, the bleach kits contain harsh ingredients such as ammonia, sodium hydroxide, and peroxide that can dry out hair and leave it prone to breakage.
  • Chosen color:  The shade you select also affects duration. As you might expect, darker and more pigmented colors tend to last longer. Long-lasting Splat hair colors include dark green, dark blue, purple, and fuchsia. The shortest-lasting hair colors include white, yellow, lavender, silver, and neon.
  • Condition of hair: Color lasts longer if your hair is bleached before dyeing. Virgin and dark-colored hair won’t retain color long, and high-porosity hair does a similarly poor job. So, bleached and healthy hair makes the perfect canvas for vivid and lasting Splat semi-permanent colors.
a girl with blue colored hair Splat

What Can You Do to Preserve Your Splat Hair Color?

To extend the vibrancy and longevity of Splat hair color as much as possible, you’ll need to change your hair care routine. But make sure to prepare your hair for coloring and apply Splat dye properly. The best routine in the world won’t do any work without the right foundation. Here are some basic guidelines to ensure optimal results and durability.

  1. Applying the dye as directed: Follow. The. Directions.  It seems obvious, but it’s easy to overlook and is crucial for maximizing your hair dye’s lifespan. If you cut corners, like leaving the dye shorter than directed, the color is likely to come out lighter and fade faster. That said, thoughtfully bending the rules can better your results. Leaving the dye in one day longer than recommended can actually help in obtaining long-lasting color. In general, though, you’ll want to do what you’re supposed to. Make sure your hair has been lifted with bleach to a light blonde stage. (Brilliant Blondexx Bleach with Bond Protect will help minimize damage.) Apply dye to clean, detangled, and completely dry hair. Use a shower cap to help retain body heat and enable better color penetration. Applying heat from an external source like a blow dryer during the processing time can help as well.
  2. Washing frequency: Excessive washing is the main cause of fading, so you’ll need to wash your hair less than you normally would. If your hair tends to get oily fast, use a dry shampoo to refresh between sudsy shampoo sessions. That way, you can cut washing in half and better avoid washing out the pigment.  Look for a color-safe dry shampoo rich in rice starch and antioxidants that is also free of color-depleting chemicals.
  3. Type of hair shampoo: Your regular shampoo can negatively affect the vibrancy and longevity of your hair color. If you look in the shower and find sulfate-based and clarifying shampoos, this definitely applies to you. These can strip your hair of the color you spent so much effort putting in. Instead, use a mild, sulfate-free shampoo formulated for color-treated hair. Splat Fade Defense Hair Color Maintenance Kit is a shampoo and conditioner kit that meets these criteria and is loaded with color enhancers. Not only will it protect your favorite Splat color from time’s worst effects, but it will also keep your hair soft, manageable, and shiny.
  4. Exposure to heat: The more exposure you allow to hot water and heat-based styling tools, the faster your color will fade. To maintain vibrancy, reign the water temperature in and use cool or lukewarm water. Otherwise, you’ll be opening cuticles that permit the color to bleed. After washing, let your hair air dry whenever possible. If you do use a blow dryer, flat iron, or curling iron, use a heat protectant spray to maintain your vivid hair color.
  5. Exposure to sunlight and chlorine: You’ll need to protect your hair from the sun, which can lighten the pigments in your hair. The sun’s UV rays act like bleach, not only fading color but also leaving the hair itself dry and brittle. Likewise, you should take steps to protect your hair from the chlorine in swimming pools. Hard water poses a related danger and can be mitigated by installing a shower filter in your bathroom.
  6. Using Color Conditioning Masques: Splat Color Conditioning Masque deposit color that helps keep your dye fresh. They can revitalize your existing shade, add shine, and bring softness back into those strands. The masks can also deposit color on pre-lightened hair. It takes only 3 minutes to see results. To maximize those results, however, you’ll want to leave the mask on for 20–30 minutes. 

How to Wash Out Splat Hair Dye

Sometimes you may get bored with your color or have to change your look for some reason.  When talking about removing any hair dye it is important to do it properly to preserve the overall health of your hair. If your hair is dry and damaged, wait until the color fades gradually with washing.

Here are some ways to get rid of Splat bold colors, or speed up the color fading process.

1. Clarifying shampoo and baking soda: Mix equal parts of clarifying shampoo and baking soda and let the mixture sit in your hair for 30 minutes before washing off with warm water. If your hair is partially colored, cover only that part of your hair. This mixture can leave your hair dry, so follow with a deep hair mask to restore moisture and shine.

2. Bleach bath: This is the most effective way to get rid of Splat’s semi-permanent color. A bleach bath also known as bleach wash is a milder alternative to regular bleach and it can still lighten hair effectively.

To make a bleach bath mix a lightener with ½ cup of clarifying shampoo. Adding shampoo will make the bleaching less harsh. You can also add ½ cup of water if you want a more diluted formula. Blend the ingredients together.

Apply the mixture to wet hair and avoid covering regrown and non-colored parts of the hair. Remove the mixture once you get the desired shade. Keep in mind that you shouldn’t leave the mixture to sit longer than 45 minutes.

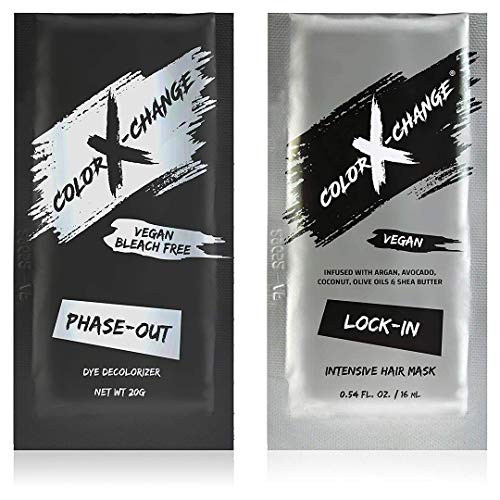
3. Color removers: Color removers are gentler on the hair than bleach but they are less effective in removing direct dyes than bleach washes. If you do use one, make sure you use a color remover formulated for direct dye removal.

a woman with Splat hair color

Help Your Hair to Survive Cold Days: Homemade Hair Masks for Winter

Countless hours go into our hair, but far too few go into its very foundation—the scalp. The critically important sebaceous glands produce sebum, a waxy substance that prevents over-drying, from it. Throughout a lifetime, however, our scalp endures chemicals, heat tools, overwashing, hormonal fluctuations, and changing weather. Alone, any one of these is enough to impair the natural oils the scalp’s hair follicles produce. But all together, they can strip away even the most basic protections.

Wintertime especially takes a major toll. Cold air, wind, rain, and snow drain the moisture from hair, leaving it brittle and prone to breakage. Hiding inside is no safe bet either, as the dry air from indoor heating can strip the moisture from your locks just as thoroughly. Consequently, it’s important to educate yourself on how to prevent drying, especially during the harsh winter months. 

attractive young woman walking in the rain

How to Provide Your Hair with Extra Hydration in the Winter

Once the cold rolls in, you’ll need extra protection. But you don’t have to invest in expensive hair products to achieve desirable moisturizing results. A homemade hair mask mixed with kitchen ingredients can be just the savior your hair needs on bitter-cold days

Natural ingredients such as honey, fruit, and nut oils are rich in vitamins and minerals, perfect for locking in moisture and providing additional nutrients. Better yet, you’re likely to have most of what you need already. And whatever you don’t is easily found in your local grocery store.

Just remember, you should adapt your hair care regimen as soon as the temperature drops. Deep conditioning keeps hair elastic and strong during the winter’s challenges. It is recommended that you do these treatments at least twice a month throughout the season. This will further protect your hair from tearing and drying out.

Now that you know what to do, you’ll want to start making your own moisturizing masks. Here are a few to get you started and keep your locks beautiful and healthy!

blonde woman wearing warm knitted sweater

Homemade Hair Mask for Winter

1. Egg Yolk and Olive Oil Hair Mask

You will need:

  • 1 egg yolk
  • 1 tablespoon of olive oil
  • 1 teaspoon of lemon juice

Directions (1–2 times a week):

  1. Put the ingredients in a bowl and mix until frothy
  2. Massage the mixture into your hair and scalp.
  3. Cover with a shower cap and leave for 20 minutes
  4. Rinse the mask from hair with lukewarm water

2. Homemade Hair Mask with Avocado and Olive Oil

You will need:

  • 1 ripe avocado
  • 1 tablespoon argan or olive oil
  • 1 tablespoon honey
  • ⅛ cup coconut milk

Directions (1–2 times a week):

  1. Smash up the avocado and add all ingredients together in a bowl
  2. Apply the mixture to your hair, starting with the roots
  3. Wait 30 minutes before rinsing off

3. Homemade Moisturizing Hair Mask with Pumpkin Puree and Coconut Oil:

You will need:

  • 1 can pumpkin puree
  • ½ tablespoon coconut oil
  • 1 tablespoon yogurt

Directions (1–2 times a week):

  1. Mix all ingredients together
  2. Apply to damp hair
  3. Let sit for 15 minutes before rinsing
Blonde woman in a wool winter cap

How to Combat Common Winter Hair Problems

1. Avoid Washing Your Hair too Often

Shampooing over frequently worsens dryness and weakens resistance to external factors. Washing twice a week strikes a near-optimal frequency. If you have problems with excess sebum, use a dry shampoo between washes to refresh your hair and give it volume and a pleasant scent.

Also, make sure to use a sulfate-free shampoo that is gentle on your hair, and use conditioner after each wash. Your rinse-out conditioner should replenish moisture and add slip to minimize damage from combing and styling.

Rinse your hair with lukewarm or cool water (no cold water near the roots!) for smoother and shinier locks.

2. Eliminate Static Electricity

Dry air and sudden changes in temperature may cause static charge in your hair. Staticky hair is impossible to style and is prone to tangling and breakage.

To prevent the appearance of static, use an ionic hair dryer, detangle hair with static-free brushes, and incorporate static tamers into your hair care regimen.

Your clothes can also cause flyaway hair. Wool, nylon, and polyester tend to build static electricity. Choose cotton, linen, and other natural materials that will keep your hair grounded.

3. Dandruff Can Get Worse During the Winter

Dandruff issues worsen during the winter, as the cold weather and lack of humidity create the perfect conditions for a dry, itchy scalp. Unless you want the embarrassing flakes on your clothes, you’ll need a dandruff shampoo. That said, some have an intense smell and can leave your hair feeling dry. Instead, use herbal shampoos formulated to relieve dandruff without stripping natural oils.

4. Protect your Hair from the Cold

Wearing a cap when outside protects against wind, rain, and snow, but no one likes ruined hair. Some materials can make your scalp sweat and create an unpleasant smell. Avoid this by wearing a soft cap with satin or silk underneath as a lining. Silk also prevents hair from developing static or damage due to friction with the cap.

For the cap itself, choose natural materials that allow your scalp to breathe and don’t negatively affect your hair. And don’t wear it for long. Put the cap on your head just before leaving the house and take it off as soon as you get back in.

sweet blonde girl against the snowcovered forest

5. Keep your House Pleasantly Warm, but not Hot

If the temperature inside your home is much higher than outside, you’ve identified one of the factors that can irritate your skin and scalp.

The US Department of Energy (DOE) states, quite rightly, that 68 °F is the optimal indoor temperature. They also recommend turning down your thermostat below 68 degrees when you go to sleep.

To keep your environment humid and to protect your hair from dry air, use room humidifiers. A humidifier helps retain moisture in the room, adds moisture to your tresses, and keeps your scalp itch-free.

6. Don’t Underestimate the Power of Hair Oils

The sharp wind outdoors and the heat indoors can strip your hair of its natural oils. When this happens, your hair will start to curl in search of moisture. No one wants that annoying frizzy look.

Hot oil treatment is mandatory in winter. Simply take a little olive oil, apply it to dry hair, wrap it in a warm towel, and leave for half an hour before washing.

Use lightweight hair oil and apply it to the ends after styling to smooth staticky strands and impart shine.

curly blonde woman in white sweather and gloves

Batana Oil Benefits for Hair and How to Use It

Every season presents its beauty challenges, and winter is no exception.  With wind, rain, snow, and unpredictable swings in humidity, few people’s tresses emerge unruffled.  These pesky variables can be particularly frustrating for those on the curly hair spectrum.

Fortunately, there are many things you can do to be winter-ready and optimally manage your mane all year long.  A must-have tool in the hair-benefiting arsenal is batana oil. It is known for its nourishing and moisturizing properties, which make it an effective natural hair treatment. Read on to discover some tricks this incredible oil has up its sleeve.

beautiful African woman using batana oil for her hair

What Is Batana Oil?

Batana oil derives from one of the two palm oil species, the American oil palm(Elaeis oleifera).  This plant is native to tropical Latin America and can be found from Mexico all the way to Peru.  However, despite its high-quality, oil yields are generally low, making it relatively rare compared to its relative, the African oil palm (Elaeis guineensis).

Most commercially available batana oil originates in one place: La Moskitia, Honduras.  The primary producers are the indigenous Miskito people, also known as Tawira or “the people of the beautiful hair.”  Producing this oil has been a part of their culture for centuries, and they believe it to be a miracle oil for skin and hair.

Batana oil has a waxy texture and earthy scent that some people may find unpleasant.  It is all-natural and free from chemicals, making it a safe choice for skin and hair care.

Batana Oil Benefits

The number of beauty-promoting qualities of batana oil appears boundless.  Among the top praises regarding its benefits for hair are:

  • Nourishing
  • Replenishing & Repairing
  • Moisturizing
  • Color Enriching
  • Preventing Hair Loss & Stimulating Growth
  • Shine Enhancing

In addition to these benefits, batana oil helps reverse damage from hair dyes, chemical treatments, and UV pollution. It also helps to keep hair soft, manageable, and frizz-free. In other words, if beautiful hair is your thing, there’s nothing not to like about this oil.

Batana Oil for Hair Growth

As it is high in essential fatty acids, batana oil thoroughly nourishes the scalp.  In the process, it also helps to moisturize the hair, heal injuries, and promote new growth.  How does it do this?

Batana oil is high in oleic and linoleic acid, which hold moisture and nutrients in the hair follicle providing the necessary fuel for longer, shinier locks.  In addition, this added moisture helps prevent breakage while fortifying existing hair, increasing volume, and adding luster simultaneously.

To stimulate hair growth, use the oil on damp hair after washing and concentrate on the spots with thinning hair.

Batana Oil for Grey Hair

Another effect of using this remarkable oil is that it naturally masks greys.  The quality of batana oil is such that it readily penetrates deep into the hair.  In addition to the rest of its beneficial effects, batana oil acts as a natural dye. The pigment of the oil seeps in, darkening your mane with repeating applications, without exposing you to any harmful chemicals in the process.

How To Use Batana Oil

Much like coconut oil, batana oil becomes solid at room temperature.  To use it, you’ll want to liquefy it by heating it in a double boiler.  No double boiler?  No problem! 

Take a heat-resistant mug, bowl, or jar and set it in a pan of water that comes halfway up the sides.  Scoop in the desired amount of batana and enjoy the earthy fragrance as it dissolves into liquid form.

Once it is cool enough to handle, rub it generously into your scalp and all the way to the tips of your hair.  Let it sit for as long as you desire, from a few minutes to overnight.  You can safely leave it on your skin and hair without causing damage. Wash out if and when you’re ready and enjoy your shine!

To keep your hair moisturized, you can use batana oil as a leave-in conditioner. Take a pea-sized amount of the oil and rub it in your hands to liquify it. Apply it throughout your damp hair after washing, focusing on the ends.

Where To Buy Batana Oil

When procuring any item, it’s best to source out the cleanest product available.  Steer clear of fillers, additives, fragrances, or really anything other than 100% pure oil; if you’re able to find organic oil, even better.

Remember, what you put on your skin and hair seeps into your body.  Take care of your beautiful self and use caution in what you apply.  It can be helpful to read several product reviews and press before committing to buying one.

When it comes to online stores, Etsy has the widest choice of batana oil products at affordable prices.

The Takeaway

People are rarely unimpressed by a beautiful head of hair.  Being the proud owner of a healthy mane feels empowering and can help to boost confidence.  When it’s possible to promote this state without costly procedures and the use of chemical-laden products, it’s a win-win.

Batana oil does everything you want for your tresses without any downsides.  It feeds, strengthens, volumizes, adds luster, and generally enhances the hair on your head.   With all those benefits, this oil will likely earn you some bragging rights.  With the finish in sight, the only thing left to do is pass the batana!

beautiful dark-skinned woman using batana oil for her hair

How to Properly Use Velcro Rollers to Prevent Damage to Your Fine Hair

What Are Velcro Rollers?   

Velcro rollers are making comeback, and there are a number of reasons why. These hair styling tools give volume and lift to flat, lifeless hair in a matter of minutes. They’re heatless, self-gripping, and don’t necessarily require other accessories to secure them in place.

The rollers are made from plastic and have a Velcro exterior with enough grip to easily adhere to and wrap hair. However, Velcro rollers are not only for curling your hair. Small Velcro rollers naturally allow tight curls. But larger rollers can create volume and bounce in flat, straight, or fine hair in addition to allowing for looser, bouncier curls and waves.

With a set of Velcro curlers, you can get voluminous, bouncy blowouts without ever needing a salon. Better yet, you can take them with you anywhere.

brunette woman in welcro rollers looking at camera

Do Velcro Rollers Damage Hair?    

By using velcro curlers, you can reduce the use of heat-styling appliances that are known to dry out and damage your hair. However, Velcro rollers are not completely safe for your hair, especially if you use them all the time. Many users, especially those with long or coiled hair, complain that their hair was damaged due to using velcro rollers. The most common problems associated with the use of Velcro rollers are split ends, the appearance of frizz, and hair breakage.

Velcro curlers do not have a smooth surface like magnetic curlers. Rather, they have tiny bristle-like hooks meant to secure them in place. Super-textured hair can easily catch in the roller as a result, which leads to frizz and—in more severe cases—hair breakage. If you have 3C or 4C hair, you may need to smooth it with a hot brush before applying Velcro rollers.

How to Minimize Damage when Using Velcro Rollers

Fine hair is more susceptible to breakage, so individuals with fine hair types should be very careful when using Velcro curlers. To minimize the possibility of tangles, brush your hair before rolling.

Always put the correct amount of hair on the roller. The sections of the hair at the base should be no larger than the roller itself. Too much hair can cause strands to get caught during removal.

Unless your hair is short, use a Velcro roller with a diameter greater than 1 inch. The larger the roller you use, the less trouble you will have when unraveling your hair. This greatly minimizes the chance of damage. 

If you use a blow dryer, wait for the rollers to cool down before taking them out.

Although Velcro rollers are described as self-gripping, it’s almost always better to secure them in place with clips. Unsecured Velcro rollers can move and touch surrounding rollers, causing hair strands to catch and tangle.

Regularly blow-drying your hair while it’s wrapped in Velcro rollers can result in dryness and heat damage. To avoid this, first, let your hair air dry about 80% of the way, and always use a heat protectant. Then put the rollers in your hair and apply heat with a blow-dryer so the tools can do their work.
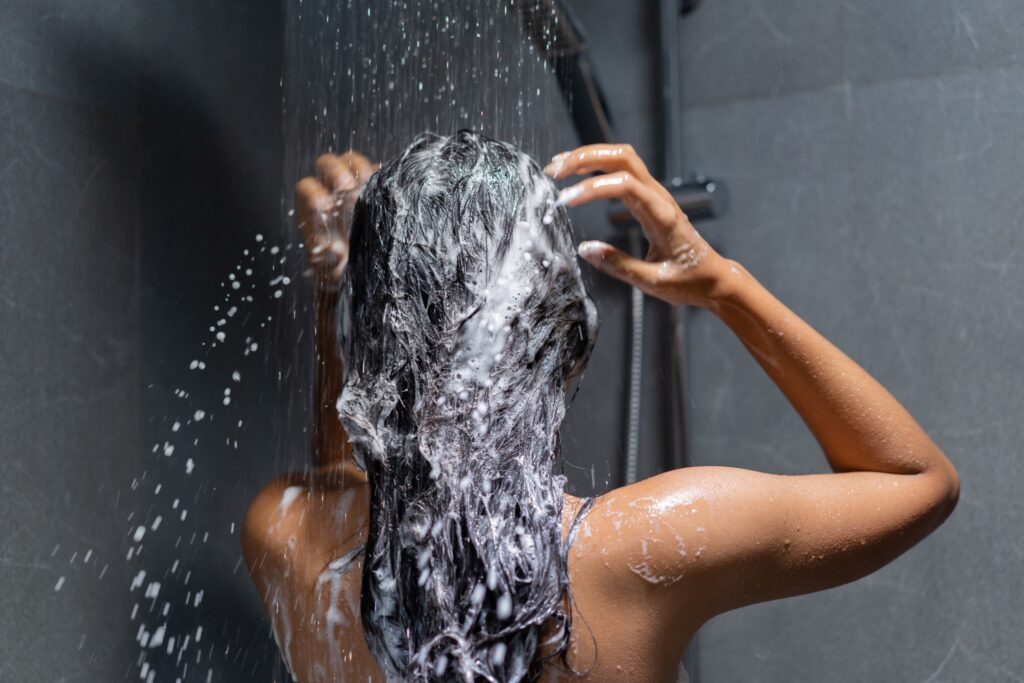
If using a blow dryer, wait for the rollers to cool before taking them out.

Woman in velcro hair curlers indoors

Do Velcro Rollers Work on Fine Hair?       

Velcro rollers produce wonderful results with fine hair giving the lift and volume that fine hair needs most. However, you must be gentle when placing and removing the rollers. It’s critically important to perform each step correctly. Fine hair is delicate and prone to breakage, and you should avoid any pulling that may lead to damage or breakage. Always use large-sized rollers on fine hair, as larger sizes will minimize any chance of getting hair stuck in the roller.

How to Correctly Use Velcro Rollers

Velcro rollers can be used on both wet and dry hair. You need to apply a styling mousse with heat-protective properties to make your hair more pliable while preventing heat damage. First, air or rough-dry your hair until it is about 80% done.

Next, use a hot air brush to heat and finish drying the chosen section of hair before lightly wrapping it around the curler. Start from the ends and rotate the roller toward your roots. If you have long hair, you will need to secure rollers with a clip or bobby pins, as longer hair puts more weight on them.

If your goal is to get more volume, spray a root lifter or other volumizing product over your rolled hair. Then use a hair dryer with a diffuser to apply more heat and make the curling process more effective.

When using rollers on dry hair, you can heat each section with a flat iron or hot brush. You’ll need to roll the sections up while they’re still hot, as you can only change the shape of your hair and add lift with heat. 

If your goal is maximum volume, use larger curlers. Just as the larger barrel of a curling iron gives looser curls, the same is the case with curlers. Curlers often come in sets of different sizes, so you can choose which one to use depending on your desired hairstyle. By combining different sizes, you get more dimensions and more natural loose curls.

Finally, leave the rollers in for 10 to 30 minutes before removal.

It’s important to wait until your hair cools completely before removing the rollers. Removing curlers from hot hair can spoil the results.

How to Put Velcro Rollers on Fine Hair

Fine hair isn’t ideal for the self-gripping aspect of Velcro curlers, as they can fall out easily. To secure the curler, you’ll need to use hair clips.

Don’t overuse the blow dryer. Apply only as much heat as necessary to manipulate your hair and create more volume and lift.

To get the max volume, lift the hair high before wrapping it, roll the section of hair back down, and fix the rollers closest to the roots of the section you work on. Also, roll the hair away from your face in face-framing areas.

Use your fingers to comb and style your hair. Using a brush can leave fine hair flatter.

beautiful woman with velcro hair curlers

How to Remove Velcro Rollers?    

The best protection against hair damage is to learn how to put the rollers on and take them off properly.

To remove the curlers, gently and slowly unroll them one by one without pulling or tugging. Make sure the curler does not catch your hair, which can be painful and may lead to damage.

Another method is to unroll the curler only far enough to grip your hair at the roots and slide it down instead of unrolling.

Once the rollers are out you can use a paddle brush to smooth strands or do finger styling to get a more natural look while leaving volume untouched. Finish with a hair spray to hold the style you’ve obtained.

Can You Sleep in Velcro Rollers?   

Velcro curlers are more likely to damage your hair if left in overnight. Movement while asleep will cause friction and tangles. Additionally, sleeping with Velcro curlers is less comfortable than with foam options. These problems can worsen with fine hair that needs more gentle handling. Therefore, it’s better to use these hair styling devices for twenty minutes before removing them gently.

To Summarize: How to Safely Use Velcro Rollers for Fine Hair and any other Hair Type?

Divide your hair into sections and use a good volumizing mousse and heat protectant.

Use 1-inch rollers or wider so you can take them out effortlessly.

Wrap amounts of hair that don’t exceed the size of the roller, wrap lightly, and secure the rollers in place with hair pins.

Remove the roller gently and avoid tugging or pulling your hair.

Allow your hair to air dry enough (80%) then place the rollers and use a blow dryer after wrapping.

If your hair is fine or thinning, you shouldn’t use Velcro curlers regularly.

Finally, never, ever sleep in Velcro rollers.

happy beautiful woman in hairrollers

How to Maintain Ombre Hair Color while Keeping Hair Healthy

What is Ombre Hair Color?

Ombre hair is a look created by a colorist that leaves a darker root color extending downward more than 4 inches until the color shifts to something blonde or vivid. An ombre can also consist of a dark root that extends down to a lighter color than the original base color. But the darker color will be 4+ inches before the next color begins.

This style is easy to maintain and creates long lengths of time between appointments.

woman with ombre hair color

How is Ombre Different from Balayage?

Ombre and Balayage do not mean the same thing. It’s important to know the difference so that language doesn’t confuse you or the colorist creating your look.
An Ombre hair color has a darker root that extends downward more than 4 inches. A balayage look may have a natural, darker root as well but it will extend down only 1-3 inches and not more.

Think of an ombre as primarily just two colors. Dark hair extending past 4 inches then suddenly you get a color change. Once you reach the portion where the hair changes to a lighter color, the color can be anything: blonde, pink, grey, rainbow, etc.

With balayage, you will typically have ribbons of light and dark color that start just after a natural root color that extends down no more than 3 inches.

Ombres are often nice for people who want their natural hair color at the top, then something vibrant or exciting just at the bottom.

How Long Will Ombre Hair Color Last?

In short, a very long time. Many people will go 5-12 months before touching up an ombre. It’s a very low-maintenance hair color that keeps you relaxed along the way.

The only part of an ombre that may need more maintenance is the lighter, vivid or blonde color. To maintain the vibrancy of vivid color or fight unwanted yellow tones in blonde ends, you may need to re-tone the hair regularly.

Is Ombre Hair Color Hard to Maintain?

Low maintenance is one of the main reasons for the popularity of the ombre hair trend. Your ends are the only part of your hair that require special attention.

Maintenance for your ombre hair color largely depends on what you get. We can cover some common looks to give you the best idea of what to expect.

Ombre with vivid colors at the ends: expect to touch up a vivid color anywhere from 4-8 weeks after the initial application. For people who want to maintain a bright bold color on their ombre, 4 weeks between appointments isn’t unrealistic.

backside of  woman with purple ombre hair

Ombre on Dark Brunette Hair with Blonde Ends: once the dark brunette color is lifted to a level 9 or 10, a toner can be applied for a softer, cooler blonde. Maintaining the blonde will require more toners about every 6-8 weeks.

a beautiful young woman with ombre hair wearing dark gloves

Ombre On Brown Hair with Red Ends: this all depends on how vibrant you want your red. To keep it bright and bold looking, a toner every 6-8 weeks may be needed. But always consult with your colorist to know the length of time for brightening the ends of your ombre hair.  

young beautiful woman with ombre hair color

Ombre on Dark Blonde Hair with Lighter blonde ends: this look is extremely low maintenance. If you’re naturally a dark blonde, that means the lighter color at the ends of your hair may not need a toner very often. You can expect to do a touch-up when you want to bring your color higher again after growth. The range of an ombre re-touch on dark blonde hair is anywhere from 5-12 months between appointments.

a woman with blonde curly ombre hair

What Shampoo to Use on Ombre Hair

Use a mild color-safe shampoo and avoid products that contain sulfates. Apply conditioner after each shampooing to replenish moisture and make brushing bleached ombre hair easy. Focus on your ends and leave the conditioner for 1-3 minutes before rinsing. To brighten the blonde parts of your hair, use a purple shampoo once a week. Alternatively, you can use a purple mask if your ends are very dry.

To avoid dryness due to frequent shampooing, use a natural-based dry shampoo, preferably one in powder form. However, make sure to use dry shampoo sparingly to refresh your locks without unwanted effects. Frequent use of dry shampoos can lead to product buildup and scalp problems. 

beautiful young woman with modern ombre hairstyle

How to Protect Ombre Hair Color?

Moisture will always be imperative to maintaining your ombre hair color. Use an oil and a cream-based heat protectant after each time you wash your hair. Apply a deep conditioning mask once a week or biweekly.

Formaldehyde-free keratin treatments are also a good idea to rebuild keratin protein into the core of the hair shaft.

Then there are also metal detox products that can remove unwanted buildup, so your hair stays healthier.

Bleaching can leave your hair overly dry and prone to breakage. To restore strength and softness to your bleached hair, use Olaplex Hair Perfector once a week. Apply the product to damp unwashed hair and leave it on for just over 10 minutes. Then wash and condition as normal. Have a professional colorist assess the damage to your hair and create a plan with you. By figuring out how dry or damaged your hair is after your ombre lightening service, you can create a plan to recover moisture, strength, and the overall integrity of your hair. 

beautiful woman with healthy ombre hair

Should You Dye Your Hair While It’s Wet or Dry?

Can You Dye Your Hair While It’s Wet?

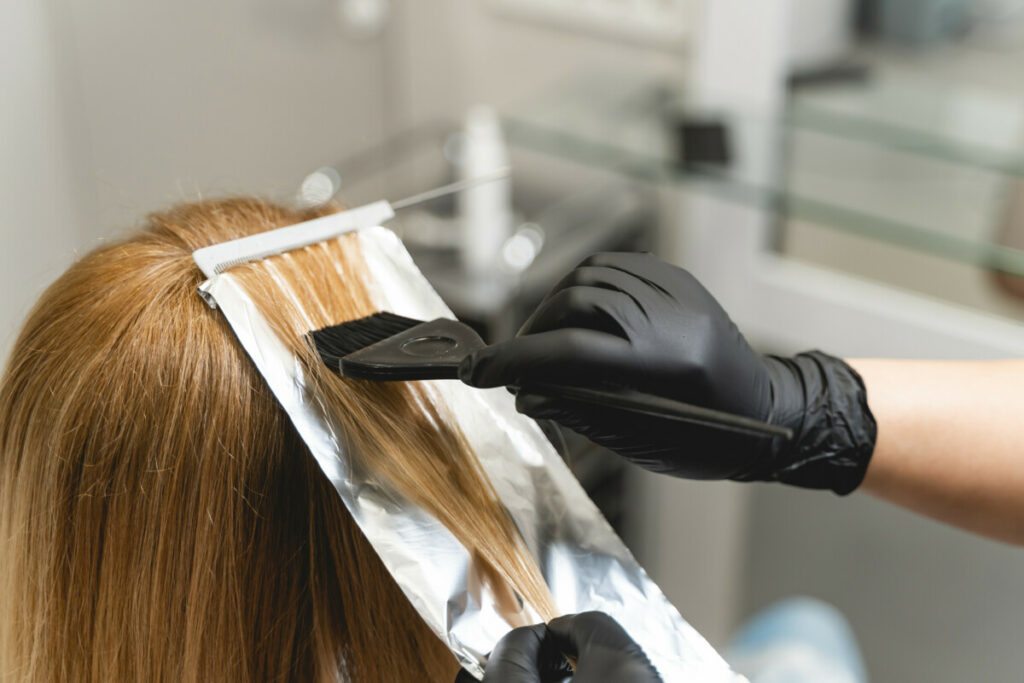
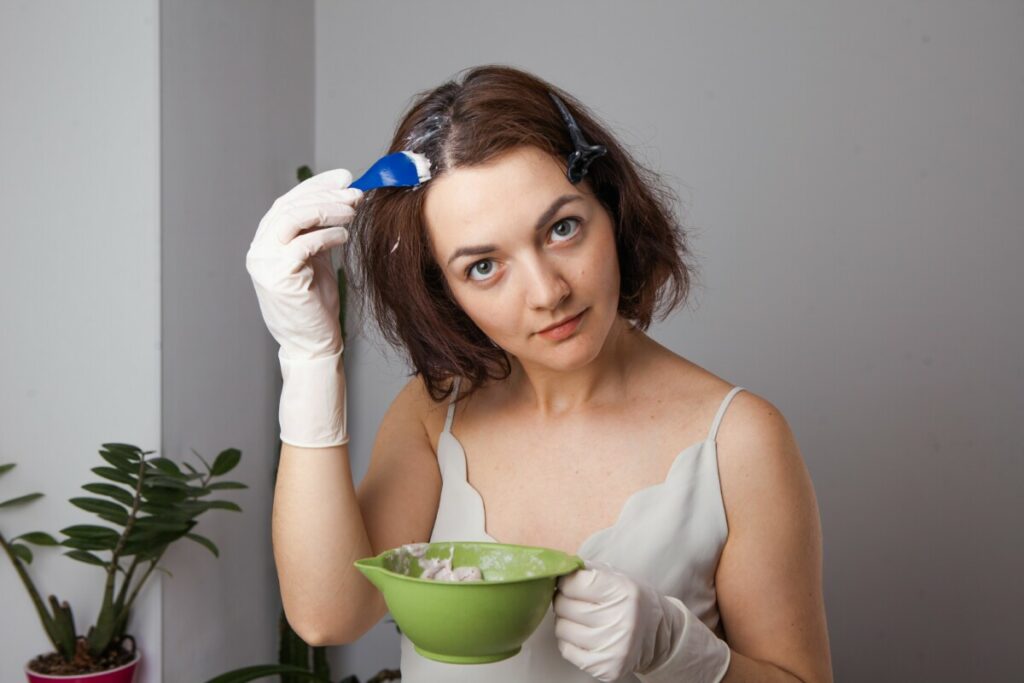
Hair dye can be applied to both wet and dry hair, and which method works best depends on what type of dye you are going to use. Some types of hair dye can be used on wet hair, while others work best on dry hair.

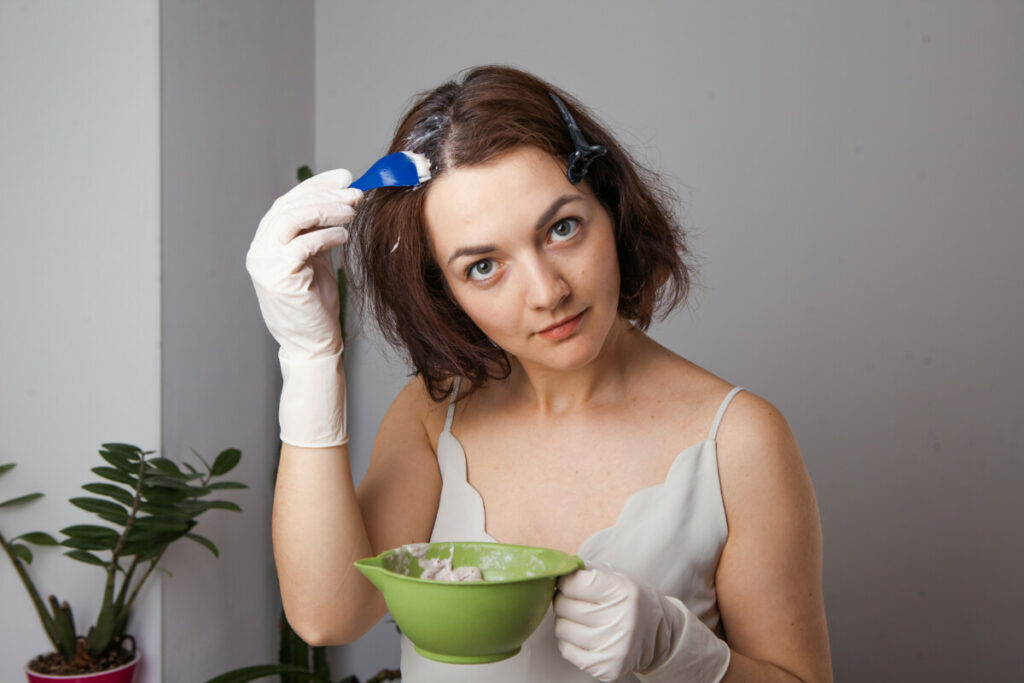
There are some at-home box dyes that come with directions for applying the dye to wet hair. With these dyes, the hair should actually be towel-dried and damp since applying color to sopping wet hair will cause the dye to run. The dye should be left on as long as directed by the manufacturer. Put a shower cap on over your hair and do other things as you wait. Once the recommended amount of time has passed, rinse the dye from your hair thoroughly with lukewarm water.

 beautiful girl with ginger-colored hair posing at home

Note that if you decide to dye your hair yourself, you should always closely follow the directions that came with the product. Coloring products are formulated differently depending on the brand and product, and the instructions that apply to one product do not usually apply to another.

Can You Dye Damp Hair?

Yes, you can. There are a few things that make dying wet hair more convenient than dying dry hair:

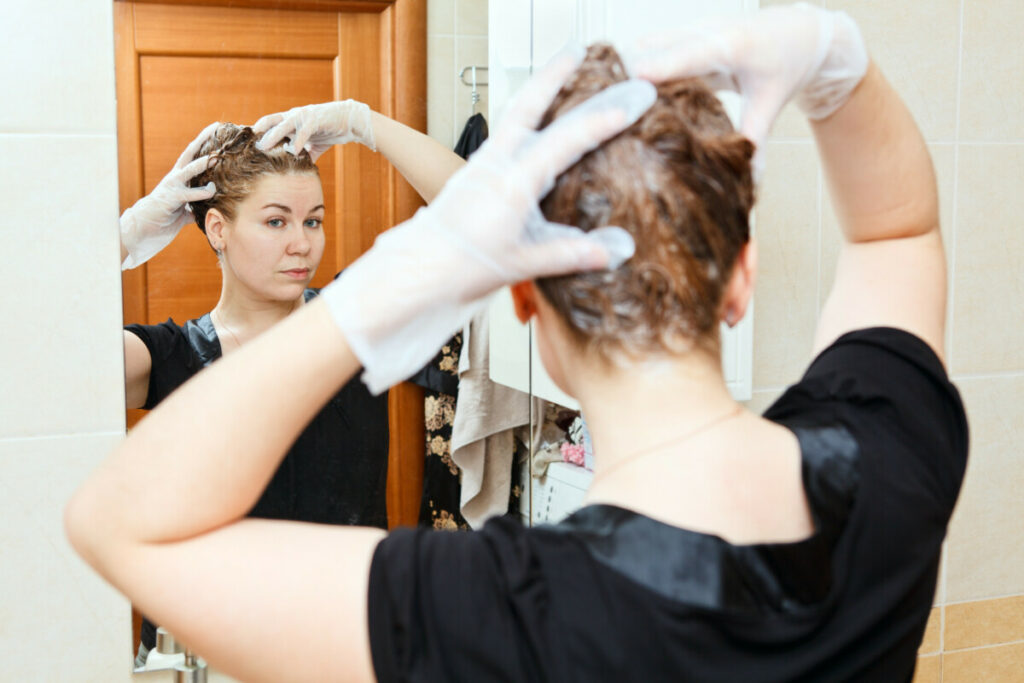
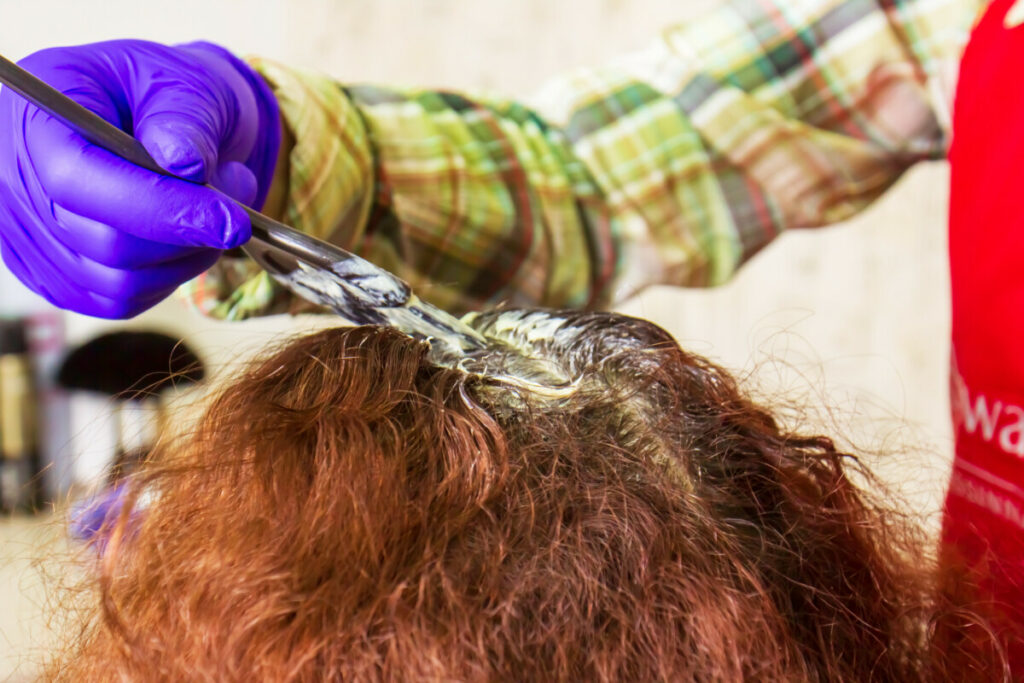
1. When your hair is wet, color is easier to apply and distribute, especially if your hair is thick and coarse. You will also need less product to completely cover damp hair with dye.

2. When your hair is dry, you need to use a brush and tinting bowl. Applying dye to wet hair can be done in the shower, making the coloring process more straightforward and less messy.

ginger girl in pajama posing in morning

What Types of Hair Dye Work on Wet Hair?

Temporary dyes can be applied to wet hair, and you will usually get better results than when applying them to dry hair.

Semi-permanent dyes should be applied to wet hair as these dyes don’t contain ingredients like peroxide or ammonia, which are meant to lift the cuticles to allow pigments to adhere. When you wash and towel-dry your hair before color application, it will create the perfect base for semi-permanent coloring because the moisture in your hair will slightly raise the cuticles, making your hair more receptive to the color. If your hair is dry, the cuticles will stay closed and the color molecules will not be able to attach to the hair.

Demi-permanent colors can be applied to either wet or dry hair, but the color will absorb better into wet strands. Moisture in the hair lifts the cuticles, making it easier for the color pigments to wrap around and lightly penetrate the hair. Although it doesn’t fully penetrate the hair shaft, the demi-permanent color will absorb better and last longer than semi-permanent dyes. 

Wet balayage is a hair highlighting method in which a hairdresser applies a lightener to damp hair. The results of this method will show more dimension and a more natural look.

Henna dyes will show the best results if applied to freshly washed and towel-dried hair. You can also get good results if you apply henna to dry hair, but like other dyes, it is much easier to distribute the mixture when your hair is wet.

Interested pretty girl with ginger hair touching her face

What Types of Hair Dye Work on Dry Hair?

Permanent colors should be applied to dry hair. While dying wet hair with permanent color is possible, you may not get the exact results you want. The most commonly seen unwanted result of using permanent dye on dry hair is an uneven and dull color.

Why Should You Use Permanent Colors on Dry Hair?

 red-haired girl reading book beside window

There are several reasons why hairdressers practice applying permanent colors to dry hair.

  1. You do not need water to raise the cuticles like you do when using semi-permanent dyes. Ammonia and peroxide in permanent dyes lift the cuticles, allowing the dye molecules to penetrate deeper layers of your hair.
  2. When applying color to dry hair, your natural oils work to protect hair from chemical damage.  It is preferable that the hair is not freshly washed before dying and instead it is recommended that you wait for a day or two after your last shampoo before dying hair. During this period, natural oils will restore a protective oil barrier that helps to prevent chemical damage. Your hair is at its most fragile when it is wet as the cuticles of wet hair are open, leaving the hair prone to damage. Applying dye containing ammonia and peroxide to wet hair can therefore cause serious hair damage and may lead to breakage.
  3. Permanent dyes adhere better to dry hair, and the result is a more even, uniform, and vibrant color. When using permanent hair colors, water acts as a dilutant, limiting the amount of color that your hair can absorb and possibly causing the color to look uneven in some sections of your hair.

Takeaways

  • Permanent dyes require dry hair, while temporary and semi-permanent dyes work better on wet hair.
  • Having your hair colored by a professional will always be your best option if you are thinking about completely changing your color.
  • If you buy an at-home coloring kit, always read the full instructions that come with the product because application procedures will vary with every coloring product.
Beautiful ginger girl posing with smile beside window

Hair Toppers Vs. Wigs: Which Will Work Better for You 

There’s something so special about snapping that first clip to secure your wig or topper. It’s always followed by snapping just a few more around the perimeter of your head to secure the hair in place.

You look up, brush the hair back from your face, do a slight wiggle to adjust the part, and look at yourself for the first time with new eyes as your heart skips a beat.

Nothing really compares to the experience of seeing yourself for the first time with the hair of your dreams. Except for the anticipation along the way of picking out every aspect of your hairpiece to suit your look and lifestyle. There are many steps that can help you determine what works for you, but the biggest question is where to begin.

Worried woman with thinning hair

With extensions being all the rage, wigs and toppers might not be your first thought. But there are certain advantages to wigs and toppers that make them worth looking at.

For starters, you’ll need to determine what you need most. Ask yourself, is it volume? Length? Full coverage? Is there a reason you may want a wig or topper vs. extensions? Such as, has your hair thinned evenly all over? Was there a percentage of hair loss? Was there chemical breakage? What’s your budget?

Knowing the answers to these types of questions will help you determine the hairpiece that suits you best.

What Is a Wig and What Can It Do for You?

A wig is a hair piece that provides full coverage, meaning all your natural hair will be underneath it, or it will act as your hair when natural hair is missing.

They are incredible structures and require skill and patience to create, whether they are made from real or synthetic hair.

For higher quality, selecting a wig made of real hair is the best option. These types of hairpieces can sometimes cost as much as thousands of dollars, but when taken care of, can last for a long time.

Beautiful young woman brushing her hair in morning

When a wig is an essential piece of your daily self-care routine, getting one made of real hair sets you up for a great experience. You can wash, curl, style, and even get it dyed just as you would your natural hair. They also attach seamlessly to your head, blending in with your skin so no one can tell you’re wearing a wig at all.

Wigs provide complete, immediate perfection. But how does a wig differ from a hair topper?

What Is a Hair Topper and What Can It Do for You?

Hair toppers are much smaller hair pieces that only cover the small, top portion of your head. They are designed to add volume and fill in where your natural hair that is thin or broken on the sides in front of the ears.

A quality topper will blend in seamlessly with your natural hair. Often, they attach to your hair with pressure snap clips, but there are other methods of attachment to explore as well. Once it’s snapped in place, you can pull a small amount of your own hair out from underneath it, blending it in with the topper hair to make everything look natural.

The unique thing about toppers is they can be partnered with micro-fusion or tape-in extensions. What’s beneficial about this compared to a wig is how breathable the combination is. The topper is also easier to take on and off due to its size and weight. 

With natural hair toppers, you can get them dyed and highlighted just like natural hair. Make sure to have a professional with experience dye or highlight your hair topper to preserve its quality. 

Which is Better for Thinning Hair, a Topper or a Wig?

This will all depend on your situation. Are you just looking to experiment with your hair and try something new? Or are you looking for coverage because of thinning or balding hair?

Coverage: If you are at the beginning stages of hair loss or your hair is slowly starting to thin, then a hair topper would be the better option. Hair toppers are an excellent choice if you are experiencing hair loss or hair thinning at the top of your head or on your crown! They give you coverage at the top and that extra volume. But if your hair loss is more advanced or you are experiencing baldness, a wig will benefit you more.

Wig vs Topper comparison chart

Color: When it comes to color, the hair topper you choose should match the color of your hair so that it can blend in and go unnoticed. With a wig, you have more freedom and can literally choose any color you want, whether it is brown or pink.

Timing: With a wig, you can style it before putting it on your head, saving a lot of time. A topper, on the other hand, takes more time to blend with your natural hair. So, it is all up to you when it comes to the timing factor.

Beautiful young woman with hair comb

Damage to your own hair: Hair toppers are gentler to your own hair because you can apply hair products and your scalp can breathe.  But they can cause damage if you don’t use them properly. If your hair is already damaged, hair toppers that clip in might damage your hair further because your hair can’t handle the extra pressure. Be gentle with the removal of the topper. Don’t just rip it out because you are getting frustrated.

Which one is more comfortable: Hair toppers are more comfortable than wigs because they are lightweight and breathable. And for this reason, they are also great on those humid or hot summer days because there isn’t heavy hair to make you melt away with sweat.

Takeaway

Hair toppers are a great choice if you want a lightweight and more natural look and if you want to add some volume and body to your hair. Wigs are the better option when you need to cover the whole head. Plus, wigs are a great choice if you want to have fun and experiment with different colors. Make the choice that will satisfy your hair needs. Happy hair, happy life!

Beautiful young woman with Bible

Styling Permed Hair: Can You Flat-Iron, Curl, or Braid Your Permed Hair?

Perm, is that buzzword from the past that conjures images of gigantic curly hair full of frizz and pizzazz. But more recently, this buzzword has been making a comeback as a new and improved hair trend. From upgraded techniques that cause less damage to the ability to create softer, more natural-looking curls, perms are making waves across all hair platforms as the next best option for your style.

One of the most common reasons for getting permanent waves is to save the time you need to style your hair in the morning. Perms eliminate the need for using hot styling tools, making your morning routine much simpler. Since perm is a chemical treatment, there are some do’s and don’ts when styling your hair.  So, let’s get into the dos and don’ts of styling them, why you may or may not want a perm, and some common dilemmas about styling your permed hair with hairstylist Andrea Haynes @babehairxo.  

Cute young student girl with permed hair

How do You Style a Permed Hair in the First 48 Hours?

“What’s the best style post perm within the first 48 hours? Nothing. It’s best for the first 2-3 days to let your hair rest, meaning, no putting it up, tying it back, or styling it at all. In fact, you’ll even need to wait to get it wet” Andrea explains. “A perm is a chemical process that breaks down strong, natural bonds in the hair and reforms them to the shape of the rod used.”

What’s the Best Method for Styling Permed Hair in the Morning?

“Moisture. Keeping your new curls moisturized is the best way to style them day in and day out whether it’s morning or night. Invest in conditioning treatments and oils that saturate hair without leaving it greasy”, says Andrea. “If your hair is a bit wild in the morning, use a refresher spray that moisturizes better than water. Water is good too, but once it evaporates, your hair can be left frizzy. Finishes it off while it’s still damp with a mouse that does not contain alcohol” recommends Andrea.

Cute girl with permed hair outdoor

Can You Brush Your Hair After a Perm?

As counter-intuitive as it seems, brushing your perm is not the best way to encourage a soft curl pattern. “To avoid frizz and get the best from your curls, use your fingers to lightly divide pieces. You can also use a very wide-tooth comb to gently piece apart the individual curls” recommends Andrea.

“To impact the health of your curls the most though, think anti-frizz. To achieve less frizz, get a silk cap to sleep in at night. This reduces the friction between your hair and the fabric over the pillow you sleep on. It also reduces your need to brush your hair in the morning.” 

Cute girl with permed hair wearing a red dress

Can You Straighten Permed Hair with a Flat Iron?

According to Andrea, you should avoid heat straightening. “This is highly not recommended, for a few reasons. When the hair is permed, the core bonds are broken and then reformed. But it leaves your permed hair in a more sensitive state. Sometimes you’ll experience dryness, and you’ll need to increase the moisture in your hair-care routine. Flat ironing can only increase the dryness and high heat can damage the sensitive reformed bonds.

If you do decide to flat iron it, make sure to prep the hair with a cream-based, thick heat protectant. Don’t use a high heat setting, but slowly increase the temperature as needed.”

Can You Curl Your Hair after Permanent Waving?

Andrea points out that hot styling tools are not compatible with permed hair. “As with flat ironing a perm, any sort of heat can decrease its longevity and add dryness. It’s no different with curling a perm. It’s not recommended, but if you decide to do it, use low heat and a thick, cream-based heat protectant. Don’t let the iron sit long against the hair for the best results.”

“In the end, it’s better to engage with your curls like you would natural curls. Treat them liberally with moisture products, wash sparingly, and enjoy the curl pattern that takes shape” says Andrea.

Can You Braid Permed Hair?

“The real question is, when. Braids and perms go hand in hand. A braid compliments the beautiful movements of the curls, but make sure not to braid too tightly. Executing a tight braid can harm the perm and hurt your scalp. Keeping your braid loose and gentle is the best way to go” Andrea reveals.

young pretty woman with permed hair

Can You Dread Permed Hair?

The verdict is split on whether you should dread permed hair or not. Some professionals will say no, but some may have the skill set to do so. “Make sure to get the health of your hair tested before moving forward with this. Also, talk to someone who has had it done before and learn from their experience” recommends Andrea.

How to Go Gray from Colored Hair

This one isn’t your average hair trend. You know, the kind that brings back looks from 2 decades past and recreates them with a modern twist.

Instead, this trending hair color carries more risk with it for a variety of reasons. From the initial decision to do it to the long process, it takes to get there, getting back to your natural grey hair color is no easy task. But it’s not impossible, and the rare value it can add back to your life will make it worth it.

So, what are the steps it takes to get back to your natural grey hair color? They may vary depending on the starting point. For example, the steps of getting back to natural grey after drying black or dark brown vs. blonde will be different. But expect to spend somewhere between 5-10 hours working on this transition.

Gray-haired woman speaking on the phone

Transitioning From Dyed Dark Brown Hair to Natural Grey

When the hair has been dyed dark brown or black for a long period of time, it may be necessary to get a color-removing treatment prior to beginning the actual service. Your colorist will know which type to choose and how to apply. Some, like the Malibu C CPR Color Pigment Remover, take 15-45 minutes to process.

The next step is highlighting or bleaching out the old color. Your colorist will usually use foils and paint the bleach only on the areas of the hair that have the dark dye. Depending on how dark the hair this, this may need to be done twice.

Then it will be washed out and a bond-builder applied. The famous @Jackmartincolorist uses the K18 repair system throughout the process to keep the hair healthy.

After the 1st  and/or 2nd rounds of bleaching have been completed, your colorist will need to match the color of the bleached hair to the natural grey root color pattern. To do this, they will use toners to get the yellow out and leave the right level of grey/silver to match your own natural grey hair. They may also need to add in some lowlights if the natural grey is salt-and-pepper. 8 hours is an average length of time to complete the full transition from dark brown/black to natural grey.

Transitioning From Dyed Dark Blonde Hair to Natural Grey

Transitioning from dyed blonde hair back to natural grey may take less time than going from dark brown back to grey, but it also depends on the health of the hair and if there are any banding issues.

If the hair is brittle and in poor condition, the colorist may need to use a lower-level developer to lift the dark blonde to a light blonde. Using a low-level developer will take a longer time to process, affecting the overall time of the service.

Once the hair has been lightened with bleach to a level 10, the colorist can then tone it to match the color of the natural grey pattern. 

Transitioning From Dyed Red Hair Back to Natural Grey

Gray-haired woman looking at the mirror

To go from dyed red hair to a natural grey, a lightener will have to be used to lift out the red color. Red hair color can be stubborn, especially if it’s dark red/auburn. It may take two sessions to extract it all with the lightener.

Then the grey-blending happens when the colorist chooses toners that match the natural grey pattern and applies them to the highlighted hair.

Make sure to use K18 Leave-In Repair Hair Mask after this intensive service. The strength of your hair depends on it!

Going Back to Natural Grey by Growing Out the Hair

If you prefer not to put your hair through the intensive highlighting process it takes to get it back to a natural grey, then you can simply grow it out.

The pros to this are 1. It keeps your hair healthy. 2. Inexpensive. 3. You don’t run the risk of having a mistake made during the massive color process.

But there are some cons. Depending on the length of your hair, it could take years and years to grow it all out if you’re not wanting to lose a lot of length during the cuts. The hair as it grows will have to pass through phases of looking unbalanced. Many women feel compelled to wear hats.

When your gray roots start to appear, you can use temporary gray root concealers for a while to hide them. These products commonly wash out with the next shampoo, so you have to apply them after each wash. As your hair continues to grow, root concealers will be less convenient.

Instead of taking the long route and letting your natural grey grow out while gradually cutting out the color, you can opt to go short and cut all of the color out. This leaves you natural grey in one cut session and lets you sport a lovely short new look.

attractive middle aged lady with short haircut

Maintenance and Color Schedule

The famous @Jackmartincolorist leads in transforming hair back to its original and natural grey state. He recommends getting blending touch-ups 3 times per year to maintain a beautiful grey look. Scheduling your regular color touchups is one of the best ways to experience gorgeous hair year-round.

To keep your natural grey tresses healthy, establish and maintain a foundational routine of care. Use a moisturizing shampoo and conditioner, a quality oil, and a cream-based heat protectant for best results. Use purple shampoo periodically to neutralize yellow tones.

Also, add in professional-grade glossing treatments to boost shine. Getting these seasonally can make all the difference when keeping your natural grey hair looking shiny and smooth.

Gray-haired woman in the park reading a book