How to Remove Static from Your Hair and what Static Tamers to Use

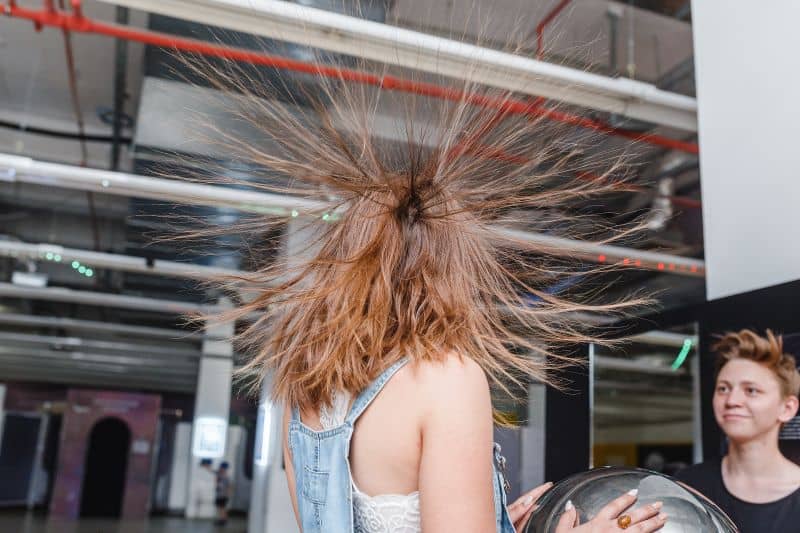
Fly-away hair happens when your strands are rubbed against some materials that hold static electricity on their surface. Since materials with the same charge repel each other, the positively charged individual hairs try to put as much distance between them as possible. This is known as a “fly-away hair” effect.

Static electricity makes hair look untidy and difficult to manage. Fortunately, there are anti-static hair tools and products you can use to minimize the appearance of flyaway hair.

 woman with standing hair from static electricity at physics museum
 Woman with standing hair from static electricity at physics museum

What Causes Static Hair?

  1. Dry hair: Dry, over-processed, and fine hair is more prone to turn into fly-away strands than thick or healthy hair. Higher moisture content increases the conductivity of hair strands and makes it easier for your hair to spread out and neutralize the static charge. Dry hair acts as an insulator and cannot conduct and release the static charge, which causes your positively charged strands to repel each other and fly in all different directions.
  2. Dry air: Hair becomes more prone to static during cold winter months due to the lack of humidity in the air. Dry external conditions and dry indoor air due to heating, absorb the moisture not only from the air, but from your hair as well, and this encourages the accumulation of static electricity. The humidity prevents the build-up of static and helps to release it from hair, while dry air increases the build-up of electrical charges.
  3. Clothes: Sweaters, coats, and caps made from wool, acrylics, and polyester tend to cause an accumulation of static when rubbed against your hair. Resist wearing hats or caps made of these materials and look for cotton clothes instead.
a blonde woman with flyaway hair

How to Tame Flyaways?

When your hair flies in different directions it might be challenging to maintain a respectable style. Trying to fix the style with an ordinary brush creates even more static electricity, worsening the problem.

To reduce static electricity build-up, you need to keep your locks healthy and well moisturized. There are also some quick fixes to try when it is not possible to prevent your hair from becoming charged with electricity.

Products for Flyaway Hair

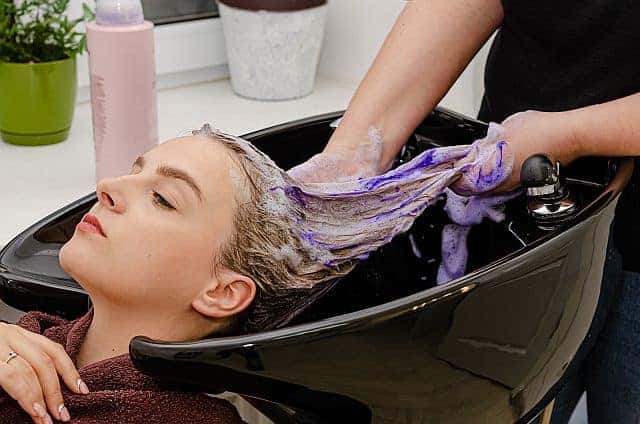
1. Shampoo for Staticky Hair

Avoid shampooing your hair daily, as excessive washing can cause hair to become overly dry. When detergents in a hair shampoo deprive your hair of its natural oils, it becomes drier and more prone to static. Skipping a day in between shampoos helps keep the natural moisture in your hair, making it less prone to static.

Refrain from using shampoos with sulfates, as these tend to strip the natural oils from your hair and disturb the natural pH balance. Select a hydrating, nourishing shampoo that only washes away dirt and the surface level of excess sebum. 

Related product: Aveda Smooth Infusion Shampoo helps soften hair and makes it easier to style. Hydrolyzed wheat protein and a special infusion of plant extracts help to create a smooth surface on hair to reduce frizz, minimize flyways, and add extra shine.

2. Conditioner for Flyaway Hair

Use a moisture-rich conditioner every time you shampoo your hair to prevent dryness and reduce static charge. Before exiting the shower, rinse your hair with cool water for a few seconds to seal the cuticle and prevent frizz and fly-away hair.

Keratin-enriched conditioners help seal the cuticle and reduce friction, making hair less prone to static and frizz.

attractive brunette woman with long flyaway hair

3. Leave-in Conditioners for Flyaway Hair

Apply a leave-in conditioner to towel-dried hair, especially if your hair is on the dry side. This helps your hair retain its natural moisture and prevents the static charge from accumulating on your strands.

Use a deep conditioning mask once a week to restore moisture and keep your hair healthy and more resistant to static charge.

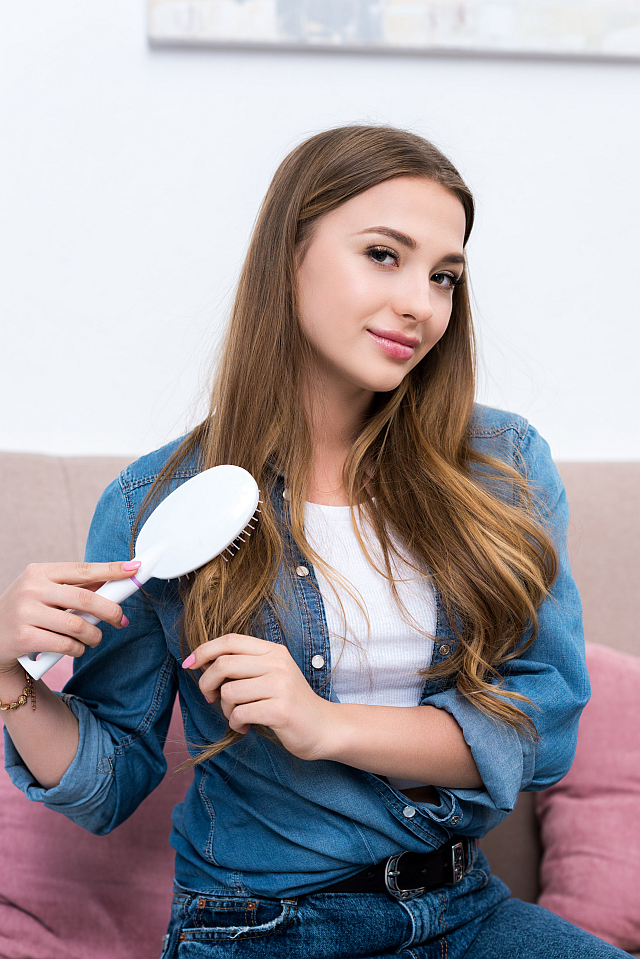
4. Anti-Static Hair Brushes

The friction caused by excessive brushing may result in fly-away hair. Combing generates less friction between hair strands than brushing and helps reduce a build-up of static charge.

Wrong: Plastic or silicone styling tools create static electricity when coming in contact with your hair. Unlike plastic brushes, hairbrushes with stainless steel bristles don’t produce a static charge and they leave your locks smooth and manageable.

Right: For detangling purposes use a good wooden comb, because wood doesn’t create static electricity in combination with other materials, including your hair. The wooden teeth of the comb also help evenly distribute natural oils, adding a nice shine to your hair.

Related product: Natural Wooden Bamboo Brush by Sofmild is made with biodegradable materials. Wooden bristles stimulate the scalp, naturally condition your hair and help create a sleek and shiny finish.

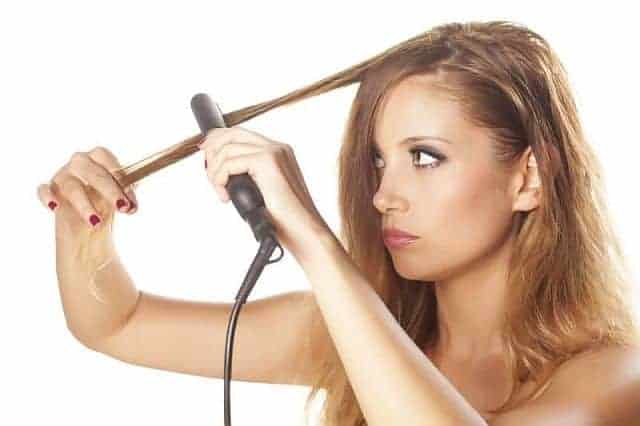
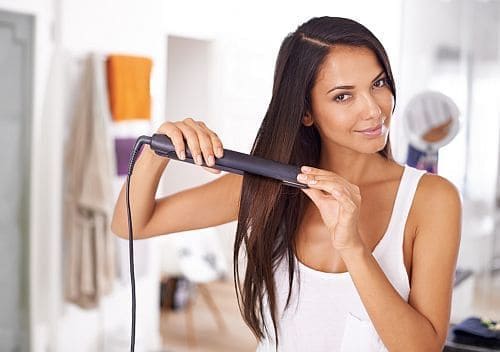
Tip 1. To create a straight look, use a hair straightener brush with negative ion technology such as Ionic Straightening Brush by HODAY. It helps to achieve a straight finish while leaving hair smooth, shiny, and static-free.

Tip 2. When blow-drying your hair, use an antistatic, ionic mineral-infused round brush that leaves your locks looking smooth, healthy, and glowing.

5. Ionic Hair Dryers

Ionic blow dryers generate negative ions which neutralize the positive charge responsible for fly-away hair. This type of hair dryer breaks the water molecules into smaller particles. This helps lessen the amount of heat and time needed for drying your hair and reduces the loss of inner moisture.

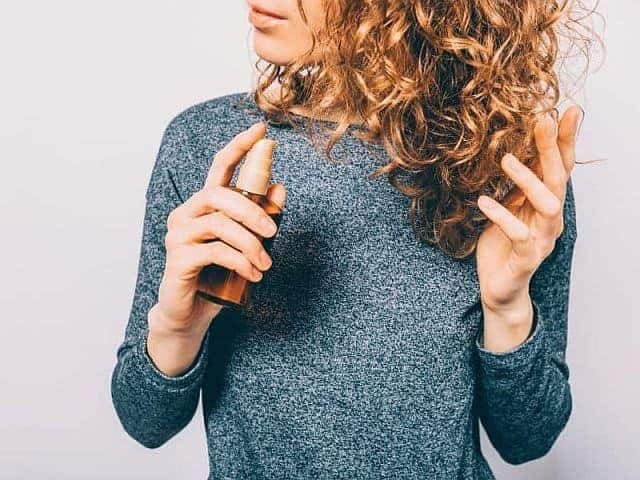
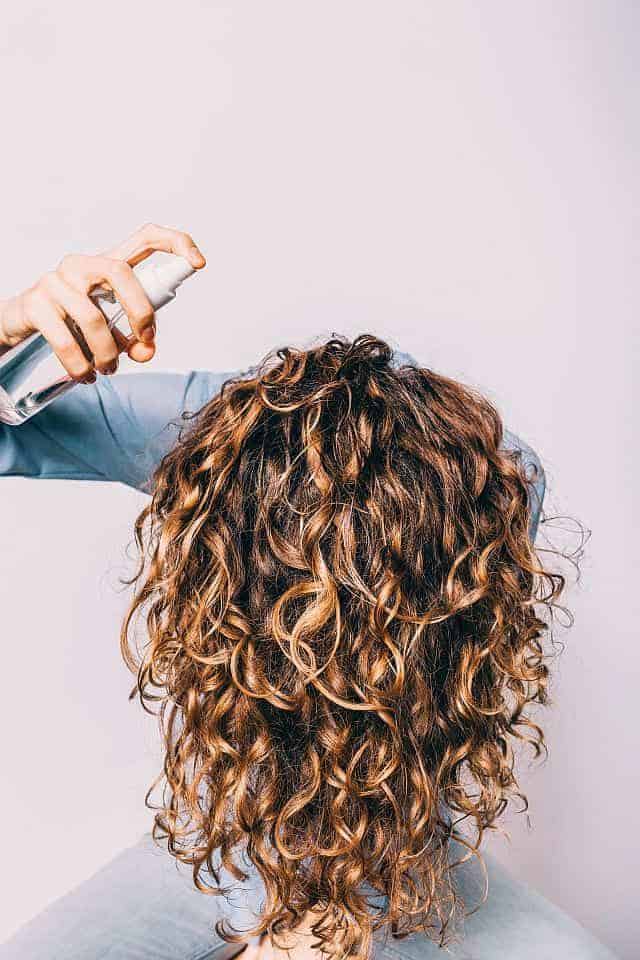
4. Anti-Static Hairsprays

An alcohol-free hairspray is a very handy styling product for taming static hair. Alcohol in standard hair sprays can lead to dryness, making the problem even worse in the long run.

Related products:

  • Smart Solutions Flexible Holding Spray provides a flexible hold to keep your style all day without leaving your hair feeling sticky. It is formulated with plant extracts that help balance moisture, prevent static and fly-away hair, and protect hair color from fading.
  • Oribe Foundation Mist helps detangle hair, provides thermal protection, and neutralizes the static charge.

Applying a small amount of hair oil, focusing on the ends, will counteract the static electricity. Oil-based hair products also help replenish lost natural oils, while adding a glossy shine to your hair.

a beautiful brunette woman with static in the hair

Quick Fixes for Static Hair

  1. Hair finishing stick: The flyaway tamer wand quickly and effectively fixes flyaway hair, broken hair, and edge hair, making your hairstyle neat and smooth. This way you can put annoying flyaway hair under control instantly. This hair-taming product is small and easy to carry in a bag and use when needed.

Hair Feel Finishing Stick by Aroamas uses natural ingredients such as beeswax, seed oil, primrose oil, and camellia to smoothen flyaways and create a shiny finish. Just dip the mascara brush in the gel and lightly run it over rebellious strands.

2. The magic of dryer sheets: Keep a dryer sheet in your purse for emergencies. When your hair gets charged, place and rub it over your hair. In the same way, as a dryer sheet neutralizes the static in your clothes, it will instantly help smooth your hair. Try to avoid this method when possible, as a dryer sheet contains toxic chemicals that can be absorbed through your skin.

3. Wet your hands: Sliding your wet fingers along the hair is another quick and easy way to tame fly-away strands.

a girl uses anti-static brush

Straightener Brush vs Flat Iron: Which is Better for Your Hair?

Traditional straightening tools like flat irons may take a while to create the sleek, shiny look that many women are aiming for. To resolve that, a new straightening appliance has been launched. It combines the heating feature of a flat iron with the convenience of an ordinary hairbrush. This new appliance is was Electric Straightening Brush

This innovative styling tool has a heated base and bristles that enable you to straighten your hair while brushing it. This new generation of hair straighteners is claimed to be a great alternative to traditional straighteners, providing faster and easier straightening.

In recent years, heated styling brushes have become a hot topic in the hair care industry and must-have beauty aid for busy individuals. But this revolutionary straightening tool hasn’t met everyone’s expectations. Some women weren’t satisfied with them and decided to return to their flat irons.

a woman with hair styled with an electric hair brush

Can a Heated Hair Brush Replace Your Flat Iron?

It depends on your needs. If pin-straight hair is what you are aiming for, you should stick to a conventional flat iron. For straightening purposes, electric brushes are less efficient than flat irons. It’s particularly hard to get your ends straight. But you may find this appliance good enough for quick straightening in the morning. You may want to have one for the days you don’t have time to use a flat iron.

Does Electric Hair Brush Work on all Types of Hair?

Manufacturers claim that this “new revolutionary device” can be used on all hair types. But is it possible that a single styling appliance can work perfectly for all hair types, lengths, and conditions?

In most cases, straightening brushes work well for individuals with slightly wavy hair to make their locks straighter without reducing volume and bounce.

A heated styling brush is a great time saver for individuals with curly hair and those with very thick unruly hair. Some curly-haired women are delighted with the reduction in styling time that the new straightening brushes provide, while others may be disappointed with the additional volume.

This brush may not perform well if your hair is too short, because you may experience difficulty in creating the tension needed to straighten your hair.

Some individuals with naturally straight hair use a heated brush to get more volume or to get their hair slightly curled at the ends.

For frizzy hair, ceramic hair straightening brushes with anion anti-static technology can eliminate static electricity and reduce frizz.

Does it work?! |Hair Straightener Brush on Natural Hair – video by Lovely Bryana

Is a Straightening Brush Better than a Flat Iron?

A heated hair brush can indeed provide some benefits that outperform those of a traditional straightening iron. How much benefit you will get depends on your hair type and your personal preferences. Below is the list of potential benefits that a quality electric hair brush can offer:

  1. Saves your time. Compared to a flat iron, by using a heated styling brush, you can shorten the time needed to straighten your hair. How is this possible? When using a heated brush, you can work on larger sections of hair, compared to when using a flat iron. A heated hair brush can handle quite a large portion of hair at once, covering the entire head faster, which cuts down styling time. It is useful for occasions when you need to smooth and style your hair fast.
  2. Gentler on the hair than a flat iron. The straightening process is less damaging to the hair if you use a quality appliance and if you use it properly. Your hair will not overheat, as you don’t press it between hot plates. The duration of exposure to heat is also shorter than when you use a flat iron.
  3. Straightens the hair without flattening it. A straightening brush smooths your hair without reducing the volume. Your hair will retain more body and appear less flat than it will after using a flat iron. If you want volume in your hairstyle, then this is the product for you.
  4. Easy to use. Once you learn the technique, electric hair brushes offer an easier way to straighten hair, compared to ordinary flat irons.

Are there any Disadvantages?

  1. If you want to achieve pin-straight hair, then you’ll be disappointed. Your hair will not be as straight as much as you want.
  2. It may be particularly difficult to smooth the ends of your hair because they will slide away. To straighten a portion of your hair, you have to apply some tension. To create the necessary tension on the ends, use a protective glove that usually comes with the product. You may also choose to shape the ends inwards or outwards if you don’t like them pin-straight, but this may require multiple attempts.
  3. The roots may not get enough heat to straighten and your natural curl pattern may still be noticeable.
a young woman using a hot straightening brush

What Makes a Quality Electric Hair Brush?

1. MCH Heat Technology

The MCH (metal-ceramics heater) saves power, heats instantly, and delivers a consistent temperature for efficient and damage-free straightening.

2. Ceramic 3D Design

A multi-dimensional ceramic heated surface design provides a larger contact area than ordinary flat surfaces and enables you to style larger portions of hair with one stroke. This ensures more even heating and helps shorten the straightening time.

3. Anti-Static Technology

Anti-static technology helps prevent static from building up on your hair by supplying hair strands with negatively charged ions. The ceramic material in a straightening brush emits negative ions that seal the cuticle, cut down frizz, and tame flyaway hair.

4. Anti-Scald Design

The anti-scald design of brush straighteners protects the skin from heat, eliminating the risk of getting burned. The handle and the bristle tips stay cool while the brush is hot inside.

5. Adjustable Temperature Control

An adjustable heat setting is a must-have feature that enables you to set the temperature according to your hair type and the desired style.

Temperature setting guide:

  1. Fine or bleached hair: up to 290℉
  2. Fairly healthy slightly wavy hair: up to 350℉
  3. Thick and curly hair: up to 390℉

Tips for Using a Heated Styling Brush

There are some specific precautions and tips to follow when using a hairbrush straightener to achieve the best results and prevent heat and mechanical damage.

  1. Use a hot brush only on freshly washed, conditioned, and dried hair. Residue and dirt in your hair can cause tangles and lead to breakage.
  2. Also, keep your brush clean by wiping it regularly with a dry fiber cloth to clean residue and dust that collects over time. Remove hair trapped in the base of the brush.
  3. Never use a heated styling brush on wet hair. If applied to wet hair, electric brushes can cause heat damage, similar to damage from a flat iron. Also, the brush won’t slide smoothly when your hair is wet. That is why you should use an electric brush straightener only on dry and clean hair.
  4. Make sure to remove any tangles before you start straightening. Using a heated brush over knotted hair may cause breakage.
  5. Apply a heat protectant while your hair is still damp to lock in moisture and minimize the chance of heat damage.
  6. A brush straightener is more effective if you brush from underneath, by lifting a portion of hair and moving the brush from the roots to the ends. Stretching the hair with your other hand can help.

What Else Should You Know Before Buying a Heated Hair Brush?

  • A hairbrush straightener can be a great time saver for individuals who are looking for a way to reduce styling time.
  • if you prefer pin-straight hair you won’t be happy with this product. If you decide to buy one for getting ready fast when you are short of time, keep your flat iron for special occasions.
  • Try the brush before purchasing if possible.
  • Go to YouTube and watch video tutorials.
  • Take into consideration the latest models, as hair brushes are a relatively new product and there might be some improvements.
  • Select a returnable product to be sure you don’t waste your money.
a woman with hair styled with hot brush in the salon

How to Reduce Heat Damage from Flat Ironing Your Hair

Flat irons are an extremely popular styling device that helps you get straight glossy hair without leaving your home. However, this styling tool that gives you that glamorous look can cause irreversible damage to your hair. The chances for hair damage increase if you use the appliance inappropriately, or when your hair is not adequately protected. Hair straighteners use extremely high temperatures (up to 450°F), which can fry your hair if you don’t use a heat protectant.

Signs of Heat Damaged Hair

The high heat from straightening irons can damage the cuticle layer, making strands porous and prone to frizz and split ends. Frequent heat straightening can deprive the hair of the vital moisture that keeps your strands elastic and strong.

The high temperatures during flat ironing can also weaken the hair’s internal protein structure, leaving your strands weak and prone to breakage.

Heat damage is hard to undo, and heat-destroyed hair cannot recover from the damage. Cutting it may be your only option to get rid of the damage.

A girl straightening the section of the hair with a flat iron

How to Prevent Heat Damage to Your Hair

Since heat-induced damage is irreversible, it is advisable to take proper precautions to prevent the damage from occurring. Here are some tips on how to use a flat iron without compromising the integrity of your hair.

1. Make Sure Your Hair is Completely Dry before Straightening

Your hair is most fragile and susceptible to damage when it’s wet. Flat ironing wet hair can lead to “bubble hair” unless you use a wet-to-dry flat iron. To reduce the amount of heat, consider letting your hair air dry instead of blow-drying it before flat ironing.

If you are busy and need to blow-dry your hair, make sure to thoroughly towel-dry it after washing using a highly absorbent towel. It is recommended to use an ionic hair dryer that helps lock in moisture, reduces drying time, and tames frizz. Blow-dry in a downward motion to make hair as straight as possible before starting the flat-ironing.

Wet & dry flat irons are designed to have an option for styling damp hair. The plates have holes or steam vents that remove water from your hair. An additional benefit is that drying and styling your hair at the same time can be less time-consuming than the traditional heat straightening method.

2. Do not Flat Iron your Hair Daily

Flat irons should be used in moderation. Less frequent heat straightening helps reduce the risk of heat damage and gives you healthier hair in the long run. For very fragile hair such as fine, color-treated, or relaxed hair, it is not advisable to use a flat iron more than once a month.

3. Flat Iron Clean Hair

Make sure your hair is clean and properly protected before you start heat straightening. When you apply heat to unwashed hair, styling product residue and dirt could fry your hair. Before you begin the straightening process, wash your hair using a moisturizing or smoothing shampoo and conditioner. Moisturizing ingredients help protect hair’s natural oils while smoothing components seal the cuticles and make it easier to achieve a straight, sleek style.

Also, make sure to clean your appliance regularly to remove dirt and product buildup from the plates.

A beautiful brunette using a flat iron to style her long hair

4. Purchase Quality Appliances

It’s worth investing in a quality appliance that can give you sleek hair without causing noticeable damage. High-quality flat irons require fewer passes to achieve the look that you are aiming for.

A professional-grade flat iron with tourmaline-infused ceramic plates is designed to evenly distribute heat and provide faster styling. Tourmaline-infused ceramic produces negative ions that seal the cuticle and protect hair from drying out. Be sure that your device is equipped with multiple heat settings, so you can control the heat level to be compatible with your hair type.

Vibrating flat irons use a combination of heat and vibration to glide smoothly over the section of the hair. Tiny vibrations reduce pulling and snagging, allowing for easier release of hair. This makes the heat straightening process faster and reduces the possibility of heat damage or breakage. This type of flat iron works best on thick, coarse hair.

Steam flat irons release steam from a built-in water tank to moisten the hair during straightening, so they are less likely to burn your hair than regular straighteners.

5. Select Appropriate Heat Settings

Use your flat iron moderately and adjust the heat level according to your hair texture and condition. Fine hair requires lower temperature settings than thick or coarse hair. If your hair is fine, select a temperature below 325°F. For medium hair texture and fairly healthy strands, the temperature should range between 300°F to 375°F.

Color-treated and chemically processed hair is more prone to heat damage than healthy hair. Thicker hair can handle temperatures ranging from 360 to 410 degrees. For curly hair, it is advisable to stay below 375 degrees Fahrenheit.

Hairdresser holding a hair straightener

6. Use Heat Protection Products

To minimize heat damage, always use a heat protectant before straightening your hair. These products fortify the hair with moisture and form a protective layer to defend hair against heat damage. Select a product formulated with natural and organic ingredients, as it will stay in your hair.

A heat protector should be applied to clean, damp hair to be absorbed into the hair shaft. Comb your hair with a wide-toothed comb to remove tangles and to evenly spread the product from the roots to the ends. This will enable the plates to glide smoothly and prevent the hair from getting caught.

If you have fine or oily hair, select a lightweight heat defender spray that will leave your hair feeling weightless. The quality nozzle is crucial for even spreading and avoiding product waste or build-up.

7. Use Bond Building Products

Bond Building treatments help to repair hair damage from heat styling and chemical treatments. You can go to the salon to get a stand-alone reparative bond multiplying treatment or you can use at-home bond reinforcing products that are designed to maintain the result achieved by the salon treatment. You can also purchase bond-reinforcing products in the form of shampoos, conditioners, leave-in masks, and smoothing serums. Incorporating these innovative products in your hair care routine helps your hair to recover from previous damage and become more resilient to future damage from hot styling tools, chemicals, and environmental stressors.

8. Section your Hair

For an easier and more efficient straightening process, divide your hair into sections and twist them up using large clips. Divide those large sections into smaller, easy-to-manage portions, based on the size of your plates. Clip up all the sections of hair except the one you have released to work on. Begin from the lower sections of your hair, sliding the iron down the section, and continue to the top focusing on one piece at a time. The section you work on should be small enough to pass between the plates easily. Straightening too much hair at a time may require extra passes which will increase the possibility of heat damage.

9. Keep your Straightening Iron Moving

Keep your hot appliance in constant motion. Don’t let the appliance sit in one spot for more than 3 seconds, as keeping the iron in one spot or running it too slowly will increase the likelihood of heat damage. Try to straighten each section in a single pass. If you need to go through the same section more than once, take a small break between passes to reduce the chances of heat damage to a minimum.

a fashion woman with heat straightened hair

How to Reduce Frizz in Your Hair

Frizzy hair is one of the most annoying problems that many women deal with, especially during the humid summer months. Frizz makes hair unattractive and difficult to manage. Although the problem may seem overwhelming, some effective practices can help to keep the frizz under control.

Hair gets frizzy when the outer layer of your hair (cuticle) doesn’t lay flat. Ruffled and damaged cuticles cannot lock in the moisture needed to keep hair strong and elastic. Moisture-deprived hair tends to absorb water from the air. The porous exterior surface of the hair strand allows moisture from the atmosphere to pass through, causing the hair strands to swell, creating a frizzy look.

Before trying to prevent or tame frizz, you need to understand what causes your hair to look frizzy.

a cute African American girl with frizzy hair

What Causes Frizzy Hair?

  • The Environment: Changes in humidity levels make hair look frizzy and lose its smooth texture and shine. Humid air, wind, and UV radiation are the most common frizz-causing environmental factors. Heated indoor air can also cause frizz and flyaway hair.
  • Genetics: Naturally dry, delicate hair can be inherited. Different hair types have different reactions when exposed to humidity. Curly hair is dry because it lacks protective oils that provide a barrier against humidity. We already know that dry hair tends to suck up moisture and turn frizzy.
  • Hair care regimen:  Some hair care and hair styling practices such as over-washing or using excessive heat, can lead to dryness, damage, and breakage, contributing to the appearance of frizz.
  • Chemical treatments: Other sources of frizz are chemical hair treatments, like hair coloring, bleaching, and perming. Using too many chemicals can strip the hair of protective oils and damage the cuticle layer which assists in the moisture retention process. Over-processed hair is dry and porous and readily absorbs moisture from humid air.

How to Prevent Frizz from Occurring?

To get your frizz under control, you have to deal with the root causes of frizzy hair. Below are a few guidelines on what changes you need to make in your current routine to prevent frizz from developing and get smoother hair.

  1. Reduce the frequency of washing. Don’t wash your hair daily. Overwashing can strip hair of its natural oils, which help control and prevent frizz. For people with normal or dry hair, it is advisable to wash their hair twice a week at most, using a gentle, sulfate-free shampoo. Don’t rinse your hair with hot water after using shampoo and conditioner, as hot water raises the cuticle and causes frizz.
  2. Avoid excessive brushing. Avoid using a hair brush for combing your hair. Brushing, especially when using a plastic comb, can disrupt the hair cuticle, resulting in hair static. Excessive brushing also stretches hair strands, which may lead to breakage. Breakage leaves twisted hair pieces that lead to that “poofy” appearance.
  3. Don’t rub your hair with a towel. Rough towel drying can disturb the cuticle and create frizz. Gently squeeze excess water from your hair and wrap it in a microfiber towel or a T-shirt to soak up moisture, keeping the cuticle smooth.
  4. Avoid alcohol-containing products. Alcohol and other preservatives are often used in hair products to extend their shelf life. Alcohol-filled hair styling products can dry hair, causing the appearance of frizz. To reduce frizz, make a switch to alcohol-free styling products.
  5. Be careful with flat ironing. If possible, stop or reduce the use of hot styling tools. If you do use a flat iron, start at a low-temperature setting and don’t exceed 365 F to avoid damage to hair from excessive heat.
  6. Protect your hair from environmental factors. To prevent frizz, avoid exposing your hair to the wind and humidity. Put your hair in a bun or pull it up into a ponytail on windy and humid days. Before you go swimming, protect your hair from chlorine, which can strip the hair of natural oils, resulting in dryness and damage. Saturate your hair with fresh water before you enter the pool and rinse it immediately after you finish swimming.

How to Tame Frizzy Hair

  1. Use conditioner after each shampoo. Use a rinse-out conditioner each time you shampoo to smooth the cuticle and keep your hair well-moisturized.  Use cool water during the conditioning stage to close down the cuticle, prevent frizz, and impart shine.
  2. Dry the hair properly. Let your hair air-dry 90 percent of the way before you blow-dry. Select a hairdryer with ionic technology that helps reduce static electricity. Use low-temperature settings and blow dry in a downward motion to smooth the cuticles and prevent your strands from developing frizz.
  3. Do deep conditioning. Apply a deep-conditioning treatment once a week to infuse your dry hair with moisture, repair damaged strands, and increase softness and shine. Use packs with potent moisturizing ingredients, such as olive, avocado, and jojoba oils. Doing hot-oil treatments also helps keep your hair properly moisturized and frizz-free.
  4. Use leave-in conditioners. Apply a leave-in conditioner while your hair is still damp to gently remove tangles and prevent damage from combing. A leave-in conditioner fills your locks with extra moisture and helps smooth frizzy strands.
  5. Use a wide-toothed comb. Gently comb your hair while it is still wet, using a wide-toothed comb, to reduce breakage. Avoid using plastic combs or brushes to keep static away from your hair.
  6. Use anti-frizz serums. You can use anti-frizz styling products, such as anti-frizz serums and hair sprays that contain water-soluble silicones (Dimethicone Copolyol and Cyclomethicone). Those products coat your hair with a thin film, which acts as a barrier between the hair strands and outdoor humidity.
  7. Use hair oils. Plant oils, like argan, almond, and coconut oil trap moisture inside the hair, tame static and frizz, and add a healthy shine. Apply a dime-size amount of oil to clean, damp hair, preferably to the ends. These nourishing oils differ from heavy synthetic products because they help repair hair damage, instead of just covering it.
  8. Switch to a satin pillowcase. Cotton pillowcases suck up the moisture from your hair. Satin or silk pillowcases are smoother and gentler to hair, which helps retain moisture and reduce frizz-inducing friction.
  9. Get regular trims. Trim your hair regularly to remove damaged ends. Damaged hair is more prone to develop frizz than healthy and well-nourished hair.
a student girl with frizzy hair

In-Salon Treatments for Frizzy Hair

Keratin Hair Treatment

This procedure involves the application of liquid keratin into the hair and intense flat iron heat to seal the treatment. Keratin straightening products coat the hair strands and create straight, smooth, and frizz-free hair.

Brazilian Blowout

This hair smoothing treatment infuses a mixture of amino acids into the cuticle layer to make your hair smoother, shinier, and less frizzy.

Hair Botox   

Hair Botox is a new ultra-nourishing technology that uses organic compounds to restore damaged hair. The formula contains nourishing active ingredients that penetrate the hair shaft to repair damaged fibers, seal the gaps, and flatten ruffled cuticles.

Hair Glossing Treatments

Hair gloss and hair glaze treatments will coat your strands to reduce porosity, eliminate frizz, and add reflective shine to your hair. Those treatments also enhance the color vibrancy and slow down the color-fading process.

A young girl holding an umbrella and protecting her hair from frizz

Using Clay for Washing Your Hair

Is Clay Good for Hair?

Clay has been used for cosmetic purposes since ancient times. The cleansing and soothing properties of clay and the absence of chemicals have made it increasingly popular among people who prefer natural beauty products. Today, clay is a must-have product in any nature-inspired beauty regimen.

This nature-made material is rich in minerals and nutrients, which makes it beneficial for all skin types. Cosmetic clays have clarifying properties and can remove excess oils, dirt, and chemicals from the skin and hair.

This powerful detoxifier is negatively charged, so it can attract positively charged ions, toxins, and product build-up in the hair and scalp. When mixed with water, clay draws out impurities and excess oils from the skin and hair.  It helps to unclog pores and gently exfoliates the scalp, relieving dandruff and hair loss issues.

Clay also softens hair, helps with detangling, and enhances curl patterns, which makes it a favorite product for women with natural hair.

Cosmetic clay in bowls

Clays for Washing the Hair

Washing hair with clay is a growing trend, as many people are switching to a natural hair care regimen to avoid the toxic chemicals you can find in commercial hair care products. There are various types of clay on the hair care market, but Bentonite, Rhassoul, and Kaolin clays are the most commonly used for cleansing natural hair.

1. Bentonite Clay

Bentonite Clay Sliding Down Rocks

Bentonite clay is formed by volcanic activities and was first found in Fort Benton in the USA.  This is a great therapeutic clay that may be consumed for detoxing and revitalizing the entire body or applied topically to cleanse and detox the skin and hair.

Bentonite clay is highly absorbent and has a strong attraction to positively charged chemicals, toxins, and impurities. This property makes it perfect for cleansing and detoxifying skin and hair.

Bentonite Clay Hair Mask

Here is a simple recipe to create your own bentonite clay mask:

  • 1 cup of bentonite clay
  • 1 cup of warm water
  • 1/2 cup of apple cider vinegar

You can add a tablespoon of your favorite hair oil for extra benefits. Add more water to get the desired consistency. Leave the mask on for 5-20 minutes, then rinse it thoroughly.

Bentonite Clay Benefits for Hair

  • It thoroughly clarifies the hair and takes away product buildup, excess oil, dirt, and everything bad from your scalp and hair.
  • It keeps follicles clean and strengthens hair. It also hydrates the scalp and relieves dandruff.
  • High levels of mineral elements, such as calcium, silica, iron, and potassium, help condition and soften the hair.
  • Bentonite clay makes detangling easier, reduces frizz, increases curl definition, imparts shine, and makes hair more manageable.

2. Rhassoul Clay

Rhassoul clay, also known as ghassoul clay or Moroccan red clay, is a reddish-brown clay that originates from Morocco. This nutritious mineral clay has been traditionally used in Morocco for skin and hair care. Moroccan red clay is a highly regarded beauty product, due to its strong purifying and cleansing abilities and therapeutic benefits.  It blends easily with water, forming a smooth, silky paste, which is an excellent cleanser for the skin and hair.

Rhassoul Clay Benefits for Hair

  • Moroccan red clay gently cleanses the hair, without depleting protective natural oils from the hair and scalp. It also conditions your hair, leaving it moisturized and soft after washing.
  • Rhassoul clay soothes the scalp, due to its anti-inflammatory and antiseptic properties. It reduces dryness and flakiness and provides relief from dandruff and psoriasis.
  • It removes excess oil, unblocks clogged pores, and creates the optimal environment for healthy hair growth.
  • Due to its high mineral content, this clay eliminates the need for deep conditioning after washing hair. It acts as a detangler for natural hair and helps define and soften waves and curls.

3. Kaolin Clay

White kaolin clays deposits

Kaolin clay, also called China clay, is widely used in the cosmetic industry. Kaolin clay has the lowest pH and has the gentlest cleansing action among all clays.

It gently removes impurities from the scalp and hair, without stripping natural oils, and is ideal for people with dry or sensitive skin. Its absorptive capacity is not significant. However, if you have dry hair, this clay may be the right choice.

Kaolin clay is available in several colors, based on the mineral constituents.

Kaolin Clay Benefits for Hair

  • This clay gently cleanses hair and scalp, without excessive drying.
  • It stimulates blood circulation and gently exfoliates the scalp while cleansing.
  • Kaolin clay strengthens hair, improves elasticity, and helps repair damaged hair.
  • It soothes the scalp, helps treat dandruff, and encourages hair growth.
Black woman with curly hair and bright red lips

Clay Wash Vs. Hair Shampoo

  1. The strong ionic negative charge gives the clay its ability to draw out impurities from the hair. Many cleansing and conditioning properties make it a great alternative to commercial hair shampoos. Clay is rich in minerals and nutrients and can offer benefits that regular shampoos can’t provide. Clays can be used for washing hair regardless of hair type.
  2. If you are fed up with chemical-laden shampoos, incorporate clay into your hair care regimen. Clay washes are natural and free of harsh cleansing agents, preservatives, fragrances, mineral oils, and other synthetic ingredients.
  3. If you are going no-poo, you need deep cleaning, occasionally.  A clay mask will clarify and detox your hair and scalp, without the excessive drying associated with clarifying shampoos.
  4. Some clays will clarify and condition your hair at the same time. Clay provides a nutrient boost to your hair and leaves it feeling soft and easier to detangle.
  5. Washing with some clays makes the scalp healthier, offering relief to people who suffer from itchiness, dandruff, and psoriasis.
  6. Clay is naturally biodegradable and will not pollute water systems and rivers.

The Downsides of Washing Hair with Clay

Washing your hair with clay is less convenient than using regular shampoos. The process can get really messy. Plus, it can be hard to thoroughly wash out clay from the hair, especially if you have high porosity hair.

two bowls with clay masks for hair

How to Wash Your Hair with Clay

Mix 1-2 tablespoons of clay powder with water in a non-metallic container. For long or very curly hair, you need to add more clay and make the mixture thinner, but not runny.

Wet your hair as you do before shampooing, then apply the mixture to the hair. Saturate hair thoroughly and make sure to reach your scalp. Massage the scalp for a few minutes. Rinse hair thoroughly, using plenty of running water; otherwise, the tiny clay particles can remain in your hair.

Helpful Tips

  • Use only non-metallic utensils and bowls when mixing clay with water, as the metal may interact with clay lessening its effectiveness.
  • Make sure that the clay doesn’t dry on your hair; otherwise, it will be difficult to get it out of the hair.
  • Add a few drops of argan oil to the mixture to help impart shine or add some other oils of your preference for conditioning benefits.
  • Most clays have much higher alkalinity than your hair. Use apple cider vinegar rinse to restore your hair’s natural pH balance after washing it with clay.
Dark skinned woman with coiled hair

How to Keep Your Bleached Hair in Good Condition

The bleaching process can have negative effects on your hair’s health, leaving your strands fragile and susceptible to split ends and breakage.

To prevent further damage and an unwanted haircut, you need to take special care of your processed blonde hair. Below are some effective tips on how to handle regular bleaching/coloring sessions and keep your blonde hair in good condition.

After washing, don’t rub your hair with a towel, as this will roughen up the hair cuticle, causing tangles, frizz, and breakage. Instead, use a soft microfiber hair towel to pat dry your hair and soak up excess water without causing friction and damage.

Allow your hair to air dry as often as possible. Avoid excess brushing, as bleached hair is not strong enough to withstand too much manipulation without breaking off. Also, limit the use of hot styling tools. Use a heat protectant and keep your dryer in the lowest heat setting.

a sensual woman with bleach damaged hair

Before swimming in a pool, make sure to wet your hair with non-chlorinated water and wear a swimming cap. This way your hair will soak up fewer chemicals from the pool water. Also, make sure to rinse your hair soon after swimming.

Sunlight may escalate dryness and turn your hair brassy. Cover your head with a hat when spending long periods in the sun. Use sunscreen spray to protect your locks from overdrying and to prevent color fading.

Best Products for Bleached Hair

1. Shampoo and Conditioner for Bleached Hair

This post contains links to Amazon. The publisher may get paid if You purchase something through the links without additional costs to You.

To prevent overdrying, don’t shampoo immediately after a bleaching session. Instead, condition hair to get back some of its natural moisture. Wait a few days before going back to your regular washing routine and make sure to use a good moisturizing and sulfate-free shampoo and conditioner.

Your lightened hair needs products packed with natural, highly moisturizing ingredients. Use products that are specially designed for dry, colored, or damaged hair. Avoid shampoos and conditioners that contain sulfates, as sulfate-based cleansers can be very harsh on fragile processed hair.

To retain moisture inside the hair, avoid frequent shampooing. Overwashing can strip the hair of its natural, protective oils and leave it feeling dry and brittle. Wash your hair no more than twice a week to allow the natural oils to form a protective coating around hair strands. Use conditioner generously every time you wash your hair.

Always use lukewarm water, as hot water can dry out your locks and make the color fade faster. If your hair feels greasy, use a dry shampoo to stretch out the time between washes.

To prevent the drying effects of frequent shampooing and to bring your hair back to its healthy condition, consider a pre-shampoo treatment. Many pre-wash formulas are made to preserve moisture and restore the elasticity and softness of your dry, overly-porous hair.

Olaplex Bond Maintenance Shampooir?t=softerhair 20&l=am2&o=1&a=B07D37PQGL and Conditioner set is formulated to repair bonds within the hair to undo the damage from chemical treatments and protect overly processed hair from further damage. This helps restore internal strength and reduce hair breakage after multiple bleaching/coloring sessions. This shampoo and conditioner set also eliminates frizz, improves manageability, and enhances hair shine.

beautiful blonde woman with healthy bleached hair

2. Purple Shampoos for Bleached Hair

Bleached hair is quite porous and prone to discoloration and turning brassy soon after coloring. To get rid of yellow undertones and combat unwanted brassiness, you need to use a purple toning shampoo once a week. Here are some good products that can be of great help.

Pravana The Perfect Blonde Purple Toning Hair Shampooir?t=softerhair 20&l=am2&o=1&a=B01DFK47EQ is a highly pigmented and very effective purple shampoo formulated to counteract yellow and brassy tones in lightened blonde hair. This sulfate-free purple shampoo gently removes excess oil and enhances brightness and shine, while keeping your blonde locks brass-free.

To prolong the time between coloring sessions, use temporary color products. The gentlest way to refresh the color of your bleached hair or temporary color very lightened hair is to use color-depositing shampoos, color-depositing conditioners, and hair color rinses.

3. Hair Masks for Bleached Hair

Regular deep conditioning will compensate for the loss of moisture, rebuild hair strength, and restore its original sheen and softness. To maintain softness and elasticity, make sure to deep condition your hair once a week.

1. Mon Platin Professional Black Caviar Total Blonde Hair Mask for blonde, bleached, or lightened hair is formulated to deeply condition, hydrate, detangle, and revive hair damaged by bleaching, coloring, and other chemical treatments.

2. amika The Kure Intense Repair Maskir?t=softerhair 20&l=am2&o=1&a=B07H33XCTK is rich in vitamins, antioxidants, and fatty acids, that repair damage from frequent bleaching and make hair stronger, shinier, and more manageable. It is free of harsh ingredients and is safe for color-treated and keratin-treated hair.

4. Leave-In Conditioners

You need to be especially gentle when combing your hair.  A few drops of moisturizing leave-in conditioner applied to damp hair help untangle strands and keep the breakage to a minimum. A good leave-in conditioner also provides the right amount of hydration to dry, overworked hair and may offer protection from the sun.

5. Protein Fillers

A protein filler is another must-have product if you regularly lighten your hair. This hair-repairing treatment will make your over-processed and porous hair feel healthy and smooth again.

Pureology Strength Cure Best Blonde Miracle Filler ir?t=softerhair 20&l=am2&o=1&a=B07GBGYJFTis a daily leave-in treatment for highlighted blonde hair. This product claims to make salon blonde hair 78% stronger with continuous use while making a noticeable difference after the first application. It works as a detangler, adds volume to fine hair, and reduces frizzing.

The Keravis –a vegetable protein in the formula, fills in gaps in hair’s cuticle, leaving your overprocessed, brittle hair feeling softer and healthier. The filler should be applied to damp hair before blow-drying and styling.

fashion blonde girl wearing a ponytail

6. Bond Multipliers

Olaplex Hair Perfector

Olaplex Step No 1 Bond Multiplier added directly to the lightener before application helps prevent damage during the bleaching process.

Olaplex Hair Perfector No 3 ir?t=softerhair 20&l=am2&o=1&a=B00SNM5US4 helps reverse damage from chemical processing and protects hair from further damage and breakage. It is suitable for use at home between coloring seasons. Use this product once a week to rebuild and reconnect broken disulfide bonds and keep your hair strong and healthy.

Apply Olaplex Hair Perfector No 3 to towel-dried hair, comb it through, and leave it in the hair for at least 10 minutes. The treatment can be left on the hair for longer periods to provide even better results, but it must be shampooed and rinsed out of the hair due to some chemical compounds in its formula.

Bonding systems are gaining popularity as more and more people are playing with trendy colors and need protection from damage during their color adventures.

Having such potent damage-repairing products doesn’t mean that you should stop caring about harsh environmental factors that can work against your hair health.

A beautiful blonde woman with healthy hair wearing a hat

How to Minimize Damage to Your Hair from Bleaching

What is Bleaching?

Bleaching is an oxidation process that lifts the original hair color from your hair. Bleaching chemicals penetrate the cuticle and degrade existing hair pigments, thus removing the original color from the strands. This process turns your hair white or colorless. Bleaching kits contain bleach in powder form and a cream developer with hydrogen peroxide that must be mixed with bleach to activate it.

The outer hair cuticle needs to be lifted to allow penetration of the bleaching solution into the hair shaft. During the bleaching process, the hair color changes gradually. Depending on your natural color, your hair may go through many stages of brown, red, orange, and yellow before reaching a white-blonde shade.

Gorgeous woman with bleach damaged hair lying at the shore

Possible Damage to Hair from Using Bleach

Unfortunately, bleaching agents don’t only affect color molecules in your hair. The bleaching process also weakens protein bonds, making the hair brittle and more fragile than before. The hair’s natural keratin is also weakened, resulting in structural damage to the hair.

Bleaching strips your hair of its natural oils that keep your strands healthy and moisturized. Bleaching chemicals can weaken the cuticle scales, leaving the inner core of hair exposed and prone to moisture loss. This leaves your hair feeling dry and overly porous.

In conclusion, bleaching is a harsh process that can leave your hair overly dry, brittle, frizzy, susceptible to tangling, and more prone to breakage, static, and split ends than previously.

Related post: How to Keep Your Bleached Hair in Good Condition

How to Minimize Risks of Damaging Your Hair

If you have been thinking about bleaching your hair, it is always better to consult a professional, especially if your hair is on the darker side. After the initial transformation, you can try to save money by touching up your roots at home.

However, if you bleach your hair at home, be aware that bleaching is a risky and time-consuming process that requires the use of proper techniques and the right tools to avoid long-term damage.  Here are a few helpful tips before you start.

1. Avoid drugstore brands of hair as they can cause severe damage and opt for professional-quality products available in salons or reputable beauty shops. Quality bleaching products also contain nourishing ingredients and conditioning agents in their formulation.

2. It is advisable to use the lowest volume which should be effective in removing your original color but is still gentle on your scalp and hair. Use no more than a 20-volume developer for light brown and dark blonde hair, while medium-dark and deep red hair need a 30-volume developer to be effective. If you want to go from dark hair to white blonde, you will need a more intensive bleaching treatment and professional help.

3. After selecting the right volume of the developer, you need to properly adjust the time to get the desired blonde shade. Leaving the bleach in your hair too long will fry the hair. If your hair is not completely lightened during the recommended time, rinse the chemicals out and reapply the bleach a few days later.

Beautiful woman with lightened hair taking a selfie

4. When bleaching dark hair, you should gradually lighten it before reaching a blonde shade. A resting period of at least a week between bleaching sessions will give your hair some time to recover from damage. Deep conditioning treatments work well between bleach applications.

5. If your hair has recently been permed or chemically straightened, bleaching can lead to excessive hair damage. It is advisable to wait at least two weeks for your hair to heal before putting it through the bleaching process.

6. Don’t wash your hair a day or two before the bleaching session. Let the protective coating of your natural oils prevent scalp irritation and protect your hair from over-drying. Paint your roots close, but don’t apply the mixture directly onto the scalp to avoid chemical burns.

7. Make sure to do a deep conditioning treatment one or two weeks before your bleaching session. Building up moisture in the hair before bleaching will minimize damage and help preserve the integrity of your hair.

8. Coconut oil pre-highlight treatment will protect your scalp and hair from burns and damage caused by bleach. Cover your hair with coconut oil and leave it overnight or at least an hour before bleaching. Apply the bleach with the oil still in your hair.

9. Make sure to rinse off the bleach solution completely from your hair. Any remaining chemicals in your hair can cause scalp burns and further damage to the hair.

10. Use a protein filler to balance out porosity, reduce the damage, and spread color more evenly.

11. For managing newly grown hair, apply the bleach only to the new growth and avoid putting the formulation on hair that’s already blonde to avoid damaging it.

Importance of Using Olaplex

The best way to protect your hair from the damaging effects of chemicals in the bleach is to use OLAPLEX Bond Multiplier. Olaplex works to minimize damage and repair the hair during the bleaching/coloring service. Olaplex No1 Bond Multiplier added to your lightener/bleach allows the hair to be lifted higher without serious damage. Olaplex reconstructs the previously broken bonds and protects your strands from further damage, enabling you to grow longer healthier hair.

A range of different bond multipliers has been introduced recently for a similar purpose – to protect hair from chemical damage and prevent breakage after coloring, bleaching, and texturizing treatments.

Smiling blonde girl sitting on the floor

Sugar Hair Sprays – a Gentle Alternative to Drying Salt Sprays

What is Sugar Spray?

These multi-purpose styling products are becoming a popular alternative to salt-based texturizing sprays. Sugar hair sprays are infused with sugar cane extract, which can give fullness, texture, and glossiness to your hair. Unlike conventional hair sprays, most sugar sprays are free of drying alcohol and harsh chemicals. Unlike sea-salt sprays, they won’t strip your hair of its natural moisture. These styling sprays are also safe for the environment.

Sugar sprays add a great beachy texture to your locks with lasting benefits. If you want to achieve that popular beach hair look, without the drying effects of salt, sugar hairspray can be the right choice.

a woman styling hair by using a sugar hair spray

Best candidates: Sugar cane extract is a good moisturizing agent that can be particularly beneficial for individuals with dry, damaged, or chemically processed hair. This effective humectant draws moisture to the hair and coats each strand, creating the illusion of fuller hair. If used carefully sugar styling sprays may leave your hair with plenty of bounce.

A sugar spray is a great choice if you need to make your hair more manageable, especially if your hair is fine.

These products are suitable for all hair types and textures and can be applied either to damp or dry hair. When used before blow-drying, sugar sprays give a fuller appearance to your hair. When applied after styling, they provide hold, helping your hairstyle last longer.

Benefits of Using a Sugar-Based Spray for Styling Your Hair

  1. More volume: These styling products work great for anyone with thin, fine hair that needs more body and texture. Sugar sprays enhance natural texture, provide lift, and add volume to your hair.
  2. Better hold: A sugar spray enhances the body and gives control to limp straight hair, giving it much-needed texture. Sugar sprays also help to control and maintain hold for hair that is already voluminous.
  3. Conditioning benefits: Sugar cane extract has moisturizing and conditioning properties and helps protect hair from damage. If your hair is on the dry side, you might want to try a sugar-based styling spray.
  4. Curl enhancer: A sugar spray nourishes your curls and enhances your natural curl pattern. It also helps your curls stay in place for longer.
  5. Frizz tamer: A sugar spray helps reduce frizz and tame flyaway hair.
  6. Shine booster: This hairspray leaves a healthy shine on your hair.
  7. Color-friendly: Sugar sprays won’t strip color from your hair. When shopping for a spray, check the label to make sure that the spray doesn’t contain sulfates or sodium chloride.
  8. The flowers of heaven: Sugar styling sprays leave your hair smelling great and generally have a more pleasant scent than salt sprays.

Downsides

  1. Sugar hairspray can leave your hair a bit crunchy if you use too much of the product. To avoid stiffness, use no more than a few squirts. Try spraying the product onto your hands and then applying it to your hair.
  2. Some brands may contain harsh chemicals such as parabens, fragrances, and Methylisothiazolinone. Always check the label and opt for a product with natural ingredients. The majority of quality sugar-infused sprays contain only sugar extract and a few nourishing ingredients.
  3. Sticking residue may clog the nozzle, preventing the product from dispensing correctly. To fix it, try to run the nozzle under hot water for several minutes.
  4. Sugar hairsprays can cause buildup in your hair. Use clarifying shampoo periodically to strip away unwanted residue.
Gorgeous woman with wavy hair styled with a sugar apray

How to Make Your Own Sugar Spray

A sugar spray is extremely easy to make because it basically only contains two ingredients – water and sugar.

Steps:

  1. Pour a small glass of water and two teaspoons of sugar into a pot and place it on the stove. Turn the heat. When the water comes to a boil, turn off the heat.
  2. Stir until the sugar is completely melted.
  3. Wait for the liquid to cool and then pour it into a spray bottle.

You can play with the amount of sugar to get a stronger or lighter hold.

Optionally, you can add more ingredients like lavender or rosemary essential oils to make it smell nice and to extend the shelf life.

Store the spray in the refrigerator for up to seven days.

How to Use a Sugar Hair Spray?

Sugar styling sprays are suitable for all hair types and can be used either on dry or damp hair. You can use the product before blow-drying if you want to add extra volume or apply it after styling your hair if you want more hold. Spray 20-30 cm away from the hair to make your hairstyle last.

To give fine hair volume, spray a few spritzes on damp, ready to blow-dry the hair. To create maximum body, lift hair, and spray near your roots before blow-drying.

For a just-back-from-the-beach texture and tousled waves, apply to damp hair before blow-drying, focusing the spray on the midsection and ends of your hair. Apply to dry hair and scrunch small sections to get a fresh tousled look.

Apply a few spritzes to dry hair for light to medium hold. Spray more after styling for a long-lasting, firm hold. Spray in layers for the strongest hold, but don’t overdo it to avoid crunchiness.

Spraying the product on damp hair and combing it through may help to prevent crunchiness.

Cover your clothes with a towel during application as the spray can be sticky when wet.

Sugar Hair Sprays Vs. Salt Infused Hair Sprays

  • Sugar hair sprays are less drying to the hair than salt-based sprays due to the moisturizing effects of sugar extract. This is particularly important if you have curly or chemically processed hair.
  • Sugar styling sprays can be used to control frizz and tame flyaway hair, while salt sprays can exacerbate frizz due to the drying effects sea salt can have on hair.
  • Sugar-based sprays enhance hair’s shine, while salt sprays give hair a beachy texture with a more matte look.
  • Salt found in hair sprays can strip color and keratin treatment from your hair. Sugar-based hair sprays are keratin– and color-friendly products as long as they don’t contain strong chemicals in their formula.
  • Salt sprays provide a more texturized look and work best for fine hair to add body and thickness. Sugar sprays provide better hold and a softer texture, and they are ideal for styling medium to thick hair.
  • Sugar styling sprays will offer more softness and subtle waves, while sea salt sprays help you get a gritty look and beachy waves.
  • Salt sprays work better on straight hair that needs some texture and can be too drying for curly hair. Sugar sprays have more versatility and can be used on curly hair as well as on other hair types.
a beautiful girl with hair styled with a sugar spray

DIY Sea Salt Spray That Won’t Dry Out Hair and The Best Brands to Buy

You have probably noticed that after spending a day at the beach your hair gets beachy waves and a lot of texture. If you like that messy tousled look, you will be glad to know that there is a hair product available to obtain similar results.

A sea salt spray is a hair styling product, that could mimic natural beach hairstyles, giving your hair a gritty texture and perfectly imperfect messy waves. It can also give your hair some rest from constant blow drying and possible heat damage.

The best part of using this styling product is that you can get the desired look almost instantly, no matter how far from the sea you are. Beach sprays work for everyone’s hair but results may vary depending on the type, texture, and length.

How to Make Your own Natural Sea Salt Spray

DIY sea salt spray is very simple to make. Making sea salt spray at home saves you money and gives you more control over the ingredients, so you can customize it to your needs.

What You’ll Need:

  • 1 cup water (distilled)
  • 1 tablespoon of sea salt or Epson salt
  • 4-5 drops of essential oil of  your choice (optional)
  • 2 teaspoons of aloe vera gel
  • 1 tablespoon of unrefined coconut oil
  • 1 spray bottle (preferably glass)

Aloe vera is a great moisturizer, so if your hair is on the dry side add aloe vera gel to your beach hair spray to prevent the salt from drying out your locks.

Epsom salt (magnesium sulfate) has conditioning properties, so it is less drying than sea salt.

Essential oils like lemon grass, grapefruit, or orange essential oil will add a nice summery scent.

Coconut oil will help to hydrate your hair and scalp.

In a  mixing bowl, add hot water and salt and stir until the salt is completely dissolved. Allow the mixture to cool, and then pour it into your spray bottle. Add the rest of the ingredients. Place the cap on the bottle and shake well to combine.

DIY sea salt spray may least three months when stored at room temperature.

How to Use Sea Salt Spray

a girl applying sea salt spray to her curly hair

Shake the bottle well. Spray on wet hair and comb through, then scrunch to create body and waves. Let your hair air dry or blow dry it. You can apply a few spritzes after blow-drying your hair to get more voluminous waves. Otherwise, you can spray your hands and run them throughout your hair to get imperfect beachy waves.

You need to use sea salt spray sparingly. If you use too much of the product, it can make your hair look crunchy or crispy.

Related article

How to Buy a Quality Beach Hair Spray

a girl applying sea spray to her straight hair

When shopping for a quality sea salt spray, look for a product that meets the following criteria:

  1. Look for a product formulated with the finest natural ingredients that don’t irritate sensitive skin or do any harm to your hair.
  2. Your sea spray should contain moisturizing oils and conditioning ingredients to protect your hair from drying out. The extended use of salt sprays can worsen hair damage. The protection is especially important for curly hair that is already dry by nature.
  3. A good sea spray should add texture to straight hair that otherways lays flat or needs additional styling effort to get a wavy look. It should also add much-needed volume to fine hair, making it feel thicker and fuller.
  4. The product ideally provides a slight hold without making your hair stiff or crunchy.
A beautiful woman with beachy waves in her hair

Related Products

Here are a few suggestions to help you decide:

1. Beach Wave Spray for Straight Hair: Davines This is a Sea Salt Spray

This unisex sea salt spray is formulated to give fullness and a perfectly messy texture to hair. The product keeps hair well hydrated throughout the day by gradually releasing water molecules onto the hair shaft. It has a refreshing vanilla scent with some coconut undertones. This spray works great on straight, fine, flat, and thinning hair. This sea salt spray is expensive but it is completely worth the price.

If your hair is already wavy this spray will boost your natural waves. It will give you pretty beachy waves if you have styled your hair with a curling wand.

2. Salt Spray for Fine Hair: Herbivore Botanicals -Sea Mist Texturizing Salt Spray

This all-natural spray for hair, face, and body comes in a pretty glass bottle. It contains no sulfates, alcohol, parabens, fragrances, artificial colors, or fillers. There are no animal ingredients, and no animal testing is conducted on this product.

Ingredients: The product contains Dead Sea Salt, which cleans and detoxifies the skin, improves circulation, and stimulates hair growth. Other ingredients include aloe vera, coconut oil, natural vanilla oil, and lime essential oil (which helps fight dandruff). The formula uses Leucidal Liquid as an alternative to synthetic preservatives.

3. Sea Salt Texturizer for Curly Hair: The Shore of Yourself Sea Salt Spray For Curly Hair

This sea salt hair spray is designed for curly and wavy hair. It holds your curls beautifully without making them feel stiff or crispy. When used on straight hair this sea salt spray gives volume, texture, and manageability.

Ingredients: Maris Salt has therapeutic properties and acts as a disinfectant and conditioning agent while adding thickness and volume to your hair. Macrocystis Pyrifera (Sea Kelp) Extract soothes the scalp and helps moisturize and soften hair while adding shine. Algae extract contains amino acids, vitamins, and minerals that are essential for your hair’s overall health. Benzyl Salicylate acts as a UV absorber that prevents sun damage and color fading.

4. Sea Salt Spray for Color-Treated Hair: ORIBE Apres Beach Wave and Shine Spray

This texturizing spray adds body and shine to hair, allowing you to create tousled, beach-inspired waves.

Ingredients: Hydrolyzed wheat protein strengthen your strands and improve your hair’s health. Safflower seed oil, amber extract, and marigold flower extract moisturize hair, strengthen the hair follicle, and make your hair look healthier. Galanga root extract works as a conditioning agent and can absorb ultraviolet light.

a charming young woman with sun-kissed hair

Surprising Benefits of Sea Salt for Your Hair

Have you noticed that after swimming in the sea, your hair is somehow different? It gets a casual look and gorgeous messy waves. This messy appearance is due to the salt in the seawater. Salt opens the hair cuticle and plumps up the strands, giving your hair more texture and enhancing natural curls and waves.

The good news is that you don’t have to go to the sea every time you want this casual summer hairstyle. The hairsprays infused with sea salt can bring those beachy waves into your hair.

By using a sea salt spray you can get gorgeous beach-inspired hairstyles without having to visit the shore. The sea salt gives a subtle messy effect to your hair, making the summer endless and bringing the beach with you everywhere.

A cute girl with beachy hair wearing a hat

Related post: Four Sea Salt Hair Sprays for Beach-Inspired Waves

Benefits of Using Salt Spray on Fine Hair

If you struggle with fine and thinning hair, a salt-infused hairspray might be your Holy Grail. It can lift the roots of fine hair and give a light hold, making your hair appear fuller.

This product can also keep the hair from falling flat throughout the day. If you have limp hair, use several spritzes of a beach spray on dry hair near the roots.

To create more volume, apply the salt texturizing spray to damp hair before blow-drying. For maximum volume, flip your head upside-down, apply spray towards the base of your roots, and scrunch your hair while blow-drying it.

Suggested product: Beauty by Earth Sea Salt Spray for Hair. (made in the USA with organic & natural ingredients).

Benefits of Sea Salt for Oily Hair

If you have oily hair, seawater can help you go longer between washes. Sea salt helps to absorb excess sebum, reducing the frequency of hair washes. It makes your hair appear wet and attractive on days when you skip washing your hair. In addition to masking grease, it helps to keep your scalp flake-free.

Effects of Sea Salt on Straight Hair

a brunette  woman with beach wavy hair

If you don’t like your stick-straight hair, try to include a sea salt spray in your hair care regimen. This product will give you a beautiful back-from-the-beach style without using any tools.

Although a sea salt spray does not make straight hair wavy, it will add a nice grip and volume and combat flat, limp locks. It helps you get a kind of carefree wind-swept style and hold waves after curling.

To achieve the tousled look, spray your hair while it is wet, and scrunch it to get the de desired volume and texture. You can also try to braid your hair overnight.

If your hair is fine and straight, apply the spray while it is still wet to improve the texture and get more volume. Or spray the product into your hands, squeeze your freshly washed hair, and allow it dry naturally.

Benefits of Sea Salt for Curly and Wavy Hair

a woman with wavy hair on the coast

It is easy to get lovely beach waves if you have naturally wavy hair.  Use a few spritzes of salt spray on your damp hair, then scrunch it with your fingers to style.

Sea salt can be used on curly hair to enhance its natural texture and get soft beach waves. You can get smooth waves and a lasting hold without using hot tools. All you have to do is to apply the product to the hair, comb it through with a wide-toothed comb, tousle the hair with your hands, and let your locks air dry.

To get beautiful loose waves, French-braid your with the spray in before going to bed. Finger-comb your hair after taking the braid out. To get smooth waves, pull your hair into a tight bun and let it dry naturally.

Salt can make curly hair feel drier than usual. You should condition your hair regularly and use quality hair oil. Make sure to choose a sea salt spray that contains moisturizing hair oils in its formula.

Can Sea Salt Harm Your Hair?

Sea salt can be beneficial for the scalp and hair, but excessive use of salt sprays may have some unwanted side effects.

  • Dryness: This is a common side effect of salt hair sprays especially if you use too much of the product. The salt can draw out moisture from your hair, leaving it dry and brittle. Salt sprays should not be used daily, especially if your hair is on the dry side. To combat the drying effect of salt, you should do deep conditioning and use hair serums or moisturizing hair oils.
  • Protein damage: Salt can also strip protein from the hair, making your hair weaker and more prone to breakage. If you have received keratin treatment recently, using these sprays can reduce the longevity of your treatment.
  • Sticky-feeling hair: Using a generous amount of salt spray can leave your hair feeling sticky and crunchy. You may feel the urge to wash it as soon as possible.

Tips for Using a Sea Salt Spray

  1. For the best results, apply a salt spray to damp hair. Apply a few spritzes to your hair and run your hands through it. You can either let your hair dry naturally or use a blow dryer for a quicker result and more volume.
  2. You can also spray the product into the palms of your hands and then finger comb or scrunch hair to create waves and body.
  3. To get a voluminous blowout, apply the spray to damp hair and comb through while using a blow dryer in a downward motion.
  4. When using salt hairspray on dry hair, work the product through your hair to get a wind-swept look.  For the best results, apply the product to the middle of your hair down to the ends.
  5. If you have long hair and want to achieve that carefree beachy look, spray it onto towel-dried hair and then twist the sections of your hair.
  6. If you have short hair, massage the spray into your towel-dried hair. Style with your fingers to create a textured, ruffled look.
a gorgeous woman with beachy hair look after swimming in the ocean

Six Purple Toning Shampoos for Gray Hair

Why Does Hair Turn Gray?

The main reason behind hair graying is a lack of melanin production. Melanin is the pigment responsible for hair color. It is produced in melanocytes – special cells found in the hair follicle. Melanocytes decline in numbers with aging. Consequently, the amount of melanin produced in hair follicles gradually decreases, causing hair to lose its original color.

Graying hair is a blend of normally pigmented strands and hair strands without pigment. White hair has no natural pigment at all.

The age at which graying begins is determined mainly by genetic factors. Some people spot the first white hairs on their heads at age 20 (premature graying), while others retain their natural hair color until old age. Hair graying is progressive and permanent, and there’s not much you can do to slow down the process.

attractive woman with graying hair

How to Stop Gray Hair from Turning Yellow

When you’re looking for a shampoo for gray hair, pick up a product that is specifically formulated for gray or white hair.

To counteract the brassy or yellow tones that gray hair can develop, stylists recommend using silver or purple shampoos. This type of hair shampoo contains blue/violet pigments that adhere to the hair shaft and neutralize the yellowish tinge in gray hair. A good toning shampoo for gray hair is supposed to gently clean the hair, leaving it brighter, more manageable, and softer.

Best Violet Shampoos for Gray Hair

This post contains links to Amazon. The publisher may get paid if You purchase something through the links without additional costs to You.

1. Framesi Color Lover Dynamic Blonde Violet Shampoo

This is an intensely pigmented purple shampoo formulated to eliminate yellow and brassy tones from blonde, gray, or white hair in just one wash. The formula is free of sulfates and sodium chloride which is a plus for fragile, colored hair.

Should you use it?  If your gray hair easily gets brassy from hard water or sun exposure, this shampoo is a good choice to get rid of unwanted tones. It works exceptionally well for blonde shades but it is also a great choice for anyone who has platinum or silver hair.

Benefits:

  • Removes yellow tones from gray hair
  • Keeps blonde color fresh and vibrant
  • Maintains cool highlights

Suggested use: Massage the shampoo evenly through wet hair and leave it to sit for 2-3 minutes before rinsing. Make sure to control your hair to get the results you want. It can turn light-colored hair purple if left for too long. It can be hard to create rich leather. Add a bit of your favorite shampoo to help with foaming.

Make sure to use a conditioner. Use this violet shampoo weekly and alternate it with your regular shampoo.

2. Aveda Blue Malva Shampoo

This purple shampoo is formulated with blue Malva, to add moisture and brighten gray strands. The formula includes echinacea or coneflower, which increases blood circulation in the scalp area to strengthen the hair follicles and prevent premature hair loss.  

This shampoo gently cleanses hair and scalp and eliminates yellowish and brassy tones. It adds a beautiful silvery hue to gray hair. Blue Malva keeps your gray hair in good condition, leaving it soft, shiny, and easy to style. This product won’t dry out your hair like some other purple shampoos. Despite being purple/blue, it creates white foam and does not stain your skin.

This shampoo also works great for preventing the discoloration of blonde hair caused by hard water. It prevents blonde-dyed or highlighted hair from turning yellow or dull.

3. PRAVANA THE PERFECT BLONDE Purple Toning Sulfate-Free Shampoo

If you are looking for a sulfate-free shampoo and at the same time want a shampoo that tones down brassiness, The Perfect Blonde Purple Toning Shampoo by Pravana is the right choice.

This shampoo with accompanying conditioner is the first step of the recently launched THE PERFECT BLONDE Purple Toning regimen, which also includes Toning Masque and Seal & Protect Leave-In Mist.

THE PERFECT BLONDE Purple Toning Sulfate-Free Shampoo uses special pigments to enhance radiance and neutralize unwanted yellow and brassy tones in blonde, gray, or highlighted hair. This shampoo refreshes the look of your hair when the color starts to fade. It can also be of great help to anyone who is attempting to embrace natural grays.

The color of the Pravana shampoo is a deep dark purple. Unlike some other chemical-smelling violet shampoos, it has a light and pleasant grape scent. It cleans hair gently and effectively. Purple stains can be easily washed away from the skin with water and soap.

Apply a quarter-sized amount and massage to wet your hair. Suds up and allow it to sit for a few minutes. The process can be repeated if additional toning is desired. It can leave a purplish hue if left in the hair for a longer time.

4. Schwarzkopf BC Color Freeze pH 4.5 Silver Shampoo

This silver shampoo helps to enhance bright and silver tones in the hair. It is enriched with violet color pigments that neutralize yellow tones in gray and white hair.

Schwarzkopf BC Color Freeze pH 4.5 Silver Shampoo helps restore hair’s elasticity and strength while keeping your color on the icy side.

To remove yellow tones, massage the shampoo into your wet hair and rinse thoroughly after 1-3 minutes. The violet/purple pigments are strong, but they wash out easily. You can also mix it with your regular shampoo and use it for each wash.

5. ORIBE Silverati Shampoo

This silver shampoo is developed to combat dullness and yellow tones in gray and white hair. Blue and silver pigments help to eliminate yellow tones relieving brightness and restoring the shine of dull lifeless hair. Mild cleansing agents derived from coconut and corn gently cleanse the hair without stripping natural oils.

This shampoo boosts hair strength and elasticity and improves the manageability of grey strands. It also protects vulnerable gray hair from sun damage and other environmental aggressors. This beautifully scented shampoo leaves hair feeling soft and silky.

6. Jhirmack Silver Plus Ageless Shampoo

This inexpensive alternative to salon-grade purple shampoos works well for canceling out and preventing yellowing in gray, blonde, bleached, or highlighted hair. It neutralizes brassiness without leaving any residue while improving hair’s strength and elasticity. It also softens coarse gray hair and keeps it silky and shiny.

Green tea extract and folic acid help healthy hair growth and promote a glossy shine. Co-enzyme Q10 helps protect color from fading and prevents damage from styling tools. Macadamia nut oil prevents dryness, tames frizz, and increases shine.

What Causes the Yellow Tinge in Gray Hair?

The porosity and lack of pigment make your hair vulnerable to sun damage and more susceptible to absorbing traces of pigment from the environment. Gray hair is prone to turn yellow mostly due to product residue, heat styling, and environmental pollutants.  Other common factors that can cause yellow tones in the hair are hard water, chlorine, excess sunlight, and smoking.

If you decide to let your hair go gray, you will need to add a new product to your hair care regimen. To keep your hair looking shiny and healthy, you need a shampoo that is designed to enhance brightness and give a healthy shine to gray hair.

A gray-haired woman in the garden

Caring for Gray Hair

Gray hair differs in texture from pigmented hair. Gray strands are often more prone to frizz and harder to manage than pigmented hair. Gray hair can’t reflect light and as a result, it loses its natural luster.

Gray hair requires tender care to retain softness and manageability. Fortunately, with the right care and modern cut, graying and white hair can look beautiful and elegant.

Wash your graying hair with a shampoo designed for dry hair and follow with a good hydrating conditioner to prevent your gray hair from looking dull and frizzy.

To keep your gray locks healthy, apply a deep conditioning treatment once a week, and also do hot-oil treatments occasionally. Use a leave-in conditioning spray to help smooth unruly strands.

Set your styling tools to low or cool settings to minimize heat damage.

Your gray hair should be trimmed every 6 to 8 weeks, as it can look unruly if it’s not trimmed regularly.

Before entering a swimming pool, soak your hair with a conditioner. This will minimize the absorption of pool chemicals that can damage and discolor gray hair.

If discoloration happens, don’t worry. Just make sure you have a purple shampoo in your bathroom cabinet and let the magic happen.

Thoughtful gray-haired woman holding eyeglasses

Who Should You Use Purple Shampoo and How to Use It Properly?

What Is Purple Shampoo?

If you are a salon blonde, you know it can be a pain to keep your hair color looking bright, vibrant, and beautiful. Blonde hair can easily pick up unwanted tones due to lifestyle factors, smoking, or external elements. If you’re in a hard water area or spend much of your time in the sun, your hair color can quickly lose its initial beauty and turn dull and brassy.

One of the most effective ways to fight brassy and orange tones in your bleached hair is to use a purple shampoo. Purple shampoo is designed to neutralize those unwanted yellow and brassy tones that your hair has picked up over time and to bring it back to a pretty blonde color.

A purple shampoo makes your blonde color stay bright which helps prolong the time between color appointments.

beautiful blonde girl with brassy hair

What does Purple Shampoo Do?

the color wheel

The purple toning shampoo is specially formulated to brighten up the blonde color and cancel out the appearance of the yellow base color. That happens because opposite colors in the color wheel neutralize each other when combined. Since violet is the opposite color of yellow, the purple pigments in the shampoo work to neutralize the yellow pigments in blonde hair.

When mixed, yellow and violet produce a pale beige or white. That’s why washing the hair with purple shampoo takes brassy and yellow tones out of blonde and gray hair.

Who Should Use Purple Shampoo?

  1. The purple-pigmented shampoo is most often used by individuals who have bleached or dyed blonde hair. The cool violet pigments in the shampoo help counteract warm tones in blonde hair, keeping the color fresh and bright.
  2. Women with platinum blonde locks need a purple shampoo to make their blonde platinum color more vibrant and to keep the brass away.
  3. People with natural blonde hair often use purple shampoo to get rid of brassy tones and enhance their natural blonde color.
  4. Brunettes with blonde highlights can benefit from using purple shampoo as well. The toning violet pigment helps keep the brass away without affecting dark hair color.
  5. Individuals with gray hair can also benefit from using purple shampoo occasionally. These shampoos will keep gray hair from yellowing while improving shine.
  6. Virgin hair won’t get as many benefits as bleached hair from using a violet shampoo. The hair that has gone through an extensive bleaching process is porous and ready to absorb violet pigments quickly. Virgin hair is less prone to discoloration, but it is also less ready to absorb the pigments present in the purple shampoo.
hairstylist washing clients' hair with a purple shampoo

How to Use Purple Shampoo?

It is advisable to start using purple shampoo a few weeks after the coloring service to prevent your blonde color from becoming dull and brassy.

  1. Wet your hair with warm water before using violet shampoo. Hot water will lift the cuticles resulting in better penetration of the purple pigments.
  2. Massage the violet shampoo into your hair and leave it on for the recommended time.
  3. Rinse your hair with cold water. Cool water will close the cuticles, sealing the pigment into hair strands and leaving your hair smooth.
  4. If you have dark hair with blonde highlights, you can wash the hair with your regular shampoo first, and then apply the purple shampoo to the areas with lightened hair. Such partial application helps reduce the drying effects of purple shampoo.
  5. If you have hair or scalp problems, you can use the shampoo recommended by your dermatologist first, and then apply purple shampoo to eliminate unwanted tones.
  6. Make sure to use a conditioner afterward, as most purple shampoos tend to strip moisture from your hair and scalp. Too much purple can be unfavorable, so use either a purple-based shampoo or conditioner, not both.

How Long Should You Leave Purple Shampoo in Your Hair?

Generally, it is recommended to let the violet shampoo sit in your hair for 1 to 5 minutes. If your hair is very yellow, let it sit for about 5-7 minutes. Overly porous hair tends to absorb purple pigments quickly. Never leave the shampoo in for more than 5 minutes on heavily bleached hair. Otherwise, your overly porous hair will soak up too much pigment and turn purple.

If violet shampoo leaves your hair with a purple hint, wash the hair with a clarifying shampoo to remove the excess purple.

How Often Should You Use Purple Shampoo?

This product is not intended for daily use. To combat an unsightly color and keep natural brightness, you need to tone your blonde hair occasionally. Wash your hair with purple shampoo once a week or whenever your hair needs it. To avoid over-drying the hair, rotate it with your regular shampoo.

A good purple shampoo is one of the most reliable products for preventing brassiness in blonde, gray, or streaked hair. If you find that violet shampoo makes your hair a bit dry, a gentler alternative is a purple mask. Violet masks are less intense but they have more conditioning agents that work to prevent dryness.

You can also add a bit of purple shampoo to your regular cleansing product. This will add some toning properties to your regular shampoo without any risk of over-drying.

attractive blonde woman with hair washed with purple shampoo