How to Properly Use Velcro Rollers to Prevent Damage to Your Fine Hair

What Are Velcro Rollers?   

Velcro rollers are making comeback, and there are a number of reasons why. These hair styling tools give volume and lift to flat, lifeless hair in a matter of minutes. They’re heatless, self-gripping, and don’t necessarily require other accessories to secure them in place.

The rollers are made from plastic and have a Velcro exterior with enough grip to easily adhere to and wrap hair. However, Velcro rollers are not only for curling your hair. Small Velcro rollers naturally allow tight curls. But larger rollers can create volume and bounce in flat, straight, or fine hair in addition to allowing for looser, bouncier curls and waves.

With a set of Velcro curlers, you can get voluminous, bouncy blowouts without ever needing a salon. Better yet, you can take them with you anywhere.
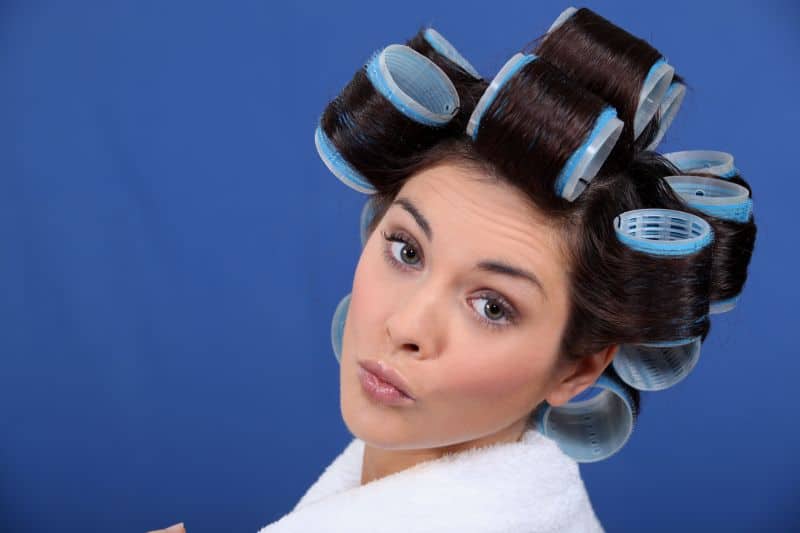
brunette woman in welcro rollers looking at camera

Do Velcro Rollers Damage Hair?    

By using velcro curlers, you can reduce the use of heat-styling appliances that are known to dry out and damage your hair. However, Velcro rollers are not completely safe for your hair, especially if you use them all the time. Many users, especially those with long or coiled hair, complain that their hair was damaged due to using velcro rollers. The most common problems associated with the use of Velcro rollers are split ends, the appearance of frizz, and hair breakage.

Velcro curlers do not have a smooth surface like magnetic curlers. Rather, they have tiny bristle-like hooks meant to secure them in place. Super-textured hair can easily catch in the roller as a result, which leads to frizz and—in more severe cases—hair breakage. If you have 3C or 4C hair, you may need to smooth it with a hot brush before applying Velcro rollers.

How to Minimize Damage when Using Velcro Rollers

Fine hair is more susceptible to breakage, so individuals with fine hair types should be very careful when using Velcro curlers. To minimize the possibility of tangles, brush your hair before rolling.

Always put the correct amount of hair on the roller. The sections of the hair at the base should be no larger than the roller itself. Too much hair can cause strands to get caught during removal.

Unless your hair is short, use a Velcro roller with a diameter greater than 1 inch. The larger the roller you use, the less trouble you will have when unraveling your hair. This greatly minimizes the chance of damage. 

If you use a blow dryer, wait for the rollers to cool down before taking them out.

Although Velcro rollers are described as self-gripping, it’s almost always better to secure them in place with clips. Unsecured Velcro rollers can move and touch surrounding rollers, causing hair strands to catch and tangle.

Regularly blow-drying your hair while it’s wrapped in Velcro rollers can result in dryness and heat damage. To avoid this, first, let your hair air dry about 80% of the way, and always use a heat protectant. Then put the rollers in your hair and apply heat with a blow-dryer so the tools can do their work.

If using a blow dryer, wait for the rollers to cool before taking them out.
Woman in velcro hair curlers indoors

Do Velcro Rollers Work on Fine Hair?       

Velcro rollers produce wonderful results with fine hair giving the lift and volume that fine hair needs most. However, you must be gentle when placing and removing the rollers. It’s critically important to perform each step correctly. Fine hair is delicate and prone to breakage, and you should avoid any pulling that may lead to damage or breakage. Always use large-sized rollers on fine hair, as larger sizes will minimize any chance of getting hair stuck in the roller.

How to Correctly Use Velcro Rollers

Velcro rollers can be used on both wet and dry hair. You need to apply a styling mousse with heat-protective properties to make your hair more pliable while preventing heat damage. First, air or rough-dry your hair until it is about 80% done.

Next, use a hot air brush to heat and finish drying the chosen section of hair before lightly wrapping it around the curler. Start from the ends and rotate the roller toward your roots. If you have long hair, you will need to secure rollers with a clip or bobby pins, as longer hair puts more weight on them.

If your goal is to get more volume, spray a root lifter or other volumizing product over your rolled hair. Then use a hair dryer with a diffuser to apply more heat and make the curling process more effective.

When using rollers on dry hair, you can heat each section with a flat iron or hot brush. You’ll need to roll the sections up while they’re still hot, as you can only change the shape of your hair and add lift with heat. 

If your goal is maximum volume, use larger curlers. Just as the larger barrel of a curling iron gives looser curls, the same is the case with curlers. Curlers often come in sets of different sizes, so you can choose which one to use depending on your desired hairstyle. By combining different sizes, you get more dimensions and more natural loose curls.

Finally, leave the rollers in for 10 to 30 minutes before removal.

It’s important to wait until your hair cools completely before removing the rollers. Removing curlers from hot hair can spoil the results.

How to Put Velcro Rollers on Fine Hair

Fine hair isn’t ideal for the self-gripping aspect of Velcro curlers, as they can fall out easily. To secure the curler, you’ll need to use hair clips.

Don’t overuse the blow dryer. Apply only as much heat as necessary to manipulate your hair and create more volume and lift.

To get the max volume, lift the hair high before wrapping it, roll the section of hair back down, and fix the rollers closest to the roots of the section you work on. Also, roll the hair away from your face in face-framing areas.

Use your fingers to comb and style your hair. Using a brush can leave fine hair flatter.
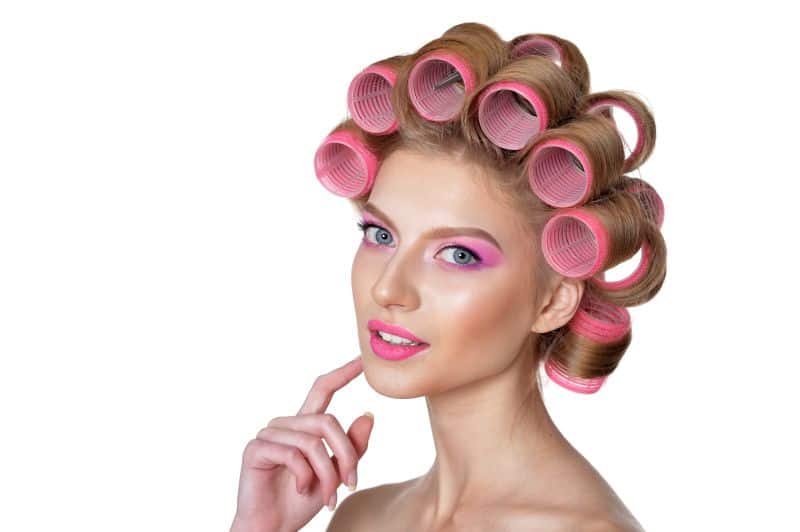
beautiful woman with velcro hair curlers

How to Remove Velcro Rollers?    

The best protection against hair damage is to learn how to put the rollers on and take them off properly.

To remove the curlers, gently and slowly unroll them one by one without pulling or tugging. Make sure the curler does not catch your hair, which can be painful and may lead to damage.

Another method is to unroll the curler only far enough to grip your hair at the roots and slide it down instead of unrolling.

Once the rollers are out you can use a paddle brush to smooth strands or do finger styling to get a more natural look while leaving volume untouched. Finish with a hair spray to hold the style you’ve obtained.

Can You Sleep in Velcro Rollers?   

Velcro curlers are more likely to damage your hair if left in overnight. Movement while asleep will cause friction and tangles. Additionally, sleeping with Velcro curlers is less comfortable than with foam options. These problems can worsen with fine hair that needs more gentle handling. Therefore, it’s better to use these hair styling devices for twenty minutes before removing them gently.

To Summarize: How to Safely Use Velcro Rollers for Fine Hair and any other Hair Type?

Divide your hair into sections and use a good volumizing mousse and heat protectant.

Use 1-inch rollers or wider so you can take them out effortlessly.

Wrap amounts of hair that don’t exceed the size of the roller, wrap lightly, and secure the rollers in place with hair pins.

Remove the roller gently and avoid tugging or pulling your hair.

Allow your hair to air dry enough (80%) then place the rollers and use a blow dryer after wrapping.

If your hair is fine or thinning, you shouldn’t use Velcro curlers regularly.

Finally, never, ever sleep in Velcro rollers.
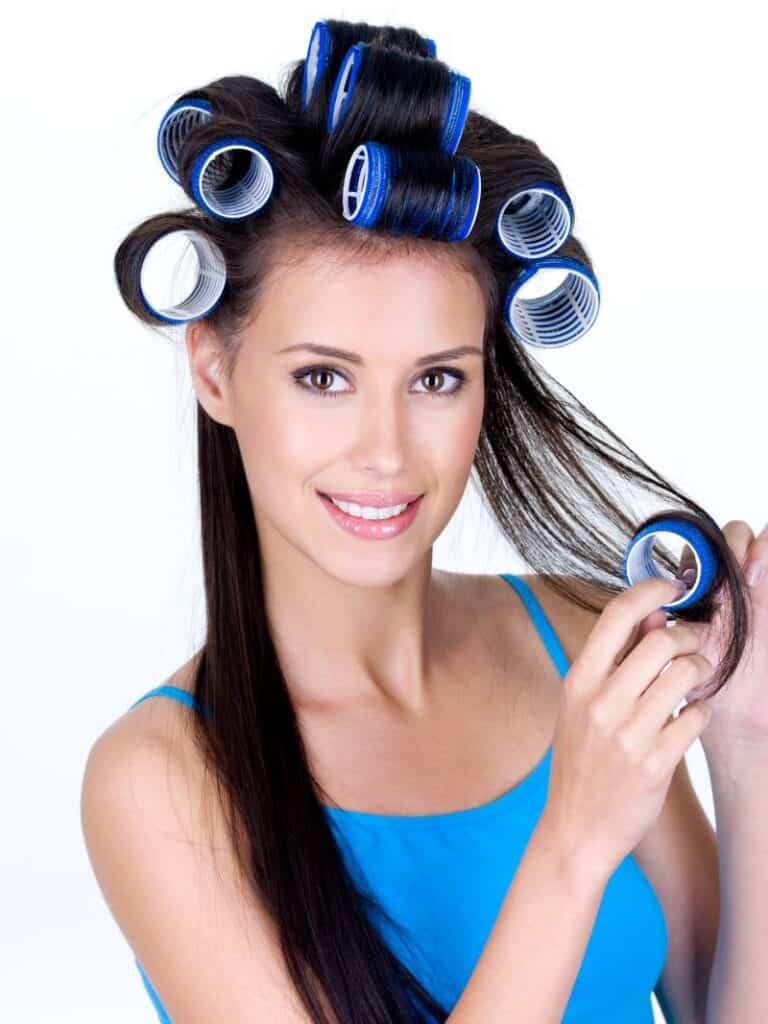
happy beautiful woman in hairrollers

How to Maintain Ombre Hair Color while Keeping Hair Healthy

What is Ombre Hair Color?

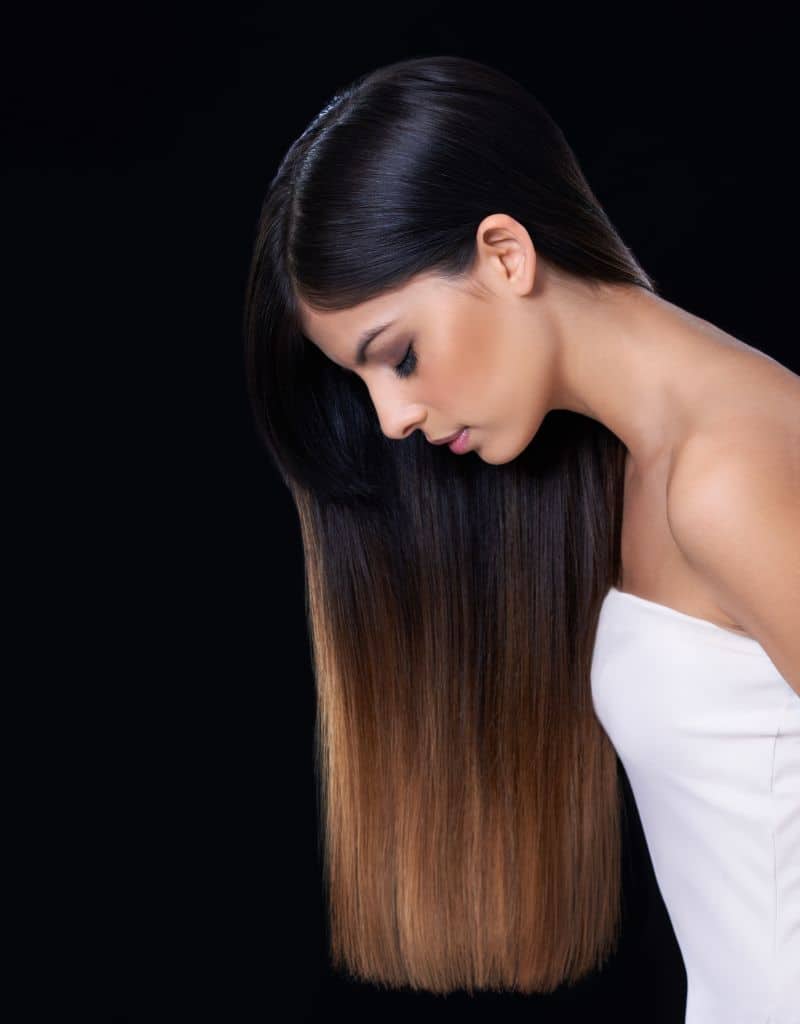
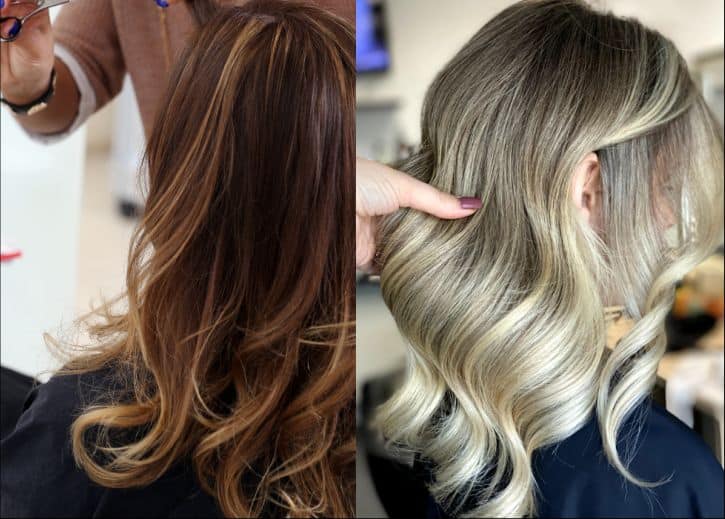
Ombre hair is a look created by a colorist that leaves a darker root color extending downward more than 4 inches until the color shifts to something blonde or vivid. An ombre can also consist of a dark root that extends down to a lighter color than the original base color. But the darker color will be 4+ inches before the next color begins.

This style is easy to maintain and creates long lengths of time between appointments.

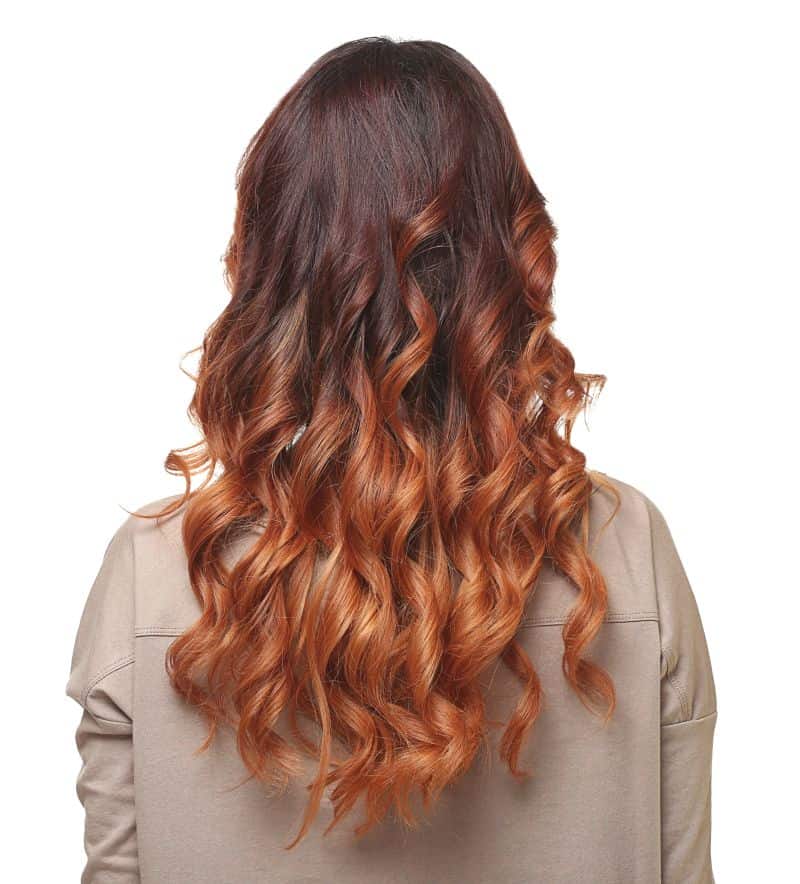
woman with ombre hair color

How is Ombre Different from Balayage?

Ombre and Balayage do not mean the same thing. It’s important to know the difference so that language doesn’t confuse you or the colorist creating your look.

An Ombre hair color has a darker root that extends downward more than 4 inches. A balayage look may have a natural, darker root as well but it will extend down only 1-3 inches and not more.

Think of an ombre as primarily just two colors. Dark hair extending past 4 inches then suddenly you get a color change. Once you reach the portion where the hair changes to a lighter color, the color can be anything: blonde, pink, grey, rainbow, etc.

With balayage, you will typically have ribbons of light and dark color that start just after a natural root color that extends down no more than 3 inches.

Ombres are often nice for people who want their natural hair color at the top, then something vibrant or exciting just at the bottom.

How Long Will Ombre Hair Color Last?

In short, a very long time. Many people will go 5-12 months before touching up an ombre. It’s a very low-maintenance hair color that keeps you relaxed along the way.

The only part of an ombre that may need more maintenance is the lighter, vivid or blonde color. To maintain the vibrancy of vivid color or fight unwanted yellow tones in blonde ends, you may need to re-tone the hair regularly.

Is Ombre Hair Color Hard to Maintain?

Low maintenance is one of the main reasons for the popularity of the ombre hair trend. Your ends are the only part of your hair that require special attention.

Maintenance for your ombre hair color largely depends on what you get. We can cover some common looks to give you the best idea of what to expect.

Ombre with vivid colors at the ends: expect to touch up a vivid color anywhere from 4-8 weeks after the initial application. For people who want to maintain a bright bold color on their ombre, 4 weeks between appointments isn’t unrealistic.

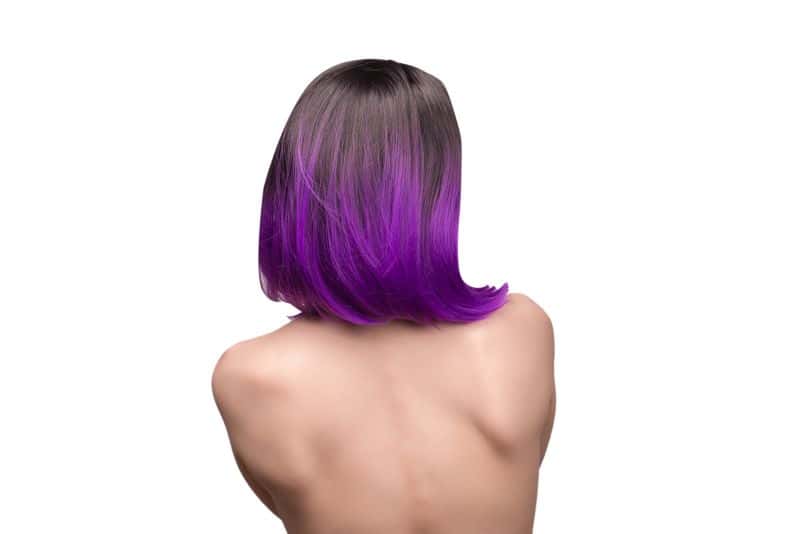
backside of  woman with purple ombre hair

Ombre on Dark Brunette Hair with Blonde Ends: once the dark brunette color is lifted to a level 9 or 10, a toner can be applied for a softer, cooler blonde. Maintaining the blonde will require more toners about every 6-8 weeks.

a beautiful young woman with ombre hair wearing dark gloves

Ombre On Brown Hair with Red Ends: this all depends on how vibrant you want your red. To keep it bright and bold looking, a toner every 6-8 weeks may be needed. But always consult with your colorist to know the length of time for brightening the ends of your ombre hair.  

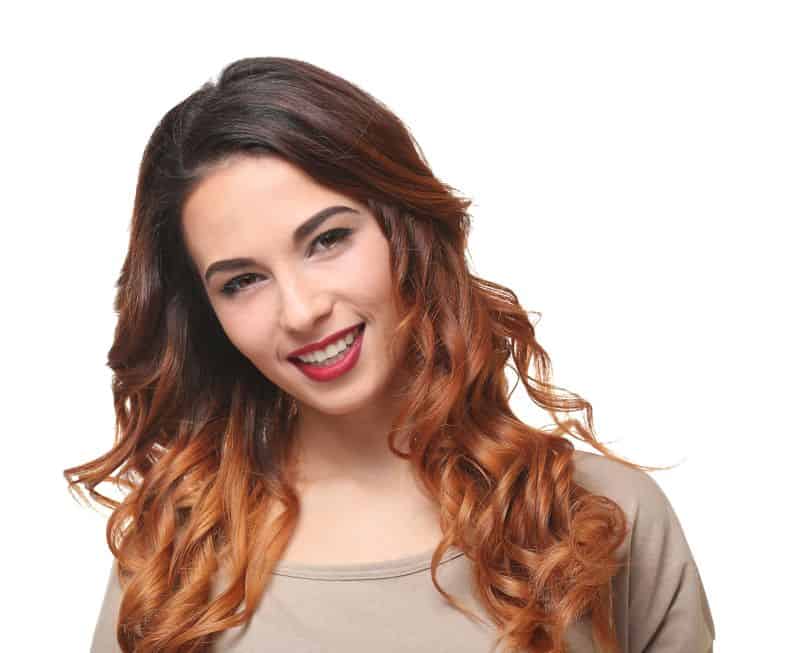
young beautiful woman with ombre hair color

Ombre on Dark Blonde Hair with Lighter blonde ends: this look is extremely low maintenance. If you’re naturally a dark blonde, that means the lighter color at the ends of your hair may not need a toner very often. You can expect to do a touch-up when you want to bring your color higher again after growth. The range of an ombre re-touch on dark blonde hair is anywhere from 5-12 months between appointments.

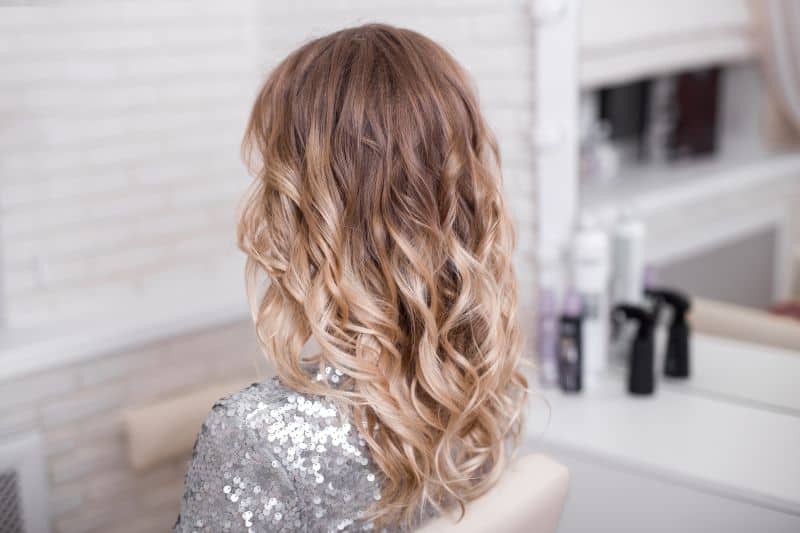
a woman with blonde curly ombre hair

What Shampoo to Use on Ombre Hair

Use a mild color-safe shampoo and avoid products that contain sulfates. Apply conditioner after each shampooing to replenish moisture and make brushing bleached ombre hair easy. Focus on your ends and leave the conditioner for 1-3 minutes before rinsing. To brighten the blonde parts of your hair, use a purple shampoo once a week. Alternatively, you can use a purple mask if your ends are very dry.

To avoid dryness due to frequent shampooing, use a natural-based dry shampoo, preferably one in powder form. However, make sure to use dry shampoo sparingly to refresh your locks without unwanted effects. Frequent use of dry shampoos can lead to product buildup and scalp problems. 

beautiful young woman with modern ombre hairstyle

How to Protect Ombre Hair Color?

Moisture will always be imperative to maintaining your ombre hair color. Use an oil and a cream-based heat protectant after each time you wash your hair. Apply a deep conditioning mask once a week or biweekly.

Formaldehyde-free keratin treatments are also a good idea to rebuild keratin protein into the core of the hair shaft.

Then there are also metal detox products that can remove unwanted buildup, so your hair stays healthier.

Bleaching can leave your hair overly dry and prone to breakage. To restore strength and softness to your bleached hair, use Olaplex Hair Perfector once a week. Apply the product to damp unwashed hair and leave it on for just over 10 minutes. Then wash and condition as normal. Have a professional colorist assess the damage to your hair and create a plan with you. By figuring out how dry or damaged your hair is after your ombre lightening service, you can create a plan to recover moisture, strength, and the overall integrity of your hair. 

beautiful woman with healthy ombre hair

Should You Dye Your Hair While It’s Wet or Dry?

Can You Dye Your Hair While It’s Wet?

Hair dye can be applied to both wet and dry hair, and which method works best depends on what type of dye you are going to use. Some types of hair dye can be used on wet hair, while others work best on dry hair.

There are some at-home box dyes that come with directions for applying the dye to wet hair. With these dyes, the hair should actually be towel-dried and damp since applying color to sopping wet hair will cause the dye to run. The dye should be left on as long as directed by the manufacturer. Put a shower cap on over your hair and do other things as you wait. Once the recommended amount of time has passed, rinse the dye from your hair thoroughly with lukewarm water.

 beautiful girl with ginger-colored hair posing at home

Note that if you decide to dye your hair yourself, you should always closely follow the directions that came with the product. Coloring products are formulated differently depending on the brand and product, and the instructions that apply to one product do not usually apply to another.

Can You Dye Damp Hair?

Yes, you can. There are a few things that make dying wet hair more convenient than dying dry hair:

1. When your hair is wet, color is easier to apply and distribute, especially if your hair is thick and coarse. You will also need less product to completely cover damp hair with dye.

2. When your hair is dry, you need to use a brush and tinting bowl. Applying dye to wet hair can be done in the shower, making the coloring process more straightforward and less messy.

ginger girl in pajama posing in morning

What Types of Hair Dye Work on Wet Hair?

Temporary dyes can be applied to wet hair, and you will usually get better results than when applying them to dry hair.

Semi-permanent dyes should be applied to wet hair as these dyes don’t contain ingredients like peroxide or ammonia, which are meant to lift the cuticles to allow pigments to adhere. When you wash and towel-dry your hair before color application, it will create the perfect base for semi-permanent coloring because the moisture in your hair will slightly raise the cuticles, making your hair more receptive to the color. If your hair is dry, the cuticles will stay closed and the color molecules will not be able to attach to the hair.

Demi-permanent colors can be applied to either wet or dry hair, but the color will absorb better into wet strands. Moisture in the hair lifts the cuticles, making it easier for the color pigments to wrap around and lightly penetrate the hair. Although it doesn’t fully penetrate the hair shaft, the demi-permanent color will absorb better and last longer than semi-permanent dyes. 

Wet balayage is a hair highlighting method in which a hairdresser applies a lightener to damp hair. The results of this method will show more dimension and a more natural look.

Henna dyes will show the best results if applied to freshly washed and towel-dried hair. You can also get good results if you apply henna to dry hair, but like other dyes, it is much easier to distribute the mixture when your hair is wet.

Interested pretty girl with ginger hair touching her face

What Types of Hair Dye Work on Dry Hair?

Permanent colors should be applied to dry hair. While dying wet hair with permanent color is possible, you may not get the exact results you want. The most commonly seen unwanted result of using permanent dye on dry hair is an uneven and dull color.

Why Should You Use Permanent Colors on Dry Hair?

 red-haired girl reading book beside window

There are several reasons why hairdressers practice applying permanent colors to dry hair.

  1. You do not need water to raise the cuticles like you do when using semi-permanent dyes. Ammonia and peroxide in permanent dyes lift the cuticles, allowing the dye molecules to penetrate deeper layers of your hair.
  2. When applying color to dry hair, your natural oils work to protect hair from chemical damage.  It is preferable that the hair is not freshly washed before dying and instead it is recommended that you wait for a day or two after your last shampoo before dying hair. During this period, natural oils will restore a protective oil barrier that helps to prevent chemical damage. Your hair is at its most fragile when it is wet as the cuticles of wet hair are open, leaving the hair prone to damage. Applying dye containing ammonia and peroxide to wet hair can therefore cause serious hair damage and may lead to breakage.
  3. Permanent dyes adhere better to dry hair, and the result is a more even, uniform, and vibrant color. When using permanent hair colors, water acts as a dilutant, limiting the amount of color that your hair can absorb and possibly causing the color to look uneven in some sections of your hair.

Takeaways

  • Permanent dyes require dry hair, while temporary and semi-permanent dyes work better on wet hair.
  • Having your hair colored by a professional will always be your best option if you are thinking about completely changing your color.
  • If you buy an at-home coloring kit, always read the full instructions that come with the product because application procedures will vary with every coloring product.
Beautiful ginger girl posing with smile beside window

Hair Toppers Vs. Wigs: Which Will Work Better for You 

There’s something so special about snapping that first clip to secure your wig or topper. It’s always followed by snapping just a few more around the perimeter of your head to secure the hair in place.

You look up, brush the hair back from your face, do a slight wiggle to adjust the part, and look at yourself for the first time with new eyes as your heart skips a beat.

Nothing really compares to the experience of seeing yourself for the first time with the hair of your dreams. Except for the anticipation along the way of picking out every aspect of your hairpiece to suit your look and lifestyle. There are many steps that can help you determine what works for you, but the biggest question is where to begin.

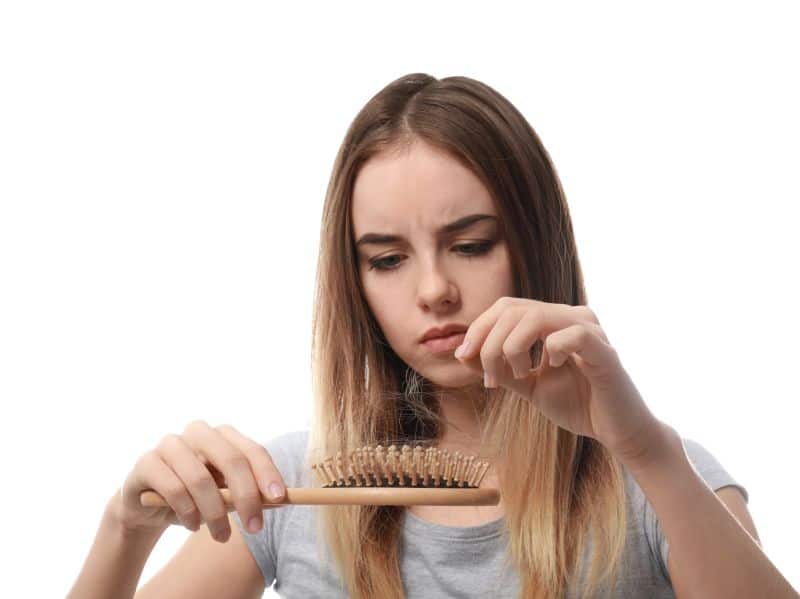
Worried woman with thinning hair

With extensions being all the rage, wigs and toppers might not be your first thought. But there are certain advantages to wigs and toppers that make them worth looking at.

For starters, you’ll need to determine what you need most. Ask yourself, is it volume? Length? Full coverage? Is there a reason you may want a wig or topper vs. extensions? Such as, has your hair thinned evenly all over? Was there a percentage of hair loss? Was there chemical breakage? What’s your budget?

Knowing the answers to these types of questions will help you determine the hairpiece that suits you best.

What Is a Wig and What Can It Do for You?

A wig is a hair piece that provides full coverage, meaning all your natural hair will be underneath it, or it will act as your hair when natural hair is missing.

They are incredible structures and require skill and patience to create, whether they are made from real or synthetic hair.

For higher quality, selecting a wig made of real hair is the best option. These types of hairpieces can sometimes cost as much as thousands of dollars, but when taken care of, can last for a long time.

Beautiful young woman brushing her hair in morning

When a wig is an essential piece of your daily self-care routine, getting one made of real hair sets you up for a great experience. You can wash, curl, style, and even get it dyed just as you would your natural hair. They also attach seamlessly to your head, blending in with your skin so no one can tell you’re wearing a wig at all.

Wigs provide complete, immediate perfection. But how does a wig differ from a hair topper?

What Is a Hair Topper and What Can It Do for You?

Hair toppers are much smaller hair pieces that only cover the small, top portion of your head. They are designed to add volume and fill in where your natural hair that is thin or broken on the sides in front of the ears.

A quality topper will blend in seamlessly with your natural hair. Often, they attach to your hair with pressure snap clips, but there are other methods of attachment to explore as well. Once it’s snapped in place, you can pull a small amount of your own hair out from underneath it, blending it in with the topper hair to make everything look natural.

The unique thing about toppers is they can be partnered with micro-fusion or tape-in extensions. What’s beneficial about this compared to a wig is how breathable the combination is. The topper is also easier to take on and off due to its size and weight. 

With natural hair toppers, you can get them dyed and highlighted just like natural hair. Make sure to have a professional with experience dye or highlight your hair topper to preserve its quality. 

Which is Better for Thinning Hair, a Topper or a Wig?

This will all depend on your situation. Are you just looking to experiment with your hair and try something new? Or are you looking for coverage because of thinning or balding hair?

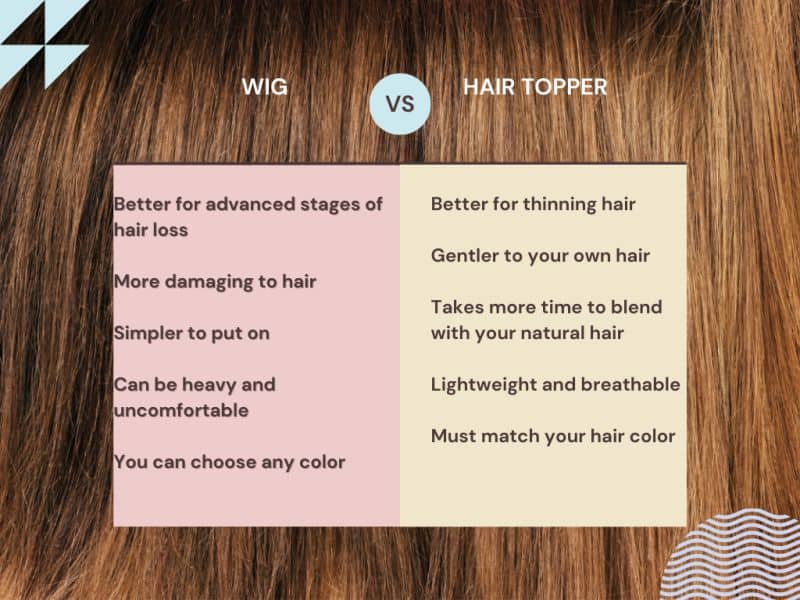
Coverage: If you are at the beginning stages of hair loss or your hair is slowly starting to thin, then a hair topper would be the better option. Hair toppers are an excellent choice if you are experiencing hair loss or hair thinning at the top of your head or on your crown! They give you coverage at the top and that extra volume. But if your hair loss is more advanced or you are experiencing baldness, a wig will benefit you more.

Wig vs Topper comparison chart

Color: When it comes to color, the hair topper you choose should match the color of your hair so that it can blend in and go unnoticed. With a wig, you have more freedom and can literally choose any color you want, whether it is brown or pink.

Timing: With a wig, you can style it before putting it on your head, saving a lot of time. A topper, on the other hand, takes more time to blend with your natural hair. So, it is all up to you when it comes to the timing factor.

Beautiful young woman with hair comb

Damage to your own hair: Hair toppers are gentler to your own hair because you can apply hair products and your scalp can breathe.  But they can cause damage if you don’t use them properly. If your hair is already damaged, hair toppers that clip in might damage your hair further because your hair can’t handle the extra pressure. Be gentle with the removal of the topper. Don’t just rip it out because you are getting frustrated.

Which one is more comfortable: Hair toppers are more comfortable than wigs because they are lightweight and breathable. And for this reason, they are also great on those humid or hot summer days because there isn’t heavy hair to make you melt away with sweat.

Takeaway

Hair toppers are a great choice if you want a lightweight and more natural look and if you want to add some volume and body to your hair. Wigs are the better option when you need to cover the whole head. Plus, wigs are a great choice if you want to have fun and experiment with different colors. Make the choice that will satisfy your hair needs. Happy hair, happy life!

Beautiful young woman with Bible

Styling Permed Hair: Can You Flat-Iron, Curl, or Braid Your Permed Hair?

Perm, is that buzzword from the past that conjures images of gigantic curly hair full of frizz and pizzazz. But more recently, this buzzword has been making a comeback as a new and improved hair trend. From upgraded techniques that cause less damage to the ability to create softer, more natural-looking curls, perms are making waves across all hair platforms as the next best option for your style.

One of the most common reasons for getting permanent waves is to save the time you need to style your hair in the morning. Perms eliminate the need for using hot styling tools, making your morning routine much simpler. Since perm is a chemical treatment, there are some do’s and don’ts when styling your hair.  So, let’s get into the dos and don’ts of styling them, why you may or may not want a perm, and some common dilemmas about styling your permed hair with hairstylist Andrea Haynes @babehairxo.  

Cute young student girl with permed hair

How do You Style a Permed Hair in the First 48 Hours?

“What’s the best style post perm within the first 48 hours? Nothing. It’s best for the first 2-3 days to let your hair rest, meaning, no putting it up, tying it back, or styling it at all. In fact, you’ll even need to wait to get it wet” Andrea explains. “A perm is a chemical process that breaks down strong, natural bonds in the hair and reforms them to the shape of the rod used.”

What’s the Best Method for Styling Permed Hair in the Morning?

“Moisture. Keeping your new curls moisturized is the best way to style them day in and day out whether it’s morning or night. Invest in conditioning treatments and oils that saturate hair without leaving it greasy”, says Andrea. “If your hair is a bit wild in the morning, use a refresher spray that moisturizes better than water. Water is good too, but once it evaporates, your hair can be left frizzy. Finishes it off while it’s still damp with a mouse that does not contain alcohol” recommends Andrea.

Cute girl with permed hair outdoor

Can You Brush Your Hair After a Perm?

As counter-intuitive as it seems, brushing your perm is not the best way to encourage a soft curl pattern. “To avoid frizz and get the best from your curls, use your fingers to lightly divide pieces. You can also use a very wide-tooth comb to gently piece apart the individual curls” recommends Andrea.

“To impact the health of your curls the most though, think anti-frizz. To achieve less frizz, get a silk cap to sleep in at night. This reduces the friction between your hair and the fabric over the pillow you sleep on. It also reduces your need to brush your hair in the morning.” 

Cute girl with permed hair wearing a red dress

Can You Straighten Permed Hair with a Flat Iron?

According to Andrea, you should avoid heat straightening. “This is highly not recommended, for a few reasons. When the hair is permed, the core bonds are broken and then reformed. But it leaves your permed hair in a more sensitive state. Sometimes you’ll experience dryness, and you’ll need to increase the moisture in your hair-care routine. Flat ironing can only increase the dryness and high heat can damage the sensitive reformed bonds.

If you do decide to flat iron it, make sure to prep the hair with a cream-based, thick heat protectant. Don’t use a high heat setting, but slowly increase the temperature as needed.”

Can You Curl Your Hair after Permanent Waving?

Andrea points out that hot styling tools are not compatible with permed hair. “As with flat ironing a perm, any sort of heat can decrease its longevity and add dryness. It’s no different with curling a perm. It’s not recommended, but if you decide to do it, use low heat and a thick, cream-based heat protectant. Don’t let the iron sit long against the hair for the best results.”

“In the end, it’s better to engage with your curls like you would natural curls. Treat them liberally with moisture products, wash sparingly, and enjoy the curl pattern that takes shape” says Andrea.

Can You Braid Permed Hair?

“The real question is, when. Braids and perms go hand in hand. A braid compliments the beautiful movements of the curls, but make sure not to braid too tightly. Executing a tight braid can harm the perm and hurt your scalp. Keeping your braid loose and gentle is the best way to go” Andrea reveals.

young pretty woman with permed hair

Can You Dread Permed Hair?

The verdict is split on whether you should dread permed hair or not. Some professionals will say no, but some may have the skill set to do so. “Make sure to get the health of your hair tested before moving forward with this. Also, talk to someone who has had it done before and learn from their experience” recommends Andrea.

How to Go Gray from Colored Hair

This one isn’t your average hair trend. You know, the kind that brings back looks from 2 decades past and recreates them with a modern twist.

Instead, this trending hair color carries more risk with it for a variety of reasons. From the initial decision to do it to the long process, it takes to get there, getting back to your natural grey hair color is no easy task. But it’s not impossible, and the rare value it can add back to your life will make it worth it.

So, what are the steps it takes to get back to your natural grey hair color? They may vary depending on the starting point. For example, the steps of getting back to natural grey after drying black or dark brown vs. blonde will be different. But expect to spend somewhere between 5-10 hours working on this transition.

Gray-haired woman speaking on the phone

Transitioning From Dyed Dark Brown Hair to Natural Grey

When the hair has been dyed dark brown or black for a long period of time, it may be necessary to get a color-removing treatment prior to beginning the actual service. Your colorist will know which type to choose and how to apply. Some, like the Malibu C CPR Color Pigment Remover, take 15-45 minutes to process.

The next step is highlighting or bleaching out the old color. Your colorist will usually use foils and paint the bleach only on the areas of the hair that have the dark dye. Depending on how dark the hair this, this may need to be done twice.

Then it will be washed out and a bond-builder applied. The famous @Jackmartincolorist uses the K18 repair system throughout the process to keep the hair healthy.

After the 1st  and/or 2nd rounds of bleaching have been completed, your colorist will need to match the color of the bleached hair to the natural grey root color pattern. To do this, they will use toners to get the yellow out and leave the right level of grey/silver to match your own natural grey hair. They may also need to add in some lowlights if the natural grey is salt-and-pepper. 8 hours is an average length of time to complete the full transition from dark brown/black to natural grey.

Transitioning From Dyed Dark Blonde Hair to Natural Grey

Transitioning from dyed blonde hair back to natural grey may take less time than going from dark brown back to grey, but it also depends on the health of the hair and if there are any banding issues.

If the hair is brittle and in poor condition, the colorist may need to use a lower-level developer to lift the dark blonde to a light blonde. Using a low-level developer will take a longer time to process, affecting the overall time of the service.

Once the hair has been lightened with bleach to a level 10, the colorist can then tone it to match the color of the natural grey pattern. 

Transitioning From Dyed Red Hair Back to Natural Grey

Gray-haired woman looking at the mirror

To go from dyed red hair to a natural grey, a lightener will have to be used to lift out the red color. Red hair color can be stubborn, especially if it’s dark red/auburn. It may take two sessions to extract it all with the lightener.

Then the grey-blending happens when the colorist chooses toners that match the natural grey pattern and applies them to the highlighted hair.

Make sure to use K18 Leave-In Repair Hair Mask after this intensive service. The strength of your hair depends on it!

Going Back to Natural Grey by Growing Out the Hair

If you prefer not to put your hair through the intensive highlighting process it takes to get it back to a natural grey, then you can simply grow it out.

The pros to this are 1. It keeps your hair healthy. 2. Inexpensive. 3. You don’t run the risk of having a mistake made during the massive color process.

But there are some cons. Depending on the length of your hair, it could take years and years to grow it all out if you’re not wanting to lose a lot of length during the cuts. The hair as it grows will have to pass through phases of looking unbalanced. Many women feel compelled to wear hats.

When your gray roots start to appear, you can use temporary gray root concealers for a while to hide them. These products commonly wash out with the next shampoo, so you have to apply them after each wash. As your hair continues to grow, root concealers will be less convenient.

Instead of taking the long route and letting your natural grey grow out while gradually cutting out the color, you can opt to go short and cut all of the color out. This leaves you natural grey in one cut session and lets you sport a lovely short new look.

attractive middle aged lady with short haircut

Maintenance and Color Schedule

The famous @Jackmartincolorist leads in transforming hair back to its original and natural grey state. He recommends getting blending touch-ups 3 times per year to maintain a beautiful grey look. Scheduling your regular color touchups is one of the best ways to experience gorgeous hair year-round.

To keep your natural grey tresses healthy, establish and maintain a foundational routine of care. Use a moisturizing shampoo and conditioner, a quality oil, and a cream-based heat protectant for best results. Use purple shampoo periodically to neutralize yellow tones.

Also, add in professional-grade glossing treatments to boost shine. Getting these seasonally can make all the difference when keeping your natural grey hair looking shiny and smooth.

Gray-haired woman in the park reading a book

Hot Oil Treatment for Low Porosity Hair: Best Oils and How to Apply Them

What is Low Porosity Hair?

Hair porosity is the ability of hair to attract and hold moisture. If you’re unsure about your hair porosity level, there are several porosity tests you can conduct yourself.  The simplest is the float test which shows how quickly your hair fiber sinks when placed in water.

The Float Test: Take a strand of your hair after shampooing and before applying any product to your hair. Drop the strand in a clear glass filled with water. If the strand floats without sinking, you have low-porosity hair. The strand of high porosity hair will sink quickly to the bottom. Medium porosity will float for a while and then start to sink slowly. You can repeat the test, taking strands from different parts of your head, because it is possible that the porosity level of your hair varies in different areas of your head.

Sensual afro-american girl with low porosity hair

Low porosity hair is influenced by genetics. You can’t change it, but you can manage it.  Knowing your hair porosity level can help you pick the right products for your hair.

The good thing about having low-porosity hair is that it retains moisture well. However, adding moisture to thirsty low porosity hair could be a real challenge. The scales of the outermost layer of the hair, called the cuticle, are tightly packed, leaving no room for moisture to penetrate inside the hair. Another potential problem is that chemical hair treatments, such as coloring or straightening products, are less effective than with normal porosity hair. 

How to Moisturize Low-Porosity Hair

Here are some rules to remember when caring for your moisture-resistant, low-porosity hair. 

Use heat with a deep conditioner

Deep conditioners are designed to penetrate further into the hair than regular conditioners and can deliver moisturizing and nourishing ingredients inside the hair. If your hair isn’t receptive to treatments, you may need to apply heat to lift the cuticles and enable the treatment to penetrate the hair shaft. The simplest way to lift the cuticles is by rinsing your hair with hot water after shampooing. Apply a deep conditioning product while the cuticles are still open, allowing your hair to receive all the moisturizing benefits. If you apply a treatment that is meant to work for a longer time, it would be best if you use a thermal conditioning cap. The heat from the cap will keep the cuticles open, allowing the hair to soak up all the nourishing ingredients.

Use lightweight hair products

People often use hair products in larger amounts when trying to provide their hair with extra moisture. However, the secret is in the proper selection of products that suit low-porosity hair. You should choose water-based products and lightweight oils. Avoid heavy oils and products containing silicones or too much protein. Such products just create buildup without penetrating the hair.

Incorporate hot oil treatments

One of the advantages of hot oil treatment is that it can easily be done at home. You can get a hot oil treatment in a salon, but doing it at home is easy, affordable, and customizable. You can select the oils which your hair needs most and can be sure that your treatment is free of synthetic additives.

Why Hot Oil Treatments are Good for Low-Porosity Hair

When you apply hair oil to your low-porosity hair, it will just coat the strands without penetrating the hair shaft. Your hair needs heat that will lift the cuticle to enable the oil to penetrate the hair. That is why hot oil treatments are a great option for low-porosity hair. By applying heat, you can ensure that the cuticles will open to allow for deep penetration.

Oils that Penetrate Low-Porosity Hair

Thick oils like castor oil and olive oil will sit on the surface of the hair, blocking cuticles that are already tightly packed. Instead, you should go for lightweight oils that can pass through the hair’s cuticle without causing buildup. Some good choices are grapeseed, jojoba, and sweet almond oils.

Grapeseed oil is a fast-absorbing and non-greasy oil. It provides hair with weightless hydration and slip for easy detangling and adds natural shine.

Jojoba oil is lightweight, blends well with other oils, and washes easily from hair. It helps soothe your scalp and reduce itchiness & flaking.

Sweet almond oil has excellent moisturizing properties and helps prevent dry, flaking scalp. It gets absorbed into your hair quickly and helps improve the strength and shine of your locks.

You can’t go wrong if you use other light oils, including argan, avocado, rosehip, moringa, baobab, camellia, maracuja, and pomegranate oils.

You can also add to the mixture a few drops of essential oils, as many have antimicrobial properties and can boost blood circulation. Rosemary, peppermint, lavender, tea tree, and sage essential oils will soothe your scalp and create a good environment for healthy hair.

How to Apply Hot Oil Treatment to Your Low-Porosity Hair

Hot oil treatment for low-porosity hair is most about the right selection of hair oils because the application steps are the same regardless of hair porosity level. 

First, wet your hair before application. Make sure you don’t have a build-up of product or dirt in your hair. Then, pour the oil mixture into a small jar and place the bowl in a pot with hot water. The oil mixture should be warm but not too hot. Massage the oil mixture into your scalp and distribute evenly from the root to the tip of your hair strands. Put on a shower cap and wrap your hair with a towel to keep the oils warm for around 30 minutes or longer. The heat will expand the hair fibers by lifting the scales of the outermost hair layer, so your hair can absorb the oils.

dark-skinned woman with a towel around her head

You can also apply non-heated oils, massage them into your hair, and then apply gentle heat by using a hair dryer.

However, the most convenient method is by using a thermal conditioning cap. You can apply unheated oils and then put the thermal cap which will then heat the oils to make the treatment more effective.

Wash your hair with a sulfate-free shampoo to remove oils from your hair. Repeat the shampooing if needed.

a beautiful dark-skinned woman applies a hot oil treatment

Three Ways to Darken Highlights that Are too Light

Getting your hair highlighted can leave you feeling your best. But nothing drains that confidence faster than when those brassy, unwanted tones start to show up. You’re somewhere like 4-8 weeks out from your original appointment when you notice the color just isn’t the same.

Whether you’re a brunette or a blonde, brassy and yellow tones find a way to show up. It leaves you having to ask yourself, why does my color fade to such orange (or brassy) and yellow tones?

Or you may have ended up with highlights that are too bright for your liking and don’t blend nicely with your hair color. Highlights that appear way too bright may also be irritating. Then the follow-up question is always, what can you do about it?

Darken Your Highlights

hair highlighted hair in a beauty salon

It’s not just on-trend, but there’s something about the subtle dimension that makes people “look” at the same time it minimizes fading. When you get highlighted but only go a shade or two brighter than your natural color, the results are stunning and easy to maintain.

If you’re not quite sure what I mean, imagine you are a dark brunette wanting highlights. Instead of getting blonde highlights, you can a lighter brown. Play with the tone of it, that’s where the fun comes in.

What if your highlights are already light and you want to darken your highlights?

One amazing option is called a color melt. Color melts darken your highlights, can change the tone as well, and will leave you with an easier hair schedule to boot.

1. Color Melting

So, what exactly is a color melt? There are usually 3 colors involved in a melt and it’s designed to deepen your highlights or shift the tone or both. You’ll have the darkest color at your roots, a shade or two lighter for the mid-sections, then the ends are the brightest.

This creates a natural-looking gradient effect of color from darkest to light. When you darken your highlights using this method, the effect is seamless and natural.

How here’s the real catch, when you sport darker highlights, you will also keep them from fading to orange or yellow tones. There may be some fading, but it’s minimal.

color melt hair braon to blonde

Does a Color Melt Work When Darkening Highlighted Brunette Hair?

Yes! As mentioned before, instead of being a dark to medium brunette with light blonde highlights, darkening your highlights will give you the “bronde” effect. And color melting is a beautiful way to achieve this while maintaining highlights that are darker than your original. I suggest you leave color melting to a professional colorist. Talk to your colorist about it and see what you can come up with!

2. How to Darken Highlights with a Toner

highlights colored darker with hair dye

The easy way to temporarily tone down your highlights is to tone your hair using a toner. Toners work by depositing pigments on the surface of hair strands, so they can darken color that appears too light.  

When deepening your highlights at home, don’t go more than two shades darker than the original highlights. For example, a common bright blonde hair would be considered a level 9. Going two shades darker would put you at a 7 (a dark blonde). But if you’re original point is a 7, then you can come down to a 6 or a 5. A level 6 is considered the lightest brunette almost blonde. A level 5 is considered a medium brunette.

It’s important to determine your original starting point level. That way when you go to purchase your toner, you will accurately get a shade that is no darker than only 1 or two levels deeper than the highlights.

Things you will need:

  • Appropriate toner
  • A mixing bowl
  • 10 or 20-volume developer

Steps:

  1. Mix the toner with the developer.
  2. Apply the mixture to your hair. You can focus on your highlights or apply toner to your entire head. Toner will not affect the rest of your hair with a darker color.
  3. Let the mixture sit in your hair for up to 25 minutes. Check your hair every few minutes to ensure that you are on a good way to getting the desired results.  
  4. Once the time is up, rinse the toner out of your hair with lukewarm water.

Using a toner is a temporary solution as the molecules deplete over time and eventually, your highlights will return to their bright state. If you wish more permanent solution, consider applying a hair dye the same way you would use a toner.

3. Darkening Highlights at Home by Using Hair Dye

hair higlights darkened with a hair dye

Some of you are just good with your hair and may take it on yourself to darken your highlights at home without losing them completely.

Using hair dye just in the way you would use a toner is one of the easiest ways to darken your highlights. The results last much longer than when you use a toner for the same purpose.  

Make sure you have all things necessary for the dying job including a bowl, dye brush, and gloves. You will also need a 20-volume developer.

Steps:

  • Detangle your hair and slightly dampen it
  • Mix the dye with the developer.
  • Apply the mixture to your entire head of hair.
  • Let the mixture sit for 20 minutes. You can check on your hair occasionally to make sure the color is changing in the way you want it to. Rinse thoroughly with lukewarm water and wash with a color-safe shampoo.

The procedure is similar to normal coloring, but there are some differences. You’ll leave the dye to process for 20 minutes, instead of letting it sit for 30 + minutes. Another difference from regular coloring is that you apply dye to damp hair instead of applying it to dry hair. 

Pro Tips

One thing to avoid when darkening your blonde highlights at home is buying dark brown or black and covering over very light, blonde highlights. There are many things that can go wrong on a chemical level, but just know that without a filler, your hair can turn a murky, dark greenish brown. Then you’ll be left with getting a color correction by a professional and it’s very expensive.

Another tip for darkening your highlights at home is to make sure the color you put on your hair is distributed evenly. Saturate each section of hair to the fullest, then very gently comb everything through and re-saturate. If your ends are damaged or brittle, do the roots and mid-section first, let it process, then pull the color down and saturate your ends for the last 10 minutes.

Cute lady with blonde highlights

How to Prepare for Hair Color Appointment to Ensure the Best Outcome

Nowadays, hair dyes are less harmful than they used to be containing nourishing ingredients to counteract the damaging effect of ammonia and other chemicals. On the other hand, beauty companies are innovating protective products that reduce the harmful effects of dye chemicals and minimize the negative effects of regular coloring.

However, there are still some protective steps you can take to ensure the coloring process is completed with minimal damage to your hair and get the best possible results. Before any new color adventure, give your hair enough time to recover from previous color processing or any other chemical treatment. You can’t get the hair color of your dreams on overprocessed, lifeless hair.

In this post, we will explore how to achieve your desired hair color while maintaining your hair’s health.

A woman choosing a shade of color to dye hair

1. Don’t Wash Your Hair Two Days Before Coloring

Natural oils in your scalp and hair act as a barrier offering protection against harsh hair products. If you apply color to freshly washed hair, chemicals in hair dye can irritate your scalp and dry out your hair. That is why you shouldn’t dye your hair when it is squeaky clean. Alternatively, if you apply it to excessively oily or dirty hair the hair may not support the distribution of the dye. Leave your hair unwashed two days before coloring to allow natural oils to form a protective coating on your scalp.

2. Clarify Your Hair

If you use many styling products, they can create build-up on your hair which may interfere with the coloring process. Another kind of buildup can be caused by using hard water for washing your hair. To ensure your hair is acceptive of your chosen color, remove any buildup before applying the dye. The easiest way to remove buildup is to use a clarifying shampoo. If you have hard water in your shower a chelating shampoo is a better choice. Chelating shampoos are formulated to remove any kind of build-up, such as that from hard water, while most clarifying shampoos are made to remove only product build-up. Wash your hair with a clarifying or chelating shampoo anywhere from several days to two days before coloring. Do not use many styling products before your coloring session.

3. Use Coconut Oil Before a Color Job

Woman applying coconut oil before coloring hair

Coconut oil is a great hair moisturizer that penetrates the hair shaft and protects your hair from chemical damage. Apply coconut oil the night before or at least several hours before coloring to allow your hair to fully absorb the oil. Rub the oil into the midshaft and ends of your hair. Your ends are the driest part of your hair and need the most protection. You don’t have to apply oil close to your roots as they are protected by the scalp’s natural oils and haven’t suffered from chemical damage by the previous coloring. Several hours after applying coconut oil, you can apply the dye with the coconut oil still in the hair.  Your hair will be softer and healthier than usual.

4. Use Bond Repairing Products

In recent years it has become a practice to protect the hair during the coloring process to minimize chemical damage. Your stylist will ask you to “upgrade” offering you a higher level of protection. If you make the color appointment, make sure that your colorist uses Olaplex or another bond builder to preserve the integrity of your hair. If you are going to do the coloring job on your own, use at-home bond repairing products to minimize the damage and repair broken and damaged bonds in your hair.  

5. Conduct Patch and Strand Tests

Patch Test: You should always conduct a patch test before dyeing your hair to see how your skin will react to the chemicals in the dye. Apply a small amount of the color mixture to the area of skin on the inside of your elbow with a cotton swab. If you notice any itching, swelling, or redness, this could be a sign of an allergic reaction and you shouldn’t apply the product. If you haven’t noticed anything strange in the tested area after 48 hours then you are not allergic to the hair dye and you may apply it.

Strand test: A strand test involves dyeing a small section of your hair to see what the color will look like and can be completed at the same time as the patch test.  Use tin foil to wrap around the section to keep it from the rest of your hair. Leave the dye as long as directed on the box. Rinse and blow-dry it to see the effects. If you love what you see, continue dyeing. If you aren’t satisfied, adjust the type of dye, shade, timing, etc. The strand test is key if you are going to try a new shade. Everyone’s hair takes to dye differently. This way you can be sure that you get the exact shade you want.

How-To Do a Strand Test by Splat Hair Dye

6. Equalize Your Hair’s Porosity

How to Prepare High Porosity Hair for Color Treatment

Hair of high porosity is likely to dye unevenly. This is because most of the cuticles of the hair are lifted, allowing pigments to enter the cortex more easily. If your hair is overly porous, discuss the problem with your stylist. Hair colorists use porosity equalizers to even hair porosity before coloring. If you are going to dye your hair at home, make sure to use a neutral protein filler or a similar product to even your hair porosity and ensure the best outcome.

How to Prep Low Porosity Hair for Coloring

Low-porosity hair is likely to take longer to process color. This is because most of the cuticles of the hair are tightly closed, preventing hair products from penetrating the hair shaft. You may need more time than is directed on the box to get the desired color. Clarifying step is important to remove the product buildup that sits on the surface. It would be helpful if you apply a pre-color treatment such as Ion Pre-Color Treatment to prime your low-porosity hair for color and ensure even absorption.

a woman with freshly colored hair enjoying freedom on a sunny day

My Ways to Fix Flat Hair

I have been dealing with super flat and fine hair all my life. For so long I had been desperately trying to figure out how to give my hair a more lifted look. Over the years, I learned that, although flat hair can be difficult to manage, there are a few things that help to reduce my frustration. Today I’m going to share my experience with flat hair and provide some tips that helped give my lifeless hair more volume and movement. But first, let’s go over the most common causes of flat hair.

Why Does Hair Look Flat?

young woman with flat hair
  • Thin and fine hair: Thinning and fine hair are more likely to look flat than thick and dense hair.
  • Oily hair: When your oil glands are over-active, your hair can get oily and flat soon after washing.
  • Hair texture: Straight hair is more likely to look flat than curly hair. Curly strands take more space, giving more volume to your style.
  • Porosity level: Unprocessed strands create less friction and the hair is more likely to look flat than colored or otherwise chemically treated hair.
  • Inappropriate hair products: Moisturizing shampoos, 2-in-1 shampoos, hair oils, and sticky hairsprays can weigh down hair, making it look flatter.
  • Too many products: Hair can become flat if you overuse certain styling products. Too many products can create buildup which makes hair look heavy.
  • Hard water: Hard water in your shower can interfere with the cleansing action of your shampoo, reducing its efficiency. Plus, minerals from hard water can build up in your hair, weighing it down.
a pretty woman with voluminous hairtyle sitting at a restaurant

How to Revive Flat Hair

  1. Proper shampooing: I’ve noticed that if I apply shampoo only once, my hair will fall flat quickly. But if I apply shampoo twice and take time to massage my scalp well, my hair will be clean and feel fluffy for a longer amount of time. Using a shampoo brush is an added plus.
  2. Skipping conditioner: I avoid using conditioner regularly because it makes my hair look flatter. I only apply conditioner after using a clarifying shampoo and I focus on applying it to the ends of my hair. I leave the conditioner on for 30 seconds or less before rinsing it off.
  3. Volumizing shampoos: These shampoos give me the effect of slightly more voluminous hair. Even a small improvement can be helpful when you are struggling with the problem of flat hair. I use clarifying shampoo twice a month to remove buildup from volumizing shampoos and other products.
  4. Shampoo rotation: After using the same shampoo for a long period I notice that it loses its effectiveness and begins to leave my hair feeling heavy. Rotating several shampoos helps to lift my flat-looking hair and adds more bounce and movement.
  5. Blow-drying: Blow-drying gives more lift to my hair than air drying. Massaging the scalp in a circular motion with my hand while blow-drying helps to keep hair from falling flat quickly. Using a round brush works to lift the roots and creates a more voluminous look. Blow drying with my head upside down lifts the hair away from the scalp and helps my blowout last longer.
  6. Dry shampoo: Dry shampoo eliminates excess sebum and dirt and gives my hair an extra boost of volume.  In addition to soaking oil, it also absorbs sweat that can ruin my hairstyle, and make the hair look heavy. I usually apply dry shampoo the day after washing and it keeps my hair from falling flat during the next two days.
  7. Collagen supplements: Taking collagen pills makes my hair appear thicker and fuller. It may take about two months to see some improvement. When I stop taking the collagen, the positive effects start to fade gradually.
  8. Perm: A mild perm is a great way to add some texture and lift to flat and thin hair. I am not a big fan of tight curls, so traditional perms are not an option. For me, a body wave perm is perfect for adding volume and natural waves.
  9. Coloring: Colored hair is less prone to fall flat than virgin hair. The coloring process leaves hair more porous and increases the friction between hair fibers, which means your hair won’t fall flat as easily. However, before you decide to dye your hair, make sure you’re aware of the damaging effects of hair dyes and be careful to consider permanent coloring.  
  10. Appropriate haircut: Sometimes you just need the right haircut to revive your flat and lifeless strands and give your hair more body. It is much easier to keep short hair from falling flat than long hair. Short pixie and long angled bob are some good examples.
  11. Gel: Hair gels helped me obtain good lift and hold when I had very short hair. Longer hair is hard to comb with gel residue in it and can break easily.
  12. Hair rollers for volume: If you have long hair, try using large curlers. You won’t get curls, but you can get more lift and volume. You can also try using foam curlers overnight to wake up with voluminous hair in the morning.
  13. Appropriate hairstyle: The right styling can resolve the problem of flat hair.  Sometimes hair needs a little help to stay lifted. A double ponytail, top knot, or French twist are some examples.
a woman with a volumizing hairstyle

Partial vs Full Balayage – Which One Is Right for You?

So, you’ve decided to either get a balayage for the first time or to switch from foiling to the more lived-in color look. Great, but that’s just the beginning. What happens next is in the details and will leave you wondering, what type of balayage do I get and how much of it?

Thinking through the nuances of your balayage is a good first step before you find yourself sitting in your colorist’s chair utterly confused. Because everyone has had that moment when face-to-face with a colorist where they hear the words “would you like a full balayage or a partial balayage?” The responses can range from sitting tongue-tied with confusion to declaring “just do what you think is best,” only to be disappointed with the results.

So, here’s what you need to know about this beautiful color service and how much of it to get.

partial balayage vs full balayage photo

What is a Partial Balayage?

A partial balayage means you’re getting less of your hair colored. The general areas revolve around the face, the part line (or inches from it for the rooted look), and the crown of the head. Lightening only these areas will leave you with less of an overall blonde look, and more of a rooted, dimensional feel with higher contrast.

Should I Get a Full Balayage of a Partial Balayage?

To answer this, think through just how blonde you want to be and how much contrast between your natural color and the highlighted blonde you want to have. If you love seeing that “swirl” of colors when you wave your hair, stick with a partial balayage. If you want a more overall blonde look, shoot for the full balayage.

What is the Difference Between a Full Balayage and a Partial Balayage?

Largely it’s the placements of the highlights. A full Balayage will cover everything from face-framing to all of the interior portions of your hair in the back and on the sides, including the nape of the neck. This means when you pull it up into a ponytail, you’ll see blonde.

A partial balayage does not cover the interior portions of the hair. Partial Balayage primarily covers the crown, pieces around the face, and the top outermost layer of the hair. This means when you pull up the ponytail, you’ll see your natural color in the back and a mixture of natural and blonde in the front.

smiling woman with partial balayage

Is a Partial Balayage Worth It?

A partial balayage is worth it if you’re after dimension. Blonding this way means contrast. If you love contrast and don’t want to be too blonde, a partial balayage is the perfect service for you. The grow-out is amazing as well, so you’ll find yourself in the salon less and with a natural look until your next appointment.

How Do I Care for my Hair after a Balayage Service?

There are so many wonderful ways to care for your partial or full balayage post service. For starters, wait to wash your hair for about 24 hours. This way the color molecules have time to lock into your hair. Then when you go to wash with a color-safe and high-quality shampoo/conditioner, your hair will be ready for it.
The next care method for preserving your color is creating a foundation of products you trust. This means your shampoo, conditioner, heat protectant, and your oil. Other items can be added in later but creating a good package of 4 quality items will preserve your partial balayage.

Next is keratins. These treatments can build keratin protein back into the hair from root to tip. By filling in the porous spaces in your hair, it means your hair can receive a full or partial balayage with even, healthy coverage. Getting these treatments is one way to ensure your colorist is happy doing your hair!

back view of woman with partial balayage hair

How to Put In Tinsel Hair and How to Care for It

Bold, bright, rainbow shimmer or subtle monochromatic hues –if you want to bump your self-care and enhance beauty at the same time, hair tinsel or “fairy hair” is a cheap and effective method for 2022.

What is Hair Tinsel Exactly?

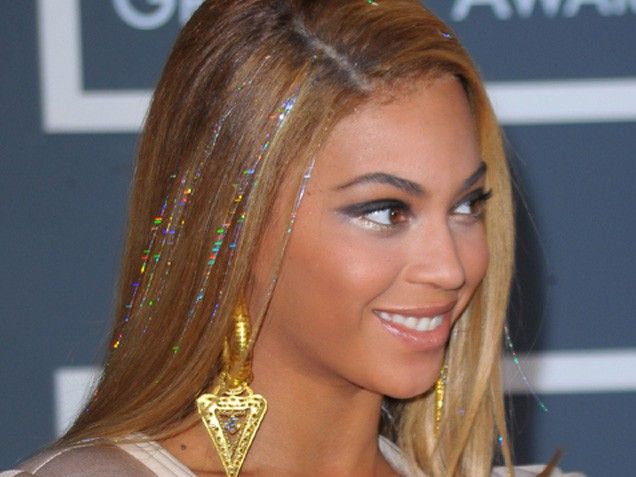
Hair tinsel is typically made from polymer fiber (a sort of plastic/fabric) or polyester, while higher-quality tinsel is made of silk. That means it’s flexible and lightweight, so it will move just like your hair without you noticing it.

It’s applied to the hair by tying it by hand or using a small hand-tied knot (or a tool to help) near the scalp. The results of the knot are so small, that the attachment isn’t noticeable. What’s noticed is the beautiful slight strand of hair that sparkles or shimmers as your hair moves.  

Beyonce with hair-tinsels in her hair

How to Attach Hair Tinsel to Hair

Now you might remember the decade encapsulating Y2K, low-rise jeans, and shimmery strands you could bead-snap into your hair using a small plastic machine of no better quality than an easy-bake-oven. But just as time improves technology, the techniques for applying hair tinsel have upgraded as well. So how exactly do you get Hair Tinsel in your hair?

For professional results, you can book an appointment with an extension expert who uses micro rings to secure tinsels near the roots. With this method, tinsel strands will last longer than when using the tie technique. It’s cost-effective as well since you’ll only need a few strands to decorate your hair in just the right way.

Knotting the tinsel to your hair by hand requires some practice to master it. The knots will hold tighter if you take one small bit of hair and only two to three strands of tinsel and tie them. Another good thing if you take less hair is that the knots will be less noticeable.

Hair Tinsel Tutorial! Video by SweetHearts Hair

If you’re into doing it yourself, there are amazing hair tinsel application kits sold on places like Amazon at very affordable prices. These are perfect for DIY connoisseurs with easy-to-follow instructions and all the tools you’ll need to get started and apply them all on your own. There are also a lot of video tutorials on hair tinsel on YouTube.

DIY SPARKLY GLITTER TINSEL HAIR Video by Sophie Hannah

How to Care for Hair Tinsel

What’s really amazing about these beautiful shimmery or diamond-studded strands, is the care. With minimal effort, you can add these to your hair without worry or concern.

After reading the manufacturer’s instructions or discussing a care routine with your extension expert, you can wash, dry, and even curl on low heat settings if the hair tinsel you get is heat resistant. When shampooing your hair, take extra care to gently massage your roots around the knots or beds.

In terms of care, hair tinsel goes unnoticed. You can treat it like the rest of your hair, so you don’t have to make significant changes in your everyday routine. But in terms of effect? These bits of gorgeous color, sparkle, or shimmer leave a significant impact.

Can You Curl Hair Tinsel or Use Flat Iron Over It?

If the tinsel you use is heat resistant, you can curl your hair with tinsel in it with a flat iron or curling wand. Higher-quality tinsels are made of silk or quality polyester fibers, which are heat resistant and can withstand the temperature of your hot tools. You can use a flat iron to straighten hair like normal, just make sure to avoid tugging on the tinsel.

Plastic tinsel can be curled by stretching. You can curl it this way even before attaching it to your hair. Apply more pressure if you want tighter curls and less pressure for softer curls.

How Long Will Hair Tinsel Stay In the Hair?

If you place them correctly hair tinsels will stay in your hair for 2-6 weeks depending on your hair type, what are they made of, and how you take care of them. Tinsels made of silk have greater durability and they will last longer in thick hair than in fine hair types.

Make sure not to tag them when shampooing and brushing hair. Put your finger to make pressure on the knot when brushing. Hand-tied tinsel may fall when the hair strand it is tied to falls out naturally. Tinsels attached as the micro ring extensions can last longer, but make sure to check them by hair extensionists periodically.

Does Hair Tinsel Damage Hair?

When attached and maintained properly and hair tinsels won’t damage your natural hair. However, you need to be gentle when shampooing your hair.  Don’t vigorously massage your roots where the tinsels are attached to your hair. For the same reason carefully comb and brush your hair and don’t brush the area behind the knots or beds to avoid pulling your hair.

As with any other type of hair extension, you shouldn’t wear tinsel hair extensions longer than two months without consulting your stylist.