How to Protect Natural Hair at Night & Preserve Every Single Hairstyle

Written by Vera Aduongo

Nowadays, I’m a lot lazier when it comes to styling my hair, but I remember when I first went natural, I would have my hair in a cute style all the time. Twist-outs, Bantu knots, braid-outs, wash-and-go’s… the whole nine! And there was nothing, absolutely nothing, that I hated more than going to bed with cute hair and waking up to a matted helmet! I had only learned how to execute the style, not maintain it. So through trial and error and pointed searches on YouTube, I finally learned how to protect my natural hair at night. After that, I was unstoppable!!

So today, let’s make you unstoppable too by showing you different protective styles for curly hair at night and when to use each one. Here’s to cute hairstyles that you can actually wear the whole week (or more)! 🥂

charming black woman sleeping

How to Maintain Curly Hair at Night:

When it comes to maintaining your natural hair as you sleep, there are 3 steps to your hair’s nighttime routine:

  1. Moisturize (if needed)
  2. Tie or braid your hair, and
  3. Cover with a satin bonnet or a scarf.

Seems simple, right? And it is simple! It varies a teeny bit, but those basic principles remain the same.

Your routine for protecting your curly or coiled hair at night will vary slightly depending on 3 things:

  1. Hair length
  2. What style your hair is in
  3. What kind of sleeper you are
  1. Hair Length

The golden standard when it comes to protecting your hair while you sleep is the pineapple, where you gather all your hair and tie a ponytail at the top of your head. If you have medium-length or really long hair, then this will work for you. But if you’ve got short hair, we’ve got to be a little more creative.

So, for everything from the TWA (Teeny Weeny Afro) to that ‘teenage phase, you may want to try banding instead. With banding, instead of trying to get your hair into one big pineapple, we’ll part the hair into sections and use elastic bands/ scrunchies that aren’t too tight to keep the hair in each section stretched. Do this all over your hair and then cover it with your bonnet or scarf.

If you’re not trying to preserve any type of curly pattern, then you can tie your scrunchie all the way from near your scalp to the ends of your hair. But if you’d like to preserve a curl or a protective style, then you’ll need to do a little bit more.

  1. What Style Your Hair Is In

Loose Natural Hair (Undefined)

If your hair is short, then all you really need to do is moisturize if needed and then put on a bonnet. Because we didn’t do anything to keep the hair stretched, it will be scrunched together in the morning, but it will be really easy to fluff using a pick and/or your hands. Since there is no curl pattern that you’re worried about losing, anything goes.

sleeping woman with naturaly curly hair

Wash-and-Go

The Wash-and-Go is very similar to loose natural hair, but this time, you’ve got hundreds of little curls, coils, or spirals that you need to maintain.

The trick to maintaining your curly natural hair at night is to make sure that the ends of your hair stay defined. When the ends of your wash-and-go still look defined, even though the middle is a bit stretched, your style will still look pretty good. So we need to keep those ends protected and find a way to retain length.

a dark-skinned teenage girl with pineapple protective hairstyle

You can opt to pineapple your hair, which will stretch the back of your hair and help give you more volume at the top. If your hair is short, you can achieve the same thing using the banding method. Then, the last step is to put on a loose bonnet. You’ll want to give your hair enough space to move around without being squished.

Pro tip: If you prefer for your hair to be flatter at the top, then instead of tying a pineapple, tie your hair into a low ponytail. Then, tie a scarf around your hair leaving out the hair in the ponytail. Top that off with a loose bonnet, so your ends have enough room, and you’ll wake up to a flat, sleeker top.

Cute Africam woman lying in bed

Twist-Outs, Braid-Outs, and Bantu Knots

You’re probably not going to like what I have to say… But the best protective style for curly hair at night is to retwist or re-braid it. So without brushing the hair out, retwist your hair into large sections and then put it on your scalp or bonnet. Aim for 10-15 twists on your whole head. The next day when you take your twists or braids down, your curls would have been preserved beautifully and will easily separate into the smaller sections that you had the day before.

Now, do you have to retwist your twist out at night? No, and the same thing goes for your braid-outs and Bantu knots.

The next best option is to use either the banding or pineapple method on large sections of your hair. These won’t do as great of a job as the retwist, but it should be enough to get you 5-7 days with your style. For the best results, when banding, wrap from near the base to somewhere near the ends. This will ensure you have bigger hair the next day. Just make sure not to wrap it too tight or you’ll lose all of your curls.

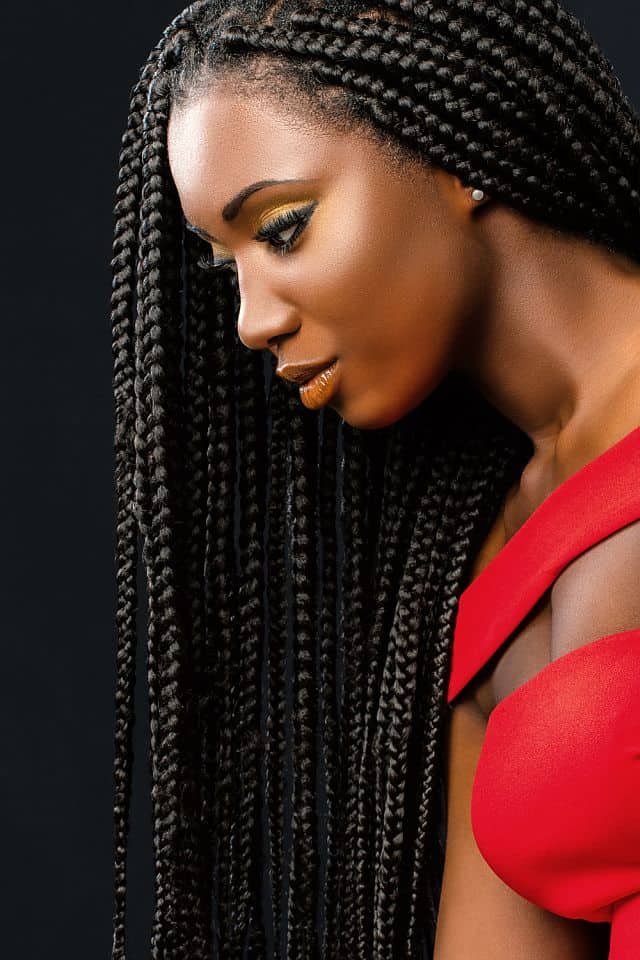
Braids, Locs, and Crochet Braids

When your hair is in these types of protective styles, they tend to remain stretched anyway, so there’s no need to do anything in that department. What we will do is get a big bonnet or scarf to cover your hair. Something big enough to accommodate all of your hair in it so that it doesn’t get frizzy.

If you’ve got human hair locs, your hair, or extensions, then it might be a good idea to moisturize your hair before you put it in the bonnet.

Related: How to Maintain Your Crochet Braids So They Last Much Longer

dark-skinned woman sleeping with braided hair
  1. What Kind of Sleeper Are You
Delicate and Dainty

If you’re one of these lucky ones, then anything goes. You can wear any bonnet or scarf. They all work. The ‘fight’ comes in the next section, where I also fall.

Rough and Tumble

Y’all! I move a lot when I sleep, so the bonnets with elastic bands don’t work that well for me. I have to use scarves or bonnets that can be tied or those with a drawstring.

So far, so good. My bonnet stays on the whole night 99% of the time. So if you’re like me, definitely try these out!

7 Tips to Grow Natural Black Hair Faster

Written by Vera Aduongo

“How do you grow natural hair fast” is a question that I get asked a lot! And I can understand why. I’ve been a natural for about 7 years now, and my hair goes past my bra strap (it would be longer if I didn’t keep trimming it), and the people asking me often want to know how they can get my results but a lot quicker. Luckily, if you implement these tips (most of which I didn’t implement in those first few years), you will get there a lot faster than I did!

Caveat: While the tips below will help you to grow your natural hair faster, there is a ceiling that your genetics place on how much hair you can grow. So for example, on average, hair grows ½ an inch every month, meaning you can reasonably expect about 6 inches of growth at the end of the year.

However, African American women have been shown to grow hair slower. Take this study, for example, that showed that our hair grew about 4 inches a year. It would appear that based on genetics, our hair just grows a bit slower. These tips are meant to help you hit your maximum growth rate, which will cause you to grow your natural hair faster. Don’t be discouraged if you feel like your hair isn’t growing as fast as you like. It will come around eventually… I promise.

So without further ado, here are my 7 top tips on how to get long natural hair fast.

young female student with long curly hair

1. Take Hair, Skin, and Nails Supplements

I mean, I’m not even fully consistent with this yet, but boy didn’t I notice a difference when I took my supplements consistently! And interestingly, I took a Biotin supplement for about a month just to get my nails less brittle, but I noticed that my hairline started to look fuller. These supplements aren’t just some gimmick! They actually work!

And studies show they are effective. My favorite is this 2012 study measuring the effect of oral supplements on women with thinning hair. The study gave one group of women an oral supplement and the other a placebo. They then measured the number of strands on a 4 cm2 area. The number of hairs in the group that took the supplements doubled in 90 days!

P.S.: You can try out one of the best-reviewed ones on Amazon: Nature’s Bounty Vitamin Biotin Optimal Solutions Hair, Skin, and Nails Gummies.

P.P.S: Supplements are NOT a replacement for a good diet. Eat as healthy as you can, to begin with, and then add on supplements to help your body fill in any gaps that might be present.

2. Nail The Art of Detangling Gently

This! If you skip all the other steps, whatever you do, implement this, and #4. Ripping through your tangles can be so tempting when you’re short on time, and your biceps are beginning to feel sore but don’t do it.

When I first started trying to grow my natural hair, I took this for granted, and as a result, my ends were horrible and tangled a lot. My hair also kept breaking. Ironically, the more tangled my ends got, the harder it was to detangle and the more impatient and rough I became. You get into this cycle that keeps you from seeing the progress you want in your hair. So make sure that you fix this.

If you have enough time and patience for it, look into finger detangling. This is, by far, the most gentle detangling, so it will allow you to keep the most hair on your scalp. If you still love your tools, look into detangling tools, such as the Felicia Leatherwood Detangling Brush and EZ Detangling Brush. Just remember to be gentle when you use these.

young student with long curly hair

3. Trim Your Ends Often

Speaking of damaged ends…. Try and get a trim every 6 months to start with. These trims usually take off the bottom ½ to 1 inch of your hair all around, which can be a game-changer if your ends are damaged, dry, and tangle-prone. If your ends are especially damaged, then you or your stylist may cut off more than that.

Then adjust the frequency of your trims once you get a feel for how long it takes before your ends are a bit ‘dusty’ again.

4. Build Consistent Wash Day & Moisturizing Routines

Consistency is the most important thing in every glow-up. Those small, beneficial habits rack up until you achieve your goal. The same principle applies when you’re trying to grow long natural hair fast.

Consistent, healthy, and manageable wash day and moisturizing routines will get you where you want to be. So take some time to map out what you’d be willing to commit to alongside your fave products and stay consistent. 

5. Protective Style A Loot!

When you’re looking to get long natural hair fast, you want to find a way to give your hair some space to grow and protect it from damage that might lead to breakage. The best way to do this is protective styling. Protective styling, when done properly, reduces the amount of manipulation your hair experiences and protects your ends from damage.

Styles such as flat twists, box braids, crochet braids, or faux locs are great options. If you’re interested in getting some crochet locs this summer, check out this article we did telling you literally everything you need to know before you get any type of crochet loc or faux loc.

6. Pamper Your Tresses with Some Treatments Once in a While

Similar to taking care of your face, your hair can benefit a lot from the occasional mask or treatment. The most common types of hair treatments are moisturizing treatments and protein treatments. These work to boost moisture levels and hair strength respectively.

If you notice that your usual moisture routine just isn’t cutting it anymore, or if it’s winter, then bust out one of your moisturizing masks.

If your hair is feeling a bit limp and kinda mushy or is breaking a lot more than usual, then it might be time for a protein boost. You’ll also want to incorporate protein treatments into your routine if you’ve had any type of chemical treatment done to your hair recently. But you can read all about protein treatments and when and how to do them here.

7. Massage Your Scalp

This one is a nice-to-have, but it makes a load of difference if you want to grow long natural hair. Scalp massages have been shown to increase hair thickness in cases with hair loss and in people who aren’t struggling with hair loss. There’s a debate out there on exactly how this works, but what we do know is it does work.

So try incorporating a 5-minute massage into your routine daily or as often as you can. Because whoever got mad at having thicker strands?!

Tip: Take advantage of your massage time to moisturize your scalp as well. Apply your favorite regular or growth oil and go to town.

Thanks for attending my little TED talk on how to grow your natural hair fast. 😁

Now go out there and be great,

XO

Dark skinned girl with long curly hair

Here’s How to Clarify Your Natural Hair the Right Way

Written by Vera Aduongo

Some terms in the natural hair space can be so sciencey. By that, I mean that they can seem like such complex ideas, so you go in expecting to get a headache. Luckily, that’s not the case with clarifying your natural hair. So today, I’m sharing my tips on how to clarify your hair the right way, answer some of the most common questions surrounding it, and tell you about the clarifying shampoo I think everyone should own.

Now, just so we’re on the same page, let’s start by explaining…

What a Clarifying Shampoo is:

Clarifying shampoos are shampoos that very thoroughly clean your hair and scalp. These shampoos can give you such an intense clean because they contain more potent cleansing agents than those found in moisturizing shampoos. Most clarifying shampoos will leave your hair feeling squeaky clean.

Happy Smiling Girl  with naturally curly hair

Can You Use Clarifying Shampoo on Natural Hair?

Interestingly, when you’re first going on your natural hair journey, you’re advised to avoid clarifying shampoos because of how dry they can leave your hair.

While I still stand by that advice, I now think that there are certain scenarios (more on that below) when it’s beneficial to use a clarifying shampoo. So I think you should keep one in your stash. With proper use, these can help you along your hair journey, not hurt it.

What’s The Difference Between Clarifying and Detoxifying Shampoos?

Clarifying shampoos tackle dirt, sweat, and product build-up. On the other hand, detoxifying shampoos eliminate toxic materials from your hair.

For example, when swimming, your hair is exposed to a toxin called chlorine, which is very drying for the hair. Using a detoxifying shampoo can help you get rid of that chlorine. Common detoxifying ingredients include apple cider vinegar and bentonite clay. So detoxifying shampoos are clarifying shampoos that give you a lil’ something extra.

And What are Chelating Shampoos?

Chelating shampoos, also known as hard water shampoos, are specially formulated to get rid of mineral buildup caused by hard water.

Hard water has a much higher mineral content than what you’d find in filtered water or water that is supplied by a city or town. These minerals form a coating on your hair, causing it to feel dry, limp, and ‘filmy’ when using regular shampoos. This coating can affect your hair’s ability to absorb moisture, leading to dryness, increased frizziness, and trouble getting hair products to work on your strands.

P.S: In case you’re wondering if you even have hard water, read this article (after you’re done with this one :))

a beautiful model with afro hair

When Should You Use Clarifying Shampoo on Your Natural Hair?

  1. If you use products that contain silicones/-cones or thick coating agents like petrolatum/petroleum jelly regularly.

In the natural hair community, silicones and petrolatum are considered the enemy! Now, I don’t think they’re that bad, but I do think it’s best to avoid them. Why, you may ask. Because these form a protective layer that’s a little too effective at keeping water from getting into your strands. The worst part is that these don’t wash off if you’re only using moisturizing shampoos, which might cause build-up. This build-up can have your strands feeling dry and breaking off.

  1. Your hair is chronically dry.

Sometimes, your hair can feel dry because of product build-up, even when you’re using natural butter like shea butter. Once they form a layer on your hair, it becomes hard for any water to get absorbed into your hair, leaving it feeling parched. So the first step to getting your hair back on track will be to strip all that product, which will allow your hair to pretty much ‘breathe’.

  1. Your hair products aren’t working anymore.

Have you noticed that one of your holy grail products just doesn’t work anymore? That might be a sign that you need to clarify your hair. When you have build-up on your hair, it interferes with how your products work.

Here’s How to Clarify Your Natural Hair Without Leaving Your Hair Stripped?

First, don’t use a clarifying shampoo unless you have to. Only pull out the big guns when you’re suspecting that you have build-up, and then you can use it ever so often to keep build-up at bay.

Ironically, use two shampoos. Follow up on your clarifying shampoo with your moisturizing shampoo. And no, don’t skip this and head straight for your conditioner. If you skip it, when you apply your conditioner and deep conditioner, your hair will still end up feeling dry. The theory on why this works is that using a moisturizing shampoo allows the pH of your hair to gradually be brought down to a level that will allow your hair to reap all the benefits of your conditioner or deep conditioner. It’s one of those “I’m not sure exactly how it works, but I’m sure it does work” types of things…

Remember to condition and deep condition your hair after you rinse out your moisturizing shampoo. Doing both will go a long way in ensuring that your hair feels great after.

Pro tip: If you notice that this still isn’t enough to restore moisture, then try a hot oil treatment right after your conditioner. Sit under a hooded dryer to amp up your results. Then continue with the rest of your routine as usual.

Lastly, don’t use these too often. Clarifying shampoos, though great, can cause more harm than good if used too often. Frequent use can leave the hair dry and the scalp flaky.

So, Here’s the Best Clarifying Shampoo for Natural Hair (IMO): Aveeno Apple Cider Vinegar Blend Shampoo

This is an all-around fave for a couple of reasons. The ACV Blend Shampoo is a three-in-one: chelating, detoxifying, and clarifying shampoo. So, it’s a go if you have hard water or swim a whole lot. The ACV also works not just to detox but also to calm down an itchy or flaking scalp. It does a great job clarifying the hair, but it doesn’t leave your hair feeling stripped. Plus, girl, the price!? It’s too good. I suggest only pulling this gem out when you need a deep clean or to maintain a build-up-free mane once every month.

How ironic is it that I’m writing this when a lot of us will be spring cleaning? Maybe it’s a sign that you should think about doing a much-needed reboot for your strands.

Till next time,

XO

Happy African-American girl with clarified hair

The Ultimate Guide on Faux, Butterfly, Soft, and Goddess Crochet Locs

Written by Vera Aduongo

Don’t you just love crochet locs?! Crochet locs came onto the scene a couple of years ago and since then, our lives have never been the same. They’re beautiful and extremely versatile, but there are a lot of questions surrounding them like how many packs to use, how to install them, how to relieve tight locs, and so much more. But first, let’s define what they even are.

What are Faux Locs, Goddess Locs, Soft Locs, and Butterfly Locs?

Faux locs are, as the name suggests, a hairstyle where one tries to emulate the look of dreadlocks without actually locing their own hair. The OG faux locs were smooth and wrapped tightly down, giving them a smooth, shiny look and feel. They were stiff when installed, only loosening up with wear. The faux locs’ overall texture becomes more natural over time. Eventually, people start to think that you actually got dreadlocks done on your hair. You can use any type of hair to achieve this look, but for a more natural look, try either Marley hair or Cuban Twist hair.

A beautiful dark-skinned girl with crochet locs

The most recent variation of faux locs that I’ve seen is soft locs. Soft locs follow the same principle as O.G. Faux Locs, but the hair is wrapped more loosely to allow it to have natural movement from the moment the locs are installed. Another plus is the texture of soft locs tends to look more natural from the get-go; it has a bit of frizz without looking messy. This may partly be because soft locs are often made with a combination of ready-made faux locs and then wrapped at the top with a lightly separated passion twist, spring twist, or water wave hair.

Distressed locs, also known as Butterfly locs, Messy faux locs and Bohemian locs, get their name because the loc is wrapped in such a way that it looks distressed or isn’t smooth all the way down. For this type of locs, you’ll use some type of water wave hair to wrap, and may also need some normal braiding hair or Marley’s hair to make the base of your locs thicker.

Goddess locs are faux locs that have some type of wavy or curly loose hair added at the end of the loc and randomly added onto the length of the actual loc. The most common “messy” hair that’s added to the loc is Deep Twist or water wave hair.

Do Crochet Locs Break the Hair?

No, crochet locs aren’t damaging, as long as they are done properly. If they’re done too tight or you neglect your hair while you have them in, then they can be damaging to your hair. So make sure they’re not done too tight (which I’ll cover later on in this article). Also, make sure to moisturize your hair and scalp regularly to avert any breakage that may result from your hair dryness.

How Long Do Crochet Locs Last?

All crochet locs except butterfly/distressed locs can easily be worn for 6+ weeks with proper care. Boho/butterfly/distressed locs will start to look really messy around Week 2, and if you can deal with that, then you can easily wear them for 4 weeks. Stay tuned for the details on how to care for them properly so that they last.

How To Install Faux Locs, Soft Locs, Butterfly Locs, or Goddess Locs?

Generally, there are 3 ways of installing all types of crochet locs:

  • Braiding your hair and then adding crochet hair to your hair and wrapping to form the loc,
  • Crocheting ready-made locs on braided or twisted hair, or
  • Crocheting ready-made locs on cornrows.

Since this hair trend has been out for a while, there are tons of companies that now offer ready-made crochet locs (recommendations in the next section). If you’re looking for the shortest installation time, then ready-made is definitely your best bet. For the most natural look, opt for either the braid-and-wrap method or the ready-made locs on individual braids or twists.

How Many Packs of Hair Do I Need for Faux Locs, Butterfly Locs, or Goddess Locs?

For Butterfly or Distressed Locs:

For medium-length/shoulder-length locs, 6-8 packs of loose hair (for wrapping) should be just fine. When purchasing ready-made locs, 6 to 7 packs should be enough for medium-width locs (different brands pack a different amount of locs in each pack, but aim for around 70-80 locs total). If you’d like small (not tiny) locs that have a natural-looking low density, 8 to 10 packs (95-110 locs) should be okay. For chunky locs, 5 to 6 packs of ready-made locs should be enough for a natural density (50 locs).

Here’s our favorite brand of loose hair: Freetress Water Wave 22” and ready-made locs: ToyoTress Butterfly Locs.

For Goddess Locs, Soft Locs, and Faux Locs:

Regardless of length, 6 packs (about 100-120 locs total) should be enough for a full look. If you want more volume, then go with 8 packs. These types of crochet locs almost always come in a small-medium size, so this estimate is for that size. If you buy loose hair, then you’ll need about 2 packs of filler hair (which can be anything) and use about 3-4 packs to wrap the filler hair and your own hair. If you want a natural sheen and some texture, opt for something like Cuban Twist hair. For the curly ends of your goddess locs, 2 packs of Deep Twist will be perfect!

Here’s our favorite brand of loose hair: Freetress Equal Synthetic Hair  Braids Double Strand Style Cuban Twist Braid 16″ (3-Pack), fave loose hair for goddess locs’ wavy ends: Freetress Deep Twist 22″ Crochet Hair, fave ready-made faux or soft locs: Youngther 14-24 Inch Faux Locs Crochet Hair 6 Packs, and fave ready-made goddess locs: Sambraid Goddess Locs Crochet Hair (14-22 Inches).  

P.S: If you have a small head, then you’ll need more packs than what’s recommended here to achieve a full look.

How Do I Keep My Crochet Hair From Being Bulky At The Base?

Crochet locs can look really bulky at the bottom where the initial loop attaches the crochet hair to your hair. There are two methods that I suggest to solve this problem:

1. When doing the initial loop at the base, only pull your hair through that loop. If you pull both your hair and the crochet hair through the loop, it will cause you to have a bulky knot at the base.

2. Try knotless crochet locs. To do this, you’ll braid your hair all the way down. Then similar to what you would do with knotless braids, you’ll add the hair a couple of centimeters into the braid.

Start by inserting your crochet hair into the braid, then place the loop onto the hook and close the latch. Pull the crochet hair through the braid. Then pull your own hair through the loop at the base of the crochet hair. Lightly tug at your braid and the crochet loc to tighten the knot at the base. Now, when you start wrapping, you’ll wrap over that base a couple of times and then move down. If you do better with visuals, check out this video:

YouTube video: SOFT LOCS WITHOUT KNOTS (MY KNOTLESS METHOD)

How to Loosen Locs That Are Too Tight?

As a rule of thumb: your hair should not be so tight that you can’t sleep or have to take painkillers to survive. One way to avoid your crochet locs being too tight is to always start wrapping the hair below the initial knot- the initial loop, at the base of your hair, that forms when you first attach your crochet locs to your hair.

But in case you already got them done pretty tight, and you’re just figuring out a way to survive, I suggest that you:

  1. Try to loosen the base of the locs. You can do this by pinching the base of your loc and slowly twisting it in the opposite direction to how the hair was wrapped. If you do this correctly, after a few twists, you’ll realize that your hair feels a lot less tight. Do this for every single loc, and they should become loose enough that you can actually lay your head down and sleep.
  2. If you want to be able to loosen the hair up, even more, take some warm water and mix that with a conditioner and a bit of oil. The warm water will help soothe your scalp and the conditioner and oil will add some slip, which should help you loosen the locs even more in Step 1.
  3. Take a Tylenol/Panadol or Ibuprofen. Yes, I know I said you shouldn’t have to take anything, but you’re already in pain, so please don’t try and suffer through it.
  4. Take a warm towel and press that onto your scalp. I can’t even fully explain to you why this helps, but when you take off that hot towel, your scalp will have calmed down by a lot.
  5. If all these steps fail, take them out. It might be hard seeing as you probably spent a couple of hundred dollars for something that didn’t even last, but keeping it in is not going to be worth it. It’s not good for your hairline or your peace of mind.

YouTube video: 7 Tips to Loosen Too Tight Braids| Locs| Twists| IMMEDIATELY

How to Keep Your Faux, Soft, Butterfly, and Goddess Locs From Unraveling?

Got2B Freeze Spray! There are many methods you can use out there to keep your ends from unraveling, but this is the safest, most convenient, and most undetectable method out there. So here’s how to use it:

When you’re literally almost done wrapping, spray the Got2B on the ends of the crochet hair and finish wrapping. Then pinch that section and hold for a couple of seconds for it to adhere properly. Another variation that will be less messy is to spray some of the Freeze Spray on your finger and then apply it to the hair.

The other methods include burning the ends with a lighter, melting the locs with a flat iron, and using nail glue. Burning your ends with a lighter and melting it with a flat iron can burn your hair and cause your locs to be “sticky” and snag easily. I don’t like the nail glue option because it’s incredibly messy (your fingers stick together), and if your glue touches your actual hair, the takedown process will be, as we say in Kenya, “premium tears”.

How to Care for Crochet Locs o That They Last Longer

For all the deets on how to wash your crochet hairstyles and how to maintain them at night, check out our previous article on how to care for crochet hair. And if you used ready-made locs on cornrows, then that’s all you will need to do.

Now, I’m going to cover the extra things you should do on top of those practices if you have crochet locs.

1. ‘Retouch’ Your Roots

If you did your crochet on individual braids or twists, you’ll need to retwist your roots to keep the style looking fresh. You can do this by applying plain water, a water-based moisturizer, or a styling product to your new growth. Then pinch your new growth and start winding the hair. Keep going until the bases of the locs start to look new again, and you can clearly see your parts. Tighten them as much as you desire but be careful so you don’t make them way too tight.

P.S: I’ve done this a couple of times when I have braids and my hair has never loc’d at the toot. Now, granted, I wasn’t keeping them in for longer than 2 months at a time, and I was also washing and moisturizing my hair.

2. Retouch Your Locs

If your locs are looking quite frizzy all the way through, then take a small piece of the exact same type of hair you used to wrap your locs and wrap it over the top half of your loc. When you’re done, your locs should look as good as new. Tip: You can skip retwisting your roots (the previous step) and just use this method to touch up both your roots and your actual crochet locs. As long as you’re comfortable with leaving your roots frizzy between retouches, then you should be fine. Just make sure not to do this a lot because it will make your roots look bulky and unnatural.

A beautiful African model with crocket locks locs

How to Take Care of Crochet Braids

Written by Vera Aduongo

It’s hard not to love crochet braids! They’re versatile, affordable, a great protective style, and they’re so easy to do, even by yourself. But you’re probably wondering what caring for your crochet braids will look like because when something sounds this good, you’re used to it not being true. That said, they really don’t take much work to maintain. So, today, we’ll run you through the basics plus how to troubleshoot some of the most common problems that people have when they wear crochet braids. After this, you’ll probably be a guru on all things crochet braids.  

How Long Do Crochet Braids Last?

Generally, they should last anywhere from 3 to 8 weeks. Some styles last longer than others, though. If you get any form of looser waves such as water waves or presto curls, then you can expect it to last on the lower side. If you crochet passion twists, box braids, faux locs, etc., then you can keep those in for much longer. Just retouch your roots occasionally, and you can get away with 6 to 8 weeks easily. Plus, you can reuse your passion twists, box braids, or Senegalese twists a couple of times.  

Cheerful woman with long crochet braids

I have had a pack of crochet box braids for the last 3 years that I’ve worn three times for about 4 to 8 weeks at a time. Now, I’m going to wash them tomorrow and install them again. So a good pair really is worth the investment!

How to Wash Crochet Braids?

My personal method? I tie my hair out of the way (in a loose bun at the top of my head), and then I shampoo just my roots.  

Pro tip: Use diluted shampoo because neat shampoo is difficult to get out of the hair. So mix 1 part of shampoo with 2 parts of water, preferably in a bottle with an applicator.  

Apply it to your roots and rub your parts gently with the tips of your fingers (not your nails). Then rinse it off thoroughly with plain water. Gently pat your roots with a towel so that any excess water is absorbed, and then you can either air dry, blow dry, or diffuse your roots. Whatever you do, make sure your hair has fully dried as soon as possible. Otherwise, you get a moldy smell that’s almost impossible to get out.  

If your crochet style requires you to use mousse and other styling products to maintain it, then you will have to wash the crochet hair too. So, you’ll have your hair down, and you’ll shampoo both your roots and your crochet hair.  

If you decide to use a regular conditioner, remember to dilute it as well and rinse it out thoroughly.  

How to Keep Crochet Hair from Slipping or Coming Out?

With some kinds of hair, your crochet knots can become loose after installation and begin to slip off of your cornrows. You’re most likely to face this issue if the crochet hair has a looser texture or if the style is very short. Because I’ve never used hair that had a loose texture or worn a super short crochet style, I’ve personally never had to deal with this problem. But you know I gatchy! So here’s what I found out:  

During installation, aim to knot the hair 2-3 times at the base. There are lots of different types of knots, including the Figure 8 knot that can keep the knots at the base of your crochet hair from unraveling altogether. But if you’re not willing to learn a new method, then you can use hair spray to hold them in place.  

Once you’re done crocheting the hair onto your braids, pull your hair taut to tighten the knots, and then spray some hair spray right on the knots. Place a clip right above the knots to hold them in place until they dry. There are other methods, but this is the easiest, safest, and least time-consuming method I found.

How to Maintain Crochet Braids at Night?

It’s easy to take for granted just how much we move in our sleep. We can be tossing and turning 40-50 times a night in our sleep. That’s a loot! Now, imagine all the friction your hair is experiencing if it’s rubbing against a cotton or polyester pillowcase. Your hairstyle will become frizzy in no time.  

To maintain your crochet braids at night, you, therefore, want to gather your hair into a pineapple or low bun and then cover that with a bonnet or satin scarf. If it’s a scarf or an adjustable bonnet, just make sure to tighten it enough so that it won’t come off in your sleep. Just don’t make it too tight, or you’ll give yourself a headache.

Beautiful dark-skinned woman with protective crochet braids hairstyle

How to Keep Crochet Braids from Frizzing?

Ultimately, the ends of your hair will get tangled. That’s just how synthetic hair is. So, every week, you should go in and trim any knots at the ends of your hair and cut out any loose strands of synthetic hair along the length of the crochet hair. Doing this will help your style look neater for longer. However, depending on the hair texture, you’ll need a couple more steps to keep your crochet hair from frizzing.  

For loose wavy or curly textures, including passion or spring twists, you’ll need to use a styling product to help tame the frizz. My favorite is mousse, but interestingly, you can also use a fabric conditioner/softener mixed with water. After snipping away flyaways and tangled ends, spray your hair with water or the water and conditioner mix. If you use water, you would apply your mousse right after this. Then smooth that into your hair and slowly separate any curls that have still clamped together.  

For box braids or Senegalese twists, you can dip your hair into hot water. With traditional braiding hair, dipping it in hot water reduces frizz and improves the overall movement of the hair. It’s the same with the crochet braid versions. The only caveat is if you choose to do the individual box braids crochet method, then make sure to dip only the sections that are below where your actual hair ends. The section above that should be maintained using mousse and trimming any flyaway strands.  

See, I told you that you’d be a guru by the end of this! Here’s to slaying those crochet braids for even longer!  

Stay tuned for our article specifically on faux locs and butterfly/distressed locs and how to care for them.    

dark-skinned young woman with hands in her braided hair

Why and How to Do a Protein Treatment on Natural Hair

Written by Vera Aduongo

Here’s the Full Low-Down on Why Protein Treatments for Natural Hair

Your hair is made up of many things, and one of them is protein. In fact, 95% of your hair is made out of a protein called keratin. So to say that protein is important for your hair is an understatement. It is absolutely crucial! The protein in your diet gets processed to make keratin, which makes your hair grow longer and stay strong.

However, certain hairstyling practices can damage our hair by interfering with the proteins in our hair. Bleaching, dyeing, excessive heat styling, relaxing and texturizing are all practices that can weaken the hair. There’s also the general wear-and-tear that can happen to our ends as our hair ages. Luckily, you can use protein treatments to help you remedy these situations temporarily.

So today, we’re going to talk about protein treatments: how they work, how to do them, and give you some recommendations on the best treatment products you can try on your hair.

Beautiful Smiling Black Woman With naturally curly hair

How Does a Protein Treatment Work?

This can get really technical, really quick, so allow us to use an analogy to explain. Let’s say you have a brick wall, and a storm comes around and damages sections of the brick wall so that some of the bricks are missing. How would you repair that wall? If the damage isn’t too bad, you’d have someone come and replace the bricks that fell out with some new ones. The wall wouldn’t be as good as new, but it would be smoother and stronger, allowing it to do a better job of protecting your property.

Got it? Now, let’s relate this to hair. The brick wall is the outermost layer of your hair called your cuticle. Your cuticle has many sections that overlap just like shingles on a roof do, and these protect the inner structure of your hair from external damage. Just like the damaged brick wall, when the cuticle is damaged, it doesn’t do a good job at protecting what’s inside, and it’s easier for things, including moisture, to easily slip in and out of the inner parts of your hair strand.

A protein treatment is the equivalent of putting in new bricks to replace the ones that were lost. Protein treatments work by temporarily filling the gaps that are present in the cuticles of damaged hair.

What Are the Benefits of Protein Treatments for Natural Hair?

Girl! There are so many benefits of protein treatments for natural hair! Protein treatments reduce breakage, which aids in length and volume retention. They can help restore elasticity. They can improve shine, reduce tangling & split ends, and make the hair smoother and more manageable.

Who doesn’t want that?!

So How Do You Know When to Do Protein Treatment on Your Natural Hair?

Generally, there are 2 ways to use protein: for periodic maintenance or repair of some damage.

If you’re looking to incorporate this into your routine to maintain your hair and not for any repair, then you don’t need to look out for any signs. Just use a low-strength protein treatment according to the instructions on the package and repeat as needed.

If you’re looking to add protein treatments into your regimen to help you make damaged hair more manageable, then you need to look out for a few things. You should consider doing a protein treatment if your hair:

  • Is brittle and is experiencing more breakage than usual
  • Is way more frizzy than usual
  • Isn’t holding the curl pattern (for curly and wavy hair types) and now looks limp
  • Is dry and struggles to retain moisture
  • Is tangling a lot more than usual and has become a lot harder to detangle
  • Feels a bit rough to the touch

You should also consider doing a protein treatment if you:

  • You have bleached or dyed your hair recently
  • Have texturized or relaxed your hair recently
  • Use heat tools such as blow dryers or flat irons frequently
  • Are transitioning from relaxed to natural
  • Have been handling your hair roughly and have noticed that your ends are damaged
dark skinned girl making selfie

What Are the Types of Protein Treatments, and How Do I Choose the Best Protein Treatment for Me?

What type of protein treatment you should use depends on whether you want to maintain your protein-moisture balance or you want to repair damaged hair.

Maintenance

For this, you’ll want to use a light protein. So opt for something with words, such as strengthening or treatments that mention keratin. These are usually light protein treatments – read the instructions to make sure.

You can get away with using these treatments every few weeks alongside having a good deep conditioning and moisturizing routine.

Tip: If you’re not sure you want to use a protein treatment at all, opt for a strengthening mask such as a henna mask. Henna molecules aren’t small enough to penetrate the hair, so they just sit on the hair, forming a protective layer around it. This layer will help reduce breakage as long as you maintain a good moisturizing routine.

Repair

Here’s where we bring out the big guns, okay? Often, for these types of protein treatments, you will have to leave the product in your hair for more than 5-10 minutes, and they’ll often require some form of heat. You’ll also know it’s a high-strength treatment because the instructions for use will tell you not to use this treatment more than once in 2 months.

Most salons will have high-strength protein treatments at their disposal, so you could always go to the salon and have a professional help you out with them.

Please note: Even if your hair is really damaged, please don’t use these protein treatments more than once in 6-8 weeks. Be patient. Your hair may get better after a couple of uses. If it doesn’t improve, your hair may be too far gone, and you just have to cut it off. And don’t skip deep conditioning and moisturizing steps either.

What Are the Best Protein Treatments for Natural Hair?

A good rule of thumb is to look for something with hydrolyzed protein. Hydrolyzed simply means that the proteins in the product are small enough that they can easily penetrate the hair strand. This means that almost all the DIY protein masks we make actually aren’t protein treatments because their molecules are too big. They may be strengthening masks, but they’re definitely not protein masks.

Best DIY Protein Treatment for Maintenance: Gelatin.

Yes, one of your fave kitchen ingredients for dessert is a great DIY option for a protein treatment. The best part? It’s a hydrolyzed protein for cheap! Mix it the same way you would if you were baking, wait until it gets warm, and apply it to your hair.

This post contains links to Amazon. The publisher may get paid if You purchase something through the links without additional costs to You.

Best Storebought Protein Treatment for Maintenance: Aphogee Keratin 2 Minute Reconstructor

This is an everybody and their mama type of product (2000 5-star reviews) because it just works! It doesn’t take long to do, doesn’t require any heat, and is light enough that it can be used frequently with a good deep conditioner and not completely mess up your hair. Apply it to freshly shampooed and conditioned hair, rinse out when done, and follow up with a deep conditioning treatment.

Best Storebought One-Step Protein + Moisture Treatment for Maintenance: Shea Moisture Manuka Honey & Yogurt Hydrate + Repair Protein Treatment.

If you’re looking to fit protein treatments into your routine in the most efficient way, then a 2-in-1 like this is your best option. You get all your hydration and strengthening at a go!

Beautiful African Woman with protein-treated hair

Best At-Home Protein Treatment for Repairing Damaged Hair: Aphogee Two-step Treatment Protein for Damaged Hair

Aphogee just knows what they’re doing when it comes to protein! This intensive protein treatment should be reserved for when your hair is really damaged, and you want something stronger to jumpstart your recovery process. Apply to freshly shampooed and conditioned hair, sit under a hooded dryer for up to 10 minutes and rinse out when done. Please don’t manipulate your hair after the treatment has started to harden. Follow up with Step 2 and rinse that out when done.

But Wait, You Need to Be Careful with Protein Treatments

If your hair is healthy and not damaged, you need to be mindful of how often you use a protein treatment. If you do it too frequently or use something too strong, your hair might move into a state called protein overload.

You’ll know that you’re suffering from protein overload because even after washing out the protein treatment and using a moisturizing deep conditioner, your hair will still feel dry and rough. Over the next few wash days after that, you’ll notice that your hair breaks more than usual, tangles more than usual, and doesn’t stay moisturized.

So please do not use protein treatments more than recommended by the product or your hairstylist.

Another thing that can help you avoid protein overload is making sure to start with light-strength treatments. So, for example, you can opt for strengthening treatments rather than protein treatments that penetrate the strands. A slight step up from that can be using a product that is both a protein and moisturizing conditioner. These can often be used a lot more, and both of those options are great for people who are just looking to maintain healthy hair.

You should only look to strong protein treatments when your hair is damaged, and even then, do not use them more frequently than recommended because they might end up doing more harm than good.

Lastly, when your hair starts to feel healthy again, please stop using the protein treatments altogether. Wait a couple of weeks and see how your hair is doing. Only use your protein treatment again when your hair has started to feel off again.

Any other questions you have about protein treatments that we haven’t covered? Please let us know in the comments below, and we’ll be sure to get back to you!

beautiful woman with protein nourished natural hair