Color Lock Hair Treatments for Vibrant and Lasting Hair Color

The coloring process involves the use of harsh chemicals, which can cause hair damage. Alkaline substances in the color mixture cause hair cuticles to lift to allow the color to penetrate inside the hair. Frequent coloring can roughen the cuticle layer, leaving your hair dry and porous. When color molecules are no longer protected within a sealed cuticle layer, your color may fade quickly.

To ensure prolonged vibrancy, as well as to avoid damage from frequent coloring, your colorist may suggest some post-color treatments to seal lifted cuticles and prevent your new color from fading.

Post-Color Hair Treatments

hairdresser looking at the color chart in the salon

Color-lock treatments are intended for use immediately after coloring to complete the color service. Your stylist will apply the treatment to wet hair after rinsing out the dye.

Color-lock treatments help close the cuticle to lock in color, untangle knots, and make hair soft and glossy. More versatile color seal treatments also prevent further oxidation by neutralizing residual dye agents in the hair. These treatments restore the natural pH levels of the hair and skin and help retain color longer.

In addition to hydrolyzed proteins, silicones, and moisturizers, color lock products usually contain an acidic ingredient that contracts and closes hair cuticles. After-color treatments are especially beneficial for high-porosity hair and when using colors that tend to fade fast, like reds.

If you dye your hair at home, Ion Color Defense After-Color Sealer is one of those post-color treatments that help to stop color bleeding and prolong its longevity.

If you dye your hair in a salon, your colorist may suggest hair gloss or hair glaze treatment to lock in your new color.

1. Hair Glazes

beautiful young woman after applying hair glaze

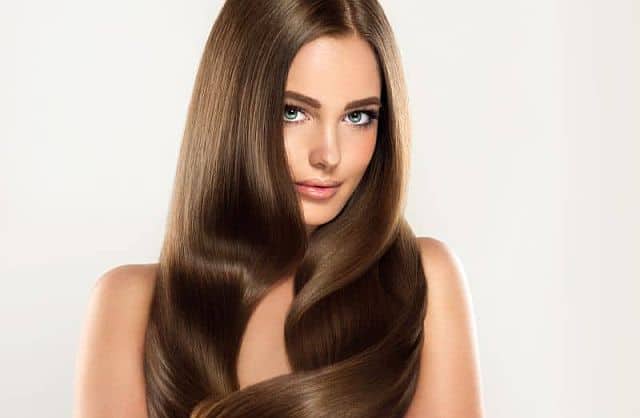
Many salons offer their clients hair glaze treatments to seal the cuticle after coloring and reveal a deeper, more intense color. Hair glaze treatments coat the shaft to enhance the effects of permanent dye, maximize shine, and help extend the life of your color.

Most hair glazing products can easily be applied at home. Simply apply the product to wet hair, allow it to penetrate for as long as directed, and rinse. The effects last up to two weeks and will give your hair a sleek look and a high-shine finish. Hask Rose Oil & Peach glaze is an affordable and easy-to-apply hair glaze that will enhance your color and add a beautiful shine.

2. Hair Glosses

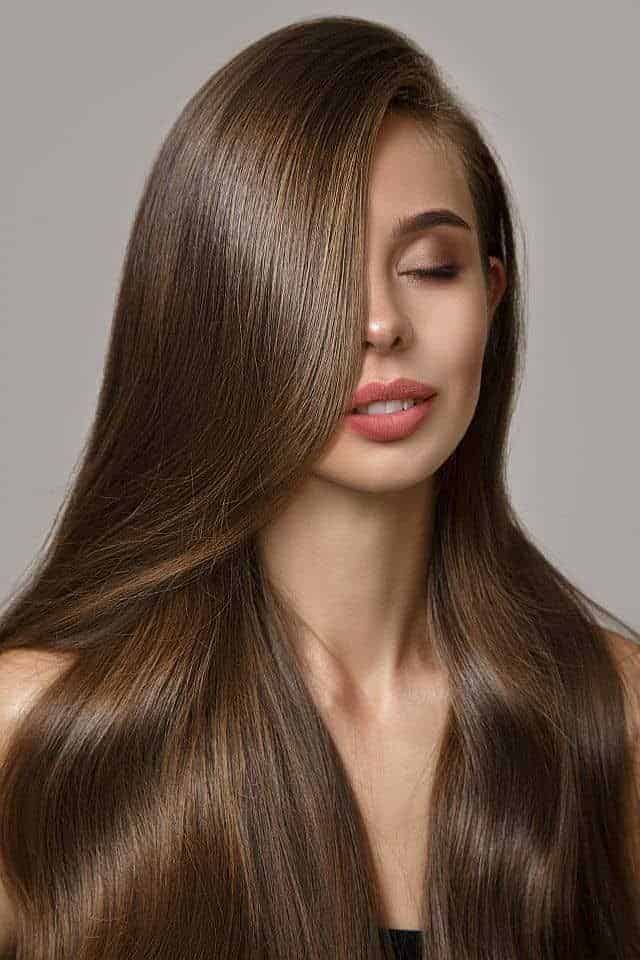
Hair glossing is a salon treatment that locks in color and adds intense shine to your hair. This treatment coats your strands without penetrating the hair shaft. Glossing products contain acidic ingredients that help smooth and tighten cuticles lifted by the chemicals in permanent dyes. Hair gloss creates a shiny film around the hair shaft to enhance the color vibrancy and add shine and softness to the hair. There are also tinted hair glosses. They deposit pigments to improve the tone of hair color and add translucent shine.

beautiful young woman after applying hair gloss

Hair glossing can be added to your hair care regimen because is easy to do at home. Make sure to follow instructions as application methods may from product to product. One of the hair glosses that is meant for use at home is dpHUE Gloss. It is available in 11 intermixable shades and the application is not messy.

The results of the glossing treatment gradually wash out every time you shampoo your hair, so the treatment needs to be re-done every 4-6 weeks if you want to maintain the effects.

How Can You Prolong the Life of Your Hair Color?

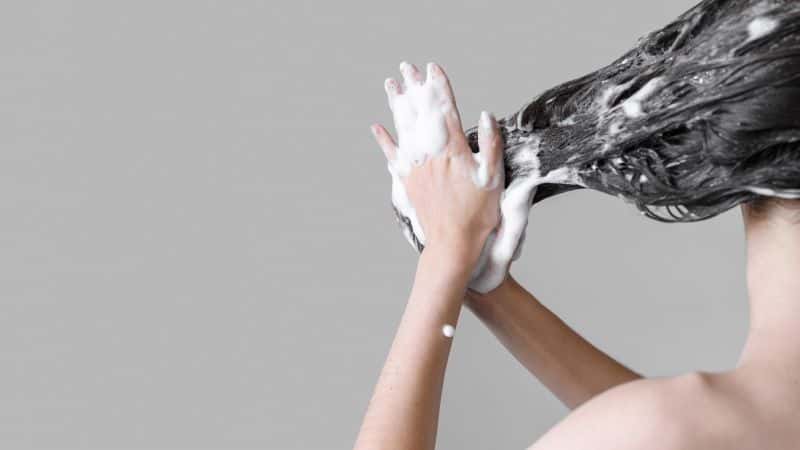
The way how you wash and style your hair can prolong the life of your color. You should refrain from frequent washing and avoid using hot water for washing your hair. Use color-safe shampoos and apply conditioner after each wash. Use hot styling tools in moderation as high heat can damage cuticles and speed-up color fading.

There are also a bunch of after-color products formulated to help lock in your color and keep your hair shiny and vibrant until your next salon visit.  Some of these color sealers for hair should be used immediately after coloring to stop the oxidative process and restore the hair’s normal pH balance. Some others are designed for home use to maintain healthy cuticles and protect hair from other environmental stressors that can affect color’s vibrancy.

1. Apply a Hair Mask for Colored Hair

Most hair masks offer a solution to a specific problem related to your hair. Masks formulated for colored hair repair damaged and weakened cuticles which help to hold the color molecules inside the hair and prolong color vibrancy. These hair masks also increase the strength and elasticity of your strands and soften hair that has been damaged by coloring. Fanola After Colour Mask is advertised to help lower pH after coloring and adds a nice shine to your hair.

A woman with long blonde hair in the salon

2. Use a Leave-In Conditioner for Colored Hair

Leave-in treatments designed for color-treated hair help seal the cuticle to keep color molecules inside the hair and prevent color from fading. Leave-in products for colored hair use amino acids, nourishing oils, antioxidants, and sunscreens to protect stressed hair from keratin damage and keep the cuticles healthy and flexible. Leave-in conditioners keep colored hair moisturized, help tame frizz and flyaways, and improve softness and manageability. They also protect hair from damaging UV rays and other environmental factors that can cause fading. Amika vault color-lock leave-in conditioner is advertised as capable of protecting the hair against UV-B damage, keeping colors vibrant, and enhancing hair’s overall health.

a young woman with salon colored hair

Pre-Color Hair Treatments for Perfect Color Results

Coloring your hair may seem like a straightforward process, but it can be challenging if your locks are not in optimal condition. While healthy hair is generally easy to dye, some types of hair can be very stubborn or unpredictable when it comes to taking hair color.

  • Over-processed or damaged hair is highly porous and may process color too fast, resulting in a darker color than desired. Damaged areas such as dry ends suck up hair dye, which may lead to uneven coverage.
  • Low porosity hair is resistant to absorbing chemical treatments, and processing time may take longer than with normal porosity hair.
  • Coarse gray hair is more resistant to dyes, so you may find it difficult to get full coverage.
a beautiful young woman sitting with hand on her chin

If your hair doesn’t absorb dye well, you must take some additional steps before color application to ensure that you will get the desired shade and even coverage. Some pre-color treatments are designed to remove all kinds of buildup to create an optimal base for color application. This helps to ensure that the color is deposited evenly and enhances vibrancy.

You must also protect your scalp and hair from chemical damage, especially if you color your hair regularly. The good news is that a variety of pre-color products are available to help you counteract the harmful effects of dye chemicals. Some pre-color treatments are also meant to protect your scalp from irritation and reduce chemical damage to the hair.

Types of Pre-Color Treatments

1. Hair Clarifying Treatments

Your hair shouldn’t be perfectly clean before coloring. Natural oils form a protective barrier that helps reduce scalp irritation and reduce chemical hair damage. However, if you have build-up from too many styling products, previous coloring, or environmental factors, you need to clarify your hair before coloring. Clarifying treatments performed two days before coloring ensure that the color will adhere better to your hair. Clarifying and chelating shampoos are commonly used to remove product and mineral buildup and allow color molecules to enter the hair shaft.

Many products are designed especially to prepare your hair for vibrant, long-lasting color. Malibu C Color Prepare and MADISON REED Prime for Perfection Hair Color Primer are some of the popular color primers. If you use these products, make sure to follow directions and apply them within recommended time before getting your hair colored.

woman using a clarifying shampoo in the bathroom

2. Protective Pre-Color Treatments

These treatments are especially important for coloring processes that involve bleach. They help minimize damage during the coloring process and strengthen your hair. Pre-color serums massaged into the hair before coloring act as a barrier between harsh chemicals and the most fragile areas of your hair.

Some pre-color products (like Follicle Guard Pre-Color Treatment) are meant to be applied before the coloring process to coat the scalp and prevent chemicals from reaching hair follicles.  

Coconut oil pre-color treatment is an efficient, affordable, and easy-to-apply pre-dye treatment. It is especially effective for high-porosity hair. This oil can penetrate the hair shaft and prevent hair damage. Make sure to apply coconut oil the night or at least several hours before you color to allow your hair to fully absorb it. Concentrate on the dryest and most porous area of your hair. Don’t rinse the oil before coloring.  

3. Hair Porosity Equalizer

These pre-color treatments balance the hair’s porosity before the coloring or lightening process to ensure more even color distribution. Protein-rich pre-color treatments help reduce porosity and smooth dry, overly porous hair. Such hair will absorb color evenly from roots to ends. Colorful Neutral Protein Filler is a well-known porosity equalizer that protects hair from damage, repairs broken bonds, and ensures even color absorption.

Protein-based porosity equalizers are not suitable for low-porosity hair. Low-porosity hair needs to be treated with alkaline solutions or heat to temporarily lift the cuticle and prepare the hair to absorb dye.

4. Pre-Color Treatments for Gray Hair

Gray hair often resists coloring and may need more time to fully absorb the dye. Washing with a clarifying shampoo before coloring dissolves excess buildup and makes it easier for dye molecules to penetrate your hair.

Very stubborn gray hair must be pre-softened before coloring to achieve full coverage. You should apply a 20-volume hydrogen peroxide developer and let it sit in your hair for 5-10 minutes. The developer lifts the cuticle for better color penetration. Rinse out the developer and dry your hair before color application.

middleaged woman with grey hair preparing the hair for coloring

5. Hair Color Removers

Color strippers are designed to remove the color buildup from previous colorings or remove unwanted hair dye to create the optimal base for a new color application. If your hair has undergone many coloring sessions, this will make it easier to get the color you want.

What Hair Color Primer to Use for Your Hair?

Pre-color primers are versatile products that provide multiple benefits for hair dye addicts. Your stylist will select the optimal pre-color treatment based on the condition of your hair and the brand of hair color that you are going to use.

Most pre-color primers can be used at home. Some pre-color treatments work better when the heat is applied, while others don’t require any heat to be effective. Always make sure to read the instructions because application methods may differ for different products. Pre-color treatments that come in a spray bottle are the most convenient for users.

If you are planning to do the dying job yourself, you can’t be wrong with coconut oil. To get the most benefits, choose virgin coconut oil, which is made without chemicals.

young woman in a hairdressing salon dyes her hair blond

Protein Fillers for Perfect Color Results

Multiple bleaching and coloring can leave your hair extremely dry and over-processed. When hair cuticles are damaged, color molecules are not tightly locked inside the hair shaft, and can easily be washed out with shampoo. Plus, overly porous hair absorbs color well in some places but not in others. You need something to help improve your hair color results and seal in color to ensure greater color longevity.

The solution to your problems is simple and very affordable- a protein filler for hair. This miracle product has been for a while a preferable way to prepare porous hair for coloring and help it to absorb the dye more evenly.

A porosity-equalizing hair filler contains hydrolyzed proteins that cling to your hair and fill in the areas of porosity, leaving your strands thicker and smoother.

Woman with beautiful hair color after using protein filler

A protein filler is often used before the color process to protect the hair from chemical damage and prevent uneven color results. This product comes in either clear or tinted versions, but the clear or neutral shade is the most common and simplest to use.

The most popular product in this category is the Neutral Protein Filler by Colorful. This protein filler is exceptionally effective on porous hair that doesn’t take the color evenly. It is affordable and very easy to use if you prefer doing your coloring job at home.

Benefits of Using Neutral Protein Filler

Allows for even penetration of the dye: Most damaged and porous areas of your hair will process color too quickly, making your color results uneven. When applied before coloring service protein fillers reduce hair porosity, preparing your hair for more even color absorption.

Protects against chemical damage: If your hair is badly damaged from using bleach, it will repair some previous damage and protect hair against future chemical damage.

Better and longer-lasting results: When applied before coloring, protein fillers help porous bleached hair take color more uniformly and help lock in the color for longer.

Consistent results: The color will look close to the color on the box, regardless of damage from bleaching or previous color build-up.  Protein fillers make your dying job much more effective, enabling you to get professional results at home.

Improvement in overall appearance of the hair: Protein fillers fill porous ends, add a lustrous sheen, and make hair look healthier and thicker.

How to Use a Neutral Protein Filler

The most common way to use this product is as a pre-color treatment, especially if you suffer from porous hair. This could be a miracle product for you, but you must use it properly.

1. Pre-color treatment: Apply the filler evenly throughout your clean, towel-dried hair, and let it sit for about 20 minutes. Do not rinse the product from your hair. Apply the color as usual. After rinsing the color follow up with a moisturizing conditioner.

Some people are curious if they get even better results if leave protein filler in their hair for longer. The answer is no. 30 minutes is the maximum time because anything longer can lead to protein overload and hair that is brittle and weighted down.

Many users have reported good results when 1-2 ounces of the protein filler are added directly to the color mixture. However, according to the instructions, applying this product as a pre-color treatment will ensure the best results.

The product is pretty runny. You can transfer it to a spray bottle for easier application.

Fashion girl colored hair after using Neutral protein filler

2. Protein repair treatment: Neutral protein filler can also be used as a conditioner treatment simply by mixing 1 ounce of water with 2 ounces of neutral protein filler.  Work the mixture into towel-dried hair, leave for around 20 minutes and rinse. The protein filler will restore the keratin stripped out of your hair, making your strands feel stronger and healthier. This treatment is highly recommended for hair that feels overly porous and damaged due to previous relaxing and bleaching sessions.

Do this repairing treatment once a month between colorings to compensate for the protein that has been lost from your hair over time and to keep your hair in good condition.

Precautions: As a protein treatment, Neutral Protein Filler works exceptionally well for hair that craves protein. However, do not use a protein filler more than once a month to avoid overloading your hair with protein. Some people may go into protein overload when leaving protein treatment in their hair for longer than recommended. Too much protein in the hair can cause the opposite effect and your hair will become inelastic and break easily.

Any kind of protein treatment should be followed by a moisturizing treatment to replenish lost moisture in the hair.

Make sure to refrigerate any leftover conditioner. Once the formula has been diluted, bioactive ingredients may spoil quickly.

Color Protein Fillers

Professional protein fillers come in various colors, but be aware that the shade you will get is not the same color you see in the bottle. Besides helping with color absorption and providing protection against hair damage, color protein fillers add missing color back into the hair and help counteract unwanted undertones. They also help color last longer and make it easier to manage some problematic hair colors, like red.

A woman with long hair and perfect color results

Some common examples:

1. If you want to take your over-processed, bleached blonde hair to a red or brown shade use red protein filler to help cut any greenish color and counteract orange tones.

2. When dying your hair white blonde use platinum protein filler (which has purple color) as a pre-treatment to avoid any brassy tones and to get a cooler shade of platinum.

The application can be messy. The easiest way of application is to add the product to your color mixture and leave it in your hair during showering.

Before using a protein filler with color for the first time, you should consult an experienced colorist to help you start.

A woman with red curly hair

Hair Color Removers- Benefits and Limitations

What is Hair Color Remover?

An artificial hair color extractor, also called hair dye remover or hair color stripper, is highly effective and one of the least harmful ways to remove artificial color pigments from your hair. If your desire to look like Gwen Stefani’s platinum pixie transformed into a “Yellow Submarine,” then read on!

Stealth Haircare Health: A color stripper is specially designed to remove oxidative (permanent) dye from the hair. Color-removing products generally don’t contain ammonia or bleaching agents. If you select the right brand and only use the product occasionally, it won’t cause significant damage to your hair.

Common Sense about the Scents: Color removers are suitable for use at home, but ensure that you carefully follow the directions and apply the product properly. The strong sulfur smell might be difficult for some people to tolerate.

A girl with wet hair after removing color

When Do You Need to Use a Color Stripper?

1. Color Chaos to Get Rid of Unwanted Color: If you tried a different brand of your desired shade and it came out darker than you wanted, a color stripper is your new BFF! Or, if you dyed your natural blonde hair a darker color, but don’t like the results, consider a color stripper as your rescue ranger! In either case, a hair dye remover is the most effective way to reverse an undesirable color application and achieve a good base for a new color.

2. Pre-treating color remover: This product can be used to remove the build-up of previous color applications, making your hair ready for re-coloring and achieving the shade of your choice.

Color removers without bleach: Color Oops Hair Color Remover, VANISH Color Corrector, PRAVANA Artificial Hair Color Extractor, and Salerm Color Reverse. These products are kinder to your hair than peroxide-containing formulas.

Brands that contain bleach: Some brands like the L’OREAL Effasol Color Remover, Colorist Secrets Haircolor Remover, and Wella Color Charm Color Remover contain bleach in their formula.

Makeover Moments: How Does a Color Remover Work?

During the processing time, the color remover works by 1. Entering the hair shaft 2. Then breaking down the large color molecules that are deposited in the hair by oxidative hair dyes.  The particles of color molecules become small enough to be washed out from the hair. This product will not only remove the synthetic pigments from the last color you applied but also from all the previous dyes, too.

Bleaching Briefs: Dye remover won’t lighten your natural hair color because it doesn’t contain bleach (there are some exceptions). This product is designed to only remove previously applied permanent hair dye pigments, without bleaching.

Here’s a bleaching brief: This product won’t work if you’re trying to restore your original natural color and you’ve used bleach in the past. Color remover won’t restore your hair to its pre-bleached color because the natural pigment within your underlying virgin hair has been lightened and altered. Dye remover will remove all the artificial dye from your hair and reveal the underlying lightened base.

Don’t expect a beautiful color after the color-removal process is completed. However, you can attain the perfect base to dye your hair again to achieve your desired color. That is what this product is designed for.

Color Chameleons: Those who want to return to their natural color may be disappointed by the results. Many people blame their color remover for leaving warm undertones (This is why you hardly ever see a highly-rated color remover). However, these undertones may be the result of the previous dying processes. Past underlying permanent dyes may have lifted some of the natural pigments present in your hair and the color extractor just revealed this unsightly hair.

Color Transformers: Will a Color Remover Strip a Semi-Permanent Color?

This unique product doesn’t work on intense colors such as blues, bright reds, pinks, purples, or greens. It only works on dyes that use peroxide developers, so it’s ineffective at removing direct dyes like henna and other plant-based colors, as well as semi-permanent or temporary colors.

Rainbow guys and gals have color-stripping products formulated for their needs. Direct dye removers help get rid of semi-permanent colors and allow for more experimenting with fashion colors.

To summarize the typical color chameleon facts,

  • The outcome depends on your natural color and your hair coloring history.
  • If you have been dying your naturally brown hair black, it may turn out a reddish-brown.
  • If you have been dying your naturally golden blonde hair a dark brown, you probably will end up with a slightly reddish blonde.
  • If you have been dying your naturally dark hair a lighter shade, a color remover likely will alleviate the artificial dye from your hair and reveal the lightened base.
  • If your hair was partially gray before permanently dying in a darker shade, your white hair will possibly turn orange. You may need help from your colorist to recolor or make the transition to your naturally gray hair.

Damage Control: Is a Dye Remover Damaging to Your Hair?

For the down low on damage control, keep in mind that color strippers remove only the artificial dyes without altering the structure of your hair. Using them is less damaging to your hair than applying bleach or ammonia-based products. However, subjecting the hair to shampooing multiple times and a lot of warm water rinsing can strip natural oils and leave your strands feeling dry. Make sure to do deep conditioning treatment to help your hair to restore moisture and softness. Do damage control to keep your hair on a hot roll!

If you only use a hair color extractor occasionally, you shouldn’t experience any serious damage to your hair. However, overusing color-stripping products can leave your hair dry, porous, and prone to breakage. Another potential unwanted effect is faster color fading because color strippers may leave the cuticles lifted.

To preserve the integrity of your hair, use hair color removers in moderation and choose a brand that doesn’t contain bleach.

How to Use Color Removers

a girl searching for information on her phone

Read the instructions: Read the instruction carefully to get the most out of the product and minimize unwanted effects. Some color removers are supposed to be used in a well-ventilated room. Some others work better in a warm room. So, you must read the instructions carefully to choose an appropriate environment as every product is different.

Protect your skin and your place: Color removers should be applied to dry, unwashed hair. The protective oil coating helps prevent skin irritation. Also, protect your clothing and nearby surfaces as the product could stain them. Always wear gloves and use the applicator bottle provided or ensure that all items used are made of plastic or glass.

Application stage: You need to follow directions and prepare the product in order to cause a chemical reaction that will strip the unwanted color. In this, stage you need to work fast because once the product is activated it will start losing its effectiveness. Using a tint brush immediately apply the mixture to the hair. If you have long hair, you may find it easier to pour the product into your gloved hand and apply it with your fingertips. Use a wide-toothed plastic comb to ensure even distribution.

Processing stage: Once the hair is well saturated with the mixture, put a processing cap over your hair, and leave it as long as directed. If instructions say to apply heat for the recommended time. You can use a blow dryer to keep your hair warm. Applying heat helps open the cuticle and accelerate color removal. If you don’t use the blow dryer, wrap the plastic cap with a towel to keep your hair warm.

The rinsing stage: This is the most important part of the process and must be done properly. During this step, you wash out the color particles from the hair. Shampoo and thoroughly rinse by directing the water into the hair multiple times. Follow each shampoo with a long warm rinse to keep the cuticles open. If you don’t rinse your hair well enough, the color particles that remain in your hair will oxidize in the air and expand again. When you do not completely flush color particles out, you may experience unwanted re-darkening and return to the unwanted color within 24-48 hours after use. The extra rinsing also helps with washing away the strong, unpleasant smell of the product.

Apply conditioner: Your hair will be a bit dry after multiple shampooing, so apply a good amount of conditioner and leave it for several minutes to combat the dryness.

Recoloring

Although the directions on the box say that you can dye your hair the same day, I would recommend letting your hair rest for several days before dying it. If your previous color applications left your hair dry and overly porous, this condition will become even more obvious after using a color remover. If you choose to apply permanent hair dye immediately following the color removal process, you need to select a color that is at least 2 levels lighter than you want, because the coloring of extremely porous hair will produce darker and more intense results than desired.

If you wish to re-color your hair the same day, it is advisable to apply a temporary or semi-permanent hair color closest to your natural shade and wait at least a week before applying a permanent dye. Use this period to recover your high-porosity hair to recover and replenish some moisture.

Use neutral protein filler to seal the cuticles and equalize hair porosity before applying a new color.

If you decide just to wait for the roots to grow out, using a “purple” shampoo will help keep the brassiness away.

attractive woman with ruby hair color

Should You Choose Ammonia-Free Hair Dyes?

More and more people are coloring their hair these days, which has allowed for the range of colors and types of hair dyes to expand rapidly. Unfortunately, the number of harmful substances in hair dyes is also growing at the same rate.

Ammonia is one example of a harmful chemical widely used in hair dyes. This chemical is a growing danger to stylists, their clients, the environment, and even the ocean. With roughly 60% of women coloring their hair regularly, along with an increasing number of men doing the same, ammonia-based dyes are negatively affecting our entire ecosystem.

Is Ammonia Harmful to Hair and Scalp

When dissolved in water, ammonia forms ammonium hydroxide, which is irritating to the skin. Ammonia in hair dyes is applied to the human scalp. Ammonia can cause skin redness, itching, burns, and discomfort. Once absorbed through the skin, ammonia will eventually enter the bloodstream.

hairdresser dying client's hair in the salon

Ammonia vapors can irritate your eyes, throat, sinuses, and lungs. Ammonia can cause breathing difficulties as well as exacerbate respiratory health problems.

In addition to a strong offensive smell, ammonia is harmful to crops, forests, and marine life.

By choosing ammonia-free hair products, you can rest assured that you are not inadvertently releasing pollutants into the environment.

Why is Ammonia Used in Hair-Dyes?

In hair coloring products, ammonium hydroxide is used to support the lightening action of hydrogen peroxide and to prepare hair to accept color pigments. The alkaline properties of ammonia raise the cuticle and allow peroxide and dye molecules to penetrate the hair shaft.

Ammonia is highly efficient for permanent color changes. In the past, it has been the only option for providing full coverage of gray hair.

How does Ammonia Damage Hair?

Ammonia is used in hair dyes to open the hair’s cuticle, preparing the shaft to accept dye molecules. However, after repeating coloring with ammonia-based dyes, the cuticle layer is disrupted to such a degree that the scales cannot close back completely and hair may become dry, porous, and brittle. Natural moisture will continue to escape due to raised cuticles, while external moisture can easily enter and swell the hair shaft, leading to frizzy and unmanageable hair.

At the same time, the new dye doesn’t last long because the color molecules can escape through the raised cuticle. That is why the color washes out more quickly, and may even turn into a different and undesirable shade. As a result, you will need to apply color more often.

How does Ammonia Affect the Hair over the Long-Term?

The corrosive feature of ammonia destroys an amino acid called tyrosine in the hair shaft. Tyrosine regulates the production of melanin, and it is responsible for holding onto color—both the new and old. When tyrosine is destroyed, the hair’s ability to hold the color is significantly reduced.

Frequent coloring may cause irreparable damage to the hair shaft. The hair cuticle cannot lay flat because the ammonia makes the pH level of the hair more acidic. This causes changes in hair texture and leaves your strands porous and more fragile.

Switching to ammonia-free dyes helps preserve the integrity of your hair, reduces hair susceptibility to lose color, and makes your locks appear smoother and shinier.

Are Ammonia Alternatives Safe?

Depending on the brand, the ingredients used to replace ammonia are:

  • Ethanolamine (also called monoethanolamine)
  • Cocamide MEA
  • Aminomethyl propanol (AMEA)

Ammonia-free dyes are not as natural as the manufacturers want a buyer to believe. Ammonia substitutes are popular because they don’t release a strong smell during the coloring process, but they are also just chemicals that act the same way as ammonia.

Ammonia replacement used in non-ammonia formulas such as ethanolamine can also be damaging to the hair when used at high levels.

Young blonde woman with curly up-do

How to Get Vibrant Hair Color without Using Ammonia-Based Hair Dyes?

  1. If you want to try color without fully committing to regular coloring, use temporary or semi-permanent hair dyes.
  2. If you are going darker, use a demi-permanent color.
  3. To correct/refresh the tone, apply hair gloss or hair glazing treatment.
  4. To combat brassiness, use purple hair shampoos.
  5. To prolong the time between salon visits, use temporary root touch-up products.
  6. Try ammonia-free permanent hair dyes.

Ammonia-Free Permanent Hair Dyes

The following brands don’t use ammonia in their formulation and are advertised to give you a long-lasting color without using harsh chemicals:

Light Mountain Natural Hair Color & Conditioner is an all-natural hair color and conditioning program free of ammonia, peroxide, and other synthetic ingredients. The formula utilizes organic Henna and other organically grown botanicals. The downside is that the application is messy and time-consuming.

Shea Moisture Hair Color System doesn’t contain ammonia and uses natural and certified organic ingredients such as Organic Shea Butter, Flax Seed Oil, and Soy Proteins to minimize chemical damage and improve hair manageability and appearance. This permanent color system provides full gray coverage and can lighten hair a few shades.

Naturtint Permanent Hair Colors contain active plant-based ingredients and use ethanolamine as the alkaline medium to open the cuticle and to create a space for the micro-pigments to penetrate. The formula is claimed to provide gray coverage in one application, giving you vibrant color for up to 5 weeks.

Bigen Permanent Powder Hair Color provides lasting, rich color with excellent gray coverage without ammonia, peroxide, or other damaging chemicals. This deposit-only color contains seaweed and oriental berry extracts and leaves your hair looking smooth and shiny. The powder formula is activated by water and the entire process takes only 20-30 minutes. It works well for covering stubborn gray hair. The downside is that it can cause allergic reactions in some people.

a blonde woman shopping for hair dye

How to Minimize Damage to Your Hair from Bleaching

What is Bleaching?

Bleaching is an oxidation process that lifts the original hair color from your hair. Bleaching chemicals penetrate the cuticle and degrade existing hair pigments, thus removing the original color from the strands. This process turns your hair white or colorless. Bleaching kits contain bleach in powder form and a cream developer with hydrogen peroxide that must be mixed with bleach to activate it.

The outer hair cuticle needs to be lifted to allow penetration of the bleaching solution into the hair shaft. During the bleaching process, the hair color changes gradually. Depending on your natural color, your hair may go through many stages of brown, red, orange, and yellow before reaching a white-blonde shade.

Gorgeous woman with bleach damaged hair lying at the shore

Possible Damage to Hair from Using Bleach

Unfortunately, bleaching agents don’t only affect color molecules in your hair. The bleaching process also weakens protein bonds, making the hair brittle and more fragile than before. The hair’s natural keratin is also weakened, resulting in structural damage to the hair.

Bleaching strips your hair of its natural oils that keep your strands healthy and moisturized. Bleaching chemicals can weaken the cuticle scales, leaving the inner core of hair exposed and prone to moisture loss. This leaves your hair feeling dry and overly porous.

In conclusion, bleaching is a harsh process that can leave your hair overly dry, brittle, frizzy, susceptible to tangling, and more prone to breakage, static, and split ends than previously.

Related post: How to Keep Your Bleached Hair in Good Condition

How to Minimize Risks of Damaging Your Hair

If you have been thinking about bleaching your hair, it is always better to consult a professional, especially if your hair is on the darker side. After the initial transformation, you can try to save money by touching up your roots at home.

However, if you bleach your hair at home, be aware that bleaching is a risky and time-consuming process that requires the use of proper techniques and the right tools to avoid long-term damage.  Here are a few helpful tips before you start.

1. Avoid drugstore brands of hair as they can cause severe damage and opt for professional-quality products available in salons or reputable beauty shops. Quality bleaching products also contain nourishing ingredients and conditioning agents in their formulation.

2. It is advisable to use the lowest volume which should be effective in removing your original color but is still gentle on your scalp and hair. Use no more than a 20-volume developer for light brown and dark blonde hair, while medium-dark and deep red hair need a 30-volume developer to be effective. If you want to go from dark hair to white blonde, you will need a more intensive bleaching treatment and professional help.

3. After selecting the right volume of the developer, you need to properly adjust the time to get the desired blonde shade. Leaving the bleach in your hair too long will fry the hair. If your hair is not completely lightened during the recommended time, rinse the chemicals out and reapply the bleach a few days later.

Beautiful woman with lightened hair taking a selfie

4. When bleaching dark hair, you should gradually lighten it before reaching a blonde shade. A resting period of at least a week between bleaching sessions will give your hair some time to recover from damage. Deep conditioning treatments work well between bleach applications.

5. If your hair has recently been permed or chemically straightened, bleaching can lead to excessive hair damage. It is advisable to wait at least two weeks for your hair to heal before putting it through the bleaching process.

6. Don’t wash your hair a day or two before the bleaching session. Let the protective coating of your natural oils prevent scalp irritation and protect your hair from over-drying. Paint your roots close, but don’t apply the mixture directly onto the scalp to avoid chemical burns.

7. Make sure to do a deep conditioning treatment one or two weeks before your bleaching session. Building up moisture in the hair before bleaching will minimize damage and help preserve the integrity of your hair.

8. Coconut oil pre-highlight treatment will protect your scalp and hair from burns and damage caused by bleach. Cover your hair with coconut oil and leave it overnight or at least an hour before bleaching. Apply the bleach with the oil still in your hair.

9. Make sure to rinse off the bleach solution completely from your hair. Any remaining chemicals in your hair can cause scalp burns and further damage to the hair.

10. Use a protein filler to balance out porosity, reduce the damage, and spread color more evenly.

11. For managing newly grown hair, apply the bleach only to the new growth and avoid putting the formulation on hair that’s already blonde to avoid damaging it.

Importance of Using Olaplex

The best way to protect your hair from the damaging effects of chemicals in the bleach is to use OLAPLEX Bond Multiplier. Olaplex works to minimize damage and repair the hair during the bleaching/coloring service. Olaplex No1 Bond Multiplier added to your lightener/bleach allows the hair to be lifted higher without serious damage. Olaplex reconstructs the previously broken bonds and protects your strands from further damage, enabling you to grow longer healthier hair.

A range of different bond multipliers has been introduced recently for a similar purpose – to protect hair from chemical damage and prevent breakage after coloring, bleaching, and texturizing treatments.

Smiling blonde girl sitting on the floor

Six At-home Hair Glaze Products

Hair glaze refers to a hair treatment that uses lightweight, water-soluble silicones to smoothen and coat the hair cuticle, thus enhancing its shine. The treatment softens and nourishes the hair leaving your strands healthy and shiny.

There are two types of Hair glaze: Clear and Tinted versions. Clear glazes soften your strands, enhance hair’s natural tone, and restore shine to dull hair. On the other hand, color-reviving glazes contain color pigments added to restore and maintain hair color, while adding a translucent coating to the hair shaft.

The effect of the glazing treatment will fade out gradually after washing several times with shampoos.

The Benefits of Using a Hair Glaze

a beautiful woman with shiny hair

Glosses and glazes are less intrusive than permanent dyes as these shine-enhancing products do not use ammonia and other harmful chemicals.

Hair glaze is a great add-on service that helps to seal freshly applied hair color into each strand, making it bright and glossy, and more long-lasting.

Applying a glaze can refresh faded colors or highlights, postpone further fading, and stretch the time between dye-job appointments.

The glaze puts a protective coating on the hair that shields the hair from external environmental factors that can fade hair color.

Hair glaze will infuse your dull and lackluster tresses with a burst of shine, giving your hair a gorgeous glow.

Hair glazes provide a gentle conditioning treatment for damaged hair; they also fill and smooth the porous cuticles and help the hair look and feel more beautiful.

Hair glaze treatments help minimize frizz and tame puffiness, making your hair soft to the touch and smooth.

At-Home Hair Glaze Treatments

Hair glazing used to be a salon-only treatment, but now you can purchase hair glaze products at your local beauty store and treat your hair at home. This is a great alternative to expensive salon glazing services; you will save your time and money while creating an effect similar to professional glazing services.

These products can be used on all hair types and textures, including color-treated, highlighted, and virgin hair. Hair glazes contain no ammonia or peroxide and they generally won’t harm your hair as long as you stick to the package instruction. They are rather inexpensive, easy to apply and maintain, and just as effective as the ones found at salons.

How to Apply Hair Glaze

In most cases, hair glaze is applied to clean, wet hair and left in for up to 20 minutes before it is rinsed out. Some hair glazes are heat-activated while others contain penetration enhancers that will give you desired results without the use of heat. Generally, hair glazes should be applied using a color brush to ensure that every strand is covered with the product. The product needs to be applied slightly below the roots, paying attention to the ends.

For tinted glazes, it is important to use gloves and thoroughly wash any area of skin that comes in contact with a glaze to avoid staining the skin. Make sure that the product is fully rinsed out from the hair.

Below are several popular home glaze products that will extend the life of permanent hair color and keep your strands silky and shiny for weeks. Keep in mind that the terms “glaze” and “gloss”, as used in these shine-enhancing products, are often interchangeable.

Best At-Home Hair Glaze Products

This post contains links to Amazon. The publisher may get paid if You purchase something through the links without additional costs to You.

1. John Frieda Liquid Shine Clear Hair Glaze

This ammonia/peroxide-free formula enhances hair shine without affecting hair color. It improves texture for silky smoothness by filling in damaged areas inside the hair. This light silicone-based product gives hair a silky and smooth feeling without weighing hair down or leaving a greasy residue. It provides immediate shine, helps tame frizz, and improves the appearance of your hair.

This clear glazing treatment can be used to boost hair shine for every shade of color-treated, highlighted, or natural hair. It is easy to use and makes no mess in the shower. It can be left in the hair for several minutes after your shampoo and conditioner or can be used once a week as a 20-minute shine enhancement treatment.

2. John Frieda Brilliant Glaze for Brunettes 

This ammonia-free formula contains a blend of mild semi-permanent dyes and shine boosters, to add a hint of glossy brown color and extend the life and tonal richness of brunette hair.

Benefits:

  • Gives a youthful look and shine to dull brown hair
  • Enhances hair color, keeping the highlights bright and shiny
  • Extends the life of hair color and prolongs the time between salon appointments
  • Turns gray hair into a natural-looking blonde color
  • Leaves hair soft and manageable
  • Results intensify with each application

3. Sebastian Cellophane Clear Shine (Walmart)

The hair cellophane uses silicon-based polymers to seal cuticles and add a beautiful shine to your hair. It won’t deposit any color in your hair. However, this treatment will likely make your color last longer and appear more radiant. Your hair will feel smoother and silkier, especially if your strands are chemically processed and look dull. The treatment also helps tame frizz and flyaways.

It can be used with good results on relaxed or Japanese straightened hair.

The treatment lasts for about 12 washings and fades away with each shampooing. Once needed, you can reapply it.

How to use: Clear cellophane is easy to use at home, while the colored version should be applied by a professional for best results.

If you use a clear treatment, you can apply it either with your hands or with a dye brush. Apply to partially dried hair (about 75%), using enough product to cover every strand.  Put on a shower cap and apply heat for 20 -30 minutes. By applying heat you will activate the product to give you the best results.

Let your hair cool after removing the shower cap, then rinse with lukewarm water.

Update: Read the ingredient list carefully to make sure that the formula doesn’t include parabens.

a woman with hair glaze treatment in her hair

4. Clairol Professional Radiance Color Gloss (discontinued)

This semi-permanent hair color comes in 21 glamorous glosses. It is used to revive color and add shine to color-treated hair or to enhance and brighten natural hair color. It helps to eliminate yellow tints from lightened hair.

The formula is free of ammonia and gentle on your hair. It has to be mixed with a developer before application. It takes 15-20 minutes to process depending on if you use heat or not.

This shine booster is suitable for colored, permed, or relaxed hair. It works great for hair that looks dull and lifeless, making it look healthy and shiny for up to six weeks. The product will gradually wash out of your hair during that time.

5. Mark Hill Only Takes a Minute 60-Second Detox Gloss Treatment 

This creamy, sweet-smelling formula contains Argan Oil, Sea Silk, and vitamins to moisturize and protect your hair while adding shine. You can use it in place of a conditioner, so it saves you time. The product is advertised to take just one minute, but you may want to leave it for a few extra minutes to ensure a deeper condition. The treatment leaves hair moisturized, shiny, soft, and easy to style. If your hair is in good condition, you only need to use it once in a while.

a beautiful woman with glaze treatment in her hair

6. Shu Uemura Color Lustre Cool Blondeir?t=softerhair 20&l=am2&o=1&a=B00B7F09JY 

This post-shampoo toning treatment restores the vibrancy of blonde hair, refreshes platinum tones, and takes off unwanted yellows and warm tones from blonde hair. It subtly deposits color pigments to prolong the intensity of your color and prevent fading between salon visits.

It is free of ammonia and silicone and is enriched with Linseed Oil and Musk Rose Oil to nourish and hydrate your locks and keep hair soft, shiny, and manageable.

It is an expensive product, but it will last for an extended time as you only need a little drop of it per time. The tube lasts for approximately 12 applications, depending on the length and thickness of your hair. To keep your hair in a perfect blonde shade, you need to use it after every 2-3 shampoos.

Apply the treatment to towel-dried hair and leave it on for 5-10 minutes.

a happy woman with shiny long hair after glaze treatment

The Differences between Hair Gloss and Hair Glaze and which Option to Choose

Shiny hair is a sign that your locks are healthy, which is what the majority of people hope to achieve. When your hair is healthy, the cuticles tightly cover the hair shaft, making the surface of your hair smooth. A smooth, healthy strand of hair reflects light like a mirror, giving it a shiny appearance.

Chemical treatments, excessive heat, chlorinated water, and extreme environmental conditions can cause hair damage, disturbing the naturally smooth cuticle layer and leaving your strands looking frizzy, dull, and lifeless. Your hair color may also lose its vibrancy and fade faster. Such over-processed and damaged hair has a rough and porous surface meaning it can’t reflect light.

Fortunately, there are hair treatments that can restore shine and make your locks look fabulous again! Hair glosses and hair glazes are the best solutions for overly porous lackluster hair.

These shine-enhancing treatments are gaining popularity because of their ability to smooth the hair surface, giving your hair the desired luster. Both treatments are pretty easy to apply, and can be used on any hair type, including virgin, color-treated, and highlighted hair.

a sensual woman after hair gloss treatment

Hair Gloss vs. Hair Glaze Treatment

These two treatments differ from one another in the way they work. Hair glosses work by penetrating the hair shaft and sealing the cuticles. Hair glaze products simply coat your strands and just sit on the surface. Another difference is how long the treatment will stay in your hair before being washed out. But let’s look at it a little closer.

Hair gloss usually contains peroxide in its formula. The peroxide can lift the cuticle and penetrate the hair shaft, allowing for the depositing of color pigments inside the hair shaft. Hair glossing treatment can change hair color by a full shade with effects lasting about 4-6 weeks.

Hair glaze is a temporary shine treatment, which doesn’t contain ammonia or peroxide and cannot, therefore, open the cuticle. This treatment gently coats your strands with shine or/and semi-permanent color. Consequently, the effects are considerably more short-lived compared to hair gloss and last only a week or two.

Both treatments give a similar result – glowing and healthy-looking hair. Although hair color experts consider them to be two separate types of products, manufacturing companies often use the terms “hair gloss” and “hair glaze” interchangeably. What’s even more confusing is that many hair dye manufacturers add the word “gloss” to their products for marketing purposes.

Let’s Try to Simplify It

At this point, trying to make a clear distinction between hair gloss and hair glaze treatment is useless and can even add to the confusion. So, in this article, we are going to talk about two formulas regardless of the name on the packaging.

  1. The first is a mild, short-lived formula that just coats the hair shaft.
  2. The second formula penetrates the hair shaft and lasts up to six weeks.

Both formulas are available in two options: clear and tinted.

Before you decide between these options, you should talk to your stylist about desired results. Also, ask questions about the product they are going to use.

If you decide to do a glossing treatment at home, make sure to carefully read the directions for use. Take time to learn about the product and the results you can expect.

Clear vs. Tinted Hair Gloss/Glaze

As we already mention, hair shine treatments are available in two versions – clear and tinted. Both versions will provide you with glamorous shiny hair and help extend the life of your current hair color.

Colored glossing/glazing treatments work to enhance and maintain the underlying color and add shine.

Clear glossing/glazing products do not contain color, which makes them suitable for every shade of natural or color-treated hair. Clear glosses/glazes seal the cuticle layer and coat the hair shaft with a transparent shine.

The Longevity of Hair Gloss and Hair Glaze Treatments

The stronger formulas of hair shine treatment penetrate the hair shaft and produce more lasting results. The effects last for three to six weeks. The longevity may vary among brands and whether you have received the treatment in a salon or have done it yourself.

The milder formulas are a short-term solution, lasting one to two weeks since they only coat hair strands. Both formulas fade away with normal hair washing.

a beautiful woman with hair glossing treatment

Benefits of Hair Shine Treatments

  1. Shine-enhancing treatments are relatively mild and less damaging to your hair and scalp compared to regular dyes. A shine treatment provides intense conditioning for stressed, dull, and lifeless hair. It helps to temporarily fix the damage, prevents flyaway hair, and minimizes the appearance of frizz. To maintain the results, use sulfate-free products that are designed for colored hair.
  2. Both treatments protect the color from washing out fast and stretch out the time between color appointments. Shine treatment helps seal freshly applied hair color, creating a protective film that helps reduce fading. It also helps revive your color once it starts to fade.
  3. Hair gloss/glaze treatment can fix a bad dye job. If your color has turned out a little brighter than desired, the glossing treatment can help adjust the tone.
  4. Gloss/glaze treatments can tone down brassy highlights and orange hues in blonde and brunette hair while eliminating yellow from grays.
  5. The milder formulas cover the hair shaft, leaving hair shiny, smooth to the touch, and easy to style. They cannot change the existing color, but do bring back the natural shine to hair that feels dry and dull.
  6. You can change your color whenever you want as shine treatments will not interfere with any type of chemical treatments you may decide to do.
a sensual brunette with shiny hair

Which Hair Gloss/Glaze Treatment to Choose?

The decision depends on your preferences and the specific needs of your hair.

If your hair color has started to fade, but you are not ready for the next color service, look for a gloss/glaze with color pigments to get your rich shade back. Tinted shiny treatments can provide decent color refreshment between permanent color services.

For those who are not happy with their current color, a tinted shine treatment can make subtle corrections to a previously applied color. If the color turned out a little brighter than desired, the tinted hair gloss/glaze can help adjust the tone.

If you are a brunette and want to balance out brassy highlights, look for a colored hair gloss or glaze.

If you are blonde and your hair is getting dull and brassy, go for a clear product.

Individuals with virgin hair can use the treatment to make their hair healthier-looking and shinier. Clear treatments make the natural color more beautiful due to increased light reflection.

Tinted shine treatments can be the perfect way for hair color newbies to experiment with colors without commitment.

If you want to cover your gray roots, opt for a stronger and tinted glossing product. The stronger hair glossing formula, especially the tinted one, will efficiently mask growing roots until your next salon appointment. Mild and clear formulas will not provide the full coverage of gray hair. However, they can smooth the cuticle layer and add a hint of tone to blend in a few pesky strays.

If you like your hair color (natural or dyed) and only want to add shine and softness, look for a clear gloss or glaze. A clear shine treatment will revitalize hair’s natural brilliance, soften the strands, and refresh faded lengths and ends.

If you prefer not to use chemicals on your hair, a milder formula that just coats the hair shaft is less likely to contain any harsh ingredients.

If you prefer doing hair shiny treatment at home, the mild and clear formulas are quicker and easier to apply.

a gorgeous woman with glossy hair