Last Updated on January 11, 2023 by Gaga
So, you’re here, which probably means braiding for beginners and intermediate methods weren’t of interest to you. Perfect! Landing in the Faux Braid section just means you want to get started without the pains of a learning curve, and darling, there is nothing wrong with that.
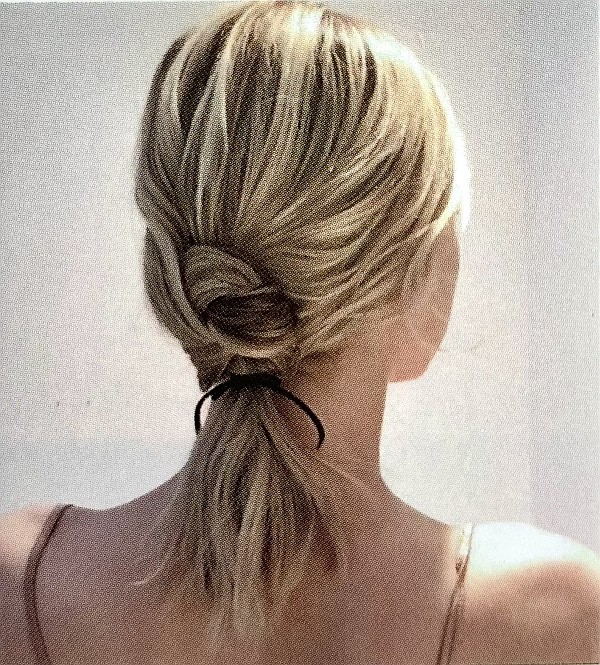
Steps for a Simple Knotted Faux Braid
- This style is best for long hair however, it can be done on medium length as well. The results are incredible so start by brushing your hair and adding in your oil and heat protectant.
- You’re going to take a section from the right and left front bang area, assuming those pieces of hair are long enough to pull around the side of the head to the back.
- Once you’ve brought you’ve brought both pieces to the back, tie an actual knot.
- Secure just underneath the knot with a very small rubber band that matches your hair color.
- Repeat this using sections of hair just below the sections you just knotted and incorporating the tail from the knot above.
- Each new knot should be tied just below the one above it and secured each time with a rubber band until you reach the lower neck hair line.
- You can either tie it off here and leave a low ponytail or you can put it in a rubber band. Then you can split the hair underneath the rubber band and begin tying knots once again until you run out of hair. Always secure with a small rubber band after each knot is created.
Steps for the Pull-Through Faux French Braid
- What’s perfect about this style is it looks luxurious yet can be given an “un-done” edge by starting with beachy waves and some texture spray, keeping you fresh and modern.
- You can start the look anywhere you like, but for this written tutorial we will begin by parting the top section of your head into a mohawk. Then take the “bang area” of your hair towards the front top and secure this with a rubber band.
- Secure a section of hair with a second rubber band just behind the first one. Keep them close.
- Split the ponytail of the top section in half and bring the ponytail of the second section through the split. Pin it with a clip. Bring the split ponytail hair of the first section down around the hair that’s split through it, and secure it with a band.
- Now slide your fingers on either side of your hair, add in hair and grab the hair that is already there from the ponytail. Combine the added hair with it and secure it with a rubber band.
- Continue this pattern and motion of adding in hair as you go until you run out of hair.
- Rough it up a bit by pulling small strands loose or loosening the rubber-banded sections of hair just a bit.
- Spray with hair spray to hold!
Steps for the Faux Braid Using Bobby Pins
- This look is particularly good as a half-up faux braid look. You can keep your hair smooth with added volume at the root or use texture spray and waves for that “un-done” feel. Begin by taking a section of hair starting near the temples and incorporating the band area. Secure with a small rubber band.
- Now take a small section of hair just below where you started on one side of the head. Pull it upright to reach just behind the rubber band that secured the first section. Place a bobby pin on this section of hair you are holding.
- Twist it over the rubber band and slide it underneath it.
- Now do the same to the other side, making sure to cross over the section you just did before.
- Repeat this pattern for several rows, making sure to cross over each time.
- It creates a causal, intricate “braided” style.
The horizontal faux braid updo – Video by Andrea Haynes
Faux Braids Continued – The Faux Braided Horiztonal Updo
I’m not sure there is a more beautiful and relatively simple faux braid updo than this one. The first time I created this look, I stood back and held up my hands thinking “did these really just create this?” The results were luxurious yet still somehow down to earth. And the idea that you can do this on yourself with minimal bobby pins? Your friends will be speechless.
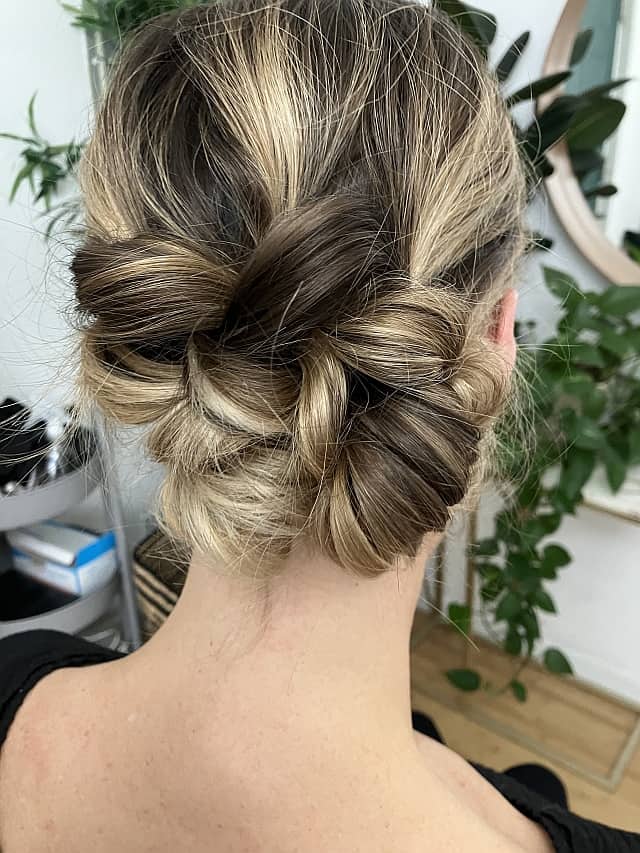
Steps For the Faux Braided Horizontal Updo that Leaves them Speechless
Remember that this look is a “horizontal” updo, not a vertical one. You’re going to be faux braiding “sideways.” The mechanic used to create it may feel a bit unnatural your first or second time, but once your hands understand what to do, you’ll finish in no time.
- This look is so gorgeous, it’s good to spend time prepping the hair first. A good method is to tease hair at the root after spraying in a texture spray. Then brush out the tease with a soft brush. You can do this one or two times for the best results. Add in soft waves for texture.
- Now take a section of hair just behind the back left ear as if you’re creating a low ponytail. It’s a small section, so leave out most of your hair.
- Secure with a rubber band.
- Now secure a section small section right next to the first.
- Split the first ponytail vertically and pull the second ponytail through it. Pin the ponytail that was pulled through just to keep it out of the way.
- Now take the loose hair and add it into a newly created third section, pin.
- Keep this pattern going. Now split the ponytail that is first in line, and pull the hair of the ponytail through behind it, through it. pin that out of the way.
- Regroup the split hair together and rubber band it into a new section.
- Do this until you get from the left ear all the way to the right.
- Now you can switch to rubber banding the single ponytail that you have going and pulling each rubber band section through itself.
- Now take time to gently expand the “braid.” You’ll pull on every heart-shaped section until it’s wide. Do this evenly to each part of the hair.
- Now take the “tail” and pin it underneath the horizontal faux braid so it’s not seen.
- And you’re finished! This look will get you through any formal event or holiday party in a luxurious style! Have fun with it and make sure to practice several times.


Gaga is a blogger and founder of the Softer Hair website. She often says that insomnia is to blame for her first blogging attempts. Being the night owl, she hated the morning alarm. She left her office job and returned to what she loved most - writing.