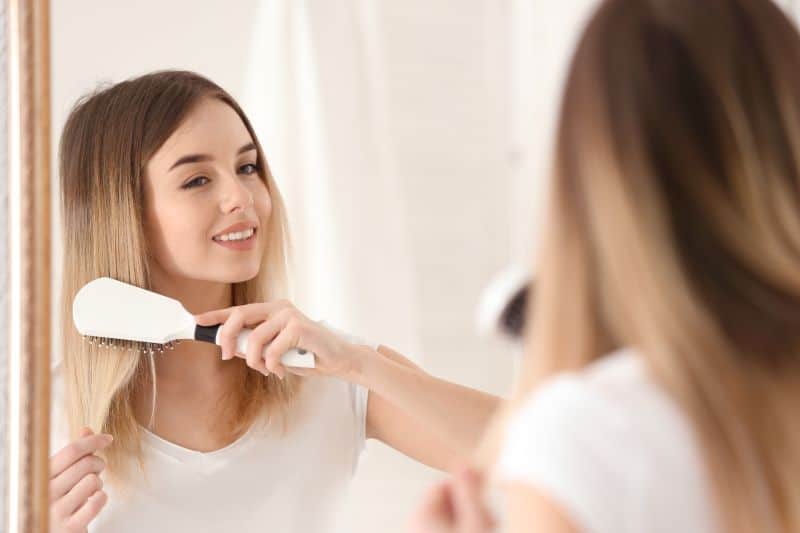
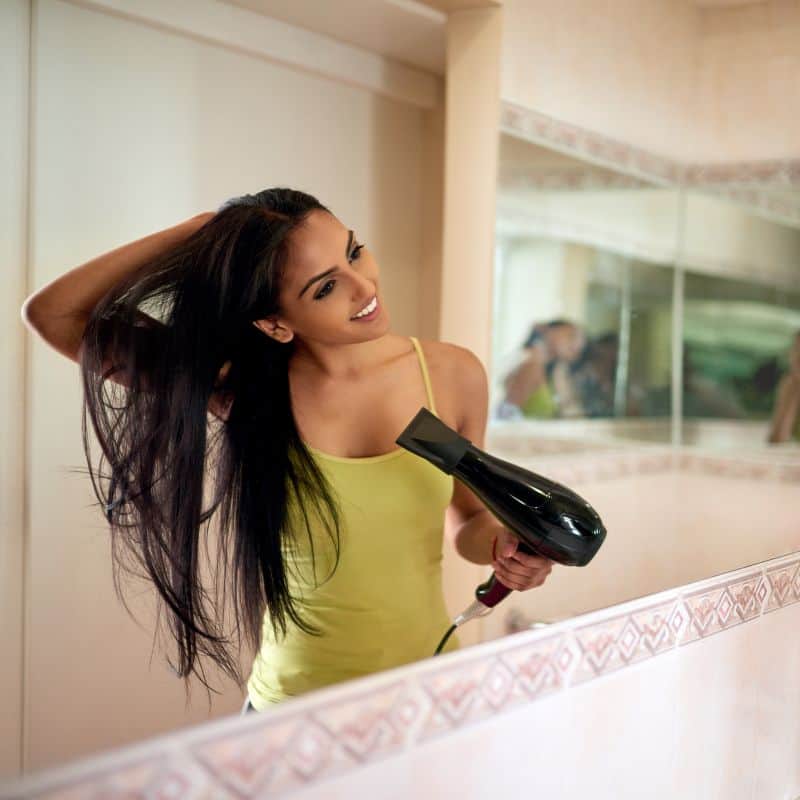
There’s something so special about snapping that first clip to secure your wig or topper. It’s always followed by snapping just a few more around the perimeter of your head to secure the hair in place.
You look up, brush the hair back from your face, do a slight wiggle to adjust the part, and look at yourself for the first time with new eyes as your heart skips a beat.
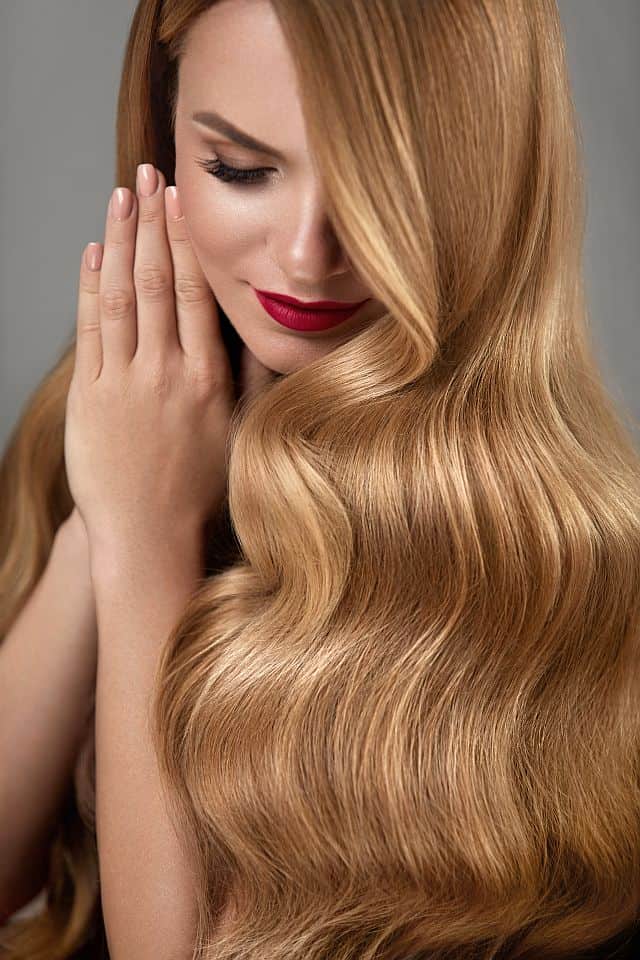
Nothing really compares to the experience of seeing yourself for the first time with the hair of your dreams. Except for the anticipation along the way of picking out every aspect of your hairpiece to suit your look and lifestyle. There are many steps that can help you determine what works for you, but the biggest question is where to begin.
With extensions being all the rage, wigs and toppers might not be your first thought. But there are certain advantages to wigs and toppers that make them worth looking at.
For starters, you’ll need to determine what you need most. Ask yourself, is it volume? Length? Full coverage? Is there a reason you may want a wig or topper vs. extensions? Such as, has your hair thinned evenly all over? Was there a percentage of hair loss? Was there chemical breakage? What’s your budget?
Knowing the answers to these types of questions will help you determine the hairpiece that suits you best.
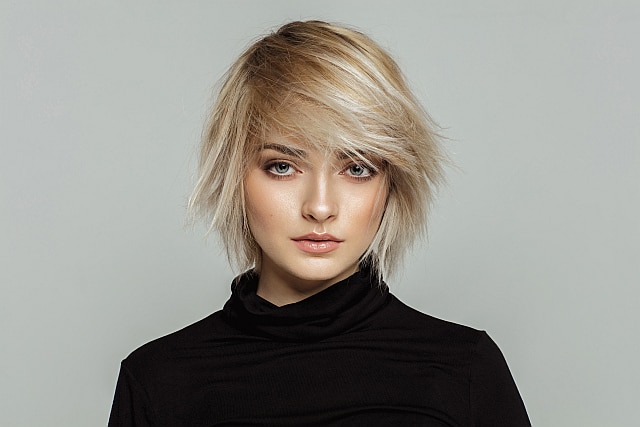
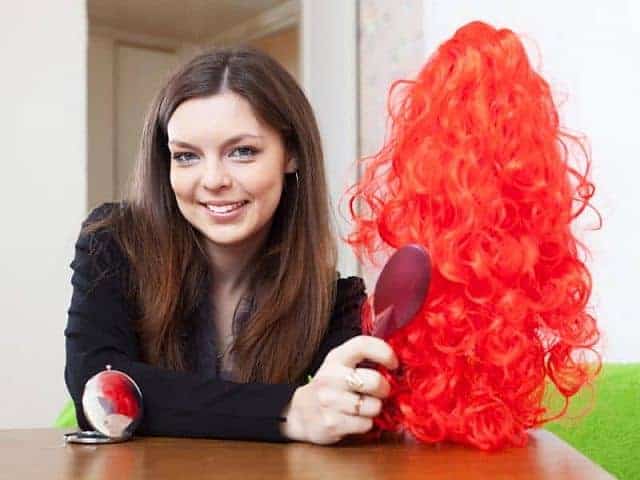
What Is a Wig and What Can It Do for You?
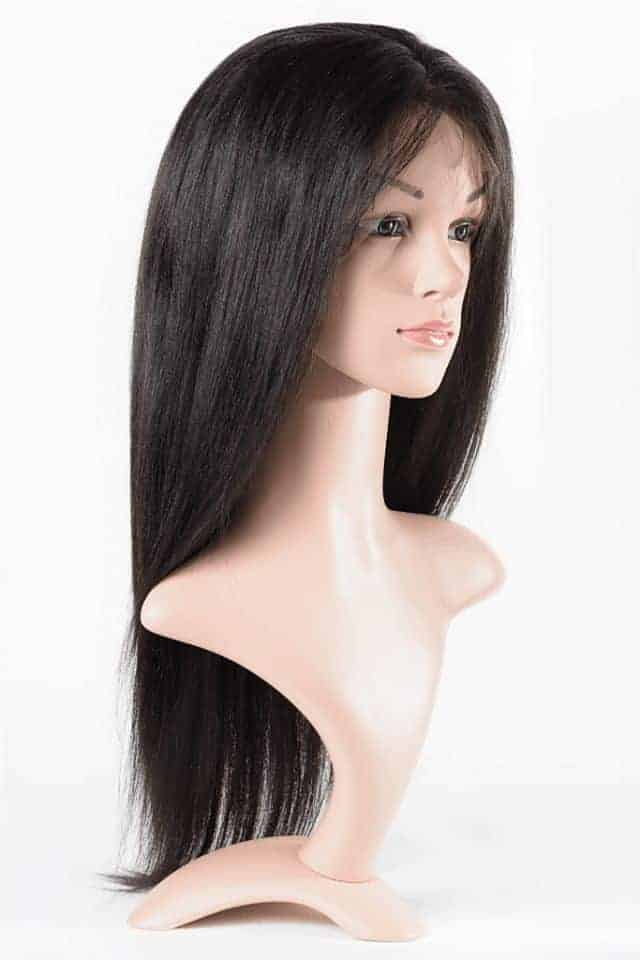
A wig is a hair piece that provides full coverage, meaning all your natural hair will be underneath it, or it will act as your hair when natural hair is missing.
They are incredible structures and require skill and patience to create, whether they are made from real or synthetic hair.
For higher quality, selecting a wig made of real hair is the best option. These types of hairpieces can sometimes cost as much as thousands of dollars, but when taken care of, can last for a long time.
When a wig is an essential piece of your daily self-care routine, getting one made of real hair sets you up for a great experience. You can wash, curl, style, and even get it dyed just as you would your natural hair. They also attach seamlessly to your head, blending in with your skin so no one can tell you’re wearing a wig at all.
Wigs provide complete, immediate perfection. But how does a wig differ from a hair topper?
What Is a Hair Topper and What Can It Do for You?
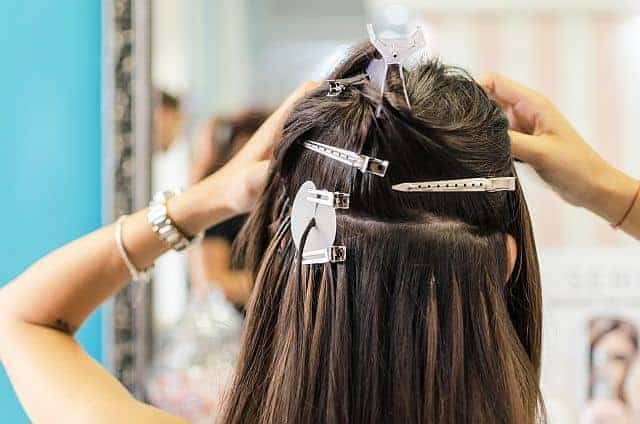
Hair toppers are much smaller hair pieces that only cover the small, top portion of your head. They are designed to add volume and fill in where your natural hair that is thin or broken on the sides in front of the ears.
A quality topper will blend in seamlessly with your natural hair. Often, they attach to your hair with pressure snap clips, but there are other methods of attachment to explore as well. Once it’s snapped in place, you can pull a small amount of your own hair out from underneath it, blending it in with the topper hair to make everything look natural.
The unique thing about toppers is they can be partnered with micro-fusion or tape-in extensions. What’s beneficial about this compared to a wig is how breathable the combination is. The topper is also easier to take on and off due to its size and weight.
With natural hair toppers, you can get them dyed and highlighted just like natural hair. Make sure to have a professional with experience dye or highlight your hair topper to preserve its quality.
Which is Better for Thinning Hair, a Topper or a Wig?
This will all depend on your situation. Are you just looking to experiment with your hair and try something new? Or are you looking for coverage because of thinning or balding hair?
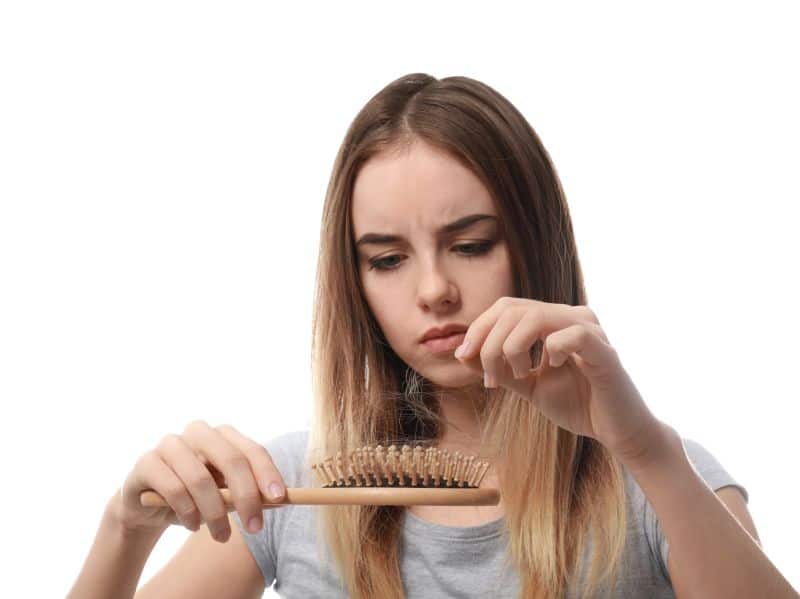
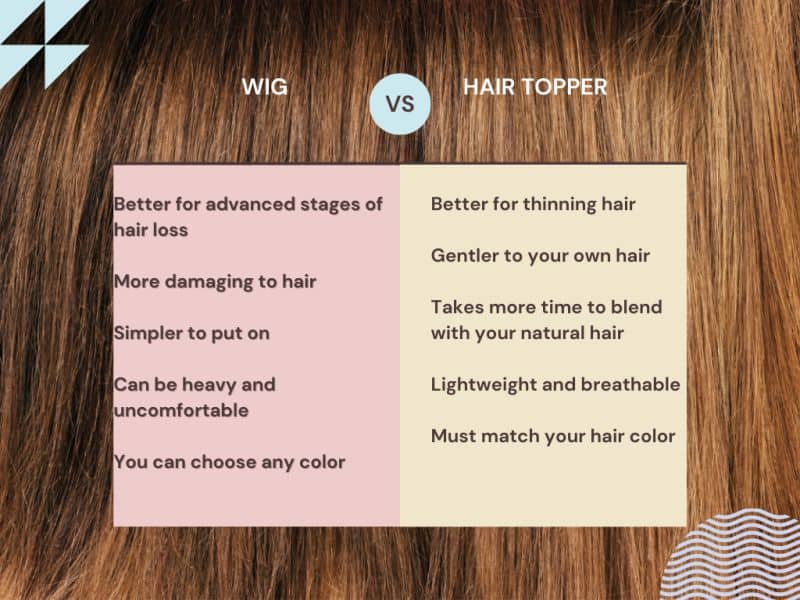
Coverage: If you are at the beginning stages of hair loss or your hair is slowly starting to thin, then a hair topper would be the better option. Hair toppers are an excellent choice if you are experiencing hair loss or hair thinning at the top of your head or on your crown! They give you coverage at the top and that extra volume. But if your hair loss is more advanced or you are experiencing baldness, a wig will benefit you more.
Color: When it comes to color, the hair topper you choose should match the color of your hair so that it can blend in and go unnoticed. With a wig, you have more freedom and can literally choose any color you want, whether it is brown or pink.
Timing: With a wig, you can style it before putting it on your head, saving a lot of time. A topper, on the other hand, takes more time to blend with your natural hair. So, it is all up to you when it comes to the timing factor.
Damage to your own hair: Hair toppers are gentler to your own hair because you can apply hair products and your scalp can breathe. But they can cause damage if you don’t use them properly. If your hair is already damaged, hair toppers that clip in might damage your hair further because your hair can’t handle the extra pressure. Be gentle with the removal of the topper. Don’t just rip it out because you are getting frustrated.
Which one is more comfortable: Hair toppers are more comfortable than wigs because they are lightweight and breathable. And for this reason, they are also great on those humid or hot summer days because there isn’t heavy hair to make you melt away with sweat.
Takeaway
Hair toppers are a great choice if you want a lightweight and more natural look and if you want to add some volume and body to your hair. Wigs are the better option when you need to cover the whole head. Plus, wigs are a great choice if you want to have fun and experiment with different colors. Make the choice that will satisfy your hair needs. Happy hair, happy life!
Had your hair extensions out and feeling like your hair is damaged? Maybe it’s feeling thinner, or matted, you may even have bald areas. This how-to repair damaged hair after hair extensions guide should give you an insight into what to do next.
So, hair extensions can add a lot of difference to your look and I foremost understand why they are addictive. I used to wear extensions for years and I’m naturally thin-haired. I’m also a hairdresser so I know the ins and outs of hair extensions. I’ve seen the damage caused by clients, by poorly applied extensions, or incorrect advice. Hair extensions need to be done well to preserve your natural hair.
Do Extensions Make your Hair Thinner?
I think the answer to this one is they can. So, yes, but not usually. Some people I find get so used to the extensions that they feel they have hair loss after removal, so that could be why. Also, repetitive strain on the same areas of the head can cause hair loss. If the extensions are applied incorrectly with too much weight on your strands the hair extensions can damage the hair by pulling it out.
I’ve also seen neglect from clients and their bonds matte together. Or maybe you have had a weave and the roots are matted. Tying hair up against the fall of the extensions also can pull out hair. Not having breaks from hair extensions can cause damage and the sad part is people who have them probably have a thin hair type already.
How to Thicken Hair after Hair Extensions?
If your hair is thin at the root – it is an issue at the scalp. Thin hair after extensions can look patchy on the scalp, or, generally thinner all around. You need to look after the scalp and follicles. Regular scalp massages supply blood flow to the follicles and do not tie hair up tightly to put a strain on them. Also, scalp/hair growth treatments, maybe vitamins for hair growth and be gentle. Do not keep putting extensions in if you’re experiencing hair loss as it will add to the problem. Regular trims also help thicken the look of the hair.
Wispy Hair after Extensions?
So wispy hair can happen. This also can be normal. A set of permanent hair extensions can be in the hair while it grows for months. Over this time hair can lose its strong haircut shape so it may just need a cut. Also, sometimes to blend the extensions into your own hair an extensionist may cut into your hair to get a seamless blend. It may not be the damage after hair extensions you’re experiencing and more about getting a haircut.
Do Extensions Damage your Hair?
So, having hair extensions taken out can be quite liberating after having them in for a while. I encourage regular hair extension wearers to have breaks from the hair extensions because it’s not advised to repetitively go over the same parts of the head. This is because it can cause alopecia from too much tension and pulls the hair out.
DamageCaused by Improper Hair Care Regimen
The damage can also be caused by a client’s home care regime, this is why is important to go to someone qualified that can advise you correctly. If you tie your hair up with extensions high or tight the pressure on your follicles can pull the hair out. Also, if a client does not brush hair through the bonds and goes to bed with wet hair, it can cause bonds to matte together causing pressure on the root.
Damaged Hair after Matted Extensions
Hair matting usually lies at the clients’ hands and it’s a nightmare for us hairdressers to remove. This actually can get so bad it needs to be cut away. That can cause hair to be knotted and picking away at it with a fine-toothed comb takes hours. It also can feel thinner after the hair extension removal because the old natural hair loss will have stayed in the matting, also the extensionist may cut the matting away because removal is not possible.
Does Hair Grow Back After Removing Hair Extensions?
The answer is yes. Not always but mostly. If you have hair loss warning signs then do not put another set of hair extensions in and give it a break. Look after your scalp, get a good haircut, eat a balanced diet, give yourself head massages and use professional quality shampoos/conditioners. My advice is to leave it alone to thicken and grow.
How Long should you Give your Hair a Break from Hair Extensions?
Personally, this depends on your situation right now. If it’s in between having new hair put in and you are not experiencing hair loss, I’d give a 2-4 weeks break. If your hair feels thinner but has no bald patches after removing hair extensions, I’d give it a couple of months. Check in after and see the difference. If you’re still worried, leave it alone for a longer period.
Then if you’re experiencing bald patches, I recommend giving your hair a rest until it grows back. You’re at risk of losing more hair, so stop trying to pinpoint why you have hair loss from extensions and learn from it. Maybe you need a new hair extensionist, maybe you need to change your hair handling at home, maybe you naturally suffer hair loss and it’s not smart to have hair extensions.
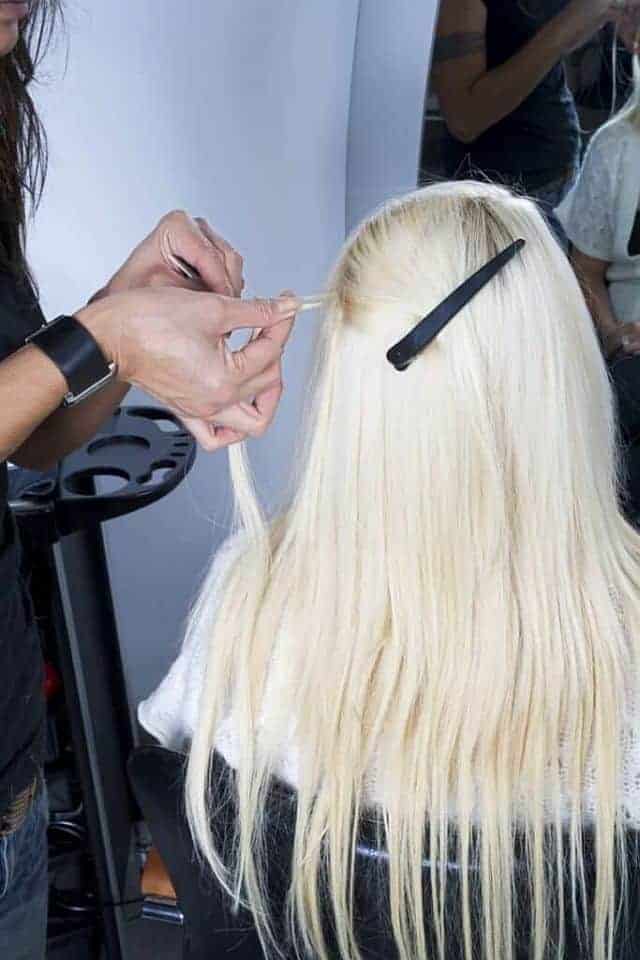
Hair extensions in 2022 are going to be one of the most talked-about trends. From clip-ins to hand-tied wefts, there are specific details that make each kind unique and worth your while. With how much they can add to your look, it’s no wonder they are so popular.
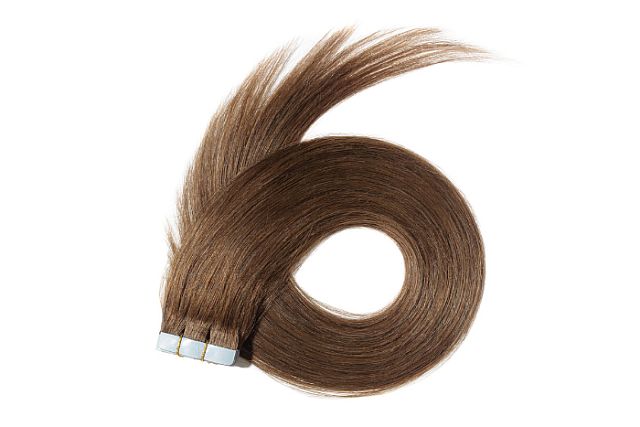
Tape-in extensions especially are worth taking a look at due to their easy installation and beautiful results. They sit right in the middle ground of high and low maintenance and offer curious clients easy wear and natural-looking, blended length.
Can You Put Tape-In Hair Extensions by Yourself?
It can’t be stressed enough that tape-in extensions need to be done by a professional. The angles you have to reach to attach each individual tab can’t be reached on your own.
The process needs to be clean, precise, and well-managed for it to provide optimal results. Make sure to research who offers tape-in extensions in your area. Search extension experts in your area on Instagram and Tiktok.
How to Install Tape-In Extensions
There are a variety of brands to choose from, so check with your stylist about the type of tape in extension they love and trust.
The basic steps you’ll go through are straightforward.
You will either purchase the hair on your own or go through your stylist. It is ideal to get the hair through your stylist as they can match the tones, any highlights, and the base color in just the right way. Doing this on your own can be extremely confusing.
Once you arrive for your appointment, you’ll get a nice clarifying shampoo and a blow dry. This preps the hair to be clean and helps with the precision element of installing the tape in extension tabs.
After the hair is fully prepped, your stylist will begin to section the hair into a pattern. They will take very thin horizontal sections the same width as the tab of hair they are ready to install.
Each tab has medical-grade glue on it that attaches it to the hair. Sometimes you sandwich the paper-thin section of hair between a top and bottom tab. Others are designed to utilize just one.
The location of the hair extension tabs needs to be precise. It can’t be too close to the scalp or too far away. This is where the precision comes in and it’s important for the outgrowth of your hair.
The extension can last anywhere from 4-6 months depending on your upkeep.
How to Take Care of Tape-In Hair Extensions
There are many ways to properly care for your tape-in hair extensions. Once you experience the beauty of this service and the gorgeous results, following the steps will feel like an easy act of self-care.
Sulfate-free shampoo and conditioner. Sometimes you can fudge on whether you use sulfate-free or regular shampoo. But in this case, sulfate-free is the way to go if you want longevity out of your tape-in extensions.
Wait to shampoo 48 hours after installation. In the meantime, use a quality dry texture spray to refresh your hair.
Avoid putting products directly on the glue tab. When conditioning your hair after your shampoo, you’ll want to keep the product away from the tab where your extension attaches to your hair.
Brushing. Brushing through your tangles becomes more of a delicate process with tape-in extensions. You can gently comb hair up to the tab but avoid brushing the tab or the outgrowth above it. In addition to being gentle, you’ll want to brush more regularly throughout your day.
Wash less frequently. Extensions of all kinds do well with minimal treatment. Whether it’s shampoo and conditioner, heat protectants, oils, etc. Less is more!
Loose braids. At night, tossing and turning can cause a lot of friction while you sleep, resulting in knots in the morning. Adding in a very loose braid can keep it under control.
Keratin Complex Keratin Treatments. When it’s time to change your extensions, you’ll book a removal service with your stylist. They will go through and gently remove all the extensions then provide a clarifying shampoo. To give your hair the boost it needs after this, getting express keratin by keratin complex is incredible. It plumps each individual hair strand, adding in large amounts of keratin, and is the perfect post-treatment for extensions.
Suggested Brands
There are an overwhelming amount of extension brands to choose from. What’s recommended is to talk with your trusted stylist about the brands they use. Here are some great ones that stand out in 2022:
Stardust Hair Extensions. Created by @roxybeautytouch, these beautiful tape-in extensions are customized to adapt to client needs. Installation takes under an hour as these well-crafted pieces are attached to the hair.
Bellami Hair Extensions. This 100% Remy hairline is hand-crafted with ethical care. It’s the leading brand in extensions and offers a simple and helpful color-matching service.
Tape-In Hair Extensions | Donna Bella Hair. These extensions match beautifully with each individual’s hair. They provide quality-made tape-in extensions and easy installation.
Do Tape-In Extensions Harm Your Hair?
Many women ask this question and for good reason. When using any kind of extension to add length to your hair, there are things to think through regarding how they affect the health of your hair.
The first is what kind of condition is your hair currently in. If your hair feels dry or damaged, it’s a good idea to spend time and effort increasing the health of your hair before getting tape in extensions or extensions of any kind.
To do this, try repair-focused products. Olaplex for example consists of a 9-step system that targets bonds call disulfide bonds. Repairing these bonds increases the strength of the hair, how shiny it is, and its overall integrity.
Doing a series of 3 or 4 keratins on the hair spaced 4-6 weeks apart can rejuvenate hair. The added keratin that goes back into your tresses plumps the hair shaft, making it weighted and healthy, and shiny; ready for those extensions!
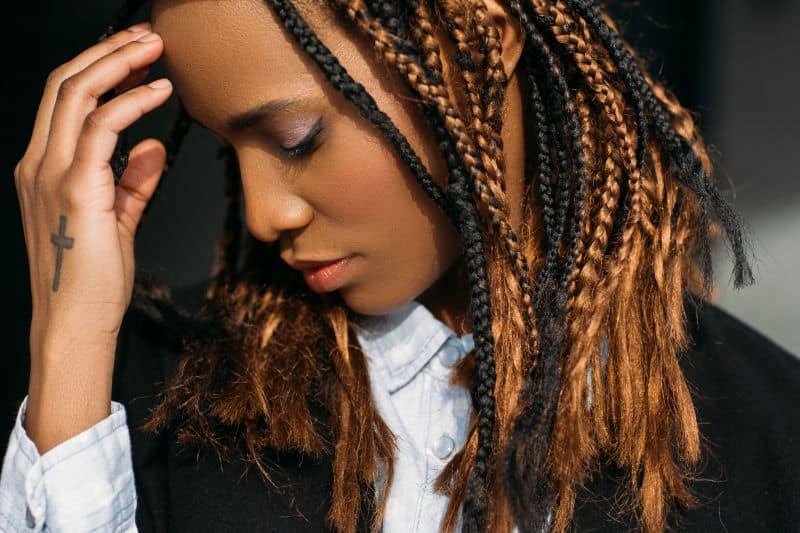
Don’t you just love crochet locs?! Crochet locs came onto the scene a couple of years ago and since then, our lives have never been the same. They’re beautiful and extremely versatile, but there are a lot of questions surrounding them like how many packs to use, how to install them, how to relieve tight locs, and so much more. But first, let’s define what they even are.
What are Faux Locs, Goddess Locs, Soft Locs, and Butterfly Locs?
Faux locs are, as the name suggests, a hairstyle where one tries to emulate the look of dreadlocks without actually locing their own hair. The OG faux locs were smooth and wrapped tightly down, giving them a smooth, shiny look and feel. They were stiff when installed, only loosening up with wear. The faux locs’ overall texture becomes more natural over time. Eventually, people start to think that you actually got dreadlocks done on your hair. You can use any type of hair to achieve this look, but for a more natural look, try either Marley hair or Cuban Twist hair.
The most recent variation of faux locs that I’ve seen is soft locs. Soft locs follow the same principle as O.G. Faux Locs, but the hair is wrapped more loosely to allow it to have natural movement from the moment the locs are installed. Another plus is the texture of soft locs tends to look more natural from the get-go; it has a bit of frizz without looking messy. This may partly be because soft locs are often made with a combination of ready-made faux locs and then wrapped at the top with a lightly separated passion twist, spring twist, or water wave hair.
Distressed locs, also known as Butterfly locs, Messy faux locs and Bohemian locs, get their name because the loc is wrapped in such a way that it looks distressed or isn’t smooth all the way down. For this type of locs, you’ll use some type of water wave hair to wrap, and may also need some normal braiding hair or Marley’s hair to make the base of your locs thicker.
Goddess locs are faux locs that have some type of wavy or curly loose hair added at the end of the loc and randomly added onto the length of the actual loc. The most common “messy” hair that’s added to the loc is Deep Twist or water wave hair.
Do Crochet Locs Break the Hair?
No, crochet locs aren’t damaging, as long as they are done properly. If they’re done too tight or you neglect your hair while you have them in, then they can be damaging to your hair. So make sure they’re not done too tight (which I’ll cover later on in this article). Also, make sure to moisturize your hair and scalp regularly to avert any breakage that may result from your hair dryness.
How Long Do Crochet Locs Last?
All crochet locs except butterfly/distressed locs can easily be worn for 6+ weeks with proper care. Boho/butterfly/distressed locs will start to look really messy around Week 2, and if you can deal with that, then you can easily wear them for 4 weeks. Stay tuned for the details on how to care for them properly so that they last.
How To Install Faux Locs, Soft Locs, Butterfly Locs, or Goddess Locs?
Generally, there are 3 ways of installing all types of crochet locs:
Braiding your hair and then adding crochet hair to your hair and wrapping to form the loc,
Crocheting ready-made locs on braided or twisted hair, or
Crocheting ready-made locs on cornrows.
Since this hair trend has been out for a while, there are tons of companies that now offer ready-made crochet locs (recommendations in the next section). If you’re looking for the shortest installation time, then ready-made is definitely your best bet. For the most natural look, opt for either the braid-and-wrap method or the ready-made locs on individual braids or twists.
How Many Packs of Hair Do I Need for Faux Locs, Butterfly Locs, or Goddess Locs?
For Butterfly or Distressed Locs:
For medium-length/shoulder-length locs, 6-8 packs of loose hair (for wrapping) should be just fine. When purchasing ready-made locs, 6 to 7 packs should be enough for medium-width locs (different brands pack a different amount of locs in each pack, but aim for around 70-80 locs total). If you’d like small (not tiny) locs that have a natural-looking low density, 8 to 10 packs (95-110 locs) should be okay. For chunky locs, 5 to 6 packs of ready-made locs should be enough for a natural density (50 locs).
Here’s our favorite brand of loose hair: Freetress Water Wave 22” and ready-made locs: ToyoTress Butterfly Locs.
For Goddess Locs, Soft Locs, and Faux Locs:
Regardless of length, 6 packs (about 100-120 locs total) should be enough for a full look. If you want more volume, then go with 8 packs. These types of crochet locs almost always come in a small-medium size, so this estimate is for that size. If you buy loose hair, then you’ll need about 2 packs of filler hair (which can be anything) and use about 3-4 packs to wrap the filler hair and your own hair. If you want a natural sheen and some texture, opt for something like Cuban Twist hair. For the curly ends of your goddess locs, 2 packs of Deep Twist will be perfect!
P.S: If you have a small head, then you’ll need more packs than what’s recommended here to achieve a full look.
How Do I Keep My Crochet Hair From Being Bulky At The Base?
Crochet locs can look really bulky at the bottom where the initial loop attaches the crochet hair to your hair. There are two methods that I suggest to solve this problem:
1. When doing the initial loop at the base, only pull your hair through that loop. If you pull both your hair and the crochet hair through the loop, it will cause you to have a bulky knot at the base.
2. Try knotless crochet locs. To do this, you’ll braid your hair all the way down. Then similar to what you would do with knotless braids, you’ll add the hair a couple of centimeters into the braid.
Start by inserting your crochet hair into the braid, then place the loop onto the hook and close the latch. Pull the crochet hair through the braid. Then pull your own hair through the loop at the base of the crochet hair. Lightly tug at your braid and the crochet loc to tighten the knot at the base. Now, when you start wrapping, you’ll wrap over that base a couple of times and then move down. If you do better with visuals, check out this video:
YouTube video: SOFT LOCS WITHOUT KNOTS (MY KNOTLESS METHOD)
How to Loosen Locs That Are Too Tight?
As a rule of thumb: your hair should not be so tight that you can’t sleep or have to take painkillers to survive. One way to avoid your crochet locs being too tight is to always start wrapping the hair below the initial knot- the initial loop, at the base of your hair, that forms when you first attach your crochet locs to your hair.
But in case you already got them done pretty tight, and you’re just figuring out a way to survive, I suggest that you:
Try to loosen the base of the locs. You can do this by pinching the base of your loc and slowly twisting it in the opposite direction to how the hair was wrapped. If you do this correctly, after a few twists, you’ll realize that your hair feels a lot less tight. Do this for every single loc, and they should become loose enough that you can actually lay your head down and sleep.
If you want to be able to loosen the hair up, even more, take some warm water and mix that with a conditioner and a bit of oil. The warm water will help soothe your scalp and the conditioner and oil will add some slip, which should help you loosen the locs even more in Step 1.
Take a Tylenol/Panadol or Ibuprofen. Yes, I know I said you shouldn’t have to take anything, but you’re already in pain, so please don’t try and suffer through it.
Take a warm towel and press that onto your scalp. I can’t even fully explain to you why this helps, but when you take off that hot towel, your scalp will have calmed down by a lot.
If all these steps fail, take them out. It might be hard seeing as you probably spent a couple of hundred dollars for something that didn’t even last, but keeping it in is not going to be worth it. It’s not good for your hairline or your peace of mind.
YouTube video: 7 Tips to Loosen Too Tight Braids| Locs| Twists| IMMEDIATELY
How to Keep Your Faux, Soft, Butterfly, and Goddess Locs From Unraveling?
Got2B Freeze Spray! There are many methods you can use out there to keep your ends from unraveling, but this is the safest, most convenient, and most undetectable method out there. So here’s how to use it:
When you’re literally almost done wrapping, spray the Got2B on the ends of the crochet hair and finish wrapping. Then pinch that section and hold for a couple of seconds for it to adhere properly. Another variation that will be less messy is to spray some of the Freeze Spray on your finger and then apply it to the hair.
The other methods include burning the ends with a lighter, melting the locs with a flat iron, and using nail glue. Burning your ends with a lighter and melting it with a flat iron can burn your hair and cause your locs to be “sticky” and snag easily. I don’t like the nail glue option because it’s incredibly messy (your fingers stick together), and if your glue touches your actual hair, the takedown process will be, as we say in Kenya, “premium tears”.
How to Care for Crochet Locs o That They Last Longer
For all the deets on how to wash your crochet hairstyles and how to maintain them at night, check out our previous article on how to care for crochet hair. And if you used ready-made locs on cornrows, then that’s all you will need to do.
Now, I’m going to cover the extra things you should do on top of those practices if you have crochet locs.
1. ‘Retouch’ Your Roots
If you did your crochet on individual braids or twists, you’ll need to retwist your roots to keep the style looking fresh. You can do this by applying plain water, a water-based moisturizer, or a styling product to your new growth. Then pinch your new growth and start winding the hair. Keep going until the bases of the locs start to look new again, and you can clearly see your parts. Tighten them as much as you desire but be careful so you don’t make them way too tight.
P.S: I’ve done this a couple of times when I have braids and my hair has never loc’d at the toot. Now, granted, I wasn’t keeping them in for longer than 2 months at a time, and I was also washing and moisturizing my hair.
2. Retouch Your Locs
If your locs are looking quite frizzy all the way through, then take a small piece of the exact same type of hair you used to wrap your locs and wrap it over the top half of your loc. When you’re done, your locs should look as good as new. Tip: You can skip retwisting your roots (the previous step) and just use this method to touch up both your roots and your actual crochet locs. As long as you’re comfortable with leaving your roots frizzy between retouches, then you should be fine. Just make sure not to do this a lot because it will make your roots look bulky and unnatural.
It’s hard not to love crochet braids! They’re versatile, affordable, a great protective style, and they’re so easy to do, even by yourself. But you’re probably wondering what caring for your crochet braids will look like because when something sounds this good, you’re used to it not being true. That said, they really don’t take much work to maintain. So, today, we’ll run you through the basics plus how to troubleshoot some of the most common problems that people have when they wear crochet braids. After this, you’ll probably be a guru on all things crochet braids.
How Long Do Crochet Braids Last?
Generally, they should last anywhere from 3 to 8 weeks. Some styles last longer than others, though. If you get any form of looser waves such as water waves or presto curls, then you can expect it to last on the lower side. If you crochet passion twists, box braids, faux locs, etc., then you can keep those in for much longer. Just retouch your roots occasionally, and you can get away with 6 to 8 weeks easily. Plus, you can reuse your passion twists, box braids, or Senegalese twists a couple of times.
I have had a pack of crochet box braids for the last 3 years that I’ve worn three times for about 4 to 8 weeks at a time. Now, I’m going to wash them tomorrow and install them again. So a good pair really is worth the investment!
How to Wash Crochet Braids?
My personal method? I tie my hair out of the way (in a loose bun at the top of my head), and then I shampoo just my roots.
Pro tip: Use diluted shampoo because neat shampoo is difficult to get out of the hair. So mix 1 part of shampoo with 2 parts of water, preferably in a bottle with an applicator.
Apply it to your roots and rub your parts gently with the tips of your fingers (not your nails). Then rinse it off thoroughly with plain water. Gently pat your roots with a towel so that any excess water is absorbed, and then you can either air dry, blow dry, or diffuse your roots. Whatever you do, make sure your hair has fully dried as soon as possible. Otherwise, you get a moldy smell that’s almost impossible to get out.
If your crochet style requires you to use mousse and other styling products to maintain it, then you will have to wash the crochet hair too. So, you’ll have your hair down, and you’ll shampoo both your roots and your crochet hair.
If you decide to use a regular conditioner, remember to dilute it as well and rinse it out thoroughly.
How to Keep Crochet Hair from Slipping or Coming Out?
With some kinds of hair, your crochet knots can become loose after installation and begin to slip off of your cornrows. You’re most likely to face this issue if the crochet hair has a looser texture or if the style is very short. Because I’ve never used hair that had a loose texture or worn a super short crochet style, I’ve personally never had to deal with this problem. But you know I gatchy! So here’s what I found out:
During installation, aim to knot the hair 2-3 times at the base. There are lots of different types of knots, including the Figure 8 knot that can keep the knots at the base of your crochet hair from unraveling altogether. But if you’re not willing to learn a new method, then you can use hair spray to hold them in place.
Once you’re done crocheting the hair onto your braids, pull your hair taut to tighten the knots, and then spray some hair spray right on the knots. Place a clip right above the knots to hold them in place until they dry. There are other methods, but this is the easiest, safest, and least time-consuming method I found.
How to Maintain Crochet Braids at Night?
It’s easy to take for granted just how much we move in our sleep. We can be tossing and turning 40-50 times a night in our sleep. That’s a loot! Now, imagine all the friction your hair is experiencing if it’s rubbing against a cotton or polyester pillowcase. Your hairstyle will become frizzy in no time.
To maintain your crochet braids at night, you, therefore, want to gather your hair into a pineapple or low bun and then cover that with a bonnet or satin scarf. If it’s a scarf or an adjustable bonnet, just make sure to tighten it enough so that it won’t come off in your sleep. Just don’t make it too tight, or you’ll give yourself a headache.
How to Keep Crochet Braids from Frizzing?
Ultimately, the ends of your hair will get tangled. That’s just how synthetic hair is. So, every week, you should go in and trim any knots at the ends of your hair and cut out any loose strands of synthetic hair along the length of the crochet hair. Doing this will help your style look neater for longer. However, depending on the hair texture, you’ll need a couple more steps to keep your crochet hair from frizzing.
For loose wavy or curly textures, including passion or spring twists, you’ll need to use a styling product to help tame the frizz. My favorite is mousse, but interestingly, you can also use a fabric conditioner/softener mixed with water. After snipping away flyaways and tangled ends, spray your hair with water or the water and conditioner mix. If you use water, you would apply your mousse right after this. Then smooth that into your hair and slowly separate any curls that have still clamped together.
For box braids or Senegalese twists, you can dip your hair into hot water. With traditional braiding hair, dipping it in hot water reduces frizz and improves the overall movement of the hair. It’s the same with the crochet braid versions. The only caveat is if you choose to do the individual box braids crochet method, then make sure to dip only the sections that are below where your actual hair ends. The section above that should be maintained using mousse and trimming any flyaway strands.
See, I told you that you’d be a guru by the end of this! Here’s to slaying those crochet braids for even longer!
Stay tuned for our article specifically on faux locs and butterfly/distressed locs and how to care for them.
Hair extensions are a serious investment of time and money, so you’ll definitely want to keep them in good condition as long as possible. It’s also important to keep your natural hair and scalp healthy while wearing extensions.
When it comes to human hair, guidelines for care differ depending on whether you’re wearing semi-permanent or clip-in hair extensions. Semi-permanent extensions are supposed to stay in your hair for 1 to 6 months, depending on their type and quality.
Today we are going to take a closer look at how to take care of human hair extensions.
How to Detangle Human Hair Extensions
Regular combing and detangling are crucial for all types of hair extensions. Combing reduces the risk of matting and also helps to blend extensions with your natural hair. You should comb your human extensions daily (when you wear them) and before each wash to prevent the tangles from forming.
Make sure to remove any knots as soon as you notice them. Fixing the problem will be tougher if you leave the knots in your hair for a while. Don’t be naughty with the knotty habits!
Use a wide-tooth comb or a brush with looped bristles that are designed specifically for wigs and hair extensions. The curved bristles without tips glide through the hair evenly without grabbing the bonds or snagging on the extensions.
Detangling steps
Divide your hair into sections and secure the rest of the hair with clips to keep it out of the way. First, try to gently loosen the knots with your fingers prior to combing to minimize breakage. Try to take out this way as many tangles as you can.
After removing the most stubborn tangles with your fingers, use a wide-tooth comb or a detangling brush to remove the remaining knots. Be gentle and try to avoid pulling the hair. Always start from the ends and gently move upwards to the roots.
When you come across a knot, hold the hair above the knot with your hand to prevent putting pressure on the bonds. This also helps prevent damage to your natural hair.
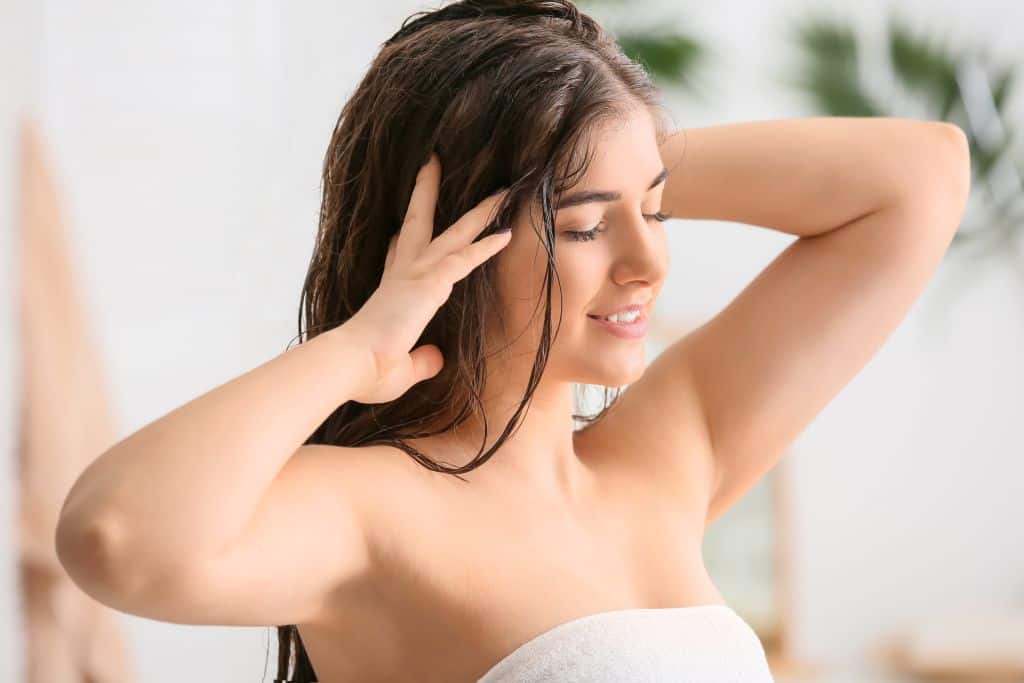
How to Wash Real Hair Extensions
If you wear clip-in extensions, you can wash them approximately once a month. Due to the lack of natural oils, clip-in extensions don’t require frequent washing.
When it comes to semi-permanent extensions, it is important to refrain from washing the hair for 2 or 3 days immediately after installation. This is necessary because the bonds need to be completely sealed before you wet the hair.
Wash your hair with extensions no more than 2 times a week. Excessive washing can loosen the bonds and shorten the longevity of your hairpieces.
Wash your locks with lukewarm water and use a mild, sulfate-free shampoo. Your shampoo for extensions shouldn’t contain drying alcohols or oils that could damage or loosen the bonds. It also must be gentle as harsh shampoos can cause friction, increasing the chances of tangling.
Gently apply the shampoo to the scalp with your fingers in a gentle downward motion. Avoid scrubbing or vigorous massaging near the bonds. Rinse thoroughly.
Apply conditioner only to the middle and ends of your hair, avoiding the roots, because the conditioner can cause the extensions to slip down.
Pro tip: To reduce the possibility of tangles, stand upright in the shower and let the water stream down from above.
Wrap your hair in a towel and don’t use the towel to rub it.
Set a hair dryer at a low heat setting and avoid applying heat to the bonds. Blow-dry the hair by pointing the nozzle downwards to prevent tangles. Don’t pull the hair with the brush.
Happy to Hydrate: Conditioning
Hair extensions lack natural hydration, so you must give them the moisture they need. Deep conditioning once a week or biweekly is required to keep them hydrated and healthy-looking. The conditioner should be applied only to the middle and ends of your hair.
Use a leave-in conditioner daily to compensate for the lack of moisture. This product should be suitable for extensions, which means no oils, silicones, and strong chemicals. Never apply leave-in conditioner too close to your roots.
How to Style Human Hair Extensions
Avoid using high heat to style your hair because the heat can weaken the bonds (or tape tabs) that hold the extensions attached. If you do use hot tools, set the heat to the lowest level and avoid the bonds. Also, make sure to use a heat protection spray. However, don’t apply oil-based hair sprays near the bonds, as such products can increase the risk of slipping.
How to Sleep with Real Hair Extensions
If you wear clip-in extensions, you need to take them out before going to bed. The removal is necessary to prevent tangles and frizz, and you will sleep more comfortably.
If you wear semi-permanent extensions, you should sleep on a satin or silk pillowcase or wrap your hair in a silk scarf. To prevent the knots, your hair must be completely dry before going to bed.
To minimize friction, pull your hair into a loose ponytail or braid it loosely before bedtime. These protective hairstyles also work well for the gym.
Protection from External Factors
Swimming in the ocean or swimming pools is not recommended because salt and chlorine can damage the bonds and adhesives. But if you love swimming, braid your hair into braids and apply a creamy conditioner before entering a pool to prevent chlorine or salt water from penetrating the hair. Once you are out of the pool, make sure to rinse the hair as soon as possible.
Sun exposure can dry out the extensions, so make sure to wear a hat or apply hair sunscreen when you’re out in the sun.
How to Dye Human Hair Extensions
Dyeing human hair extensions in lighter shades than the current color isn’t recommended due to the damaging effects of bleaching. Dyeing in darker shades doesn’t require the use of bleach, so it won’t cause significant damage and can be done by using a semi or demi-permanent color. However, let a professional stylist take care of any chemical treatment you want to try.
Maintenance Appointments
Your hair stylist will suggest how often you need maintenance appointments. This is usually 4-6 weeks after the initial installation. If your bonds become loose before that time, you’ll need to see a hair professional. After checking your extensions and the condition of your natural hair, your stylist will do the necessary fixing or removal. Once your extensions start to wear off, don’t try to remove them yourself. Let a professional stylist do it with minimal damage to your natural hair.
The process of making dreads is tiring and time-consuming. It can take 6 months to 2 years to get fully matured and locked dreadlocks. If your hair is short, it would take forever to grow it long enough to start the dreads. On the contrary, dreadlock extensions can give you the style of your dreams without the heavy commitment to real locks. When you get tired of them, all you have to do is simply have them removed, and you’re done.
Synthetic dreads come in a wide range of colors and hair lengths to match your personality. You can put them on your real dreads to get the added length you are looking for.
Another great thing about synthetic loc extensions is that they are reusable and pretty affordable. They will last you for up to 6 months if you take good care of them.
How to Put Fake Dreadlocks in your Hair?
Self-installation is time-consuming and can take 4-8 hours depending on the number of dreadlocks and your experience. You can also find a hairstylist who is specialized in dreads in your area. If you book an appointment, be prepared to sit for several hours.
I suggest watching some YouTube videos before starting self-installation to become more familiar with the process. Here are two useful instructional videos for installing artificial dreads.
Do Synthetic Dreadlock Extensions Damage your Hair?
Fake dreadlocks can be somewhat heavy and uncomfortable, and it may take some time to get used to them.
Another problem is that your skin may react to the plastic material the dreads are made of. Your scalp and other skin areas that your extensions touch can become irritated. The itchiness usually disappears after a few days. In some cases, the problem may persist, making it difficult or impossible to wear synthetic hair.
Can You Wash Synthetic Dreads?
It is relatively easy to wash synthetic dreads. You can shower and shampoo your hair whilst wearing locs. Just make sure to use a shampoo that is meant for dreads and skip a conditioner. Use a normal amount of shampoo and work with your fingertips to create rich leather. Gently rub the scalp with your fingertips. Rinse well to ensure there is no residue left in the dreads. Let the hair air dry.
Since dreads take several hours to air dry, it would be a good idea to wash the hair in the morning to ensure that it is completely dry before bedtime.
Don’t wash your dreads more often than necessary. The 7-10 day span would be optimal. Washing dreads more frequently makes them look messy and results in a shorter lifespan. Synthetic hair doesn’t absorb sebum oils from the scalp and won’t look greasy when is not freshly washed. However, synthetic fibers tend to absorb the smells from smoking and other pollutants.
Wear a shower cap when you’re in the shower on non-washing days.
How to Dry Your Synthetic Loc Extensions?
After rinsing the shampoo thoroughly, wrap your head with a microfiber towel. If the instruction suggests not to use a blow-dryer, let your dreads air dry. To speed up the drying process you can change the towel a few times. Also remember, make it a habit to wash your hair in the morning to allow it sufficient time to dry completely before bedtime.
How to Soften Synthetic Dreads?
Brand-new synthetic dreads can be stiff at first and may have an unnatural shine. To make new dreads more flexible, soak them in boiling water for 30 seconds. This will also take some of the shine out, making them look more realistic. Be careful not to boil your locs for longer as hot water can lighten the color and cause damage to synthetic fibers.
Make sure to read the instructions to find out what temperature level your dreads can withstand. Also, some types of dreads are softer than others and there is no need to put them in boiling water. Instead, rolling the ends is all you should do to make them pleasantly soft. They will also look more natural with wear.
Resealing Synthetic Locs
Over time your synthetic dreads can get a “puffy” look and may unravel a bit. When they start to show signs of wear, you need to seal them to make them look new again. Let this video say more than a million words:
Synthetic dreads are a bit heavy, and it will take some time to get used to them. Once you are comfortable, you can experiment with different styles.
Avoid using conditioners and styling products to keep the amount of residue at a minimum and reduce the need for more frequent washing.
Avoid cutting synthetic dreadlocks unless necessary. The ends of synthetic fibers would look unnatural and choppy after trimming.
Another thing you should avoid is the use of heat-styling tools. Synthetic fibers are made of plastic and can easily melt if you apply heat.
Check the provided instructions to make sure you can use a blow dryer for drying your dreads.
When individual dread slides down, you can take it off and braid it into your hair again.
Use braid rings, dreadlocks beads, and other eye-catching jewelry to create a unique hairstyle.
Sleeping with Synthetic Dreadlocks
When you go to bed, it is advisable to take off potentially damaging hair accessories and use some kind of protection for your synthetic locks. Involuntary movement during sleeping can loosen the base of your locks making them messy and frizzy or even unraveling them. Wearing a night cap made from satin will comfortably hold your hair and minimize friction-causing movements. A hair bonnet will also reduce the contact between your skin and plastic fibers, decreasing the chance of allergic reactions.
Sleeping on a silk pillowcase will extend the longevity of your fake locs.
How Long Can You Keep Synthetic Dreads in?
Be aware that you shouldn’t wear synthetic dreads continuously for a long period of time. After a month or two, take them out and give your head some rest. The extensions put stress on your hair, so make sure to give your hair some deep conditioning treatments during the resting period.
Install them back after a week if they are still in good shape. You can buy a set of new ones without spending a fortune.
Enjoy your new style without any long-term commitment!
Written by Evelyn Davies. Hair Stylist. Creative writer.
So fine hair – it’s a pain, right? Fine hair needing volume? Wanting a guide on hair extensions for thin hair? Well, you’re at the right place!
Best Hair Extensions for Fine Hair
Fine hair that never grows? Hair extensions may be your only option for long thick hair. But there are so many types of extensions now. What’s best for your fine hair?
Hair Extensions have many benefits. Extensions can make your hair appear much thicker, longer, stronger and reduce daily styling times. Fine hair needs extra care because it’s delicate. You need to research what’s best for you.
Extensions Pulling on Fine Hair
Pay attention to your roots and scalp if you have fine hair.
You have to avoid putting too much tension on your delicate roots. The last thing you need is to lose hair from too much weight/incorrect application. So, here’s a list of the hair extension types I recommend for fine hair and their benefits.
Are Nano-Beads Good for Fine Hair?
Nano beads are good for fine-haired people because you have the guidance of a professional. They can advise you, check up on how it’s going, and know when it’s time to remove them.
I think these are the best option for an individual bond hair extension on fine hair. They are more permanent so you can’t take them out and they need to be applied by a professional. They come with a flexible silicone tip and are applied with a tiny bead. They move nicely with the flex-tip and do not put too much strain on the roots.
Please bear in mind your personality and lifestyle. If you don’t like spending time blow-drying, or, if you tie your hair high and tight regular permanent extensions might not be for you.
These are wefts/rows of hair that you clip in and out as you please. These are great because you can choose when to put them in, take them out, and even how much you decide to wear. Perfect for tailoring it to your fine hair needs. I recommend having a break from extensions, especially on very thin hair, so the temporary nature of clip-ins is great.
Halo Hair Extensions for Fine Hair
Brilliant extensions to avoid pulling on thin hair.
These are super, non-invasive, temporary extension pieces. They suit fine hair types because they are temporary, with just a fine wire that creates a ‘hoop’ that sits gently on the head. Hair falls over the top and hides the hair piece. So, they are pretty good for those of you who want to avoid all clips, beads, glues, and braids.
Hair Pieces for Thinning Hair
Thinning hair has to be looked after. The last thing you want is to pull more out. The right hair pieces can help.
The world boomed with SOOO many hair pieces and it’s hard to know what’s best for fine hair. If your hair is particularly fragile, I recommend using something like a faux hair scrunchy. Avoiding heat styling. Tying it up loose and wearing a gentle hairpiece will help give your hair a break.
Top-tip – tie up your natural hair and tease it out a little around the roots, don’t wear it super tight. Tension can cause hair loss.
Ponytail Extensions for Thin Hair
There are a few fake pony methods. I think the best on fine hair is the one with the clip and wraps around it.
The tie around would put all its weight on your pony. Whereas when it has a clip the weight is distributed and isn’t as intense on one point. Meaning it isn’t pulling your hair around the edges as much. They are great for lengthening and thickening your pony and giving a quick effortless up-do.
Hair Extensions for Short Thin Hair
There are still extension options on short, thin hair.
This is the most difficult hair to blend. Because you’re short and thin, the hair may not be long enough to hide extensions. If you have a little length check out crown extensions that are textured for better blending.
Also, you may want to look into wigs. The wigs on the market for fine hair are of fantastic quality. Lace-fronted wigs are great for a natural appearance. And lace hand-tied wigs are very natural.
Or, there are headband wigs. These have a soft headband around the front to hide the hairline. Nice and easy, no faffing. So why not go for a wig until it’s grown? Then you can try one of our other options.
Hair Extensions for Thin Hair on Top
Thinning on top is never fun. But we got you covered – literally.
Bang and crown extensions are amazing for thickening the top. If you just need an extra boost on the top of your hair, try them out. They just give that fuller appearance. They thicken wispy bangs, plump up flat layers, and hide gaps where your hair splits. There are even great options for thinning guys.
Hope this guide has given you the confidence to find the right hair extensions for your fine hair. Thanks for reading!
If you’ve invested in a good quality wig, you’ll want to keep it safe and in good shape when not wearing it. Just tossing your wigs on your dresser isn’t a good option. Your wigs require appropriate storage to look their best.
Proper storage accessories will keep your wigs organized, protect them from tangling and deformation, and extend their lifespan. Appropriate wig storage will also ensure a clutter-free and more comfortable space.
Get your Marie Kondo groove on, ladies and gents! Your most frequently used wig will be readily available when you want to put it on.
Plus, there’s a wide range of accessories designed for storing your wigs. The following are some most common options for storing wigs listed from the highest to the lowest degree of user convenience.
1. Hanging Wig Stands
Hang out without a doubt with this cool and effective option! If you want to keep your wigs out of the way, but still easily accessible, consider buying a hanging wig stand. This isn’t an all-purpose wig storage accessory, but it works great for drying and storing wigs. If you have multiple wigs, this is a must-have wig accessory. Wig hangers are suitable either for short-time or for long-time storage.
Advantages
Space savers: If you’re running out of space on your dressing table, hanging wig stands are the way to go. The greatest thing about wig hangers is that you can put them out of sight, so your room is more organized. Don’t stress over any mess since they also can hold wig bands, hats, caps, and scarves.
Keep your wig clean and safe: The wig hangers enable you to hang the wigs discreetly in your closet to keep them away from light and dust, out of the reach of pets, and safe from children. Your wigs will remain in good shape and untangled between uses. The hanging design preserves the bottom of your wigs from collecting dust.
Efficient for storing long wigs: Another advantage over regular wig stands is that hanging wig stands can be used either for short or long wigs. You no longer have to choose separate wig holders for your short wigs, and another one for long ones. Long wigs can hang freely, without tangling, which helps to increase their longevity.
Ideal for drying wigs: A wig hanger is very handy when you need to dry your wig after it’s been shampooed. You can hang it on your shower rod to dry. A wig hunger provides good ventilation for fast and complete drying, and it also keeps your wig in good shape while it’s being dried.
Convenient for traveling: Wig hangers are collapsible and easy to disassemble for easy travel. Bermuda or Bali, anyone? When taken apart, they lay flat, so they take up little space in your suitcase. They’re super convenient when you need to dry a wig and keep it handy in your hotel room.
Disadvantages
Moves and grooves: While more practical for storing than a mannequin head, a wig hanger isn’t suitable for styling a wig as it’ll tends to move.
2. Collapsible Wig Stands
These stands are intended for displaying, storing, and drying your wigs. You need to assemble them to get them ready for use. Make sure to place them on a flat surface, such as your dresser or closet shelves. Place the wig on the stand after combing it out and it’ll be ready for the next use. Free your wig worries with this folding fix!
Advantages
Eye Candy: The innovative design makes them more eye-pleasing than canvas and foam heads.
Fly Dry: An open frame allows for air circulation all around, so the wigs dry quickly and evenly.
Heaven Scent: The hollow design helps to eliminate the typical odors of brand-new wigs.
Shape Up: This method keeps your wigs in good shape and tangle-free when stored.
Frequent Flier: The collapsible construction makes them highly portable and travel-friendly.
Head and Shoulders: They can also be used for displaying hats and caps.
Disadvantages
Slide and glide: Collapsible wig stands aren’t convenient for styling due to the lightweight base that will move around if you try to brush the wig.
Height Without a Fight: This wig stand is usually made of plastic and is easy to put together. The height is adjustable to accommodate different wig lengths. An adjustable plastic wig stand is used preferably for displaying and storing wigs. It helps retain the shape of your wig and keeps it tangle-free when not in use.
Advantages
Runway Ready: The design is minimalistic, modern, and very stylish.
Flex and free: Lightweight and collapsible designs are convenient for traveling
Downside
Handle with Care: The base isn’t heavy enough to sit securely during styling.
4. Cork Canvas Block Heads
From Wine to Wigs: A canvas head is the best choice for making wigs because it’s sturdy and t-pins friendly. These mannequin heads are made of cork and lined with fabric. They’re rather bulky and require a stand or tripod to sit securely. Canvas heads are much more durable than foam heads and can last for years. If cork works for your wine bottles, it’ll work for your wig!
Helpful tip: Make sure to protect it from moisture if you do any kind of wet styling. Use saran wrap to wrap it and prevent mold inside of the head.
5. Plastic Wig Heads
Fantastic Plastic? These mannequin heads are designed to mimic the shape of humans’ heads. Natural and realistic appearances make plastic heads ideal for displaying wigs. Wig heads will also preserve the style and shape of your favorite wig when not in use. Using wig heads for storing multiple wigs isn’t a good option if you have limited space.
Advantages
Eyes on the Prize: Unlike a canvas base, the presence of ears and eyes allow for a better visual appearance.
Multipurpose: It can also be used for displaying sunglasses, hats, jewelry, scarves, and masks.
Style Status: Some models have flat bottoms and can sit on their own. The heads with a hole can be fixed to a stand or tripod underneath to withstand styling.
a)Wig Heads Made of Soft Plastic
Wig heads made of soft plastic are pin-friendly and can be used for displaying, storing, making, and styling wigs.
b)Wig Heads Made of Hard Plastic
Mannequin heads made of hard plastic offer the perfect accessory for displaying wigs and storing your most-used wig. They’re sturdy enough to hold heavier wigs.
They don’t work very well for wig styling since you can’t put T pins in the plastic, so the wig may slide around when you try to brush it. More expensive models have a net attached to the head to ensure your wig doesn’t slide off.
6. Foam Wig Heads
Roam in Foam? Foam heads are inexpensive, lightweight, and suitable for storing and styling wigs. However, most foam heads look flimsy and can easily disintegrate over time from using T pins
7. Wig Boxes
Rock the Box: If your wig comes in sturdy packaging, you can store your locks by placing them back in their original box. You also can purchase a wig box that fits your needs. Wig boxes look tidy while keeping wigs away from sunlight and dust. Some wig boxes have an insert that preserves the shape of your wig when stored. Lightweight and compact boxes are very portable and perfect for traveling.
Downside
Space Chase: Low-quality wig boxes don’t leave enough space for your wig to breathe.
Bottom Line:
Regardless of which of the Lucky 7 options you choose, keep your wig stored safely and shine bright!
Are you frustrated that temporary colors never show up on your dark hair as brightly as you had hoped? You are not alone. A lot of people want to add a pop of color to their hair without permanently dyeing it. There are a few possible reasons for that:
Bright hair dyes require pre-lightening to strip away hair pigment, which can seriously damage hair.
Permanent hair coloring services are expensive and require a great deal of time at the salon.
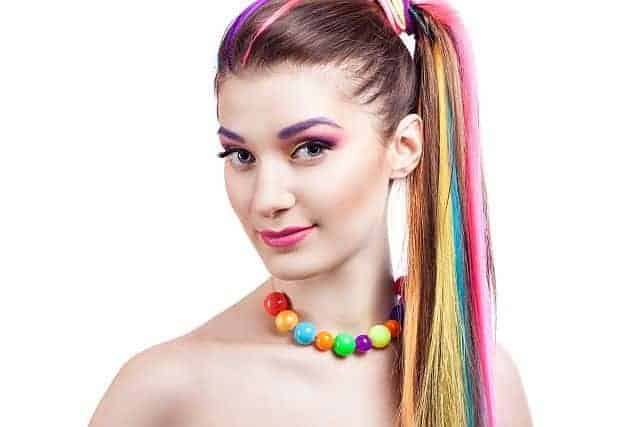
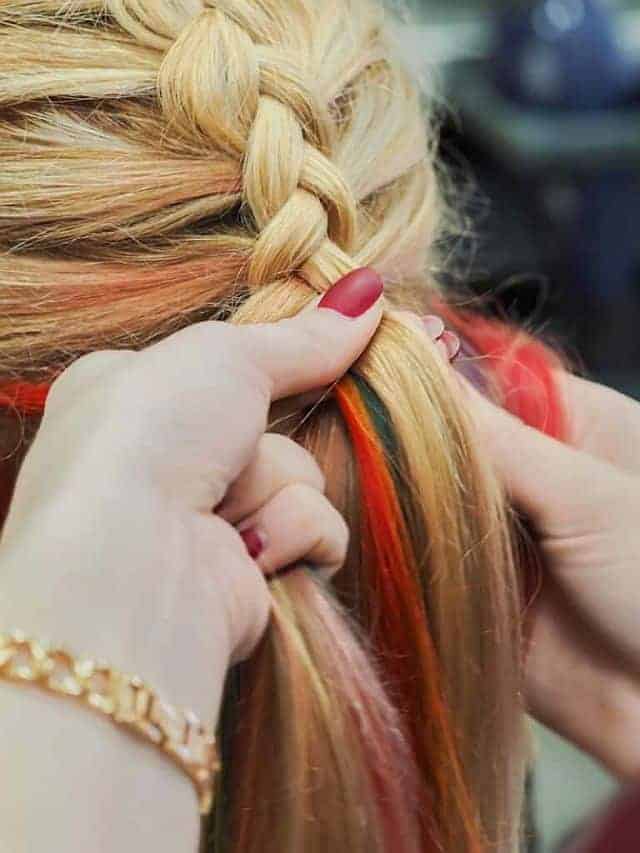
What about trying colorful clip-in extensions? If you are looking to introduce a funky, new color to your look without using bleach, rainbow clip-In hair extensionsare ideal for such an experiment! Adding those vibrant streaks of color to your hair for a special occasion or fun evening out is easy and painless and requires no commitment to long-term wear or maintenance.
What Is so Great about Colored Hair Extension Clips
Rainbow clip-in hair extensions are colorful hairpieces. Each extension has a small tooth comb that easily snaps into place near the roots of your hair. This makes those extensions a great choice if you are looking for some fast and easy clip-in highlights!
You can wear a single piece or many at a time, depending on your desired look. They are comfortable to wear and blend nicely with natural hair. You can easily take them off and reuse them when needed.
They also offer the perfect “pop” of color, whether you are looking to spice up your Halloween costume or add fun and flair to a birthday party, themed party, or special event. These festive hairpieces are incredibly popular for raves, music festivals, concerts, clubs, and crazy hair days, not to mention how much fun it is to play around with them at home.
Rainbow hair pieces are the perfect children’s gift for many occasions.
Advantages Over Permanent Hair Dyes:
Unlike hair dye, these extensions are temporary and easy to remove.
The snap-in attachments eliminate the need for damaging treatments.
Rainbow clip-in hair extensions stay bright after use and never fade.
An especially great option for those with black hairbecause 1) black hair requires especially harsh treatments to remove the pigment, and 2) chalks are time-consuming and do not show up well on dark hair.
A mess-free and safe alternative to highlights: parents can forget the fear of permanently damaging children’s hair. This way they won’t expose their children to harsh chemicals, and there is no worry about the inevitable stains from temporary hair dyes.
Suitable for individuals who are still too young for harsh bleaches and dyes.
How to Attach Clip-In Colored Hair Extensions:
Brush your hair thoroughly.
Lift and clip a small section of your hair, exposing a section of hair just underneath it where you wish to clip in the extension.
Open the clip and slide the open portion under your hair close to the root line. Then secure the clip by pressing inward.
Unclip the top section of hair and blend it over the extension with your fingers to cover the clip and prevent the appearance of visible ‘bumps’.
To shorten a learning curve, watch the instructional videos on how to attach clip-in hair extensions.
Short Guidelines for Styling
Always check the manufacturer’s instructions before applying heat, as excessively high temperatures can damage hair extensions. Most rainbow hair extensions are made of heat-resistant synthetic fibers and can tolerate temperatures of up to 300 degrees Fahrenheit.
To create curls, use a curling iron on the lowest heat setting. Hold the extension in the curling iron for 20 seconds. You can also use hair curlers to set the shape after dipping the extensions in moderately hot water. Then simply let them air dry and remove the curlers. Bam!
Easy Care Tips
Wash your hair extensions in warm water using a mild shampoo and conditioner. Immediately afterward, set them on a flat towel and let them air dry. To help reduce static and prevent tangles, consider spraying with a mixture of conditioner and water.
It is also important to gently brush through the extensions before putting them into your hair and again when removing them.
To reduce the shine from the synthetic fibers, simply dab on some baby powder.
Avoid tangles by removing the hair extensions before swimming or going to bed. Store them for future use in a plastic bag or hang them in a dry place.
The Benefits of Wearing Colored Clip-In Hair Strakes:
You can enjoy vibrant highlights without committing to expensive, permanent treatments.
The easy lock-in attachment makes taking them in and out a breeze.
A wide selection of colors makes it easy to mix and match with any of your outfits. You can effortlessly try out new styles or celebrate a special day.
These are the perfect solutions for cautious parents whose children demand bright highlights. Super cute, vibrant hair accents that provide endless entertainment.
A safe method for adding length, volume, and color without damaging your hair. The extensions can be trimmed to match natural hair length.
These extensions blend nicely into natural hair.
Weaving them into braids adds instant bulk and color.
The flexibility, ease of use, and wide array of colors make clip-in extensions a great value!
Downsides
Synthetic fibers do tend to have static cling and are prone to tangling. Depending on quality, some extensions can get “messy” and tangled fast but work great for a special day. Wearing them in braids and ponytails helps to reduce tangles.
Lower-quality synthetic fibers are prone to shedding. You may notice colorful strands of hair that have separated from the extension.
Fine hair does not hide the clip as effectively and can make it easier for the clip to slip out.
These often come without instructions. You can usually find the instructions on the seller’s website or by watching some YouTube tutorials.
This post contains links to Amazon. The publisher may get paid if You purchase something through the links without additional costs to You.
Are you bored with your hairstyle and looking for a way to refresh your look? Cutting your bangs can be a great way to update your hairstyle and try something new. However, maintaining bangs can be a headache as they require frequent trims and daily upkeep. On top of all this maintenance, if you get tired of having bangs they will take forever to grow out. In the meantime, your outgrown bangs can be a nightmare to style.
How About Trying Fringe Hair Extensions?
If you want to try having bangs but are scared to have your hair cut, fringe hair extensions are a great temporary solution. They will meet your need for bangs and create the hairstyle you are looking for without having to chop your hair off. Not only are these commitment-free bangs super easy to attach and take off, but they are also comfortable to wear and can be easily blended with your real hair.
Clip-in bang extensions are designed with one or more clips that attach them to the roots of your hair. The clips keep the bangs secure in place, even on a windy day.
Just like your own hair, you can trim your brand-new clip-in bangs to the desired length and thickness to fit your face and hairstyle. You can also style them in many ways to fit your liking.
The Differences between Human and Synthetic Bang Extensions
Clip-in bangs come in two different hair types, human hair or synthetic hair, and each has its benefits. For instance, human hair bangs can be blow-dried, heat-straightened, and curled to create any hairstyle you like. However, some synthetic hair bangs are not heat-friendly, so make sure to read the instructions before applying any hot tool.
Another difference between human and synthetic bangs is the ability to apply color. Human hair bangs benefit from their ability to be dyed into any color you wish, while synthetic bangs won’t take color.
Why are Clip-In Bangs Worth Trying?
Great for testing: Bang hair extensions are a great way to test out bangs, both for length and shape, before committing to such a big change. If you love the idea of bangs but aren’t quite sure if it will be right for you, clip-in bangs are a perfect way to see how your bangs would look before you make “the chop”.
Removable: Some women would love to have bangs, but they cannot get used to hair that continually touches their forehead and blocks their vision. Thankfully, this is not the case with temporary bangs! Since they are so easy to place and remove, you can simply wear these for as long as you want or need, and then simply take them off.
Volume booster: Clip-in bangs will give more fullness and volume to fine or thinning hair. If you would like to fill in your thinning crown area, but do not want to wear a full wig, clip-in fringe bangs are a great compromise. They will instantly give the impression of fuller hair and are easily camouflaged in your hair.
Can Hide imperfections: Did you accidentally cut your real bangs too short? Detachable bangs are the best answer to your problem. This clip-in fringe will add some extra length needed to hide your real bangs until they can grow back to your desired length. Or perhaps you are in a hurry on your way out of the house? Clip-in bangs are a great way to hide unwashed hair when you are rushed and want to look fantastic.
Give you extra oomph: Bang hairpieces can instantly revamp your look when you want a completely different style. Not only do they work for all different hairstyles, but they can also make you look much younger. And you don’t need to worry about keeping your hair down to camouflage the clips! Temporary bangs look cute with a messy bun or a ponytail and are adorable when worn with a hat or headband.
Complete your costume: Bang extensions are a great option for your next Halloween costume, special cosplay events, or costume party. You can even add bang extensions to your wig for even more flexibility and options. Enjoy being a chameleon and have fun wearing them!
Interested in clip-in bangs, but not sure how much of a commitment to make? Why not buy a set of more affordable temporary bangs to test them and play around with different styles? Once you are sure about what you are looking for, buy a more luxurious product, and enjoy having bangs!
How to Blend Bang Extensions with your Natural Hair
The key to clip-in bangs is blending your temporary bangs with your hair to make sure no one knows your secret. A little creativity helps to make them look more realistic. Here are some tricks to make sure nobody will know that part of your hair is not yours.
Color is everything. Make sure to color-match your temporary bangs to your hair color. If your bang extensions are made of human hair, dye them to achieve the perfect match.
When you cut your clip-in bangs to the desired length, point the scissors vertically and cut them into the ends to soften the line and get a more textured look.
Synthetic bangs can have a shine that is different from your natural hair. Use dry shampoo or baby powder to tone down the synthetic shine and match the texture of your natural hair.
Use colored dry shampoo for a better color match between the clip-in bangs and your hair if needed.
Wear a headband or scarf at the clip location to mask imperfect matches in color and texture.
Run your fingers through the bangs or fluff lightly with a brush to blend the bangs into the rest of your hair.
Secure the clips onto the roots of your hair, and then brush your hair over the clips to make them invisible.
Synthetic wigs come pre-styled and have less styling versatility than human hair. However, taking care of synthetic wigs is not as easy as it might seem. Synthetic hair tends to create friction and tangle more than real hair. Tangles and frizz especially affect long or shoulder-length synthetic wigs. The frizz usually happens at the ends or underneath and is often caused by friction from jewelry or clothes.
Synthetic hair doesn’t contain natural oils produced by your scalp, which is the main reason why the wig fibers easily get dried out. When your synthetic wig doesn’t get the moisture it needs and ends up rubbing against your clothes, you’re bound to get a frustratingly frizzy wig.
Fortunately, there are some things you can do to minimize tangles and keep frizz under control.
How to Keep a Synthetic Wig from Tangling
To lessen problems caused by tangling, it’s essential to use a shampoo and conditioner, designed specifically for synthetic wigs.
After washing your wig, make sure to be extra gentle when drying it with a towel. Otherwise, you’ll end up with even more tangles.
Wearing a silk or satin scarf over the collar of your jacket or wool sweater helps keep tangles at bay. It’s also best to stay out of direct sunlight and avoid the wind.
It can be easy to take a snooze, but it’s important to remember not to sleep with your wig on, or else you’ll end up with unnecessary knots and tangles.
Brush your wig with a comb or brush designed specifically for wigs. You can do this after each wear to catch those fine knots early on. Spritz your wig with a leave-in conditioner from both sides and gently comb through. If your wig is curly, use your fingers to detangle it and avoid using a brush. Then give it a shake and put your wig on a stand.
To keep the fibers soft and to prevent future tangles, use a leave-in detangling spray specially formulated for synthetic hair. Jon Renau HD Smooth Detangler is designed to eliminate tangles and frizz in synthetic hair extensions and wigs. It coats wig fibers giving them a much smoother texture, This spray is pricey but a little goes a long way and it will give your wig a longer life.
How to Keep Synthetic Hair from Frizzing
To maintain a healthy-looking and smooth wig, using the appropriate wig products is essential. Using regular styling products will lead to the build-up of dull fibers. You also can’t scrub roughly when brushing. It’s tempting to treat synthetic wigs as normal hair, but they’re not.
Let the wig air dry naturally by placing it on a wig stand. Cover your wig when not in use with a satin scarf to prevent rubbing against other objects.
Wrap your wig with a satin scarf when you are wearing it in the sun, rain, or wind.
Lastly, use a wig spray before or after styling to coat the fibers. This product will moisturize the fibers and prevent friction. African Essence Control Wig Spray reduces tangling, keeps the strands from looking frizzy on the ends, and prevents flyaways.
How to Style your Synthetic Wig
Synthetic wigs are pretty easy to style because they come pre-styled and you can wear them with minimal style upkeep. These wigs have a surprising style memory and always bounce back into shape after washing and air-drying. For detangling and minor style adjustments, use a Styrofoam or canvas wig head to stabilize the wig while working on it.
Straight-style wigs can be combed and brushed, just make sure to use the right tools and products. Use a looped brush for brushing your synthetic wig to avoid pulling hair fibers and prevent shedding. Lightly mist the wig with a wig spray to add moisture and reduce frizz. After spraying, you can use your fingers to create a tousled style.
Wigs with tight curls should not be brushed as brushing can ruin the curls. Curly wigs should be finger-detangled to remove tangles and knots. Keep in mind that using a wig hairspray can help prevent friction and maintain the style.
Related product:Awesome Synthetic Wig Leave-in Conditioning Spray prevent dryness and helps detangle any type of hair. This spray can be used before using hair rollers. It revitalizes old wigs, eliminates bad smells, and promotes volume and softness.
Caution – you should not use hot tools on regular synthetic wigs because the heat will melt synthetic fibers.
How to Curl a Synthetic Wig?
Curling your wig is a great way to refresh your style. Unfortunately, standard synthetic hair will easily melt if you use hot tools to curl it. If your wig is not heat resistant, you need plastic or foam rollers to create curls.
Slightly mist your wig with cool water before using rollers.
Comb the section of the hair to ensure that it is tangle-free.
Spray the section you’re working on with a wig hairspray before curling.
Wrap the end of the wig hair around the roller and roll each section, starting from the ends towards the base of the wig.
Use hair clips to secure the rollers in place.
Once the wig is completely dry, unravel the rollers and apply a wig spray.
How to Style Heat-Friendly Synthetic Wig
Nowadays, some brands of synthetic wigs are made to withstand the low to moderate heat of styling devices.
The temperature you use should aim for is usually between 180 to 250 degrees Fahrenheit. With the proper temperature settings, you will be able to create curls without causing permanent damage to the fibers.
For added protection use a heat protectant that is meant for use on delicate synthetic hair. HairUWear”Restore” Leave-in Conditioner & Heat Styler is a gentle nourishing detangler that also works as a heat-styling protector for heat-friendly synthetic wigs.