How to Properly Use Velcro Rollers to Prevent Damage to Your Fine Hair

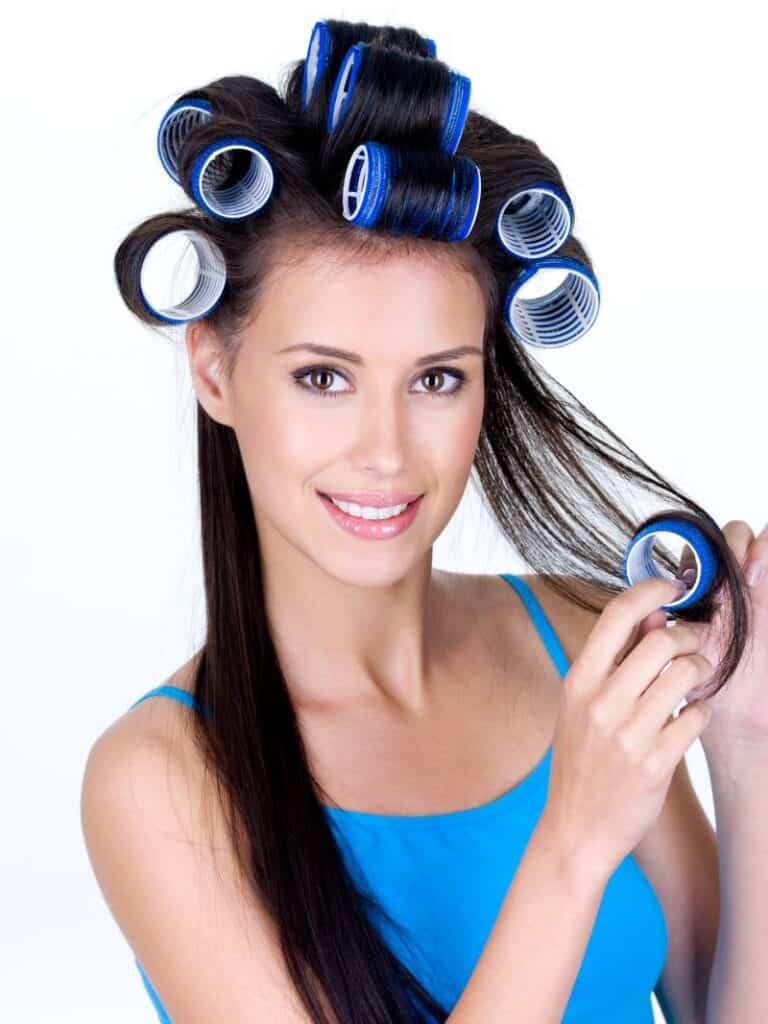
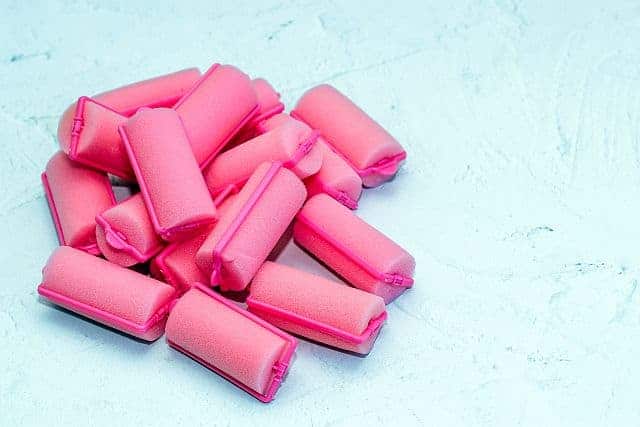
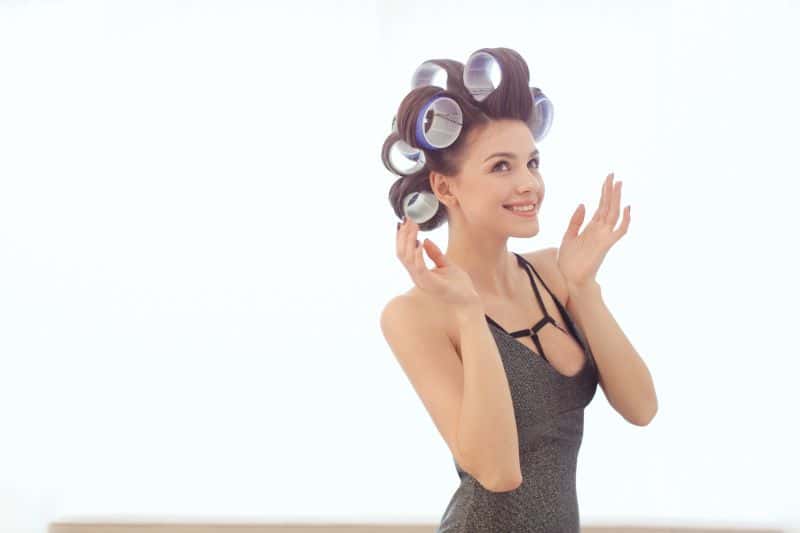
What Are Velcro Rollers?   

Velcro rollers are making comeback, and there are a number of reasons why. These hair styling tools give volume and lift to flat, lifeless hair in a matter of minutes. They’re heatless, self-gripping, and don’t necessarily require other accessories to secure them in place.

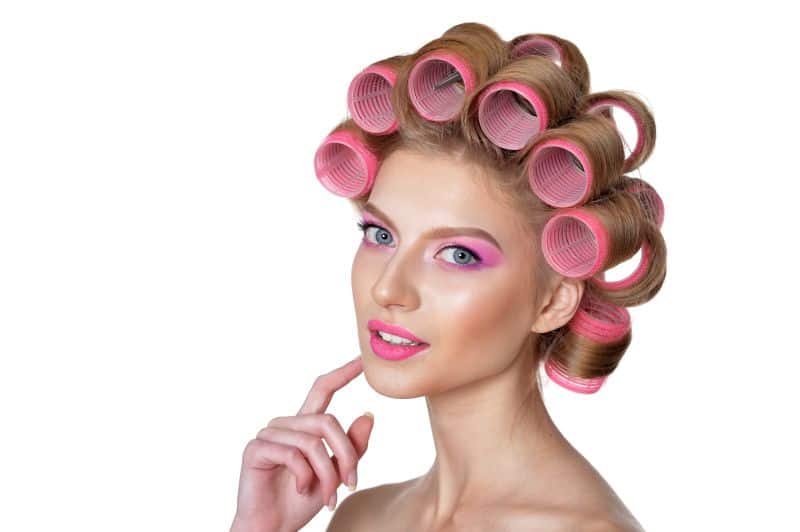
The rollers are made from plastic and have a Velcro exterior with enough grip to easily adhere to and wrap hair. However, Velcro rollers are not only for curling your hair. Small Velcro rollers naturally allow tight curls. But larger rollers can create volume and bounce in flat, straight, or fine hair in addition to allowing for looser, bouncier curls and waves.

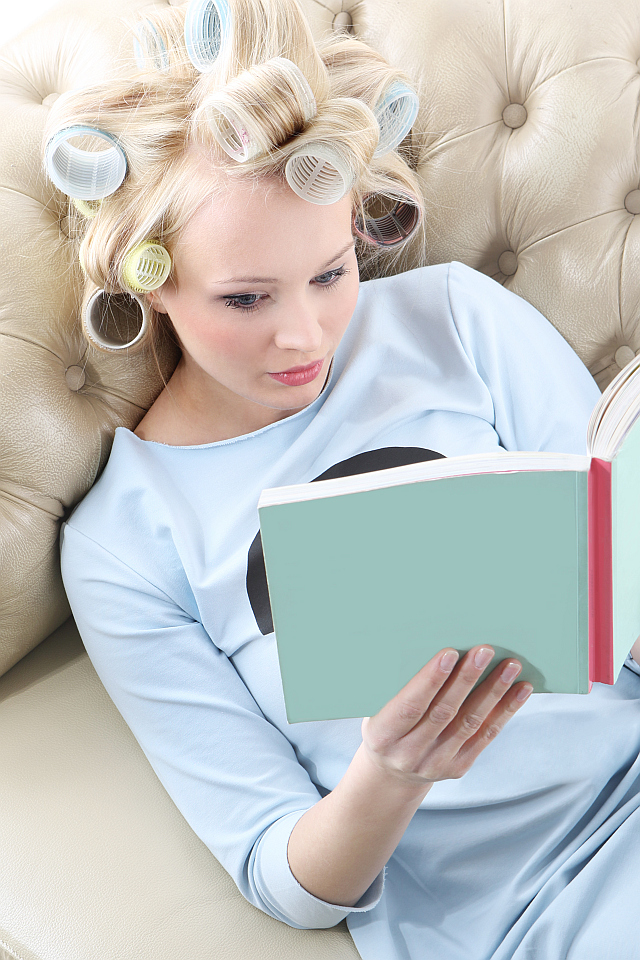
With a set of Velcro curlers, you can get voluminous, bouncy blowouts without ever needing a salon. Better yet, you can take them with you anywhere.

brunette woman in welcro rollers looking at camera

Do Velcro Rollers Damage Hair?    

By using velcro curlers, you can reduce the use of heat-styling appliances that are known to dry out and damage your hair. However, Velcro rollers are not completely safe for your hair, especially if you use them all the time. Many users, especially those with long or coiled hair, complain that their hair was damaged due to using velcro rollers. The most common problems associated with the use of Velcro rollers are split ends, the appearance of frizz, and hair breakage.

Velcro curlers do not have a smooth surface like magnetic curlers. Rather, they have tiny bristle-like hooks meant to secure them in place. Super-textured hair can easily catch in the roller as a result, which leads to frizz and—in more severe cases—hair breakage. If you have 3C or 4C hair, you may need to smooth it with a hot brush before applying Velcro rollers.

How to Minimize Damage when Using Velcro Rollers

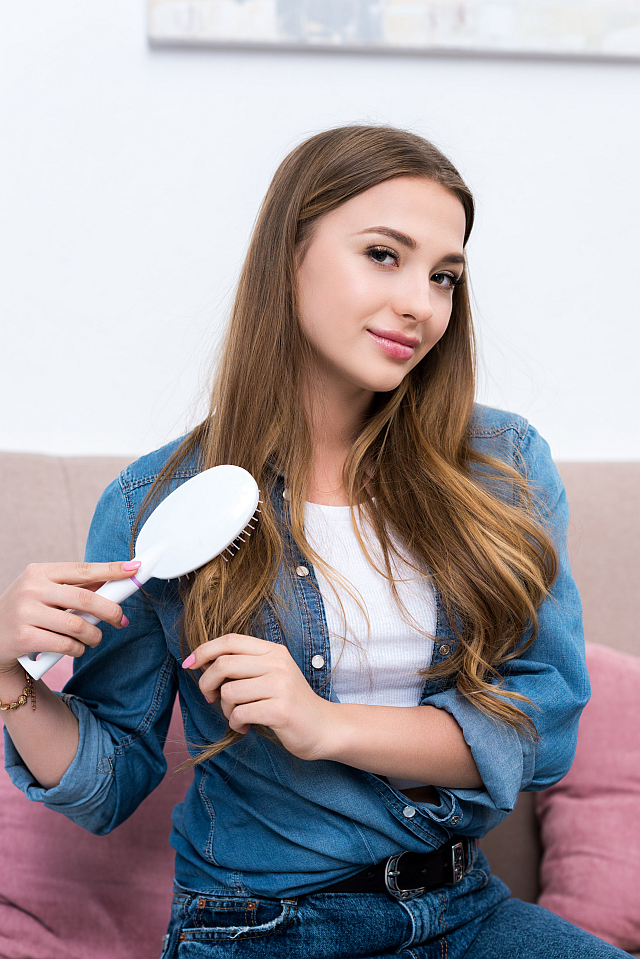
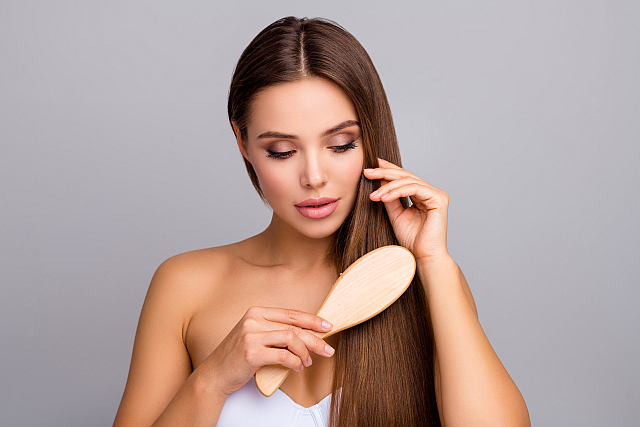
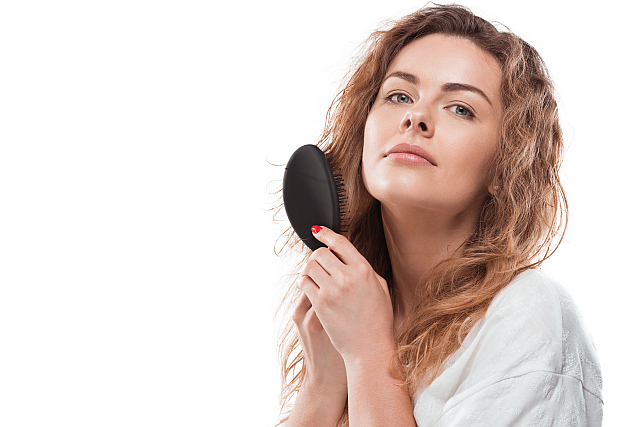
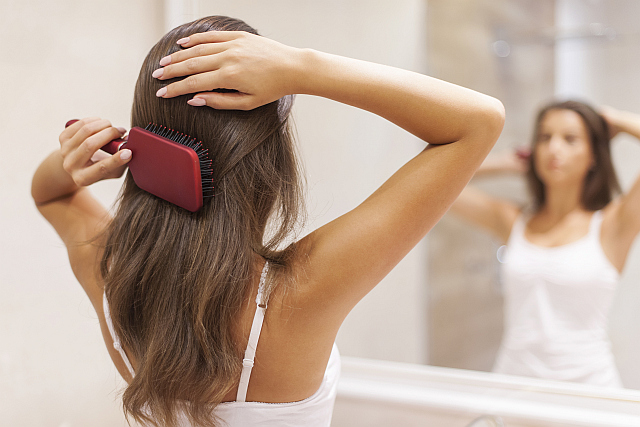
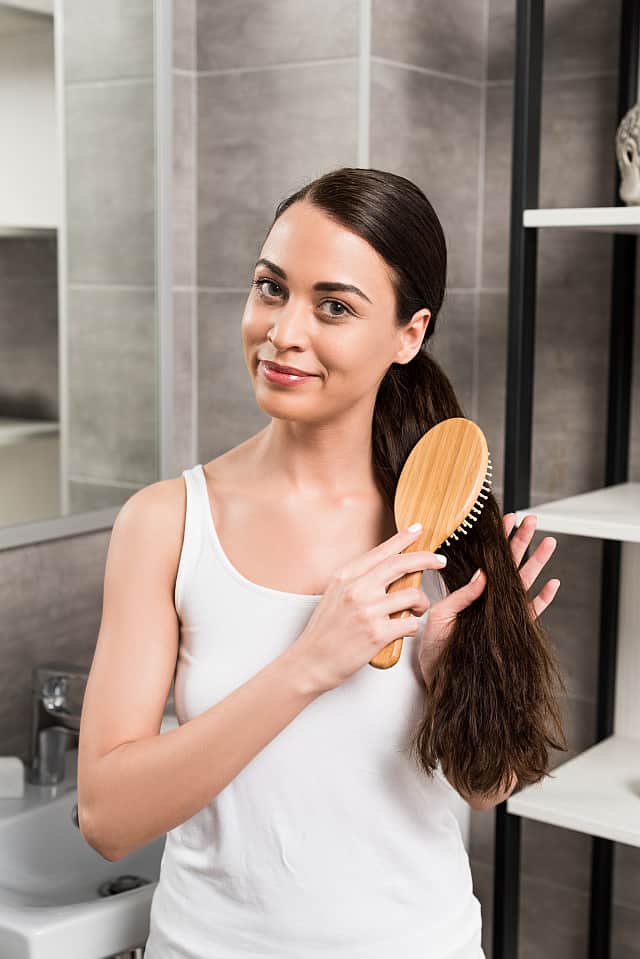
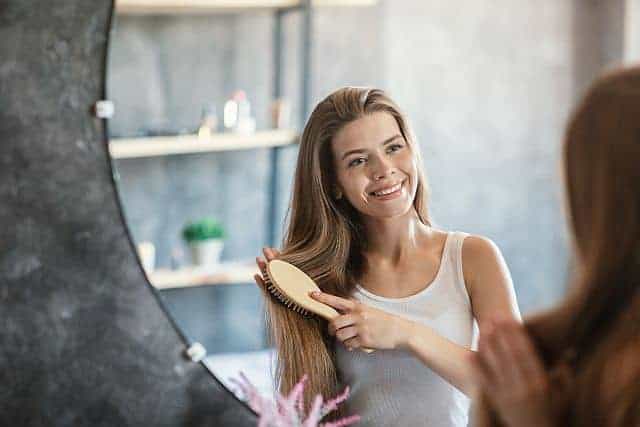
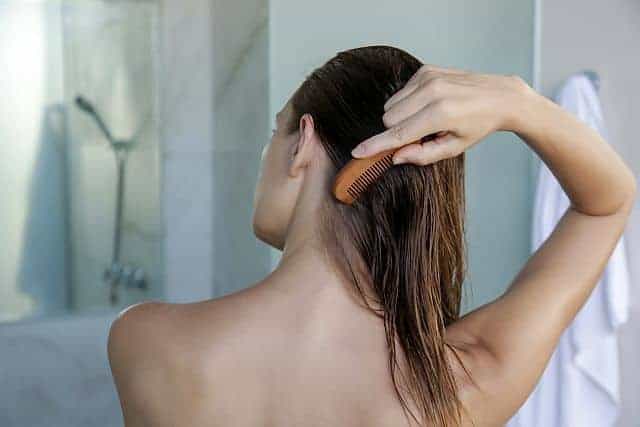
Fine hair is more susceptible to breakage, so individuals with fine hair types should be very careful when using Velcro curlers. To minimize the possibility of tangles, brush your hair before rolling.

Always put the correct amount of hair on the roller. The sections of the hair at the base should be no larger than the roller itself. Too much hair can cause strands to get caught during removal.

Unless your hair is short, use a Velcro roller with a diameter greater than 1 inch. The larger the roller you use, the less trouble you will have when unraveling your hair. This greatly minimizes the chance of damage. 

If you use a blow dryer, wait for the rollers to cool down before taking them out.

Although Velcro rollers are described as self-gripping, it’s almost always better to secure them in place with clips. Unsecured Velcro rollers can move and touch surrounding rollers, causing hair strands to catch and tangle.

Regularly blow-drying your hair while it’s wrapped in Velcro rollers can result in dryness and heat damage. To avoid this, first, let your hair air dry about 80% of the way, and always use a heat protectant. Then put the rollers in your hair and apply heat with a blow-dryer so the tools can do their work.

If using a blow dryer, wait for the rollers to cool before taking them out.

Woman in velcro hair curlers indoors

Do Velcro Rollers Work on Fine Hair?       

Velcro rollers produce wonderful results with fine hair giving the lift and volume that fine hair needs most. However, you must be gentle when placing and removing the rollers. It’s critically important to perform each step correctly. Fine hair is delicate and prone to breakage, and you should avoid any pulling that may lead to damage or breakage. Always use large-sized rollers on fine hair, as larger sizes will minimize any chance of getting hair stuck in the roller.

How to Correctly Use Velcro Rollers

Velcro rollers can be used on both wet and dry hair. You need to apply a styling mousse with heat-protective properties to make your hair more pliable while preventing heat damage. First, air or rough-dry your hair until it is about 80% done.

Next, use a hot air brush to heat and finish drying the chosen section of hair before lightly wrapping it around the curler. Start from the ends and rotate the roller toward your roots. If you have long hair, you will need to secure rollers with a clip or bobby pins, as longer hair puts more weight on them.

If your goal is to get more volume, spray a root lifter or other volumizing product over your rolled hair. Then use a hair dryer with a diffuser to apply more heat and make the curling process more effective.

When using rollers on dry hair, you can heat each section with a flat iron or hot brush. You’ll need to roll the sections up while they’re still hot, as you can only change the shape of your hair and add lift with heat. 

If your goal is maximum volume, use larger curlers. Just as the larger barrel of a curling iron gives looser curls, the same is the case with curlers. Curlers often come in sets of different sizes, so you can choose which one to use depending on your desired hairstyle. By combining different sizes, you get more dimensions and more natural loose curls.

Finally, leave the rollers in for 10 to 30 minutes before removal.

It’s important to wait until your hair cools completely before removing the rollers. Removing curlers from hot hair can spoil the results.

How to Put Velcro Rollers on Fine Hair

Fine hair isn’t ideal for the self-gripping aspect of Velcro curlers, as they can fall out easily. To secure the curler, you’ll need to use hair clips.

Don’t overuse the blow dryer. Apply only as much heat as necessary to manipulate your hair and create more volume and lift.

To get the max volume, lift the hair high before wrapping it, roll the section of hair back down, and fix the rollers closest to the roots of the section you work on. Also, roll the hair away from your face in face-framing areas.

Use your fingers to comb and style your hair. Using a brush can leave fine hair flatter.

beautiful woman with velcro hair curlers

How to Remove Velcro Rollers?    

The best protection against hair damage is to learn how to put the rollers on and take them off properly.

To remove the curlers, gently and slowly unroll them one by one without pulling or tugging. Make sure the curler does not catch your hair, which can be painful and may lead to damage.

Another method is to unroll the curler only far enough to grip your hair at the roots and slide it down instead of unrolling.

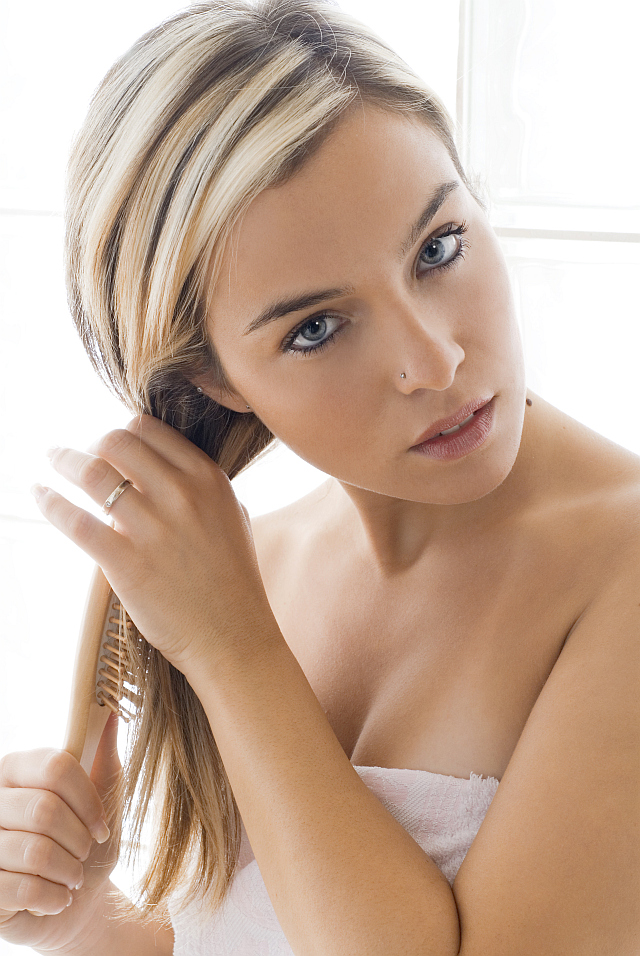
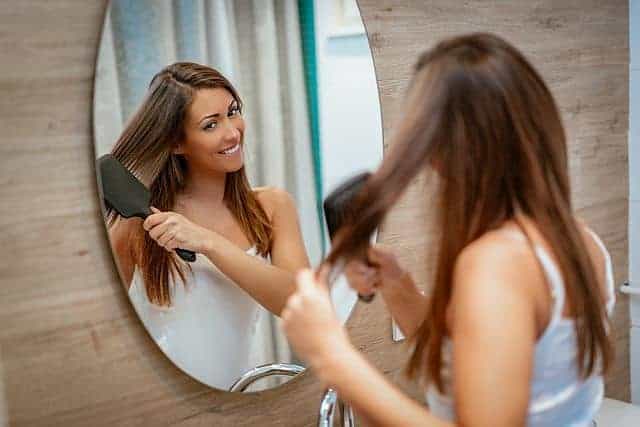
Once the rollers are out you can use a paddle brush to smooth strands or do finger styling to get a more natural look while leaving volume untouched. Finish with a hair spray to hold the style you’ve obtained.

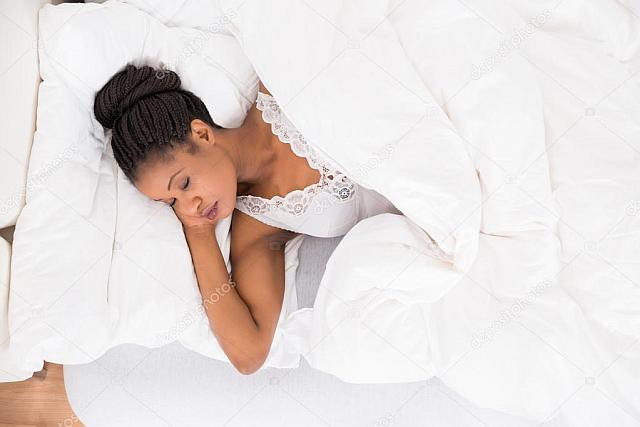
Can You Sleep in Velcro Rollers?   

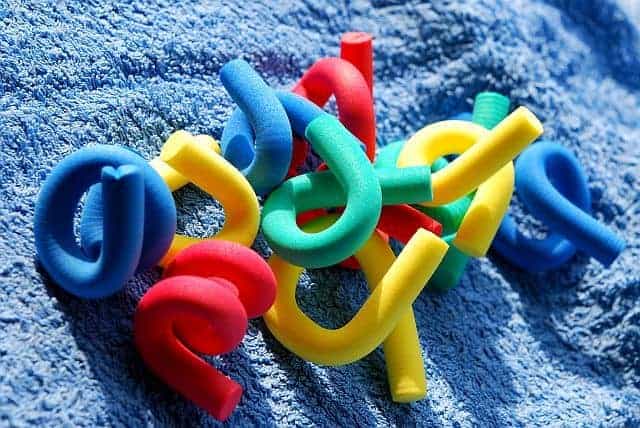
Velcro curlers are more likely to damage your hair if left in overnight. Movement while asleep will cause friction and tangles. Additionally, sleeping with Velcro curlers is less comfortable than with foam options. These problems can worsen with fine hair that needs more gentle handling. Therefore, it’s better to use these hair styling devices for twenty minutes before removing them gently.

To Summarize: How to Safely Use Velcro Rollers for Fine Hair and any other Hair Type?

Divide your hair into sections and use a good volumizing mousse and heat protectant.

Use 1-inch rollers or wider so you can take them out effortlessly.

Wrap amounts of hair that don’t exceed the size of the roller, wrap lightly, and secure the rollers in place with hair pins.

Remove the roller gently and avoid tugging or pulling your hair.

Allow your hair to air dry enough (80%) then place the rollers and use a blow dryer after wrapping.

If your hair is fine or thinning, you shouldn’t use Velcro curlers regularly.

Finally, never, ever sleep in Velcro rollers.

happy beautiful woman in hairrollers

Styling Permed Hair: Can You Flat-Iron, Curl, or Braid Your Permed Hair?

Perm, is that buzzword from the past that conjures images of gigantic curly hair full of frizz and pizzazz. But more recently, this buzzword has been making a comeback as a new and improved hair trend. From upgraded techniques that cause less damage to the ability to create softer, more natural-looking curls, perms are making waves across all hair platforms as the next best option for your style.

One of the most common reasons for getting permanent waves is to save the time you need to style your hair in the morning. Perms eliminate the need for using hot styling tools, making your morning routine much simpler. Since perm is a chemical treatment, there are some do’s and don’ts when styling your hair.  So, let’s get into the dos and don’ts of styling them, why you may or may not want a perm, and some common dilemmas about styling your permed hair with hairstylist Andrea Haynes @babehairxo.  

Cute young student girl with permed hair

How do You Style a Permed Hair in the First 48 Hours?

“What’s the best style post perm within the first 48 hours? Nothing. It’s best for the first 2-3 days to let your hair rest, meaning, no putting it up, tying it back, or styling it at all. In fact, you’ll even need to wait to get it wet” Andrea explains. “A perm is a chemical process that breaks down strong, natural bonds in the hair and reforms them to the shape of the rod used.”

What’s the Best Method for Styling Permed Hair in the Morning?

“Moisture. Keeping your new curls moisturized is the best way to style them day in and day out whether it’s morning or night. Invest in conditioning treatments and oils that saturate hair without leaving it greasy”, says Andrea. “If your hair is a bit wild in the morning, use a refresher spray that moisturizes better than water. Water is good too, but once it evaporates, your hair can be left frizzy. Finishes it off while it’s still damp with a mouse that does not contain alcohol” recommends Andrea.

Cute girl with permed hair outdoor

Can You Brush Your Hair After a Perm?

As counter-intuitive as it seems, brushing your perm is not the best way to encourage a soft curl pattern. “To avoid frizz and get the best from your curls, use your fingers to lightly divide pieces. You can also use a very wide-tooth comb to gently piece apart the individual curls” recommends Andrea.

“To impact the health of your curls the most though, think anti-frizz. To achieve less frizz, get a silk cap to sleep in at night. This reduces the friction between your hair and the fabric over the pillow you sleep on. It also reduces your need to brush your hair in the morning.” 

Cute girl with permed hair wearing a red dress

Can You Straighten Permed Hair with a Flat Iron?

According to Andrea, you should avoid heat straightening. “This is highly not recommended, for a few reasons. When the hair is permed, the core bonds are broken and then reformed. But it leaves your permed hair in a more sensitive state. Sometimes you’ll experience dryness, and you’ll need to increase the moisture in your hair-care routine. Flat ironing can only increase the dryness and high heat can damage the sensitive reformed bonds.

If you do decide to flat iron it, make sure to prep the hair with a cream-based, thick heat protectant. Don’t use a high heat setting, but slowly increase the temperature as needed.”

Can You Curl Your Hair after Permanent Waving?

Andrea points out that hot styling tools are not compatible with permed hair. “As with flat ironing a perm, any sort of heat can decrease its longevity and add dryness. It’s no different with curling a perm. It’s not recommended, but if you decide to do it, use low heat and a thick, cream-based heat protectant. Don’t let the iron sit long against the hair for the best results.”

“In the end, it’s better to engage with your curls like you would natural curls. Treat them liberally with moisture products, wash sparingly, and enjoy the curl pattern that takes shape” says Andrea.

Can You Braid Permed Hair?

“The real question is, when. Braids and perms go hand in hand. A braid compliments the beautiful movements of the curls, but make sure not to braid too tightly. Executing a tight braid can harm the perm and hurt your scalp. Keeping your braid loose and gentle is the best way to go” Andrea reveals.

young pretty woman with permed hair

Can You Dread Permed Hair?

The verdict is split on whether you should dread permed hair or not. Some professionals will say no, but some may have the skill set to do so. “Make sure to get the health of your hair tested before moving forward with this. Also, talk to someone who has had it done before and learn from their experience” recommends Andrea.

My Ways to Fix Flat Hair

I have been dealing with super flat and fine hair all my life. For so long I had been desperately trying to figure out how to give my hair a more lifted look. Over the years, I learned that, although flat hair can be difficult to manage, there are a few things that help to reduce my frustration. Today I’m going to share my experience with flat hair and provide some tips that helped give my lifeless hair more volume and movement. But first, let’s go over the most common causes of flat hair.

Why Does Hair Look Flat?

young woman with flat hair
  • Thin and fine hair: Thinning and fine hair are more likely to look flat than thick and dense hair.
  • Oily hair: When your oil glands are over-active, your hair can get oily and flat soon after washing.
  • Hair texture: Straight hair is more likely to look flat than curly hair. Curly strands take more space, giving more volume to your style.
  • Porosity level: Unprocessed strands create less friction and the hair is more likely to look flat than colored or otherwise chemically treated hair.
  • Inappropriate hair products: Moisturizing shampoos, 2-in-1 shampoos, hair oils, and sticky hairsprays can weigh down hair, making it look flatter.
  • Too many products: Hair can become flat if you overuse certain styling products. Too many products can create buildup which makes hair look heavy.
  • Hard water: Hard water in your shower can interfere with the cleansing action of your shampoo, reducing its efficiency. Plus, minerals from hard water can build up in your hair, weighing it down.
a pretty woman with voluminous hairtyle sitting at a restaurant

How to Revive Flat Hair

  1. Proper shampooing: I’ve noticed that if I apply shampoo only once, my hair will fall flat quickly. But if I apply shampoo twice and take time to massage my scalp well, my hair will be clean and feel fluffy for a longer amount of time. Using a shampoo brush is an added plus.
  2. Skipping conditioner: I avoid using conditioner regularly because it makes my hair look flatter. I only apply conditioner after using a clarifying shampoo and I focus on applying it to the ends of my hair. I leave the conditioner on for 30 seconds or less before rinsing it off.
  3. Volumizing shampoos: These shampoos give me the effect of slightly more voluminous hair. Even a small improvement can be helpful when you are struggling with the problem of flat hair. I use clarifying shampoo twice a month to remove buildup from volumizing shampoos and other products.
  4. Shampoo rotation: After using the same shampoo for a long period I notice that it loses its effectiveness and begins to leave my hair feeling heavy. Rotating several shampoos helps to lift my flat-looking hair and adds more bounce and movement.
  5. Blow-drying: Blow-drying gives more lift to my hair than air drying. Massaging the scalp in a circular motion with my hand while blow-drying helps to keep hair from falling flat quickly. Using a round brush works to lift the roots and creates a more voluminous look. Blow drying with my head upside down lifts the hair away from the scalp and helps my blowout last longer.
  6. Dry shampoo: Dry shampoo eliminates excess sebum and dirt and gives my hair an extra boost of volume.  In addition to soaking oil, it also absorbs sweat that can ruin my hairstyle, and make the hair look heavy. I usually apply dry shampoo the day after washing and it keeps my hair from falling flat during the next two days.
  7. Collagen supplements: Taking collagen pills makes my hair appear thicker and fuller. It may take about two months to see some improvement. When I stop taking the collagen, the positive effects start to fade gradually.
  8. Perm: A mild perm is a great way to add some texture and lift to flat and thin hair. I am not a big fan of tight curls, so traditional perms are not an option. For me, a body wave perm is perfect for adding volume and natural waves.
  9. Coloring: Colored hair is less prone to fall flat than virgin hair. The coloring process leaves hair more porous and increases the friction between hair fibers, which means your hair won’t fall flat as easily. However, before you decide to dye your hair, make sure you’re aware of the damaging effects of hair dyes and be careful to consider permanent coloring.  
  10. Appropriate haircut: Sometimes you just need the right haircut to revive your flat and lifeless strands and give your hair more body. It is much easier to keep short hair from falling flat than long hair. Short pixie and long angled bob are some good examples.
  11. Gel: Hair gels helped me obtain good lift and hold when I had very short hair. Longer hair is hard to comb with gel residue in it and can break easily.
  12. Hair rollers for volume: If you have long hair, try using large curlers. You won’t get curls, but you can get more lift and volume. You can also try using foam curlers overnight to wake up with voluminous hair in the morning.
  13. Appropriate hairstyle: The right styling can resolve the problem of flat hair.  Sometimes hair needs a little help to stay lifted. A double ponytail, top knot, or French twist are some examples.
a woman with a volumizing hairstyle

12 Timeless Hairstyles for Business Women

Picking a hairstyle for the workplace can be a daunting task. Not only do you need to go over the basic guidelines provided in your professional setting, but you’ll want to effectively communicate your drive and passion with your look. There are a variety of hairstyles to think through, but ultimately the one you choose will speak to your unique personality and what you plan to bring to the table in a professional setting.

Hairstyles for Working Women

1. A Sleek High Pony

A Sleek High Ponytail

In a fast-paced work environment, you can’t go wrong with a sleek ponytail. With minimal styling effort, this look will get you through your day in style and without the fuss of hair falling in your eyes.

2. The Power Bob

The Power Bob Hairstyle

Clean, strong lines in your bob-length haircut are a beautiful way to say, precision is important to you. When you want to communicate meticulous attention to detail on the job, make sure your hairstyle speaks volumes.

3. Balayage in the Workplace

Balayage in the Workplace

Sometimes the best work attire is a great hairstyle. Keep things relevant and fresh by focusing on modern color. Balayage speaks volumes in an environment where you need to communicate forward-thinking and modern simplicity.

4. The Undone Bob

The undane bob hairdo

It looks effortless, modern, balanced, and chic. The undone bob goes with any style of work attire and carries a professional yet creative vibe.

5. Natural Waves Equals Natural Charisma

Natural Waves

Letting your hair wear its natural texture in the workplace showcases your charisma. Where once letting your hair air dry evoked unfavorable descriptions, times have changed, and we see the personality and beauty of natural waves in the workplace.

6. A Shaved Undercut

A Shaved Undercut

What’s cool about this look is not just the look itself, but its versatility. Need a day where your look is less “edgy?” Just flip your hair to the opposite side to cover up the shaved portion. Or wear it as is. Either way, this look is creative and edgy and great for communicating confidence on the job.

7. A Long Pixie

A Long Pixie

There hasn’t been a decade so far where some version of the long pixie hasn’t been “in.” For the workplace, this look is manageable and takes very little time to style while still looking professional and chic.

8. Professional Women and Braided Hairstyles

Black Business Professional Women and Braided Hairstyles

Not only do braids accentuate beauty for black women in a business professional setting, but they carry a history unlike any other. Proudly wearing various braid styles in the work setting is something that carries a profound effect.

9. Side Braid

Braids in the Workplace

Braids are in, and they are the perfect way to keep your hair neat while also showcasing beauty. Taking only minutes to style, it’s a perfect look for your everyday work wear.

10. Grey Elegance

Grey Elegance

Natural, grey hair color doesn’t speak to age, but elegance. Wearing a chic style and sporting your natural grey color is a great way to carry yourself professionally in the workplace.

11. A Platinum Pixie Cut

A platinum pixie cut

A platinum pixie cut has always been cutting edge, no matter what decade it’s in. Wearing this style is a strong way to communicate that you’ve got things under control.

12. The beauty of Natural Texture

The beauty of Natural Texture

There’s no better way to showcase your creativity and ambition than by wearing the beauty of your own natural hair texture. When you want to reveal your confidence, opt for natural curls styled with moisture-based products.

Best Hair Rollers for Volume: Products and Tips for Using

Can You Create Voluminous Curls Without the Heat?

People with fine and/or thin hair, or those dealing with thinning hair, constantly seek ways to make their hair appear fuller. People who have straight hair that simply hangs want to find ways to rejuvenate their locks. Some people experiment with volumizing haircuts, some try various styling tricks, and still, others use volumizing products to create the illusion of fuller hair.

Over the last few decades, electric-powered styling tools have inundated the market with damaging effects from the heat. The tools allow customers to achieve their desired results at home, but it comes with a cost.

Although seemingly old-fashioned, hair rollers are a great way to create curls and add volume to fine and flat hair. Recently, women are starting to return to hair curlers as a healthier alternative to curling irons and wands. This heatless styling method can add natural-looking volume to hair with less damage than electric hot tools.

woman with fine brown hair curled with velcro rollers

What Are the Best Curlers for Volume?

Hair curlers come in a variety of sizes and diameters. Not every size will help create voluminous hairstyles. To boost fullness, a wider diameter is best. Anything beyond 1.5 inches isn’t the perfect size for creating volume.

Large curlers also make hair look freshly blown out without using a blow-dryer, regardless of the texture and type of your hair. The curlers lift the roots from the scalp, so your hair won’t look heavy or lifeless.

In addition to the volumizing effect, large curlers can make curly hair look straighter, reducing the need for using a flat iron. If you don’t want curls but want your hair to appear fuller and bouncier, large hair curlers are the way to go. The versatility of curlers provides a nice break from hot tools that damage all hair types.

The quality of rollers is crucial, especially for people with fine or thinning hair. The installation and removals must be both simple and secure. Flimsy rollers can tangle hair and pull it out. Fine hair is delicate and susceptible to breakage as it is, so using appropriate curlers is vital to the health of your hair.

a girl with velcro rollers in her hair

Best Velcro Rollers for Fine Hair

Suggested product: Drybar High Tops Self-Grip Rollers

This pack of 6 velcro rollers includes two sizes: 3 very large rollers and 3 medium (still large) rollers. This set works best for very long straight hair. Larger rollers are huge enough to handle very long hair, but you will need two sets.

They are nicely vented, which helps speed up the drying process.

The good thing is that these rollers give the appearance of fullness to fine hair and can make it look like you have just got a blowout. They are perfect for getting the volume in the crown.

The less good news is that although described as “self-grip” they won’t grab hair tightly, so you have to clip them.

It would be best to put these rollers after rough drying hair. Then finish blow-drying and let them sit on your hair for 15 minutes.

Volume without Heat: Foam Rollers

Related product: Conair Jumbo Self-Fastening Foam Rollers

You get 9 jumbo foam rollers in a clear zippered carrying case. For longer or thicker hair, you will need 2 packs.

These rollers work best for boosting volume in fine hair and for adding lift to flat straight hair. The size is ideal for adding volume and creating voluminous retro curls. You can also use them to smooth curly hair and give it a rest from hot tools.

If you are looking for voluminous rollers that are comfortable to sleep in, this may be a good choice.

The biggest con is that they like many sponge rollers leave dents in the hair.

If you are going to use them overnight, make sure that your hair is mostly dry, especially if you have thick hair that needs more time to dry.

Magnetic Rollers for Long Hair

Diane Magnetic Rollers – Pack of 6 Hair Rollers

You get 6 large curlers. If your hair is of medium length and density, you will need 2 packs. These curlers are intended to increase the volume of long hair or to create loose waves. Short hair may be hard to curl around. Good ventilation helps to dry hair faster.

For those who want curls, these curlers are not the best choice. These jumbo curlers will get straighter hair with slightly curled ends. They can give a nice volume and help you to get the most out of your blowout. This can save you money and reduce the use of harsh styling tools.

Although they are called “magnetic” you will need long metal pins to secure them.

Use them after towel-drying and dividing the hair into sections. Roll up a section of hair around working from the ends to the roots. Then use pins to secure them. Allow your hair to air dry or speed up the process with your dryer if you are short of time.

happy cute girl with curlers

Pro Tips for Using Hair Rollers on Fine and Thin Hair

  1. If you have fine or thinning hair, you might want to put curlers on damp hair. Because fine and thin hair dries faster than thick hair, you won’t have to wait long to get the desired effect.
  2. If you have thick and dense hair (and looking for a bit of lift), it is better not to put curlers on wet hair because it will take longer for your hair to dry. If you’re short on time, this may be inconvenient, so it may be appropriate to put the rollers on almost dry hair.
  3. Try to fix the curlers using pins to prevent them from moving in the hair, which can result in tangles.
  4. To prevent hair from coming out of the curler, use a texturizing spray or dry shampoo. Texturizing products will also make volume and waves last longer.
  5. Make sure to properly remove the hair rollers. Experiment to find the gentlest way to slide them down so you don’t break your hair or ruin the effect you are trying to achieve.
  6. After curling, use a little spray to make the results last longer. If you want a wavier look, apply the spray before curling so the waves will not fall out.

Final Words

If you have long hair, make sure to use rollers with a large diameter (above 1.5”) that have the potential to create volume. If you have short hair, look for a smaller diameter, so that your hair can wrap around.

Don’t just look for the cheapest curlers, nothing can fix broken strands. Read product reviews and scrap any that mention tangled or pulled hair.

young woman with fine hair after using hair rollers

How to Protect Natural Hair at Night & Preserve Every Single Hairstyle

Written by Vera Aduongo

Nowadays, I’m a lot lazier when it comes to styling my hair, but I remember when I first went natural, I would have my hair in a cute style all the time. Twist-outs, Bantu knots, braid-outs, wash-and-go’s… the whole nine! And there was nothing, absolutely nothing, that I hated more than going to bed with cute hair and waking up to a matted helmet! I had only learned how to execute the style, not maintain it. So through trial and error and pointed searches on YouTube, I finally learned how to protect my natural hair at night. After that, I was unstoppable!!

So today, let’s make you unstoppable too by showing you different protective styles for curly hair at night and when to use each one. Here’s to cute hairstyles that you can actually wear the whole week (or more)! 🥂

charming black woman sleeping

How to Maintain Curly Hair at Night:

When it comes to maintaining your natural hair as you sleep, there are 3 steps to your hair’s nighttime routine:

  1. Moisturize (if needed)
  2. Tie or braid your hair, and
  3. Cover with a satin bonnet or a scarf.

Seems simple, right? And it is simple! It varies a teeny bit, but those basic principles remain the same.

Your routine for protecting your curly or coiled hair at night will vary slightly depending on 3 things:

  1. Hair length
  2. What style your hair is in
  3. What kind of sleeper you are
  1. Hair Length

The golden standard when it comes to protecting your hair while you sleep is the pineapple, where you gather all your hair and tie a ponytail at the top of your head. If you have medium-length or really long hair, then this will work for you. But if you’ve got short hair, we’ve got to be a little more creative.

So, for everything from the TWA (Teeny Weeny Afro) to that ‘teenage phase, you may want to try banding instead. With banding, instead of trying to get your hair into one big pineapple, we’ll part the hair into sections and use elastic bands/ scrunchies that aren’t too tight to keep the hair in each section stretched. Do this all over your hair and then cover it with your bonnet or scarf.

If you’re not trying to preserve any type of curly pattern, then you can tie your scrunchie all the way from near your scalp to the ends of your hair. But if you’d like to preserve a curl or a protective style, then you’ll need to do a little bit more.

  1. What Style Your Hair Is In

Loose Natural Hair (Undefined)

If your hair is short, then all you really need to do is moisturize if needed and then put on a bonnet. Because we didn’t do anything to keep the hair stretched, it will be scrunched together in the morning, but it will be really easy to fluff using a pick and/or your hands. Since there is no curl pattern that you’re worried about losing, anything goes.

sleeping woman with naturaly curly hair

Wash-and-Go

The Wash-and-Go is very similar to loose natural hair, but this time, you’ve got hundreds of little curls, coils, or spirals that you need to maintain.

The trick to maintaining your curly natural hair at night is to make sure that the ends of your hair stay defined. When the ends of your wash-and-go still look defined, even though the middle is a bit stretched, your style will still look pretty good. So we need to keep those ends protected and find a way to retain length.

a dark-skinned teenage girl with pineapple protective hairstyle

You can opt to pineapple your hair, which will stretch the back of your hair and help give you more volume at the top. If your hair is short, you can achieve the same thing using the banding method. Then, the last step is to put on a loose bonnet. You’ll want to give your hair enough space to move around without being squished.

Pro tip: If you prefer for your hair to be flatter at the top, then instead of tying a pineapple, tie your hair into a low ponytail. Then, tie a scarf around your hair leaving out the hair in the ponytail. Top that off with a loose bonnet, so your ends have enough room, and you’ll wake up to a flat, sleeker top.

Cute Africam woman lying in bed

Twist-Outs, Braid-Outs, and Bantu Knots

You’re probably not going to like what I have to say… But the best protective style for curly hair at night is to retwist or re-braid it. So without brushing the hair out, retwist your hair into large sections and then put it on your scalp or bonnet. Aim for 10-15 twists on your whole head. The next day when you take your twists or braids down, your curls would have been preserved beautifully and will easily separate into the smaller sections that you had the day before.

Now, do you have to retwist your twist out at night? No, and the same thing goes for your braid-outs and Bantu knots.

The next best option is to use either the banding or pineapple method on large sections of your hair. These won’t do as great of a job as the retwist, but it should be enough to get you 5-7 days with your style. For the best results, when banding, wrap from near the base to somewhere near the ends. This will ensure you have bigger hair the next day. Just make sure not to wrap it too tight or you’ll lose all of your curls.

Braids, Locs, and Crochet Braids

When your hair is in these types of protective styles, they tend to remain stretched anyway, so there’s no need to do anything in that department. What we will do is get a big bonnet or scarf to cover your hair. Something big enough to accommodate all of your hair in it so that it doesn’t get frizzy.

If you’ve got human hair locs, your hair, or extensions, then it might be a good idea to moisturize your hair before you put it in the bonnet.

Related: How to Maintain Your Crochet Braids So They Last Much Longer

dark-skinned woman sleeping with braided hair
  1. What Kind of Sleeper Are You
Delicate and Dainty

If you’re one of these lucky ones, then anything goes. You can wear any bonnet or scarf. They all work. The ‘fight’ comes in the next section, where I also fall.

Rough and Tumble

Y’all! I move a lot when I sleep, so the bonnets with elastic bands don’t work that well for me. I have to use scarves or bonnets that can be tied or those with a drawstring.

So far, so good. My bonnet stays on the whole night 99% of the time. So if you’re like me, definitely try these out!

Do You Use the Right Brush for Your Hair Extensions?

If you wear hair extensions, you should brush your hair regularly to prevent tangling. Extensions get tangled easily and stubborn tangles can be hard to get out without ripping out your real hair.

If you use an ordinary brush to detangle hair with the extensions, you risk damaging the extension and breaking your real hair.

To prolong the life of your extension and keep your hair healthy, you need to brush the hair gently and use a specially designed tool for that task. Extension-friendly brushes are designed to glide over the bonds and comb your hair comfortably and gently.

Young woman brushing her hair with the extensions in

There are three main types of brushes that you can use for detangling your hair with the extension in it:

  1. Brushes with flexible bristles and rounded tips are a good choice to get the knots out without catching the beads and ripping out your real hair.
  2. Many extension hair brushes are variants of the tangle teaser, a widely known tool for combing tangled hair.
  3. There is also a special type of brush designed for wigs and extensions known as loop brushes. Looped brushes have curved bristles that won’t catch knots and beads.

Today we will browse some of the highly-rated brands of hairbrushes that are safe for your hair extensions.

This post contains links to Amazon. The publisher may get paid if You purchase something through the links without additional costs to You.

1. TANGLE TEEZER The Ultimate Hairbrush

This brush is a variant of the original Tangle Teezer, but unlike the original handle-free version this brush comes with a handle that makes the tool more convenient for use. It is suitable for fusion hair extensions, clip-ins, and weaves, and also for brushing synthetic wig hair.

If you have naturally curly hair, you can untangle your locks with this brush, with little or no breakage and you will need a surprisingly short amount of time for this job.

It can also be used to detangle matted children’s hair.

The downside is that it is not heat resistant, so make sure not to put a blow-dryer right on it.

brunette woman brushing her long hair

2. Wet Brush Pro Detangler

This brush can be used for brushing wet or dry hair and is suitable for brushing hair with extensions as well as wigs. What you will like about this brush is that it causes very little breakage. You will easily and quickly detangle your hair and shorten the time to get ready in the morning. This is a great brush for detangling coarse, natural, and very long hair. A comfortable rubber handle allows for a nice grip while brushing your hair.

3. The Hair Shop Store Black Loop Brush

This looped brush has curved bristles that are easy on extensions. The non-tipped nylon bristles allow for a gliding effect and painless brushing. The rounded tips gently go close to hair roots to get tangles out without grabbing on the bonds and pulling the extensions out.

It is safe for detangling any type of extension including tape-in and micro bead hair extensions. This is also a great brush for detangling synthetic or human hair wigs.

4. RemySoft One Twenty-Three Loops – Loop Brush – Safe for Hair Extensions, Weaves, and Wigs

attractive blonde woman brushes her hair

If you have invested in expensive hair extensions, you may want to consider this high-quality looped brush to increase the life of your extensions and minimize damage to your real hair. Nylon loops effortlessly comb your hair from top to bottom without snagging on your bonds or ripping your real hair. This loop brush is a lifesaver for hair with fusions, weaves, wefts, tape-ins, clip-ins, and micro bead hair extensions. You can also use it as a detangling brush for any hair type and it will work great for brushing wigs.

woman detangling her hair with a wet brush

5. Wet Brush Brush Pro Paddle Detangler

This big paddle brush is great for detangling thick, curly, and long hair. It is designed to work either on wet or dry hair, and you can use it on extensions and wigs. It’s heat resistant, so you can use it for blow-drying. The flexible bristles help to prevent pulling and breaking your hair.

The large paddle surface helps to detangle hair without the need for sectioning.

The possible con is its heaviness which can make your arm tired while blow-drying.

Woman brushes hair with extensions in the bathroom

How to Brush Your Hair with Extensions

Tie your hair in a ponytail in the neck base area. This will protect the bonds from pulling. Start combing from the ends and work your way up to the roots. Gently check the bonds with your fingers.

Try to make it a habit to do this detangling job at least once a day. Braiding the hair overnight will make morning detangling easier.

Detangling Sprays Will Minimize Tangles

The quality detangling product can keep extensions from matting and make the tangles easier to unravel.

B3 Brazilian Bondbuilder Ionic Extension Refresh seals the cuticles reducing the possibility of tangle formation. Make sure to apply it while your hair is still damp.

Final Words

When purchasing a hair brush online, make sure to read the review from people that has the same hair type and length as yours.

It would always be a good idea to go to a store to buy the brush in person. You will be able to get the right impression about its size and feel how it fits in your hand.

a brunette girl brushing her hair with extensions

Guide for Faux Braids and Braided Updos of Your Dreams

So, you’re here, which probably means braiding for beginners and intermediate methods weren’t of interest to you. Perfect! Landing in the Faux Braid section just means you want to get started without the pains of a learning curve, and darling, there is nothing wrong with that.

Steps for a Simple Knotted Faux Braid

  1. This style is best for long hair however, it can be done on medium length as well. The results are incredible so start by brushing your hair and adding in your oil and heat protectant.
  2. You’re going to take a section from the right and left front bang area, assuming those pieces of hair are long enough to pull around the side of the head to the back.
  3. Once you’ve brought you’ve brought both pieces to the back, tie an actual knot.
  4. Secure just underneath the knot with a very small rubber band that matches your hair color.
  5. Repeat this using sections of hair just below the sections you just knotted and incorporating the tail from the knot above.
  6. Each new knot should be tied just below the one above it and secured each time with a rubber band until you reach the lower neck hair line.
  7. You can either tie it off here and leave a low ponytail or you can put it in a rubber band. Then you can split the hair underneath the rubber band and begin tying knots once again until you run out of hair. Always secure with a small rubber band after each knot is created. 
Single knotted faux braid
Single knotted faux braid. Image credit by Andrea Haynes

Steps for the Pull-Through Faux French Braid

  1. What’s perfect about this style is it looks luxurious yet can be given an “un-done” edge by starting with beachy waves and some texture spray, keeping you fresh and modern.
  2. You can start the look anywhere you like, but for this written tutorial we will begin by parting the top section of your head into a mohawk. Then take the “bang area” of your hair towards the front top and secure this with a rubber band.
  3. Secure a section of hair with a second rubber band just behind the first one. Keep them close.
  4. Split the ponytail of the top section in half and bring the ponytail of the second section through the split. Pin it with a clip. Bring the split ponytail hair of the first section down around the hair that’s split through it, and secure it with a band. 
  5. Now slide your fingers on either side of your hair, add in hair and grab the hair that is already there from the ponytail. Combine the added hair with it and secure it with a rubber band.
  6. Continue this pattern and motion of adding in hair as you go until you run out of hair.
  7. Rough it up a bit by pulling small strands loose or loosening the rubber-banded sections of hair just a bit.
  8. Spray with hair spray to hold! 

Steps for the Faux Braid Using Bobby Pins

  1. This look is particularly good as a half-up faux braid look. You can keep your hair smooth with added volume at the root or use texture spray and waves for that “un-done” feel. Begin by taking a section of hair starting near the temples and incorporating the band area. Secure with a small rubber band.
  2. Now take a small section of hair just below where you started on one side of the head. Pull it upright to reach just behind the rubber band that secured the first section. Place a bobby pin on this section of hair you are holding.
  3. Twist it over the rubber band and slide it underneath it.
  4. Now do the same to the other side, making sure to cross over the section you just did before.
  5. Repeat this pattern for several rows, making sure to cross over each time.
  6. It creates a causal, intricate “braided” style.

The horizontal faux braid updo – Video by Andrea Haynes

Faux Braids Continued – The Faux Braided Horiztonal Updo

I’m not sure there is a more beautiful and relatively simple faux braid updo than this one. The first time I created this look, I stood back and held up my hands thinking “did these really just create this?” The results were luxurious yet still somehow down to earth. And the idea that you can do this on yourself with minimal bobby pins? Your friends will be speechless.

the horizontal pull-through braid into an updo
The horizontal pull-through braid into an updo. Image credit by Andrea Haynes

Steps For the Faux Braided Horizontal Updo that Leaves them Speechless

Remember that this look is a “horizontal” updo, not a vertical one. You’re going to be faux braiding “sideways.” The mechanic used to create it may feel a bit unnatural your first or second time, but once your hands understand what to do, you’ll finish in no time.

  1. This look is so gorgeous, it’s good to spend time prepping the hair first. A good method is to tease hair at the root after spraying in a texture spray. Then brush out the tease with a soft brush. You can do this one or two times for the best results. Add in soft waves for texture.
  2. Now take a section of hair just behind the back left ear as if you’re creating a low ponytail. It’s a small section, so leave out most of your hair.
  3. Secure with a rubber band.
  4. Now secure a section small section right next to the first.
  5. Split the first ponytail vertically and pull the second ponytail through it. Pin the ponytail that was pulled through just to keep it out of the way.
  6. Now take the loose hair and add it into a newly created third section, pin.
  7. Keep this pattern going. Now split the ponytail that is first in line, and pull the hair of the ponytail through behind it, through it. pin that out of the way.
  8. Regroup the split hair together and rubber band it into a new section.
  9. Do this until you get from the left ear all the way to the right.
  10. Now you can switch to rubber banding the single ponytail that you have going and pulling each rubber band section through itself.
  11. Now take time to gently expand the “braid.” You’ll pull on every heart-shaped section until it’s wide. Do this evenly to each part of the hair.
  12. Now take the “tail” and pin it underneath the horizontal faux braid so it’s not seen.
  13. And you’re finished! This look will get you through any formal event or holiday party in a luxurious style! Have fun with it and make sure to practice several times.  
the vertical pull-through braid
The vertical pull-through braid. Image credit by Andrea Haynes

Easy DIY Braiding Techniques for Hair

Written by Andrea Haynes

Hair braiding is a beautiful technique for both the style and health of your hair. But chances are you’ve experienced a bit of a learning curve with the three-strand braid, a technique that so many people were introduced to growing up. Do you remember the feeling you had once you finally mastered it? Like tying your shoes, once it clicks, it clicks. But transferring this technique to yourself for DIY braiding can be a bit trickier.

Here are a few easy tips and tricks for braiding your own hair that make the process easier. From beginners to advanced braiders, use these steps to increase your braiding skills while making your hair luxurious and healthy along the way.

Different Ways to Braid Your Own Hair –The Three-Strand Braid for Beginners

Stylist Braiding Girl's Hair In Beauty Studio

The biggest takeaway for the three-strand braid is allowing yourself some grace. When first learning the art of folding three strands of hair over each other in a pattern, it’s important to let yourself make mistakes and enjoy your own process. I promise you’ll get it!

So where do you begin? It’s helpful with this braid to begin on someone else, then once you feel like you’ve got it, transfer the technique to yourself. But for the sake of this tutorial, we will begin with braiding on yourself. 

Steps for the Three-Strand Braid on Yourself

Begin by taking a 2” wide section of hair near your face. Use a clip to pin the rest of the hair out of the way. Do not practice in front of a mirror.

The basic 3-strand braid – video by Andrea Haynes
  1. Divide the section near your face into three equal-sized strands.
  2. With one hand, pinch 2 of the strands while keeping them separate, and hold the third strand with the other hand.
  3. With the hand holding the single strand, use your loose finger (maybe the middle one) to reach and grab the middle strand and cross it over the top of the one on the outside. Now two strands have switched places.
  4. Now take the opposite hand and do the same motion, pulling the new middle strand over the top of it. The outer strand has changed places with the middle strand once again.
  5. Repeat this pattern working between your left and right hands until you see the braid form!

The classic three-strand braid creates a beautiful texture and can add a lot of style to your look. There are other types as well with ethereal qualities worth looking at.

Steps For the 2-Strand Braid or Double Fishtails

This is a great braid if you’re looking for something gorgeous but contoured to a minimalist’s aesthetic. The overlay of each strand can look more intricate than the three-strand braid, making it perfect for a party or night out.

While the steps are simple, getting a good grip on the hair might be the only area where there is a learning curve. Keep practicing, each time you do, you’ll get comfortable with the hold.

French Braiding Styles

Easy Steps for the 2-strand Braid or Dovetail/Fishtail on Yourself

  1. Start by parting your hair down the middle to create two equal amounts of hair.
  2. Begin near the front of the part on one side and collect the hair as you go into a twist until you end up twisting all the way down to just behind the ear. Secure with a small rubber band.
  3. Now for the fishtail part. Near where you just placed the rubber band, divide the loose hair below it into two equal sections. These are now called sections 1 and 2.
  4. On the outer side of section 1, take a very small piece of hair and cross it over the section you took it from, landing on the other side in section 2. Hold it with your other hand.
  5. Then, from section 2, take a small piece of hair and cross it over the section you took it from, landing in section 1. This crisscross action can be repeated all the way down until you have a beautiful fishtail braid.
  6. Gently secure with a rubber band at the end then begin to lightly pull at the crisscrosses until the braid loosens and expands in size.

Intermediate French 3-strand and 2-strand Braiding

Once you’ve gained the ability to braid, the next step is learning to do a French style. This means the braid is attached to your head. The movement follows the same pattern as a basic braid but incorporates extra strands from different parts of the head as the pieces are braided over each other.

French 2 strands braid

It is an intermediate braiding technique and builds off the foundation of being able to do a simple 2 or 3-strand braid. The results can be absolutely stunning, so practicing this is worth your efforts.

Steps for a Classic Single French Braid

  1. Start by brushing your hair back to remove the part.
  2. Take your two index fingers and place them on your temples, then slide them slowly up, landing about 2” past your hairline. This is your starting section.
  3. Divide the starting section into 3 equal pieces. These are strands 1, 2, and 3 now. It’s important to keep these 3 sections clean and evenly divided.
  4. Take the middle strand number 2 and cross it over strand number 3. The two strands have now switched places.
  5. Now before taking strand number one and crossing it with the middle strand, you’re going to slide your index finger and scoop up another section of hair, adding it to strand number 1 before the crisscross happens.
  6. This is the motion that will be repeated until you’ve braided all the way down the end of your hair. You’ll scoop in slices of hair to add in each time one of the outer sections of hair crosses over the middle piece.
  7. Make sure to view the video attached to this piece so you can see the art of the French braid. It’s a very visual process!
Beautiful girl with hair braided with a French braid

French Fishtail Advanced Technique on Yourself

The steps for a French fishtail are similar in terms of the pattern and the scooping to add in hair as you go. However, French fishtails look more beautiful than bubble braids. This means you pull the crisscross under the middle piece, instead of over it, resulting in the braid “popping out” or looking raised on the head.

The fishtail pattern is easier to see this way as it enhances the details of the look. It’s a more difficult process and takes time to master. So don’t give up, anything is possible when you want it.

hairdresser do hair braiding in salon

What Curling Iron is Best for Beach Waves?

Written by Andrea Haynes

For years beach waves have been the go-to trend for that “lived-in” hairstyle. It’s an effortless look that fits everyone and can transcend a myriad of clothing choices.

But is “easy” the name of the game with this look?

Women often ask, “how can I create beach waves with a curling iron?” Or “What tool should I use to get beach waves?” There are many YouTube tutorials on the subject and even though “effortless” is the look, the physical mechanics prove to be more difficult.

So how do you get great beach waves? Getting this look perfected comes down to a few things: 1) Tool type, 2) Heat Setting, and 3) Practice with your favorite hot tool.

Read the following tips, tricks, and how-to’s to make sure you curl your hair successfully and get that effortless beach wave look every time.

Gorgeous young brunette woman with beach waves

Best Size Curling Irons and Curling Methods for Beach Waves

Depending on the type and size of the hot tool, there’s this degree of curl that takes you from a tight ringlet to the tousled, irregular waves you naturally get from salty sea water. Most people want something in the middle. Here’s a list of tools that accomplish the range:

  1. The 1” Curling Iron. This size is standard and can provide beautiful, tighter beachy curls. People often ask if they should get the 1”, 1 and ¼ ”, or 1 and ½” barrel size. If your hair texture doesn’t naturally hold a curl well or is very straight, a 1” is your best option. It can wine the waves more tightly while still giving it that relaxed feel. Just don’t curl the ends and it will look great. The brand Olivia Garden has a beautiful 1” curler that works magic on your hair.
  2. The 1 and ½ and the 1 and ¼ inch curling irons. These are also standard sizes but work better for hair that has its own natural curl, is thicker and more weighted, or holds a curl almost too easily. They are great for loose curls with a relaxed feel.
  3. Flat Iron. Not just any flat iron does the trick. The best option for getting natural-looking beach waves is to get a curved-edge flat iron with ceramic or titanium plates. For thicker textures that don’t curl as easily, titanium plates are best. For finer textures, ceramic plates work well.
  4. The Triple Barrel. Anyone who doesn’t love the twist-and-pull method used with curling irons will love the triple barrel. It’s created in a way that makes getting beach waves easy. You simply open the clamp, insert about ½-1” section of hair, then clamp down. Hold, then remove. It works, in the same way, the crimpers of old operated, except due to larger barrel sizes, it gives it a modern feel. 
  5. S-pattern Technique with a Flat Iron. For this, you’ll need a standard-shaped flat iron vs. a curved plate. If a curved plate is all you have, don’t worry, it works too. Taking a ½” thick section of hair, you’re going to bend it just below the root into a “c” shape and press the “c” between the flat iron plates. The next section down you’re going to bend into a “c” shape, but in the opposite direction. Do this all the way down the section of hair you’re holding for beautiful, classy waves.
  6. The Twist and Clamp Method with a Triple Barrel. This method gives your hair the beachiest, wildest, most natural-looking waves. By pinching sections about the size of your finger, you can twist them then lightly clamp your triple barrel down the length of the hair then release. Alternate between this and normal clamping patterns and the hair is stunning. This technique is used by Lo Wheeler Davis for “luxury beach waves.”
  7. The Beach Waver. It’s the most user-friendly iron on the market. There’s no need to twist the curling iron at all as this is a self-turning curling iron. It gently grips the hair toward the bottom and winds it up toward the root.
  8. Curling Wands. This style of the hot tool makes things really fun. There are so many different shapes of wands, and they all create a slightly different type of curl. There are ones that are tapered at one end, others that have a more “square” barreled curve, and more with undulating “bubbles” to create horizontal volume. If you aren’t looking for horizontal volume, which makes the waves fuller going left and right from your face, then stick to a regular cylindrical wand for best results.
Dreamy brunette beauty with beach waves

Heat Setting and Heat Distribution Make a Difference

Heat settings on your hot tools can make a difference with your beach waves.

Have you ever curled your hair in a certain heat setting and your beach waves were limp and didn’t hold the shape well? Your heat setting might need to be adjusted.

  • For finer textures or highlighted hair, the heat setting can be kept low, 280-310.
  • For medium, straighter textures the heat setting can be set around 310-380.
  • But for the coarse, thick texture the heat can be set from 380-410.

TIP 1: While a low heat setting can help prevent damage, there are a couple of things to keep in mind. The first is you should always use a cream-based heat protectant. Sprays work well too, but cream heat protectants coat more heavily, preventing more damage when you’re waving your hair.

TIP 2: The second thing is it’s better to use a higher heat setting and remove the curling iron quickly from the hair vs. a low heat setting and let it sit on the hair for a long period of time. Likewise, with a flat iron, it’s better to have higher heat but fewer passes over the hair. Hot and quick is the way to go for the best beach waves. 

Friendly pensive brunette beauty with beachy hair

What’s the Difference Between a Good Curling Iron and a Low-quality One?

The difference between a quality iron vs. a low-quality iron comes down to a few things. Make sure to look at:

  1. The grip. The clamp of a curling iron or the flat iron should be just right. If it closes too tightly and grips too hard, it will pull the hair and damage it. If it doesn’t close over the hair enough, the shape won’t take well. Good tools have just the right grip.
  2. The type of material it’s made of. For thicker or courser hair, use a titanium iron. ceramic tends to be good for finer hair as it’s gentler in the process.
  3. Heat Settings. What’s important here is not just the heat settings and how hot the tool gets, but how many passes over the hair it takes to get it to either curl or straighten. If your tool is set at 400, there’s no reason it should take more than 1-2 passes over the hair to achieve the desired effect on most textures. If it does, it’s time to upgrade.
  4. How easily it glides. Chances are if you have used a curling iron or flat iron that was the low quality you felt the snag. It’s uncomfortable and makes you wonder, how could something get stuck while I’m siding it down when there’s nothing in the way? If you’ve experienced this, a sort of stuttered motion as you pull your flat iron downward, then it’s time for a change. The same goes for the curling motion. If it’s not smooth, it’s not “it.”
  5. Even heat distribution. Quality hot tools distribute their heat evenly across whatever hair they contact. Tools that do not do this, tend to overheat one spot of your hair. The effects can sometimes look like very limp hair that won’t hold its shape well. Or with flat irons, this can look like fried hair, especially on the ends.

Important Tips and Brands for Perfect Beach Waves

This post contains links to Amazon. The publisher may get paid if You purchase something through the links without additional costs to You.

Here’s a little cheat sheet of tips for getting the perfect beach waves:

  1. Use a cream-based heat protectant. The Brand I recommend for this is Kerastase. My favorite cream heat protectant is the Resistance in the teal bottle and it’s meant to be used every time you blow dry, curl, or flat iron. Plus, the smell is amazing.
  2. The fewest “passes” over the hair will keep it in the best condition. If you need to increase the heat, but do fewer passes over the hair and leave it for less amount of time on the hair, your results will be better and less damaging.
  3. Invest in something good to create beautiful, loose beach waves. Check out the Beachwaver, the Dyson Airwrap, the NuMe Octowand, Olivia Garden 1” Curling Iron, the Lo_Wheeler Davis Triple Barrel Iron, and the Triple Barrel Beach Waver   
  4. Gloss more regularly. That’s right! Instead of getting your gloss every 8-10 weeks, gloss every 4-7 weeks. It keeps the shine, helps seal your cuticle down, and keeps color fresher while you practice getting those loose, big beach waves.
Expressive young brunette woman with beachy waves
Tanned brunette beauty with beachy hair

The Best Overnight Curlers that Allow You to Sleep Comfortably

Do you want fantastic curls but always end up with dry, damaged hair? Obtaining the curls of your dreams is possible without using hot tools that can damage your hair. All you need are overnight rollers. You put them in your hair before bedtime, and when you take them off in the morning, magical curls appear in your hair.

There are several types of heatless rollers that are comfortable enough to sleep in. People who like switching up their hairstyles will be happy to have them in their bathroom cabinets. These handy hair accessories keep you from using too much heat for styling and can save you time in the morning since you don’t have to use a curling iron before heading out the door.

Today, we are going to introduce the most common types of overnight rollers and related products that are worth your attention.

a blonde woman with loose overnight created curls

1. Hair Curling Headband

These heatless curling accessories work with various textures, but you will get the best results with medium and long hair. The curling rod is made of flexible rubber or rubber foam wrapped in a smooth fabric.

This post contains links to Amazon. The publisher may get paid if You purchase something through the links without additional costs to You.

IENIN Heatless Curling Rod Headband

The kit comes with the curling rod headband, two hair scrunchies, and two claw clips. There are a lot of useful videos on YouTube and TikTok to help you shorten the learning curve.

You need to section your slightly damp hair into two parts. Put the ribbon over your head and fix it in place with the clip. Wrap your hair around the ribbon and secure it with a rubber band. Repeat this process on the other side of your head. Your voluminous curls will be ready in a couple of hours.

It would be more comfortable if you use this curling headband during the day while completing other tasks. If you are going to sleep with it, leave a small gap at the top of your head to reduce pulling the hair when tossing and turning.

Pros:

  • Very portable
  • Doesn’t take much time to put it in
  • You can release curs without any snagging
  • Silky smooth fabric doesn’t cause friction  

Cons:

  • Not very comfortable to sleep in, especially for side sleepers
  • Doesn’t work for short hair    

2. Foam Rollers

foam rollers

These rollers are made of a foam sponge and have a plastic snap that secures the rollers in your hair. Foam rollers are very comfortable to sleep in and don’t pull the hair when you move.

Related Product:

Conair Soft Foam Rollers

This set consists of 48 soft foam rollers packed in a compact case. The rollers come in four different color-coded sizes. The smallest rollers are intended for short hair, while those with a larger diameter form loose curls in long hair and also give more volume to the hair.

You can use the rollers on dry or slightly damp hair. Roll the curler toward the scalp and secure it with the clip. For the best results, use a very small amount of moisture because soaking wet hair will take a very long time to dry.

Pros:

  • Work well on all types of hair
  • Very comfortable to wear and sleep with them in
  • Create bouncy, long-lasting curls
  • The best rollers for vintage hair
  • Sturdier than competitors’ products  

Cons:

  • The fasteners tend to snap off over time
  • Can’t grab and curl very short hair
  • The clamps tend to pull out hair when you are taking the rollers out  

3. Pillow Soft Rollers

These curlers have an inner metal wire core that is wrapped in foam and covered with fabric. The wire gives the curlers flexibility so that you can bend and secure them. They can be used on dry and damp hair, but the effect will be better if your hair is barely damp.      

Related Product:

Aimin Hair Soft Overnight Hair Rollers

You get 30 pillow hair rollers in the package, and they are all the same size and are pretty thin. They can be used on all hair types but work best for creating tight curls. If you want looser curls, you should take two or three curlers and wrap the hair around them.

It is best to apply pillow curlers when your hair is 80%‒90% dry. Twist the hair, wrap it around the roller, and then bend the ends in opposite directions to secure it. It is recommended to put a net or scarf around the curlers to help them stay in place.

Pros:

  • You can sleep comfortably with them in
  • Easy to use on all hair types
  • Create perfectly tight curls
  • Don’t pull your hair when you are taking them out  

Cons:

  • Tend to slide out of the hair
  • Too thin for long hair or loose curls  

4. Satin Pillow Rollers

These curlers are made of foam covered in satin and have a plastic frame to secure them. Satin is the material that is gentlest to the hair. The satin coating helps reduce the drying and damaging effects of foam.

You will get 42 rollers in four different sizes, so you can choose the right roller for the desired size of your curls. If you are looking for a gentle alternative to traditional foam rollers, these might be worth trying.

Pros:

  • Easy to use and comfortable
  • Maintain moisture and protects your ends
  • Make nice shiny curls No tugging or pulling  

Cons:

  • The plastic frame falls apart easily
  • Tend to slide off the hair        

5. Flexible Curling Rods

These rollers consist of iron wire wrapped in a layer of foam, and you can bend them to form different shapes. When you wrap your hair around the rollers and fasten them, you get a nicely defined curl. And, if you already have some curls in your hair, these bendy rollers can give you the definition you want.

FushoP Flexi Rods Set

The 42 flexible rollers in this set come in seven different diameters packed in a convenient zip-top bag. These rollers can be used either on dry or wet hair, but for the best results, it is recommended you slightly dampen your hair with a water mist sprayer.

Thanks to various sizes, they are suitable for all hair types and lengths. If your hair is long, use the largest rollers. For short hair, use rods that are thin in width. They work well on short hair, but your hair needs to be long enough to wrap around each rod.

Pros:

  • Easy to use Fairly long-lasting curls
  • Good for all hair types Plenty of curlers in the package
  • Color coding for different sizes
  • A free shower cap included  

Cons:

  • The rod sizes cannot be customized
  • It takes some time to get used to sleeping with them in
  • Your hair may get caught inside white caps at the end.
foam hair curlers

Anti-Static Hair Brushes: Benefits, Related Products, and Your Questions Answered

Let’s face it, static is no one’s friend. If you’ve ever tangled with frizz or flyaway hairs, you already know how much havoc they can wreak on your favorite hairstyles and your overall look. During the cold and drier months, in particular, you might find that your tresses are harder to tame.

Maybe you’ve tried a host of trendy products and elixirs in an attempt to minimize the effects, or maybe you’ve had those days where you’ve found yourself reaching for a hat to cover up the whole situation.

If this is you, you aren’t the only one. Stylists and hair experts say static electricity is the culprit behind these common woes, causing strands of hair to act like repellent magnets and separate from one another, instead of lying smoothly together. Frequent blow drying or use of heat styling tools can be a factor in amping up static electricity, as can lack moisture or environmental damage.

But before you give up entirely, we’ve got one more solution for you to consider: anti-static hair brushes. If you’ve never tried a brush designed specifically for preventing static, you might be missing out. Here’s what you need to know:

An exited woman with long flyaway hair

How do Hair Brushes Cause Static?

The secret behind anti-static brushes is often in the materials used to create them.

Plastic brushes are definitely the worst choice for hair that is prone to static. When you brush your hair with a plastic brush, negative charges are transferred from the hair to the brush, leaving your hair positively charged. Positively charged hairs repel each other and end up standing out straight from the scalp. Since plastic is not conductive, it cannot help to discharge static electricity from your hair.

Plastic brushes are usually cheap and roughly finished, so they don’t glide smoothly through the hair. In addition to flyaway hair, low-quality plastic brushes can cause damage and breakage.

What Brush Materials Don’t Cause Static?

Brushes with wooden pins don’t create static and can provide you with a relaxing scalp massage. A brush with boar bristles and a wooden handle is not only super gentle on the hair but it can help with the static. Brushes infused with ionic minerals are considered one of the best options for flyaway hair. Other recent innovations related to anti-static brushes include refillable treatment sheets infused with a conditioning formula that works like an anti-static laundry sheet.

With a quality anti-static brush, you can use fewer anti-static hair products. This way you will protect your scalp from chemicals and save money in the long run.

Ready to try this whole static-fighting thing for yourself? Here are a few products we love and recommend to help you get started:

1. Soft on the Hair and Scalp: Wooden Brushes for Flyaway Hair?

Wood brushes have a neutral charge, and they barely create any static. Wooden bristles help distribute natural oils down the shaft and leave hair with a great shine while improving blood circulation in the scalp area.  When purchasing a wood brush, choose one that is completely made of natural materials and has well-polished bristle tips.

Comfortable when detangling: If you have curly hair that easily gets tangled, you may want to consider Bass Brushes. These brushes have widely spaced bamboo bristles that slide through the hair smoothly, which makes them perfect for curly hair that is prone to tangles and static.

Very giftable: TEK wood hair brushes are made in Italy and have a very attractive design. These brushes are FSC certified, hypoallergenic, and antistatic.

a happy woman brushing her hair with a wooden brush

2. Planet-Friendly: Bamboo Hair Brushes

Hair brushes with a bamboo handle and bamboo bristles are earth-friendly styling tools that help reduce the use of plastic. Bamboo bristles don’t create static, while rounded tips gently massage your head, making brushing your hair a pleasant experience.

To prolong the life of a bamboo hair brush, make sure to avoid excessive water exposure.

Hair brushes with a bamboo handle and metal bristles are another option to get rid of staticky hair. A smooth bamboo handle feels comfortable in your hand, while conductive bristles help with releasing static that is already present in the hair.

Comfortable grip and good scalp massage: BFWood Bamboo Hair Brush with Steel Bristles promises to make your smooth and frizz-free while massaging the scalp and stimulating blood flow.

A girl brushing hair with a bamboo hairbrush in front of the mirror

3. Say, “Good-Bye” to Annoying Static: Hair Brushes with Ionic Bristles

Ionic brushes are infused with ionic minerals so that they emit negatively-charged ions during hair brushing. Negative ions tame flyaway hair with a few strokes making your hair look much smoother and shinier than when you are using plastic brushes.

Lightweight detangling brush: Moroccanoil Ceramic Paddle Brush works well for detangling and blow-drying. Your hair will feel luxurious and silky after brushing. Plus, it comes with a little sectioning (and brush cleaning) tool stored inside the handle.

The woman uses an ionic brush to brush her hair

4. Tame your Mane: Anti-Static Brushes with Refillable Treatment Sheets

The ForBabs X-Static is the world’s first anti-static hairbrush with refillable anti-static sheets incorporated into the brush. Fabric layers below the bristles are coated with an anti-static conditioner that helps eliminate static electricity and make hair smoother.

When you brush your strands, anti-static sheets below the bristles work to tame flyaways. Each conditioning sheet will last 3-5 days, depending on how often you brush your hair. After several uses, you can simply remove the top layer revealing another fresh sheet underneath. When sheets run out, remove the used brush head and replace it with the refill brush head that comes with 12 tear-off sheets.

Anti-Static Hair Combs for Shiny, Tangle-Free Hair

In addition to causing snagging and pulling, plastic combs can give you unpleasant “static shock.” The best way to prevent breakage and static is to switch to a plastic-free alternative.

Antistatic hair combs are commonly made of carbon fibers or sandalwood. Both those two options have their advantages.

The wood comb bristles equally distribute natural oils down the hair shaft and provide a massaging effect to your scalp.

Carbon fiber is naturally antistatic, lightweight, and resistant to heat and chemicals.

Although wood combs can look more attractive, carbon fiber combs are easier to use and maintain.

A woman in the batheoom combing hair with a wooden comb