Best Hair Rollers for Volume: Products and Tips for Using

Can You Create Voluminous Curls Without the Heat?

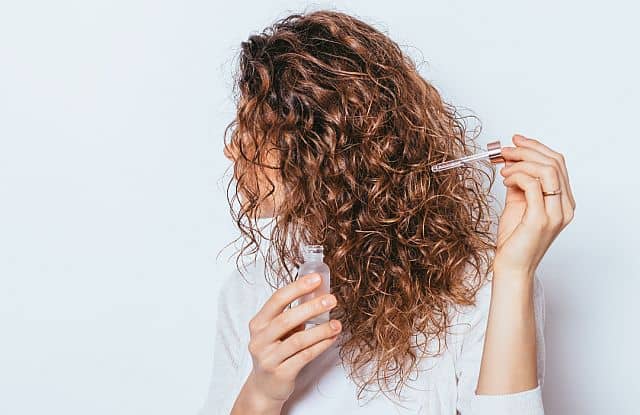
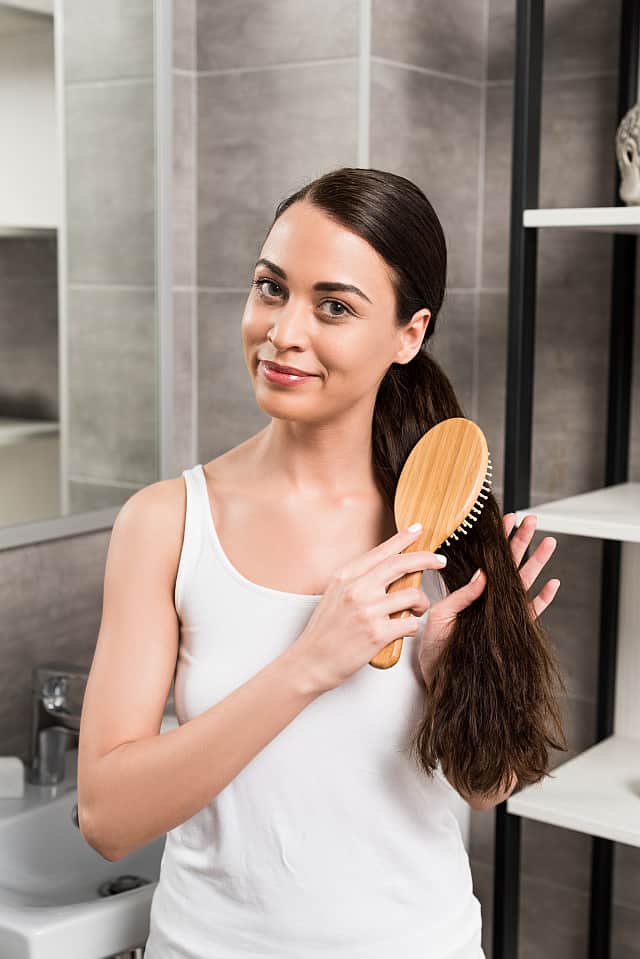
People with fine and/or thin hair, or those dealing with thinning hair, constantly seek ways to make their hair appear fuller. People who have straight hair that simply hangs want to find ways to rejuvenate their locks. Some people experiment with volumizing haircuts, some try various styling tricks, and still, others use volumizing products to create the illusion of fuller hair.

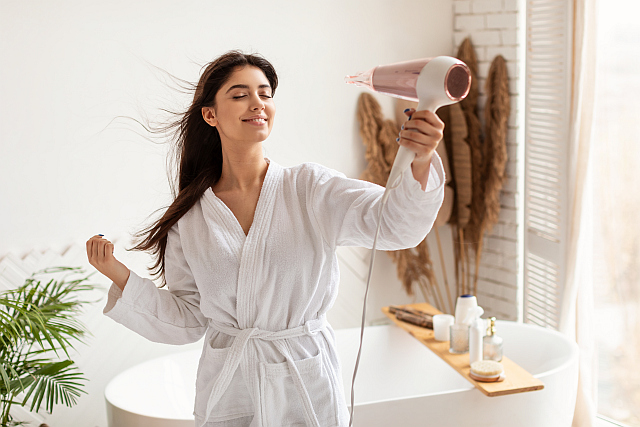
Over the last few decades, electric-powered styling tools have inundated the market with damaging effects from the heat. The tools allow customers to achieve their desired results at home, but it comes with a cost.

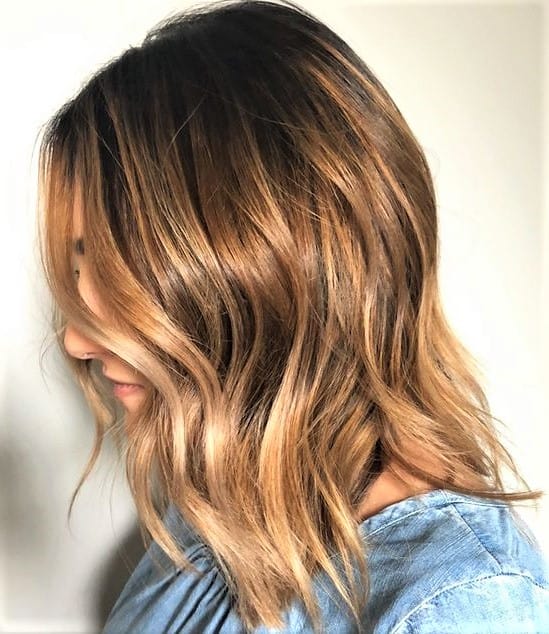
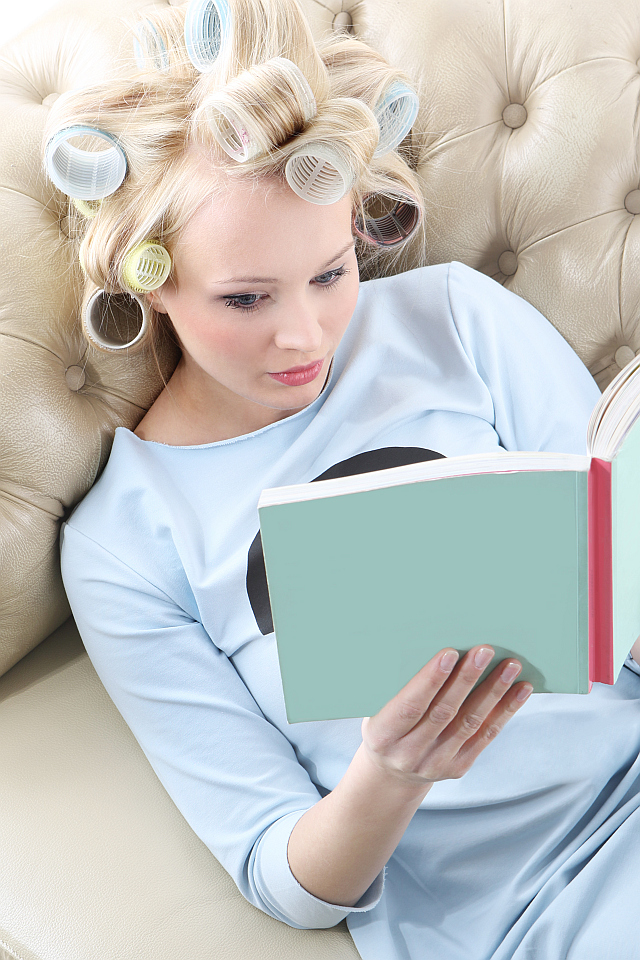
Although seemingly old-fashioned, hair rollers are a great way to create curls and add volume to fine and flat hair. Recently, women are starting to return to hair curlers as a healthier alternative to curling irons and wands. This heatless styling method can add natural-looking volume to hair with less damage than electric hot tools.

woman with fine brown hair curled with velcro rollers

What Are the Best Curlers for Volume?

Hair curlers come in a variety of sizes and diameters. Not every size will help create voluminous hairstyles. To boost fullness, a wider diameter is best. Anything beyond 1.5 inches isn’t the perfect size for creating volume.

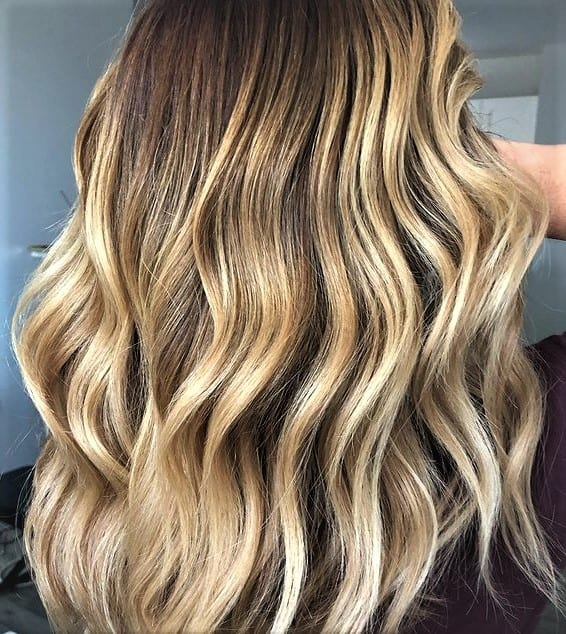
Large curlers also make hair look freshly blown out without using a blow-dryer, regardless of the texture and type of your hair. The curlers lift the roots from the scalp, so your hair won’t look heavy or lifeless.

In addition to the volumizing effect, large curlers can make curly hair look straighter, reducing the need for using a flat iron. If you don’t want curls but want your hair to appear fuller and bouncier, large hair curlers are the way to go. The versatility of curlers provides a nice break from hot tools that damage all hair types.

The quality of rollers is crucial, especially for people with fine or thinning hair. The installation and removals must be both simple and secure. Flimsy rollers can tangle hair and pull it out. Fine hair is delicate and susceptible to breakage as it is, so using appropriate curlers is vital to the health of your hair.

a girl with velcro rollers in her hair

Best Velcro Rollers for Fine Hair

Suggested product: Drybar High Tops Self-Grip Rollers

This pack of 6 velcro rollers includes two sizes: 3 very large rollers and 3 medium (still large) rollers. This set works best for very long straight hair. Larger rollers are huge enough to handle very long hair, but you will need two sets.

They are nicely vented, which helps speed up the drying process.

The good thing is that these rollers give the appearance of fullness to fine hair and can make it look like you have just got a blowout. They are perfect for getting the volume in the crown.

The less good news is that although described as “self-grip” they won’t grab hair tightly, so you have to clip them.

It would be best to put these rollers after rough drying hair. Then finish blow-drying and let them sit on your hair for 15 minutes.

Volume without Heat: Foam Rollers

Related product: Conair Jumbo Self-Fastening Foam Rollers

You get 9 jumbo foam rollers in a clear zippered carrying case. For longer or thicker hair, you will need 2 packs.

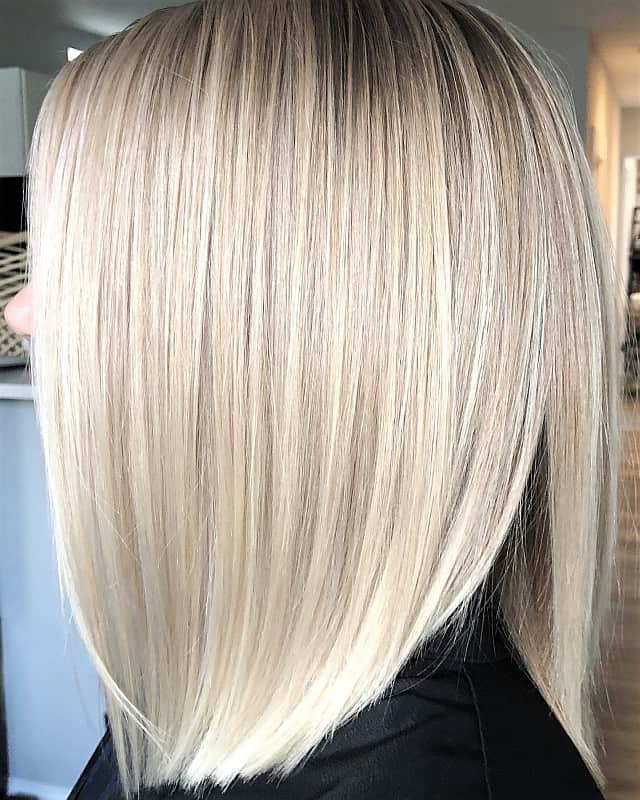
These rollers work best for boosting volume in fine hair and for adding lift to flat straight hair. The size is ideal for adding volume and creating voluminous retro curls. You can also use them to smooth curly hair and give it a rest from hot tools.

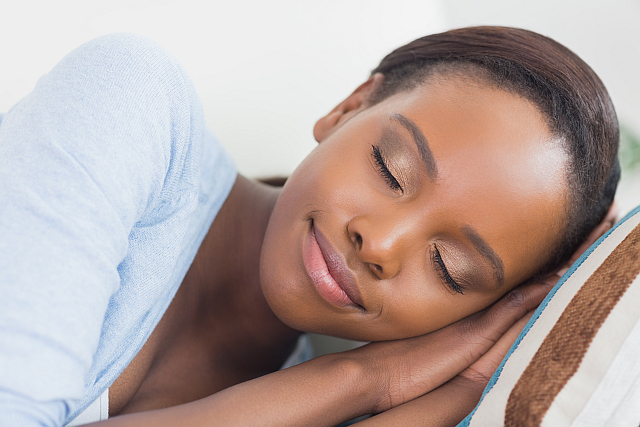
If you are looking for voluminous rollers that are comfortable to sleep in, this may be a good choice.

The biggest con is that they like many sponge rollers leave dents in the hair.

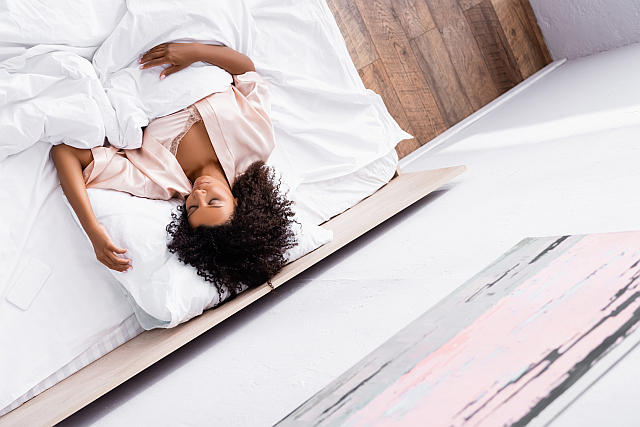
If you are going to use them overnight, make sure that your hair is mostly dry, especially if you have thick hair that needs more time to dry.

Magnetic Rollers for Long Hair

Diane Magnetic Rollers – Pack of 6 Hair Rollers

You get 6 large curlers. If your hair is of medium length and density, you will need 2 packs. These curlers are intended to increase the volume of long hair or to create loose waves. Short hair may be hard to curl around. Good ventilation helps to dry hair faster.

For those who want curls, these curlers are not the best choice. These jumbo curlers will get straighter hair with slightly curled ends. They can give a nice volume and help you to get the most out of your blowout. This can save you money and reduce the use of harsh styling tools.

Although they are called “magnetic” you will need long metal pins to secure them.

Use them after towel-drying and dividing the hair into sections. Roll up a section of hair around working from the ends to the roots. Then use pins to secure them. Allow your hair to air dry or speed up the process with your dryer if you are short of time.

happy cute girl with curlers

Pro Tips for Using Hair Rollers on Fine and Thin Hair

  1. If you have fine or thinning hair, you might want to put curlers on damp hair. Because fine and thin hair dries faster than thick hair, you won’t have to wait long to get the desired effect.
  2. If you have thick and dense hair (and looking for a bit of lift), it is better not to put curlers on wet hair because it will take longer for your hair to dry. If you’re short on time, this may be inconvenient, so it may be appropriate to put the rollers on almost dry hair.
  3. Try to fix the curlers using pins to prevent them from moving in the hair, which can result in tangles.
  4. To prevent hair from coming out of the curler, use a texturizing spray or dry shampoo. Texturizing products will also make volume and waves last longer.
  5. Make sure to properly remove the hair rollers. Experiment to find the gentlest way to slide them down so you don’t break your hair or ruin the effect you are trying to achieve.
  6. After curling, use a little spray to make the results last longer. If you want a wavier look, apply the spray before curling so the waves will not fall out.

Final Words

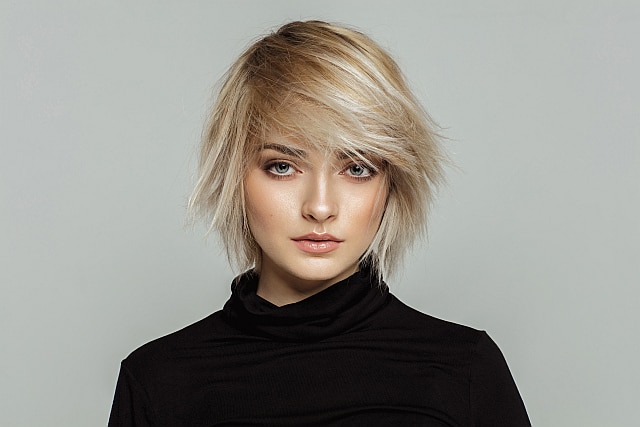
If you have long hair, make sure to use rollers with a large diameter (above 1.5”) that have the potential to create volume. If you have short hair, look for a smaller diameter, so that your hair can wrap around.

Don’t just look for the cheapest curlers, nothing can fix broken strands. Read product reviews and scrap any that mention tangled or pulled hair.

young woman with fine hair after using hair rollers

What Hair Masks You Can Leave Overnight?

Can You Leave a Hair Mask Overnight?

In short, you shouldn’t leave every hair mask overnight. Har products, including hair masks, come with directions on how to use them correctly. Most hair masks are generally meant to stay in your hair for 5-15 minutes, although there are some exceptions.

One reason for a specific amount of time is that prolonged use won’t enhance the effects of the product. After a while, hair becomes saturated and unable to absorb more treatment. There can also be adverse reactions to some ingredients in hair treatments if left on the hair for too long. To stay on the safe side, make sure to rinse the product from the hair according to the included directions.

a woman with long hair applying overnight hair mask

Why Do Some People Leave Hair Masks Overnight?

Bleaching, daily styling, and UV damage can leave your strands depleted of moisture and damaged. You might think an overnight treatment will give extra hydration and nourishment to your thirsty locks, but it’s important to give your hair what it needs without any adverse effects. This means you must use the right product, one that is formulated for long-time application. So, read the directions carefully and leave the product in your hair overnight only if the manufacturer states that the product is safe for overnight use.

While some busy people prefer overnight treatments, some others find that overnight hair masks can negatively affect sleep quality. If you are not comfortable with nighttime treatments, try to apply a hair mask when you have a day at home. Put a shower cap over your head after application, leave the treatment on for several hours (or as directed by the manufacturer), then shampoo your hair as usual.

What Hair Masks You Shouldn’t Leave Overnight?

a woman in bed with a shower cap and hair mask in her hair

Hair treatments that contain synthetic chemicals shouldn’t stay in contact with your skin overnight. These chemicals can be absorbed into your skin and do more harm than good, and no one wants that!

Hair masks that have a strong smell may irritate your nose and lower your sleep quality, and fragrances may contain unknown chemicals you don’t want to sleep with.

Protein-rich masks can overload the hair with proteins, making it too heavy and prone to breakage.

Some homemade hair masks use fresh products (such as eggs) that may go bad after a few hours and smell bad.

A hair mask with apple cider vinegar can disturb the pH balance of hair and harm color treatments if left on too long.

A blonde woman combing the hair with the mask in

Best Ready-Made Hair Masks You Can Leave Overnight

When purchasing an overnight mask, you want it to be as natural and gentle as possible. Review the ingredients before purchasing to ensure you aren’t getting something that has harsh chemicals.

We went ahead and created a small list of overnight hair treatments that are natural, color-safe, and made by companies that don’t test on animals. This is a great starting point for figuring out what will work best for your hair type and needs.

line 3

1. Bumble and Bumble While You Sleep Damage Repair Masque

Bumble and Bumble While You Sleep Damage Repair Masque works best for color-treated, dry, and damaged hair. This overnight hair mask makes detangling easy, boosts elasticity, restores softness, and keeps fragile hair looking healthy. However, it may not be suitable for people who are sensitive to strong scents.

The thick cream can be a little hard to spread over dry hair, so make sure to focus on the ends and other most damaged areas. Even if you don’t want to sleep with a mask in your hair, you can obtain most of the benefits if you apply it for 20 minutes and then wash your hair as you normally do.

line 3

2. The Mane Choice Prickly Pear Paradise Overnight Mask

This nighttime mask is formulated with vitamins and essential nutrients with minimal use of synthetic ingredients. The treatment works best for curly and coarse hair that is prone to tangles. It adds slip for easier detangling, improves hair strength, and restores softness and shine. The consistency is creamy and easy to spread, so you don’t need to use a lot.

You can use this overnight hair mask as often as needed. Apply the product to unwashed hair and leave it on for up to 12 hours.

line 3

3. Paul Mitchell Neuro Restore HeatCTRL Overnight Repair Leave-In Treatment

This leave-in treatment is designed with damaged and fragile hair in mind. It makes dry hair softer and more manageable and protects it from future damage.

You are supposed to apply the mask to the midshaft and ends of your clean dump hair before bedtime. What makes this treatment special is that you don’t have to rinse it until you plan to shampoo your hair. The exception is fine hair that may feel heavy with the treatment in it.

You can also use this mask as a leave-in conditioner and heat protectant prior to styling.

line 3

4. Budget-Friendly Mask: TWIST Sunday Feels Deeply Hydrating Hair Mask

This hair mask by Ouidad is formulated with coconut oil, jojoba oil, Shea butter, and grapeseed oil to replenish essential moisture in curly hair. It revitalizes damaged strands and improves the natural curl pattern. You can leave it for 3-5 minutes to add moisture to your hair or use it as a deeper restorative overnight treatment. The product is color-safe, free of nasty chemicals, and free of cruelty.

Happy nourishing!

line 3
charming attractive girl brush comb her hair

8 Effective Ways to Remove Brassy Tones from Brunette Hair

The effect of fresh hair color is a lot like fresh flowers: you glow the first day you get it. But what happens when those coppery, unwanted tones start to crop up? While it takes just a minute to toss out the flowers, getting rid of brassy tones isn’t so simple.

There you are in front of the mirror wondering how this happened. You went from blonde to blorange in just a matter of weeks. It doesn’t take much time, does it? Yet it happens so slowly that you don’t even notice before that important business meeting. You find yourself standing in the mirror wondering how did my color turn to orange-red overnight.

This process of “blonde” highlights fading to copper is normal, especially for brunettes. And here’s why.

a girl with brassy brown hair

Why Does Highlighted Brunette Hair Fade to Copper?

To understand why it fades, we have to look at what brunette hair is. Imagine there are 10 levels of color in each dark hair strand with a range from 1-10. Level 1 looks black. Level 10 looks like white blonde or “platinum” blonde.

But what are the ranges in between?  If you have dark brown almost black hair, you’re sitting at a 2 or 3. If you have dark brown to medium brown hair, you’re at a 4 or 5. If you have very light brown hair almost blonde, you’re considered a level 6. Numbers 7-10 are considered blonde.

Let’s say a level 4 brunette (very dark brown) wants to be highlighted to a level 7 blonde. For that brown color to look blonde, it has to pass from level 4 to 5 to 6 then finally to 7. It cannot skip a level. Why is that difficult? It’s because the pigments that secretly live beneath the brown color are reds and oranges. So when the hair is lifting from 4 to 5, red is exposed. And when the hair is lifting from 5 to 6, reddish-orange is exposed. And when you go from 6-7, it’s more warm orange-gold.

It’s those “secret” tones that live underneath the “brown” color that are the “brassy” culprits. Toner can mask these brassy hues, but unless they are bleached, they show up once the toner starts to fade.  It’s sort of this inevitable part of the process, but it doesn’t have to be startling. Let’s see what you’re up against, so we can figure out what to do.

slim young brunette woman with brassy hair

How to Get Rid of Brassy Brown Hair?

There are many great ways to minimize, halt, dimmish, transform, and stay on top of unwanted brass in highlighted brunette hair. Let’s look at the top 8 methods for keeping your color the tone you want it.

  1. Schedule regular appointments and follow them consistently. There’s nothing that impacts unwanted brassy hair like getting your color done regularly. This might not be an option you expected but hear me out. When highlighting brunette hair, especially the darker levels, your hair has to get trained. The more you stick to a consistent balayage schedule, the better your blonde tones will appear. Not only that, but they will last longer between toning sessions the more consistent you are.
  2. Keep your porosity healthy. Often with highlighting, your hair can experience high porosity. This means dryness, frizz, lack of moisture, inability to hold moisture, and consequent inability to hold color molecules in. Your hair fades fast and is more easily affected by adverse conditions when your porosity is high. One of the best methods to fill in those “holes” in your hair, is to get an Express Keratin by Keratin Complex. These treatments work wonders on all hair types and create healthy, manageable textures.
  3. Use blue shampoo. But why use blue shampoo and not purple? It has to do with Color Theory. But all you need to know is blue is the color that fights orange (brass). Be sure to use it according to the instructions or according to your hair colorist’s recommendations.
  4. Get regular toners spaced 6-8 weeks apart. Also great training for your hair. It’s like you teach it what to do with consistency. Toners are so good at depositing the right molecules to keep your color the tone you want it.
  5. Use a quality heat protectant every time you heat style. The results of applying heat and color fading are linked. Being proactive with protecting your color means putting on that cream-based heat protectant every single time you use a hot tool or just after you shower. Olaplex did a visual test on a piece of white paper. They applied their heat protectant to one piece and not to the other, then use a flat iron on it. The paper without a heat protectant turned brown. 
  6. Use sunscreen specifically designed for hair. Sunscreen designed for hair is amazing. It blocks those UV rays that can cause the color to fade quickly, making brassiness more visible.
  7. Apply hair gloss. In addition to shine-enhancing benefits, glossing treatments can keep brassiness at bay and refresh your current color.
  8. Install a shower head filter. Washing your hair with hard water can discolor hair and cause it to turn brassy. A shower filter can help reduce minerals and chlorine in your tap water saving your hair from the unwanted effects of hard water.
Gorgeous brunette woman with brass-free hair

6 Benefits of Argan Oil for Your Hair and the Best Ways to Apply It

Argan oil is extracted from Moroccan argan trees by pressing its kernels. This pure, cold-pressed oil is rich in vitamin E, fatty acids, polyphenols, and plant steroids that are essential for maintaining healthy hair and skin and is an ancient beauty elixir that has been around for centuries. Today, we use it in cosmetology as an ingredient in numerous beauty products like moisturizers, and as a carrier oil for essential oils.

Cold-pressed argan oil is a chemical-free solution for beautiful hair. The small molecules penetrate the cuticles and nourish your strands from the inside. But what are the benefits of using argan oil, and what is the best way to use it? Keep reading to find out!

1. Argan Oil for Dry Hair

Argan oil is rich in fatty acids that improve the moisture content of hair and add elasticity to dry brittle strands. This oil can penetrate the hair shaft to boost moisture, and, at the same time, it acts as a sealer that prevents moisture loss. It is a great remedy for your thirsty, dry hair.

A young woman applying Argan oil to dry hair

The best way to use argan oil for dry hair is as a pre-shampoo treatment. Apply oil to your hair and scalp and let it soak in for an hour before washing. Brush your hair to distribute the oil evenly, and then put your hair in a bun or wrap it in a towel. You can leave it on overnight if you plan to wash your hair in the morning. Argan oil can be used alone to reduce the drying effect of shampoo, or it can be used in conjunction with other oils. This practice will make your hair silkier, shinier, and less prone to breakage.

You may also apply the oil after washing but be careful not to overdo it. Only apply a small amount to your dry ends.

2. Argan Oil for Dyed Hair

a girl applies oil on dyed hair to get all the benefits of argan oil for hair

If you dye your hair and use bleach, argan oil can help keep your hair healthy. Rich in antioxidants, it will revitalize over-processed hair from the inside. It also forms a layer around the hair shaft that adds smoothness, and shine, and protects hair from breakage and environmental damage.

To revitalize damaged hair, use argan oil as a hair mask once a week. Apply a generous amount and massage it into your hair, focusing on the ends. Wrap your hair in a towel and leave it on for at least 30 minutes. Shampoo and condition as usual.

Alternatively, you can add a few drops of argan oil to your regular shampoo and conditioner.

To smooth and seal split ends, gently massage a few drops of oil into your dry ends.

young brunette woman brushes her silky hair in the bathroom

3. Softer and Silkier Hair

If your hair is thick and coarse, argan oil can improve the texture of your hair. Not only can it make your hair feel softer without feeling heavy, but it will help with detangling and styling your hair.

To enhance shine and softness, apply argan oil to damp, cleansed hair, and leave it on for at least 20 minutes. Shampoo and condition as usual.

You can also apply argan oil to damp hair before using the hairdryer. Put a few drops in your palms and work into the ends and middle part of your hair. If your hair is fine, make sure to use a very small amount.

A beautiful woman with healthy hair nourished with argan oil

 4. Does Argan Oil Make Hair Shiny?

If you are looking for an oil that leaves hair with a radiant shine without weighing it down, look no further. If your hair has lost its shine and feels like straw after years of coloring and/or environmental damage, you can restore its shine by using argan oil. This miracle oil creates a protective layer around the hair shaft, giving a glossy shine to your locks.

To restore shine to your hair, it is best to use argan oil as a leave-in conditioner before blow-drying. Apply a few drops to damp hair, focusing on the ends, then use a brush to distribute the oil evenly for a luxurious shine.

Another easy way to boost shine is to add a few drops of oil to your regular conditioner. Leave the conditioner in the hair for a few minutes and then rinse well.

 5. Argan Oil for Frizzy Hair

Applying argan oil to curly hair

If you experience frizzy hair, argan oil helps reduce the tendency of hair cuticles to swell, which reduces frizz. The oil penetrates the hair, reducing the absorption of moisture from the air and acting as a sealer that locks in the oil and smooths the cuticles, minimizing frizz.

The best way to use argan oil to reduce frizz is to rub a few drops into your hair after washing. This is especially effective if you have medium-to-thick curly hair. You will notice that your curls are more beautifully defined and bouncier. Another option to beautify your curly hair is to use argan oil as an overnight hair mask.

If you have fine hair, apply a very small amount to the ends before blow-drying and that will calm frizz without leaving a greasy look.

To calm down flyaway hairs, put 1-2 drops into the palms of your hands, rub your hands together, and then run through fly-away parts of the hair. You can also apply oil to damp hair before blow-drying or to get a sleeker, shinier finish.

6. Scalp Soother

Woman with healthy hair holds a bottle of Argan oil

Argan oil has anti-inflammatory properties which makes it a great remedy for dry and itchy scalps. This oil helps cleanse dead skin cells and balances the natural oils of the scalp.  It is especially helpful during the winter months because it helps prevent your scalp from drying out without clogging the pores.

To nourish and soothe dry skin on your head, gently massage pure argan oil into the scalp and leave it on for at least half an hour before washing your hair.

Is Argan Oil Good for Hair Growth?

Argan oil contains inflammation-fighting antioxidants that keep the scalp clean and moisturized. A healthy scalp is a good foundation for normal hair growth. There is no evidence that argan oil promotes hair growth. However, by reducing dryness and brittleness it protects hair from breakage and thus reduces hair shedding. Reducing breakage and splitting not only keeps the hair healthy-looking and beautiful but also means you don’t have to trim the hair as often, which makes it easier for you to achieve the desired length.

Make sure to always buy a premium 100% pure organic argan oil. Read the ingredients carefully and avoid products with added fillers or fragrances. You really don’t need these extra chemicals to enjoy the awesome benefits of argan oil for your hair.

A smiling girl blowdrying her long healthy hair

How to Protect Natural Hair at Night & Preserve Every Single Hairstyle

Written by Vera Aduongo

Nowadays, I’m a lot lazier when it comes to styling my hair, but I remember when I first went natural, I would have my hair in a cute style all the time. Twist-outs, Bantu knots, braid-outs, wash-and-go’s… the whole nine! And there was nothing, absolutely nothing, that I hated more than going to bed with cute hair and waking up to a matted helmet! I had only learned how to execute the style, not maintain it. So through trial and error and pointed searches on YouTube, I finally learned how to protect my natural hair at night. After that, I was unstoppable!!

So today, let’s make you unstoppable too by showing you different protective styles for curly hair at night and when to use each one. Here’s to cute hairstyles that you can actually wear the whole week (or more)! 🥂

charming black woman sleeping

How to Maintain Curly Hair at Night:

When it comes to maintaining your natural hair as you sleep, there are 3 steps to your hair’s nighttime routine:

  1. Moisturize (if needed)
  2. Tie or braid your hair, and
  3. Cover with a satin bonnet or a scarf.

Seems simple, right? And it is simple! It varies a teeny bit, but those basic principles remain the same.

Your routine for protecting your curly or coiled hair at night will vary slightly depending on 3 things:

  1. Hair length
  2. What style your hair is in
  3. What kind of sleeper you are
  1. Hair Length

The golden standard when it comes to protecting your hair while you sleep is the pineapple, where you gather all your hair and tie a ponytail at the top of your head. If you have medium-length or really long hair, then this will work for you. But if you’ve got short hair, we’ve got to be a little more creative.

So, for everything from the TWA (Teeny Weeny Afro) to that ‘teenage phase, you may want to try banding instead. With banding, instead of trying to get your hair into one big pineapple, we’ll part the hair into sections and use elastic bands/ scrunchies that aren’t too tight to keep the hair in each section stretched. Do this all over your hair and then cover it with your bonnet or scarf.

If you’re not trying to preserve any type of curly pattern, then you can tie your scrunchie all the way from near your scalp to the ends of your hair. But if you’d like to preserve a curl or a protective style, then you’ll need to do a little bit more.

  1. What Style Your Hair Is In

Loose Natural Hair (Undefined)

If your hair is short, then all you really need to do is moisturize if needed and then put on a bonnet. Because we didn’t do anything to keep the hair stretched, it will be scrunched together in the morning, but it will be really easy to fluff using a pick and/or your hands. Since there is no curl pattern that you’re worried about losing, anything goes.

sleeping woman with naturaly curly hair

Wash-and-Go

The Wash-and-Go is very similar to loose natural hair, but this time, you’ve got hundreds of little curls, coils, or spirals that you need to maintain.

The trick to maintaining your curly natural hair at night is to make sure that the ends of your hair stay defined. When the ends of your wash-and-go still look defined, even though the middle is a bit stretched, your style will still look pretty good. So we need to keep those ends protected and find a way to retain length.

a dark-skinned teenage girl with pineapple protective hairstyle

You can opt to pineapple your hair, which will stretch the back of your hair and help give you more volume at the top. If your hair is short, you can achieve the same thing using the banding method. Then, the last step is to put on a loose bonnet. You’ll want to give your hair enough space to move around without being squished.

Pro tip: If you prefer for your hair to be flatter at the top, then instead of tying a pineapple, tie your hair into a low ponytail. Then, tie a scarf around your hair leaving out the hair in the ponytail. Top that off with a loose bonnet, so your ends have enough room, and you’ll wake up to a flat, sleeker top.

Cute Africam woman lying in bed

Twist-Outs, Braid-Outs, and Bantu Knots

You’re probably not going to like what I have to say… But the best protective style for curly hair at night is to retwist or re-braid it. So without brushing the hair out, retwist your hair into large sections and then put it on your scalp or bonnet. Aim for 10-15 twists on your whole head. The next day when you take your twists or braids down, your curls would have been preserved beautifully and will easily separate into the smaller sections that you had the day before.

Now, do you have to retwist your twist out at night? No, and the same thing goes for your braid-outs and Bantu knots.

The next best option is to use either the banding or pineapple method on large sections of your hair. These won’t do as great of a job as the retwist, but it should be enough to get you 5-7 days with your style. For the best results, when banding, wrap from near the base to somewhere near the ends. This will ensure you have bigger hair the next day. Just make sure not to wrap it too tight or you’ll lose all of your curls.

Braids, Locs, and Crochet Braids

When your hair is in these types of protective styles, they tend to remain stretched anyway, so there’s no need to do anything in that department. What we will do is get a big bonnet or scarf to cover your hair. Something big enough to accommodate all of your hair in it so that it doesn’t get frizzy.

If you’ve got human hair locs, your hair, or extensions, then it might be a good idea to moisturize your hair before you put it in the bonnet.

Related: How to Maintain Your Crochet Braids So They Last Much Longer

dark-skinned woman sleeping with braided hair
  1. What Kind of Sleeper Are You
Delicate and Dainty

If you’re one of these lucky ones, then anything goes. You can wear any bonnet or scarf. They all work. The ‘fight’ comes in the next section, where I also fall.

Rough and Tumble

Y’all! I move a lot when I sleep, so the bonnets with elastic bands don’t work that well for me. I have to use scarves or bonnets that can be tied or those with a drawstring.

So far, so good. My bonnet stays on the whole night 99% of the time. So if you’re like me, definitely try these out!

Do You Use the Right Brush for Your Hair Extensions?

If you wear hair extensions, you should brush your hair regularly to prevent tangling. Extensions get tangled easily and stubborn tangles can be hard to get out without ripping out your real hair.

If you use an ordinary brush to detangle hair with the extensions, you risk damaging the extension and breaking your real hair.

To prolong the life of your extension and keep your hair healthy, you need to brush the hair gently and use a specially designed tool for that task. Extension-friendly brushes are designed to glide over the bonds and comb your hair comfortably and gently.

Young woman brushing her hair with the extensions in

There are three main types of brushes that you can use for detangling your hair with the extension in it:

  1. Brushes with flexible bristles and rounded tips are a good choice to get the knots out without catching the beads and ripping out your real hair.
  2. Many extension hair brushes are variants of the tangle teaser, a widely known tool for combing tangled hair.
  3. There is also a special type of brush designed for wigs and extensions known as loop brushes. Looped brushes have curved bristles that won’t catch knots and beads.

Today we will browse some of the highly-rated brands of hairbrushes that are safe for your hair extensions.

This post contains links to Amazon. The publisher may get paid if You purchase something through the links without additional costs to You.

1. TANGLE TEEZER The Ultimate Hairbrush

This brush is a variant of the original Tangle Teezer, but unlike the original handle-free version this brush comes with a handle that makes the tool more convenient for use. It is suitable for fusion hair extensions, clip-ins, and weaves, and also for brushing synthetic wig hair.

If you have naturally curly hair, you can untangle your locks with this brush, with little or no breakage and you will need a surprisingly short amount of time for this job.

It can also be used to detangle matted children’s hair.

The downside is that it is not heat resistant, so make sure not to put a blow-dryer right on it.

brunette woman brushing her long hair

2. Wet Brush Pro Detangler

This brush can be used for brushing wet or dry hair and is suitable for brushing hair with extensions as well as wigs. What you will like about this brush is that it causes very little breakage. You will easily and quickly detangle your hair and shorten the time to get ready in the morning. This is a great brush for detangling coarse, natural, and very long hair. A comfortable rubber handle allows for a nice grip while brushing your hair.

3. The Hair Shop Store Black Loop Brush

This looped brush has curved bristles that are easy on extensions. The non-tipped nylon bristles allow for a gliding effect and painless brushing. The rounded tips gently go close to hair roots to get tangles out without grabbing on the bonds and pulling the extensions out.

It is safe for detangling any type of extension including tape-in and micro bead hair extensions. This is also a great brush for detangling synthetic or human hair wigs.

4. RemySoft One Twenty-Three Loops – Loop Brush – Safe for Hair Extensions, Weaves, and Wigs

attractive blonde woman brushes her hair

If you have invested in expensive hair extensions, you may want to consider this high-quality looped brush to increase the life of your extensions and minimize damage to your real hair. Nylon loops effortlessly comb your hair from top to bottom without snagging on your bonds or ripping your real hair. This loop brush is a lifesaver for hair with fusions, weaves, wefts, tape-ins, clip-ins, and micro bead hair extensions. You can also use it as a detangling brush for any hair type and it will work great for brushing wigs.

woman detangling her hair with a wet brush

5. Wet Brush Brush Pro Paddle Detangler

This big paddle brush is great for detangling thick, curly, and long hair. It is designed to work either on wet or dry hair, and you can use it on extensions and wigs. It’s heat resistant, so you can use it for blow-drying. The flexible bristles help to prevent pulling and breaking your hair.

The large paddle surface helps to detangle hair without the need for sectioning.

The possible con is its heaviness which can make your arm tired while blow-drying.

Woman brushes hair with extensions in the bathroom

How to Brush Your Hair with Extensions

Tie your hair in a ponytail in the neck base area. This will protect the bonds from pulling. Start combing from the ends and work your way up to the roots. Gently check the bonds with your fingers.

Try to make it a habit to do this detangling job at least once a day. Braiding the hair overnight will make morning detangling easier.

Detangling Sprays Will Minimize Tangles

The quality detangling product can keep extensions from matting and make the tangles easier to unravel.

B3 Brazilian Bondbuilder Ionic Extension Refresh seals the cuticles reducing the possibility of tangle formation. Make sure to apply it while your hair is still damp.

Final Words

When purchasing a hair brush online, make sure to read the review from people that has the same hair type and length as yours.

It would always be a good idea to go to a store to buy the brush in person. You will be able to get the right impression about its size and feel how it fits in your hand.

a brunette girl brushing her hair with extensions

7 Tips to Grow Natural Black Hair Faster

Written by Vera Aduongo

“How do you grow natural hair fast” is a question that I get asked a lot! And I can understand why. I’ve been a natural for about 7 years now, and my hair goes past my bra strap (it would be longer if I didn’t keep trimming it), and the people asking me often want to know how they can get my results but a lot quicker. Luckily, if you implement these tips (most of which I didn’t implement in those first few years), you will get there a lot faster than I did!

Caveat: While the tips below will help you to grow your natural hair faster, there is a ceiling that your genetics place on how much hair you can grow. So for example, on average, hair grows ½ an inch every month, meaning you can reasonably expect about 6 inches of growth at the end of the year.

However, African American women have been shown to grow hair slower. Take this study, for example, that showed that our hair grew about 4 inches a year. It would appear that based on genetics, our hair just grows a bit slower. These tips are meant to help you hit your maximum growth rate, which will cause you to grow your natural hair faster. Don’t be discouraged if you feel like your hair isn’t growing as fast as you like. It will come around eventually… I promise.

So without further ado, here are my 7 top tips on how to get long natural hair fast.

young female student with long curly hair

1. Take Hair, Skin, and Nails Supplements

I mean, I’m not even fully consistent with this yet, but boy didn’t I notice a difference when I took my supplements consistently! And interestingly, I took a Biotin supplement for about a month just to get my nails less brittle, but I noticed that my hairline started to look fuller. These supplements aren’t just some gimmick! They actually work!

And studies show they are effective. My favorite is this 2012 study measuring the effect of oral supplements on women with thinning hair. The study gave one group of women an oral supplement and the other a placebo. They then measured the number of strands on a 4 cm2 area. The number of hairs in the group that took the supplements doubled in 90 days!

P.S.: You can try out one of the best-reviewed ones on Amazon: Nature’s Bounty Vitamin Biotin Optimal Solutions Hair, Skin, and Nails Gummies.

P.P.S: Supplements are NOT a replacement for a good diet. Eat as healthy as you can, to begin with, and then add on supplements to help your body fill in any gaps that might be present.

2. Nail The Art of Detangling Gently

This! If you skip all the other steps, whatever you do, implement this, and #4. Ripping through your tangles can be so tempting when you’re short on time, and your biceps are beginning to feel sore but don’t do it.

When I first started trying to grow my natural hair, I took this for granted, and as a result, my ends were horrible and tangled a lot. My hair also kept breaking. Ironically, the more tangled my ends got, the harder it was to detangle and the more impatient and rough I became. You get into this cycle that keeps you from seeing the progress you want in your hair. So make sure that you fix this.

If you have enough time and patience for it, look into finger detangling. This is, by far, the most gentle detangling, so it will allow you to keep the most hair on your scalp. If you still love your tools, look into detangling tools, such as the Felicia Leatherwood Detangling Brush and EZ Detangling Brush. Just remember to be gentle when you use these.

young student with long curly hair

3. Trim Your Ends Often

Speaking of damaged ends…. Try and get a trim every 6 months to start with. These trims usually take off the bottom ½ to 1 inch of your hair all around, which can be a game-changer if your ends are damaged, dry, and tangle-prone. If your ends are especially damaged, then you or your stylist may cut off more than that.

Then adjust the frequency of your trims once you get a feel for how long it takes before your ends are a bit ‘dusty’ again.

4. Build Consistent Wash Day & Moisturizing Routines

Consistency is the most important thing in every glow-up. Those small, beneficial habits rack up until you achieve your goal. The same principle applies when you’re trying to grow long natural hair fast.

Consistent, healthy, and manageable wash day and moisturizing routines will get you where you want to be. So take some time to map out what you’d be willing to commit to alongside your fave products and stay consistent. 

5. Protective Style A Loot!

When you’re looking to get long natural hair fast, you want to find a way to give your hair some space to grow and protect it from damage that might lead to breakage. The best way to do this is protective styling. Protective styling, when done properly, reduces the amount of manipulation your hair experiences and protects your ends from damage.

Styles such as flat twists, box braids, crochet braids, or faux locs are great options. If you’re interested in getting some crochet locs this summer, check out this article we did telling you literally everything you need to know before you get any type of crochet loc or faux loc.

6. Pamper Your Tresses with Some Treatments Once in a While

Similar to taking care of your face, your hair can benefit a lot from the occasional mask or treatment. The most common types of hair treatments are moisturizing treatments and protein treatments. These work to boost moisture levels and hair strength respectively.

If you notice that your usual moisture routine just isn’t cutting it anymore, or if it’s winter, then bust out one of your moisturizing masks.

If your hair is feeling a bit limp and kinda mushy or is breaking a lot more than usual, then it might be time for a protein boost. You’ll also want to incorporate protein treatments into your routine if you’ve had any type of chemical treatment done to your hair recently. But you can read all about protein treatments and when and how to do them here.

7. Massage Your Scalp

This one is a nice-to-have, but it makes a load of difference if you want to grow long natural hair. Scalp massages have been shown to increase hair thickness in cases with hair loss and in people who aren’t struggling with hair loss. There’s a debate out there on exactly how this works, but what we do know is it does work.

So try incorporating a 5-minute massage into your routine daily or as often as you can. Because whoever got mad at having thicker strands?!

Tip: Take advantage of your massage time to moisturize your scalp as well. Apply your favorite regular or growth oil and go to town.

Thanks for attending my little TED talk on how to grow your natural hair fast. 😁

Now go out there and be great,

XO

Dark skinned girl with long curly hair

How to Repair Damaged Hair After Taking off Extensions

Written by Evelyn Davies

Had your hair extensions out and feeling like your hair is damaged? Maybe it’s feeling thinner, or matted, you may even have bald areas. This how-to repair damaged hair after hair extensions guide should give you an insight into what to do next.

So, hair extensions can add a lot of difference to your look and I foremost understand why they are addictive. I used to wear extensions for years and I’m naturally thin-haired. I’m also a hairdresser so I know the ins and outs of hair extensions. I’ve seen the damage caused by clients, by poorly applied extensions, or incorrect advice. Hair extensions need to be done well to preserve your natural hair.

Do Extensions Make your Hair Thinner?

attaching hair extensions in the salon

I think the answer to this one is they can. So, yes, but not usually. Some people I find get so used to the extensions that they feel they have hair loss after removal, so that could be why. Also, repetitive strain on the same areas of the head can cause hair loss. If the extensions are applied incorrectly with too much weight on your strands the hair extensions can damage the hair by pulling it out.

I’ve also seen neglect from clients and their bonds matte together. Or maybe you have had a weave and the roots are matted. Tying hair up against the fall of the extensions also can pull out hair. Not having breaks from hair extensions can cause damage and the sad part is people who have them probably have a thin hair type already.

How to Thicken Hair after Hair Extensions?

If your hair is thin at the root – it is an issue at the scalp. Thin hair after extensions can look patchy on the scalp, or, generally thinner all around. You need to look after the scalp and follicles. Regular scalp massages supply blood flow to the follicles and do not tie hair up tightly to put a strain on them. Also, scalp/hair growth treatments, maybe vitamins for hair growth and be gentle. Do not keep putting extensions in if you’re experiencing hair loss as it will add to the problem. Regular trims also help thicken the look of the hair.

Wispy Hair after Extensions?

So wispy hair can happen. This also can be normal. A set of permanent hair extensions can be in the hair while it grows for months. Over this time hair can lose its strong haircut shape so it may just need a cut. Also, sometimes to blend the extensions into your own hair an extensionist may cut into your hair to get a seamless blend. It may not be the damage after hair extensions you’re experiencing and more about getting a haircut.

beautiful blonde woman with short wispy hair

Do Extensions Damage your Hair?

So, having hair extensions taken out can be quite liberating after having them in for a while. I encourage regular hair extension wearers to have breaks from the hair extensions because it’s not advised to repetitively go over the same parts of the head. This is because it can cause alopecia from too much tension and pulls the hair out.

Damage Caused by Improper Hair Care Regimen

The damage can also be caused by a client’s home care regime, this is why is important to go to someone qualified that can advise you correctly. If you tie your hair up with extensions high or tight the pressure on your follicles can pull the hair out. Also, if a client does not brush hair through the bonds and goes to bed with wet hair, it can cause bonds to matte together causing pressure on the root.

Damaged Hair after Matted Extensions

Hair matting usually lies at the clients’ hands and it’s a nightmare for us hairdressers to remove. This actually can get so bad it needs to be cut away. That can cause hair to be knotted and picking away at it with a fine-toothed comb takes hours. It also can feel thinner after the hair extension removal because the old natural hair loss will have stayed in the matting, also the extensionist may cut the matting away because removal is not possible.

Does Hair Grow Back After Removing Hair Extensions?

The answer is yes. Not always but mostly. If you have hair loss warning signs then do not put another set of hair extensions in and give it a break. Look after your scalp, get a good haircut, eat a balanced diet, give yourself head massages and use professional quality shampoos/conditioners. My advice is to leave it alone to thicken and grow.

How Long should you Give your Hair a Break from Hair Extensions?

Personally, this depends on your situation right now. If it’s in between having new hair put in and you are not experiencing hair loss, I’d give a 2-4 weeks break. If your hair feels thinner but has no bald patches after removing hair extensions, I’d give it a couple of months. Check in after and see the difference. If you’re still worried, leave it alone for a longer period.

Then if you’re experiencing bald patches, I recommend giving your hair a rest until it grows back. You’re at risk of losing more hair, so stop trying to pinpoint why you have hair loss from extensions and learn from it. Maybe you need a new hair extensionist, maybe you need to change your hair handling at home, maybe you naturally suffer hair loss and it’s not smart to have hair extensions.

a model with restored hair after removing hair extensions

Guide for Faux Braids and Braided Updos of Your Dreams

So, you’re here, which probably means braiding for beginners and intermediate methods weren’t of interest to you. Perfect! Landing in the Faux Braid section just means you want to get started without the pains of a learning curve, and darling, there is nothing wrong with that.

Steps for a Simple Knotted Faux Braid

  1. This style is best for long hair however, it can be done on medium length as well. The results are incredible so start by brushing your hair and adding in your oil and heat protectant.
  2. You’re going to take a section from the right and left front bang area, assuming those pieces of hair are long enough to pull around the side of the head to the back.
  3. Once you’ve brought you’ve brought both pieces to the back, tie an actual knot.
  4. Secure just underneath the knot with a very small rubber band that matches your hair color.
  5. Repeat this using sections of hair just below the sections you just knotted and incorporating the tail from the knot above.
  6. Each new knot should be tied just below the one above it and secured each time with a rubber band until you reach the lower neck hair line.
  7. You can either tie it off here and leave a low ponytail or you can put it in a rubber band. Then you can split the hair underneath the rubber band and begin tying knots once again until you run out of hair. Always secure with a small rubber band after each knot is created. 
Single knotted faux braid
Single knotted faux braid. Image credit by Andrea Haynes

Steps for the Pull-Through Faux French Braid

  1. What’s perfect about this style is it looks luxurious yet can be given an “un-done” edge by starting with beachy waves and some texture spray, keeping you fresh and modern.
  2. You can start the look anywhere you like, but for this written tutorial we will begin by parting the top section of your head into a mohawk. Then take the “bang area” of your hair towards the front top and secure this with a rubber band.
  3. Secure a section of hair with a second rubber band just behind the first one. Keep them close.
  4. Split the ponytail of the top section in half and bring the ponytail of the second section through the split. Pin it with a clip. Bring the split ponytail hair of the first section down around the hair that’s split through it, and secure it with a band. 
  5. Now slide your fingers on either side of your hair, add in hair and grab the hair that is already there from the ponytail. Combine the added hair with it and secure it with a rubber band.
  6. Continue this pattern and motion of adding in hair as you go until you run out of hair.
  7. Rough it up a bit by pulling small strands loose or loosening the rubber-banded sections of hair just a bit.
  8. Spray with hair spray to hold! 

Steps for the Faux Braid Using Bobby Pins

  1. This look is particularly good as a half-up faux braid look. You can keep your hair smooth with added volume at the root or use texture spray and waves for that “un-done” feel. Begin by taking a section of hair starting near the temples and incorporating the band area. Secure with a small rubber band.
  2. Now take a small section of hair just below where you started on one side of the head. Pull it upright to reach just behind the rubber band that secured the first section. Place a bobby pin on this section of hair you are holding.
  3. Twist it over the rubber band and slide it underneath it.
  4. Now do the same to the other side, making sure to cross over the section you just did before.
  5. Repeat this pattern for several rows, making sure to cross over each time.
  6. It creates a causal, intricate “braided” style.

The horizontal faux braid updo – Video by Andrea Haynes

Faux Braids Continued – The Faux Braided Horiztonal Updo

I’m not sure there is a more beautiful and relatively simple faux braid updo than this one. The first time I created this look, I stood back and held up my hands thinking “did these really just create this?” The results were luxurious yet still somehow down to earth. And the idea that you can do this on yourself with minimal bobby pins? Your friends will be speechless.

the horizontal pull-through braid into an updo
The horizontal pull-through braid into an updo. Image credit by Andrea Haynes

Steps For the Faux Braided Horizontal Updo that Leaves them Speechless

Remember that this look is a “horizontal” updo, not a vertical one. You’re going to be faux braiding “sideways.” The mechanic used to create it may feel a bit unnatural your first or second time, but once your hands understand what to do, you’ll finish in no time.

  1. This look is so gorgeous, it’s good to spend time prepping the hair first. A good method is to tease hair at the root after spraying in a texture spray. Then brush out the tease with a soft brush. You can do this one or two times for the best results. Add in soft waves for texture.
  2. Now take a section of hair just behind the back left ear as if you’re creating a low ponytail. It’s a small section, so leave out most of your hair.
  3. Secure with a rubber band.
  4. Now secure a section small section right next to the first.
  5. Split the first ponytail vertically and pull the second ponytail through it. Pin the ponytail that was pulled through just to keep it out of the way.
  6. Now take the loose hair and add it into a newly created third section, pin.
  7. Keep this pattern going. Now split the ponytail that is first in line, and pull the hair of the ponytail through behind it, through it. pin that out of the way.
  8. Regroup the split hair together and rubber band it into a new section.
  9. Do this until you get from the left ear all the way to the right.
  10. Now you can switch to rubber banding the single ponytail that you have going and pulling each rubber band section through itself.
  11. Now take time to gently expand the “braid.” You’ll pull on every heart-shaped section until it’s wide. Do this evenly to each part of the hair.
  12. Now take the “tail” and pin it underneath the horizontal faux braid so it’s not seen.
  13. And you’re finished! This look will get you through any formal event or holiday party in a luxurious style! Have fun with it and make sure to practice several times.  
the vertical pull-through braid
The vertical pull-through braid. Image credit by Andrea Haynes

Easy DIY Braiding Techniques for Hair

Written by Andrea Haynes

Hair braiding is a beautiful technique for both the style and health of your hair. But chances are you’ve experienced a bit of a learning curve with the three-strand braid, a technique that so many people were introduced to growing up. Do you remember the feeling you had once you finally mastered it? Like tying your shoes, once it clicks, it clicks. But transferring this technique to yourself for DIY braiding can be a bit trickier.

Here are a few easy tips and tricks for braiding your own hair that make the process easier. From beginners to advanced braiders, use these steps to increase your braiding skills while making your hair luxurious and healthy along the way.

Different Ways to Braid Your Own Hair –The Three-Strand Braid for Beginners

Stylist Braiding Girl's Hair In Beauty Studio

The biggest takeaway for the three-strand braid is allowing yourself some grace. When first learning the art of folding three strands of hair over each other in a pattern, it’s important to let yourself make mistakes and enjoy your own process. I promise you’ll get it!

So where do you begin? It’s helpful with this braid to begin on someone else, then once you feel like you’ve got it, transfer the technique to yourself. But for the sake of this tutorial, we will begin with braiding on yourself. 

Steps for the Three-Strand Braid on Yourself

Begin by taking a 2” wide section of hair near your face. Use a clip to pin the rest of the hair out of the way. Do not practice in front of a mirror.

The basic 3-strand braid – video by Andrea Haynes
  1. Divide the section near your face into three equal-sized strands.
  2. With one hand, pinch 2 of the strands while keeping them separate, and hold the third strand with the other hand.
  3. With the hand holding the single strand, use your loose finger (maybe the middle one) to reach and grab the middle strand and cross it over the top of the one on the outside. Now two strands have switched places.
  4. Now take the opposite hand and do the same motion, pulling the new middle strand over the top of it. The outer strand has changed places with the middle strand once again.
  5. Repeat this pattern working between your left and right hands until you see the braid form!

The classic three-strand braid creates a beautiful texture and can add a lot of style to your look. There are other types as well with ethereal qualities worth looking at.

Steps For the 2-Strand Braid or Double Fishtails

This is a great braid if you’re looking for something gorgeous but contoured to a minimalist’s aesthetic. The overlay of each strand can look more intricate than the three-strand braid, making it perfect for a party or night out.

While the steps are simple, getting a good grip on the hair might be the only area where there is a learning curve. Keep practicing, each time you do, you’ll get comfortable with the hold.

French Braiding Styles

Easy Steps for the 2-strand Braid or Dovetail/Fishtail on Yourself

  1. Start by parting your hair down the middle to create two equal amounts of hair.
  2. Begin near the front of the part on one side and collect the hair as you go into a twist until you end up twisting all the way down to just behind the ear. Secure with a small rubber band.
  3. Now for the fishtail part. Near where you just placed the rubber band, divide the loose hair below it into two equal sections. These are now called sections 1 and 2.
  4. On the outer side of section 1, take a very small piece of hair and cross it over the section you took it from, landing on the other side in section 2. Hold it with your other hand.
  5. Then, from section 2, take a small piece of hair and cross it over the section you took it from, landing in section 1. This crisscross action can be repeated all the way down until you have a beautiful fishtail braid.
  6. Gently secure with a rubber band at the end then begin to lightly pull at the crisscrosses until the braid loosens and expands in size.

Intermediate French 3-strand and 2-strand Braiding

Once you’ve gained the ability to braid, the next step is learning to do a French style. This means the braid is attached to your head. The movement follows the same pattern as a basic braid but incorporates extra strands from different parts of the head as the pieces are braided over each other.

French 2 strands braid

It is an intermediate braiding technique and builds off the foundation of being able to do a simple 2 or 3-strand braid. The results can be absolutely stunning, so practicing this is worth your efforts.

Steps for a Classic Single French Braid

  1. Start by brushing your hair back to remove the part.
  2. Take your two index fingers and place them on your temples, then slide them slowly up, landing about 2” past your hairline. This is your starting section.
  3. Divide the starting section into 3 equal pieces. These are strands 1, 2, and 3 now. It’s important to keep these 3 sections clean and evenly divided.
  4. Take the middle strand number 2 and cross it over strand number 3. The two strands have now switched places.
  5. Now before taking strand number one and crossing it with the middle strand, you’re going to slide your index finger and scoop up another section of hair, adding it to strand number 1 before the crisscross happens.
  6. This is the motion that will be repeated until you’ve braided all the way down the end of your hair. You’ll scoop in slices of hair to add in each time one of the outer sections of hair crosses over the middle piece.
  7. Make sure to view the video attached to this piece so you can see the art of the French braid. It’s a very visual process!
Beautiful girl with hair braided with a French braid

French Fishtail Advanced Technique on Yourself

The steps for a French fishtail are similar in terms of the pattern and the scooping to add in hair as you go. However, French fishtails look more beautiful than bubble braids. This means you pull the crisscross under the middle piece, instead of over it, resulting in the braid “popping out” or looking raised on the head.

The fishtail pattern is easier to see this way as it enhances the details of the look. It’s a more difficult process and takes time to master. So don’t give up, anything is possible when you want it.

hairdresser do hair braiding in salon

Here’s How to Clarify Your Natural Hair the Right Way

Written by Vera Aduongo

Some terms in the natural hair space can be so sciencey. By that, I mean that they can seem like such complex ideas, so you go in expecting to get a headache. Luckily, that’s not the case with clarifying your natural hair. So today, I’m sharing my tips on how to clarify your hair the right way, answer some of the most common questions surrounding it, and tell you about the clarifying shampoo I think everyone should own.

Now, just so we’re on the same page, let’s start by explaining…

What a Clarifying Shampoo is:

Clarifying shampoos are shampoos that very thoroughly clean your hair and scalp. These shampoos can give you such an intense clean because they contain more potent cleansing agents than those found in moisturizing shampoos. Most clarifying shampoos will leave your hair feeling squeaky clean.

Happy Smiling Girl  with naturally curly hair

Can You Use Clarifying Shampoo on Natural Hair?

Interestingly, when you’re first going on your natural hair journey, you’re advised to avoid clarifying shampoos because of how dry they can leave your hair.

While I still stand by that advice, I now think that there are certain scenarios (more on that below) when it’s beneficial to use a clarifying shampoo. So I think you should keep one in your stash. With proper use, these can help you along your hair journey, not hurt it.

What’s The Difference Between Clarifying and Detoxifying Shampoos?

Clarifying shampoos tackle dirt, sweat, and product build-up. On the other hand, detoxifying shampoos eliminate toxic materials from your hair.

For example, when swimming, your hair is exposed to a toxin called chlorine, which is very drying for the hair. Using a detoxifying shampoo can help you get rid of that chlorine. Common detoxifying ingredients include apple cider vinegar and bentonite clay. So detoxifying shampoos are clarifying shampoos that give you a lil’ something extra.

And What are Chelating Shampoos?

Chelating shampoos, also known as hard water shampoos, are specially formulated to get rid of mineral buildup caused by hard water.

Hard water has a much higher mineral content than what you’d find in filtered water or water that is supplied by a city or town. These minerals form a coating on your hair, causing it to feel dry, limp, and ‘filmy’ when using regular shampoos. This coating can affect your hair’s ability to absorb moisture, leading to dryness, increased frizziness, and trouble getting hair products to work on your strands.

P.S: In case you’re wondering if you even have hard water, read this article (after you’re done with this one :))

a beautiful model with afro hair

When Should You Use Clarifying Shampoo on Your Natural Hair?

  1. If you use products that contain silicones/-cones or thick coating agents like petrolatum/petroleum jelly regularly.

In the natural hair community, silicones and petrolatum are considered the enemy! Now, I don’t think they’re that bad, but I do think it’s best to avoid them. Why, you may ask. Because these form a protective layer that’s a little too effective at keeping water from getting into your strands. The worst part is that these don’t wash off if you’re only using moisturizing shampoos, which might cause build-up. This build-up can have your strands feeling dry and breaking off.

  1. Your hair is chronically dry.

Sometimes, your hair can feel dry because of product build-up, even when you’re using natural butter like shea butter. Once they form a layer on your hair, it becomes hard for any water to get absorbed into your hair, leaving it feeling parched. So the first step to getting your hair back on track will be to strip all that product, which will allow your hair to pretty much ‘breathe’.

  1. Your hair products aren’t working anymore.

Have you noticed that one of your holy grail products just doesn’t work anymore? That might be a sign that you need to clarify your hair. When you have build-up on your hair, it interferes with how your products work.

Here’s How to Clarify Your Natural Hair Without Leaving Your Hair Stripped?

First, don’t use a clarifying shampoo unless you have to. Only pull out the big guns when you’re suspecting that you have build-up, and then you can use it ever so often to keep build-up at bay.

Ironically, use two shampoos. Follow up on your clarifying shampoo with your moisturizing shampoo. And no, don’t skip this and head straight for your conditioner. If you skip it, when you apply your conditioner and deep conditioner, your hair will still end up feeling dry. The theory on why this works is that using a moisturizing shampoo allows the pH of your hair to gradually be brought down to a level that will allow your hair to reap all the benefits of your conditioner or deep conditioner. It’s one of those “I’m not sure exactly how it works, but I’m sure it does work” types of things…

Remember to condition and deep condition your hair after you rinse out your moisturizing shampoo. Doing both will go a long way in ensuring that your hair feels great after.

Pro tip: If you notice that this still isn’t enough to restore moisture, then try a hot oil treatment right after your conditioner. Sit under a hooded dryer to amp up your results. Then continue with the rest of your routine as usual.

Lastly, don’t use these too often. Clarifying shampoos, though great, can cause more harm than good if used too often. Frequent use can leave the hair dry and the scalp flaky.

So, Here’s the Best Clarifying Shampoo for Natural Hair (IMO): Aveeno Apple Cider Vinegar Blend Shampoo

This is an all-around fave for a couple of reasons. The ACV Blend Shampoo is a three-in-one: chelating, detoxifying, and clarifying shampoo. So, it’s a go if you have hard water or swim a whole lot. The ACV also works not just to detox but also to calm down an itchy or flaking scalp. It does a great job clarifying the hair, but it doesn’t leave your hair feeling stripped. Plus, girl, the price!? It’s too good. I suggest only pulling this gem out when you need a deep clean or to maintain a build-up-free mane once every month.

How ironic is it that I’m writing this when a lot of us will be spring cleaning? Maybe it’s a sign that you should think about doing a much-needed reboot for your strands.

Till next time,

XO

Happy African-American girl with clarified hair

6 Types of Highlights and Color Techniques You Won’t Want to Miss

Written by Andrea Haynes

Summer is just around the corner, and no doubt that urge to highlight your hair peaks every time the sun comes out. But before you dive right into the salon and say “make me blonde” you may want to know what you’re getting yourself into and why.

There are so many different types of highlights that this topic is not always easy to understand. Usually reading the language will be enough to throw you off, but then when you google images of balayage, foiliage, ombre, full foiled highlights, etc. things only get more confusing.

I want to help take out the blurry definitions and give you a solid understanding of the varied types of highlights so you can look sun-kissed or platinum in time for summer. And there’s no better time in 2022 than right now to get this process going.

Amazing Types of Hair Highlights to Choose from in 2022

1. Full or Partial Balayage

Full Blonde Balayage
Full Blonde Balayage by Andrea Haynes

If you’re hoping to get something very natural-looking that might only be a couple of shades lighter than your natural color, then balayage is a good option. Each piece is hand-painted with precision and just the right amount of saturation to give you the sun-kissed look of your dreams. So what exactly do you need to know about balayage? Just a few easy takeaways.

Balayage is a naturally “warm-color” producing process. If you like golds, warm browns, reds, honey, and champagne then this will fit your aesthetic.

What’s the Difference Between a Full and a Partial Balayage?

  • A full balayage covers all areas of the head, including the back underneath the crown down to the nape of the neck.
  • A partial only covers the upper portion of the head from the back crown to the upper portion of each side of the head.

Why should you choose a partial or a full balayage? Partial Balayage creates more “dimension.” It’s a higher contrast effect where there are naturally deeper lowlights created from your natural hair color. The takeaway is if you want high contrast with balayage, try a few partials in a row spaced 8-10 weeks apart.

Toners are often needed to soften the level of red, copper, orange, or gold that might be produced from the bleaching process. These warm color pigments live naturally in the hair and become exposed once the bleach does its job. So don’t be worried in the process. Your colorist knows what they are doing.

Toners are often needed every 6-8 weeks between services to keep the tone in the right color spectrum.

How often should you get a balayage per year? This will vary but on average people do 2-5 per year.

2. Foiliage

Full foiliage by Andrea Haynes
Full Foiliage by Andrea Haynes

When you hear the word foiliage, think bright blonde with an easy grow out. With this process, you get the best of two worlds: the brightness of “foiled highlights” mixed with the easy outgrowth of a balayage. @lo_Wheelerdavis is a luxury hair artist from California who specializes in creating high-contrast, rooty blondes. For inspiration, she is a good place to start. You’ll find everything about this look on her page, plus more.

So what do you need to know about foiliage?

  1. Using foils creates deeper saturation and heat when the product comes in contact with the hair. It’s a physically more intense process for your cuticles so take care of them in a few ways: get keratins, use hair masks 1-3x per week, try the Olaplex line, and stay regular with your upkeep.
  2. Foiliage is meant to be for high contrast. If you’re torn between foils and balayage, try foiliage.
  3. It is still a rooted look, so you are growing out your highlights easier, although still not as easy as a balayage.
  4. Often needs to be color melted post highlighting service.

3. Color Melt (NOT A HIGHLIGHT TECHNIQUE)

Often your foiliage, balayage, or foiled highlights will be followed by a color melt. Your colorist takes 2-3 colors and starts with the darkest toner at the root, then moving a couple of inches down at a time uses a slightly lighter toner for the mid-sections of the hair until the end is reached where the lightest toner is applied.

Example of Color Melt1
Example of Color Melt by Andrea Haynes

What do you need to know about a color melt?

  1. This is a toning process, not a bleaching or highlighting service.
  2. Color melting takes a lot of skills and expertise to do well. The use of three colors is slightly misleading as the color for each section as you move down in a gradient from dark to light will have multiple colors mixed in to achieve it. So for example, you’re using a dark color at the base of your hair and it could be mixed with 3 different colors to make it that shade. The same goes for the midsection color and the ends. It’s complex!
  3. It’s a conditioning process with certain brands. Some glosses act like an end-of-service shield, sealing down those cuticles and making the hair shiny and healthy-feeling.
  4. You may not need a color melt as often as you would a single toner.

4. Babylights

A good technique for the blonde that feels never quite blonde enough but still stays shy of platinum. The results of babylights are gorgeous and can be considered high maintenance.

babylights
Babylights by Andrea Haynes

So what are the key concepts for babylights?

  1. Long service. This process takes paper-thin sections and applies the bleach or lightening agent to them inside folded foils. Due to the tiny section size, the process can take a very long time. Bring a book and a snack!
  2. It’s high-maintenance blonding for a reason. You’re achieving the brightest blonde possible here just shy of a double-process platinum experience. This means to maintain that blonde, you’ll need to be booking regular touch-up services every 8-10 weeks.
  3. Aftercare is important. You’ve invested a lot of time and money into this process so taking care of it provides the best benefits. Remember to get keratins, use quality products and brands such as Kerastase, and create a solid product foundation. The foundation consists of your shampoo, conditioner, oil, and heat protectant. Make sure these are moisture-focused.

5. Double Process Blonde

Babe hair anyone? This blonding technique produces that iconic all-over single shade of blonde that symbolically screams “blondes have more fun.” (Don’t worry brunettes, your color symbolically screams the same thing, except it inserts “brunette” into the phrase).

What do you need to know about being a double-process blonde?

  1. Highest maintenance of all the blonding techniques. Time and money are important here as you’ll be in the salon for a long period of time per service. Then you’ll need to book touch-ups regularly. The harsh line that grows out is stark and getting your touch-ups is the best way to take care of it.
  2. You are depleting a lot of natural keratin on a regular basis so getting Express Keratins by Keratin Complex is a must.
  3. Make sure to tone regularly as well. If your original color was dark, your hair will want to fade to colors you might not love.
  4. Re-book touches up about every 6-9 weeks or so. This can be affected by how quickly your hair grows and how polished you want it to be. 

6. Copper Highlights

copper highlights
Copper Highlights. Photo credit by Andrea Haynes

 2022 is the year of gorgeous redheads, but not just any red. Copper-red is the look, and it’s a bit enchanting. The hues range in the spectrum from deep red-orange to pale strawberry blonde, but with copper undertones. How is this look achieved? For starters, no red color is the same so make sure to bring photos for your colorist so they can get a good idea of the copper shade you want. The look is typically achieved by doing a balayage, foiliage, or highlight and following that with copper shades of colored toners or hair dyes.

What do you need to know about highlighted copper-red?

  1. The look is not for everyone. And that’s ok.
  2. The more highlights you add in first, the more dimensions or contrast you’ll have. This also makes you lighter.
  3. It may not come across this way, but copper highlights are high maintenance. Red coppers fade quickly and will need a toner to refresh often.
  4. It’s fun! If you’re on the fence, this is the year to give it a try.

Just a simple tip, but you may want to go to a copper-red head for this service. No one knows reds like the redheads themselves. Scarlet and Co. in the Gold Coast of Chicago for example is owned by the most beautiful and talented copper-red colorist. Finding a place that specializes in reds is key.