6 Benefits of Argan Oil for Your Hair and the Best Ways to Apply It

Argan oil is extracted from Moroccan argan trees by pressing its kernels. This pure, cold-pressed oil is rich in vitamin E, fatty acids, polyphenols, and plant steroids that are essential for maintaining healthy hair and skin and is an ancient beauty elixir that has been around for centuries. Today, we use it in cosmetology as an ingredient in numerous beauty products like moisturizers, and as a carrier oil for essential oils.

Cold-pressed argan oil is a chemical-free solution for beautiful hair. The small molecules penetrate the cuticles and nourish your strands from the inside. But what are the benefits of using argan oil, and what is the best way to use it? Keep reading to find out!

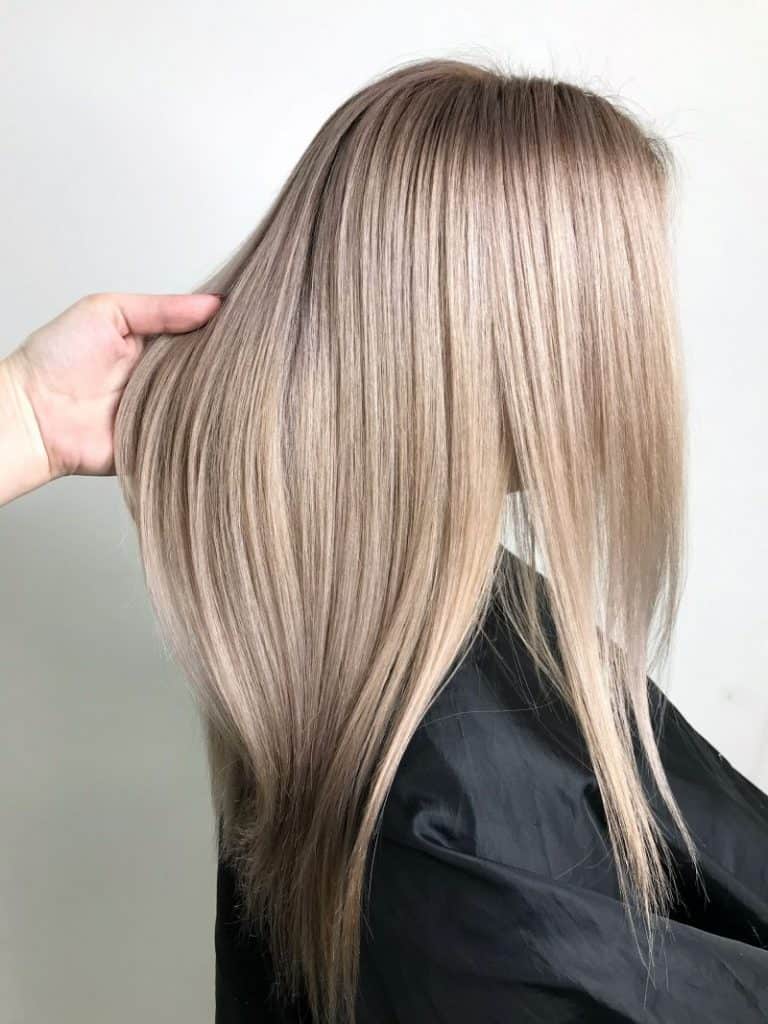
1. Argan Oil for Dry Hair

Argan oil is rich in fatty acids that improve the moisture content of hair and add elasticity to dry brittle strands. This oil can penetrate the hair shaft to boost moisture, and, at the same time, it acts as a sealer that prevents moisture loss. It is a great remedy for your thirsty, dry hair.

A young woman applying Argan oil to dry hair

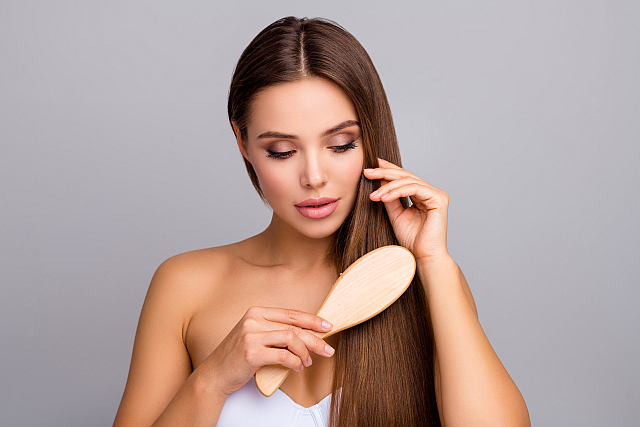
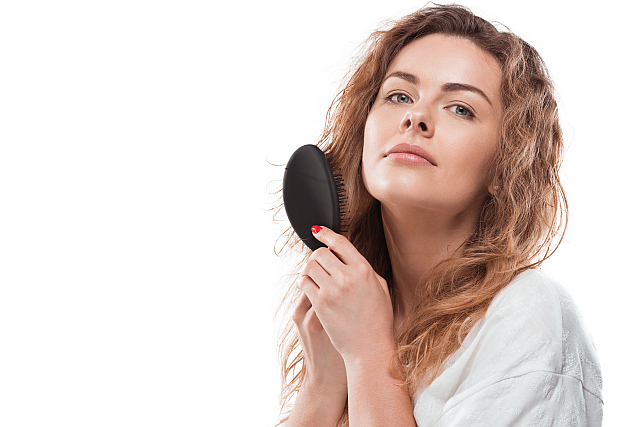
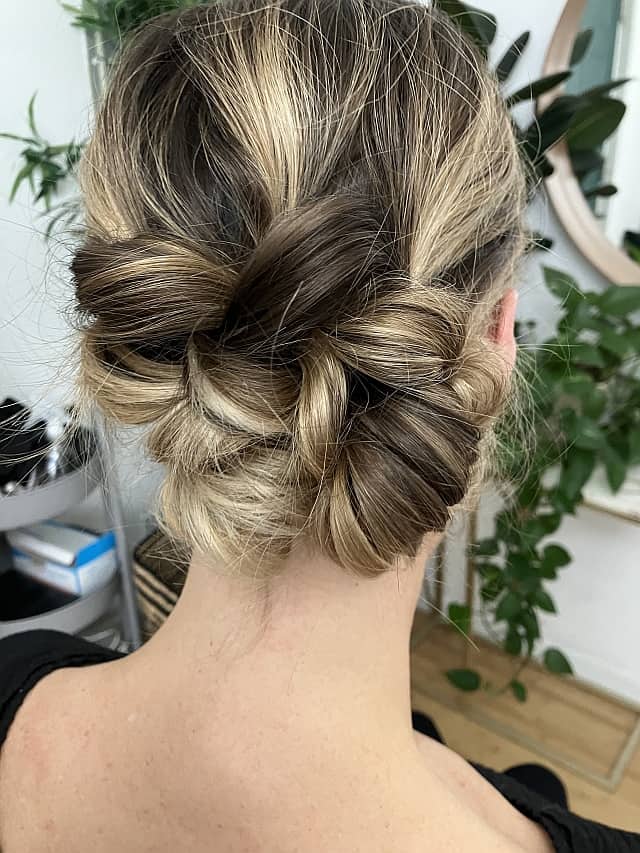
The best way to use argan oil for dry hair is as a pre-shampoo treatment. Apply oil to your hair and scalp and let it soak in for an hour before washing. Brush your hair to distribute the oil evenly, and then put your hair in a bun or wrap it in a towel. You can leave it on overnight if you plan to wash your hair in the morning. Argan oil can be used alone to reduce the drying effect of shampoo, or it can be used in conjunction with other oils. This practice will make your hair silkier, shinier, and less prone to breakage.

You may also apply the oil after washing but be careful not to overdo it. Only apply a small amount to your dry ends.

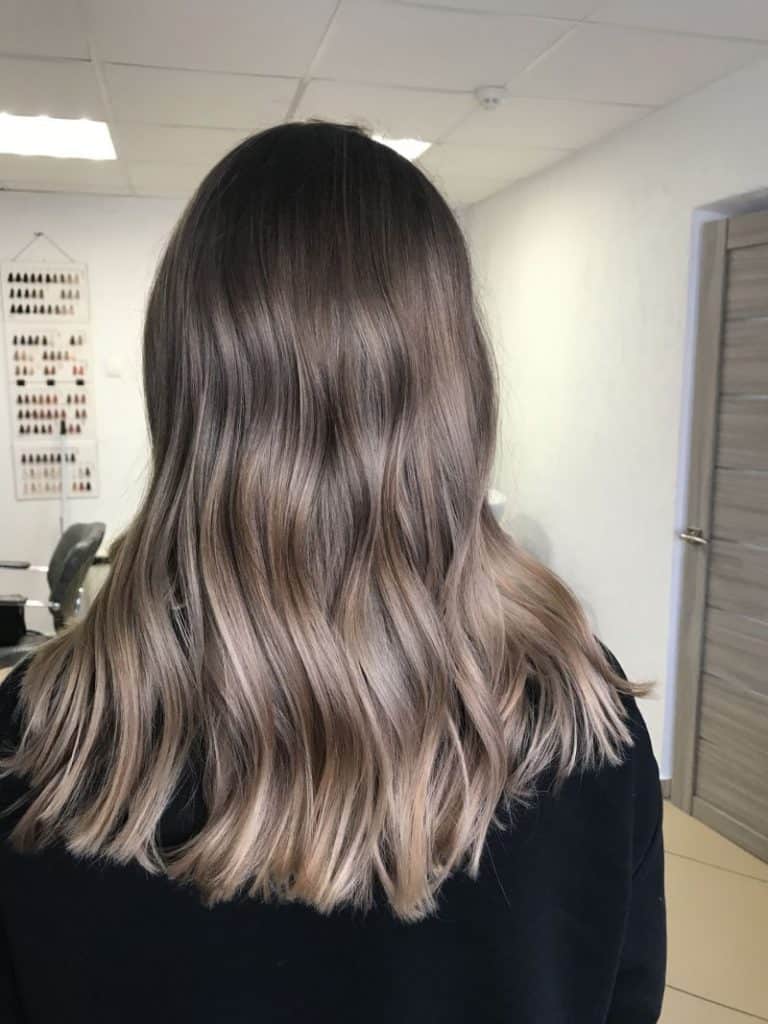
2. Argan Oil for Dyed Hair

a girl applies oil on dyed hair to get all the benefits of argan oil for hair

If you dye your hair and use bleach, argan oil can help keep your hair healthy. Rich in antioxidants, it will revitalize over-processed hair from the inside. It also forms a layer around the hair shaft that adds smoothness, and shine, and protects hair from breakage and environmental damage.

To revitalize damaged hair, use argan oil as a hair mask once a week. Apply a generous amount and massage it into your hair, focusing on the ends. Wrap your hair in a towel and leave it on for at least 30 minutes. Shampoo and condition as usual.

Alternatively, you can add a few drops of argan oil to your regular shampoo and conditioner.

To smooth and seal split ends, gently massage a few drops of oil into your dry ends.

young brunette woman brushes her silky hair in the bathroom

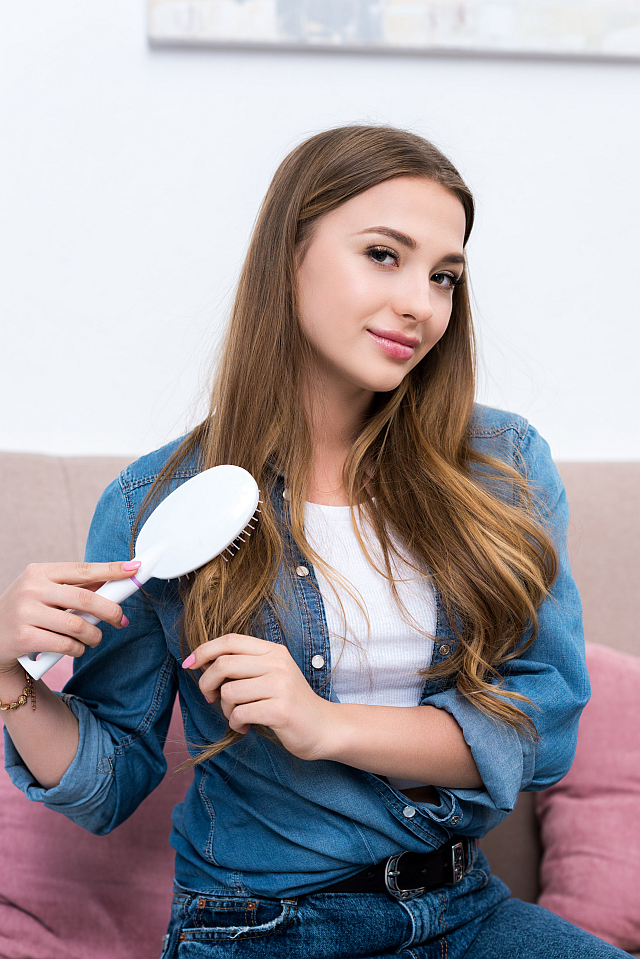
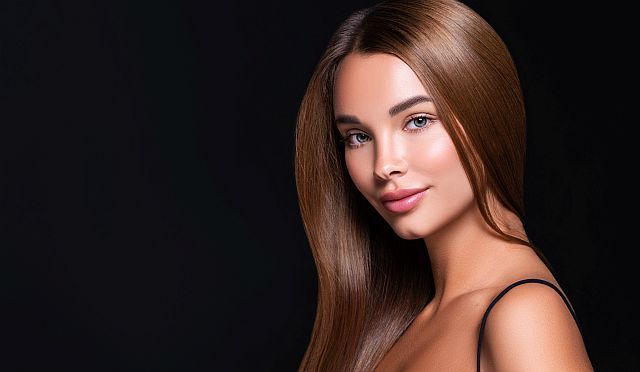
3. Softer and Silkier Hair

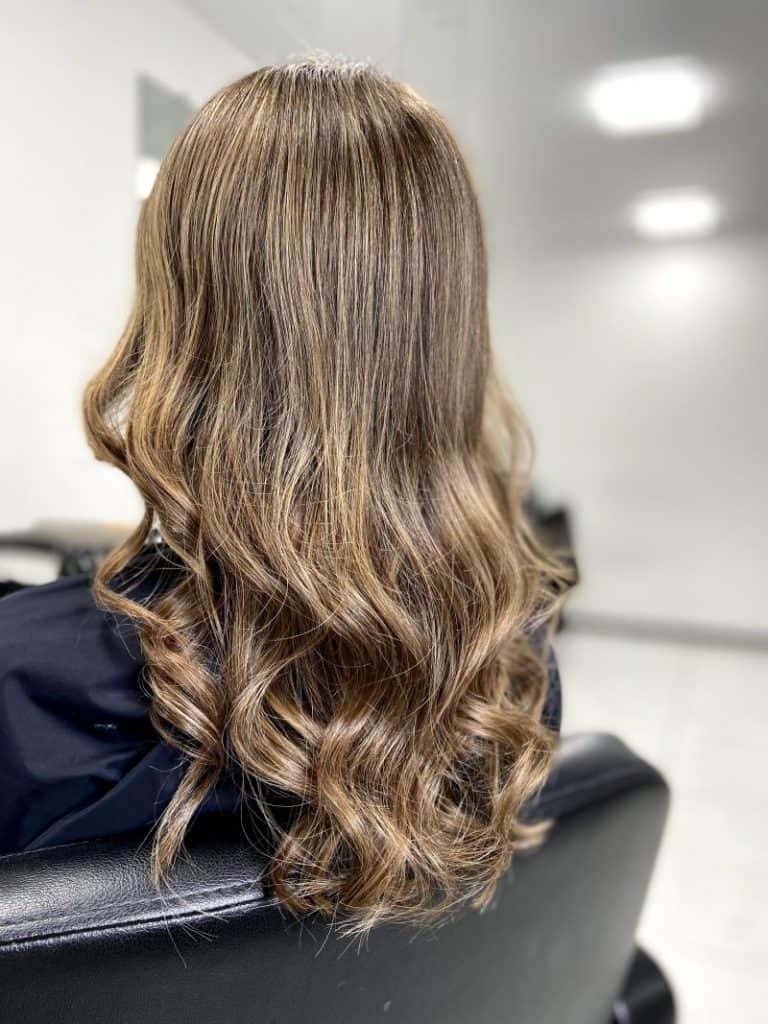
If your hair is thick and coarse, argan oil can improve the texture of your hair. Not only can it make your hair feel softer without feeling heavy, but it will help with detangling and styling your hair.

To enhance shine and softness, apply argan oil to damp, cleansed hair, and leave it on for at least 20 minutes. Shampoo and condition as usual.

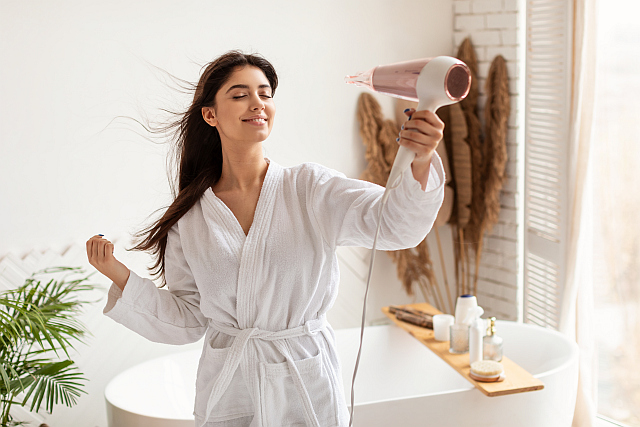
You can also apply argan oil to damp hair before using the hairdryer. Put a few drops in your palms and work into the ends and middle part of your hair. If your hair is fine, make sure to use a very small amount.

A beautiful woman with healthy hair nourished with argan oil

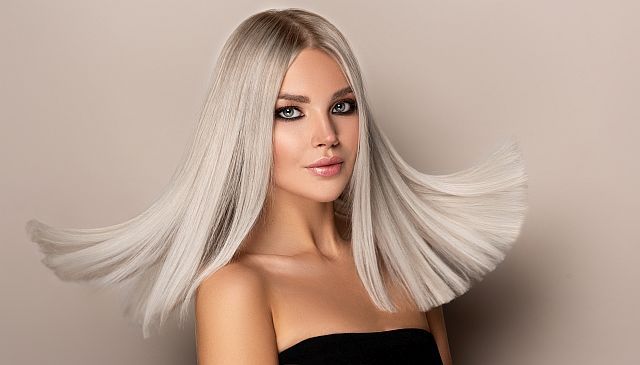
 4. Does Argan Oil Make Hair Shiny?

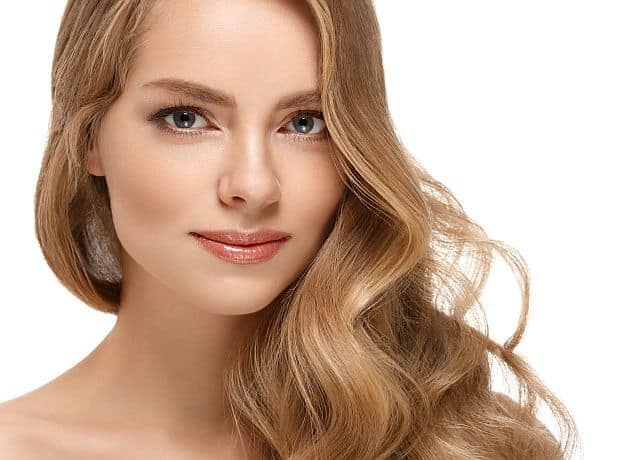
If you are looking for an oil that leaves hair with a radiant shine without weighing it down, look no further. If your hair has lost its shine and feels like straw after years of coloring and/or environmental damage, you can restore its shine by using argan oil. This miracle oil creates a protective layer around the hair shaft, giving a glossy shine to your locks.

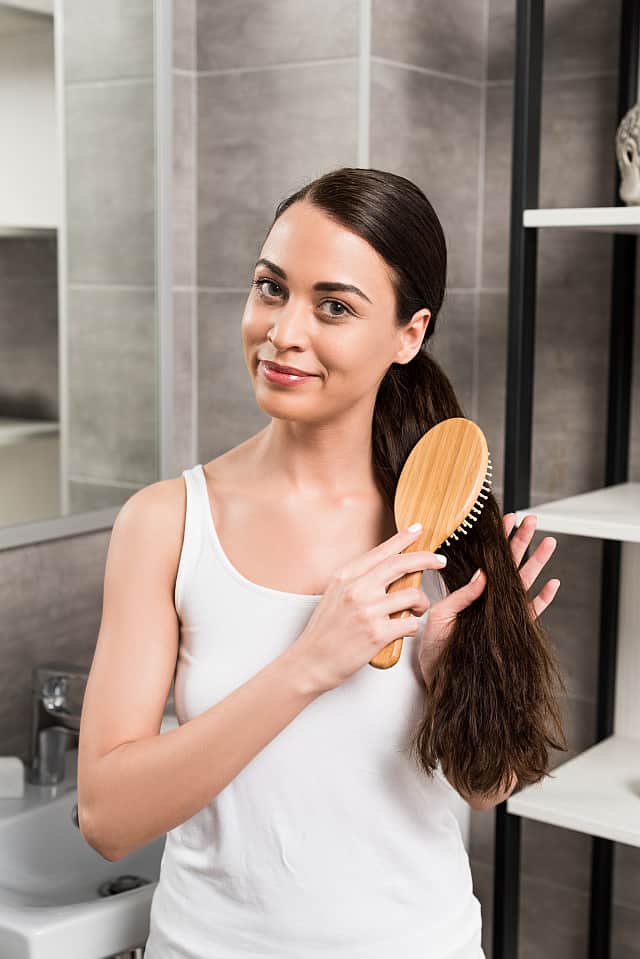
To restore shine to your hair, it is best to use argan oil as a leave-in conditioner before blow-drying. Apply a few drops to damp hair, focusing on the ends, then use a brush to distribute the oil evenly for a luxurious shine.

Another easy way to boost shine is to add a few drops of oil to your regular conditioner. Leave the conditioner in the hair for a few minutes and then rinse well.

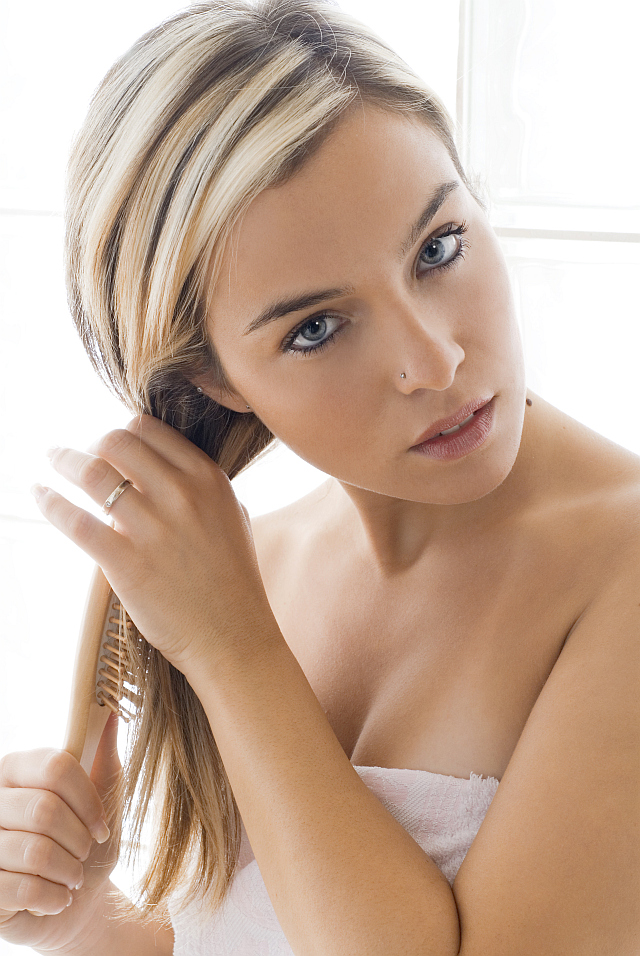
 5. Argan Oil for Frizzy Hair

Applying argan oil to curly hair

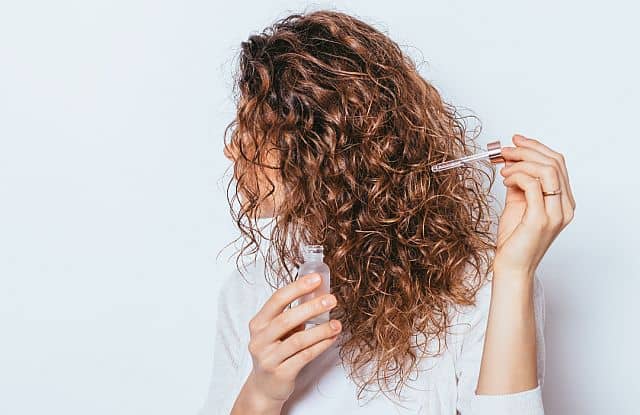
If you experience frizzy hair, argan oil helps reduce the tendency of hair cuticles to swell, which reduces frizz. The oil penetrates the hair, reducing the absorption of moisture from the air and acting as a sealer that locks in the oil and smooths the cuticles, minimizing frizz.

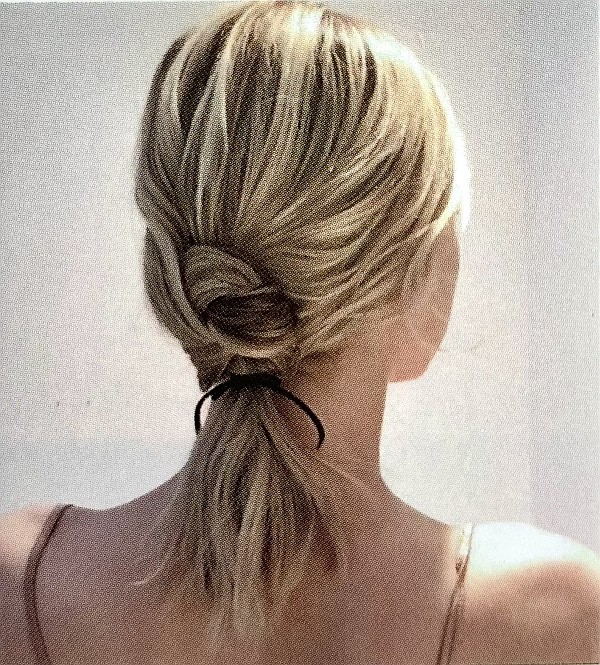
The best way to use argan oil to reduce frizz is to rub a few drops into your hair after washing. This is especially effective if you have medium-to-thick curly hair. You will notice that your curls are more beautifully defined and bouncier. Another option to beautify your curly hair is to use argan oil as an overnight hair mask.

If you have fine hair, apply a very small amount to the ends before blow-drying and that will calm frizz without leaving a greasy look.

To calm down flyaway hairs, put 1-2 drops into the palms of your hands, rub your hands together, and then run through fly-away parts of the hair. You can also apply oil to damp hair before blow-drying or to get a sleeker, shinier finish.

6. Scalp Soother

Woman with healthy hair holds a bottle of Argan oil

Argan oil has anti-inflammatory properties which makes it a great remedy for dry and itchy scalps. This oil helps cleanse dead skin cells and balances the natural oils of the scalp.  It is especially helpful during the winter months because it helps prevent your scalp from drying out without clogging the pores.

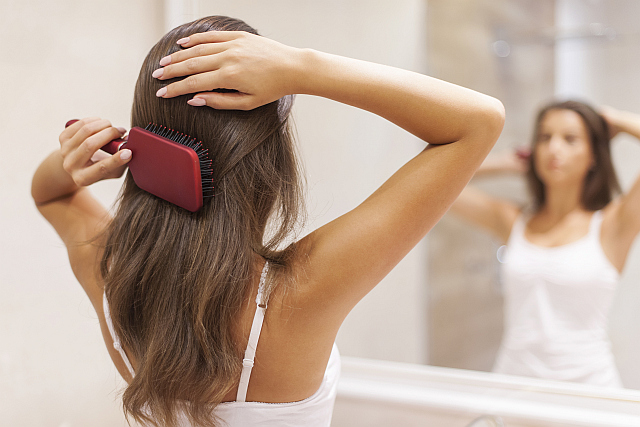
To nourish and soothe dry skin on your head, gently massage pure argan oil into the scalp and leave it on for at least half an hour before washing your hair.

Is Argan Oil Good for Hair Growth?

Argan oil contains inflammation-fighting antioxidants that keep the scalp clean and moisturized. A healthy scalp is a good foundation for normal hair growth. There is no evidence that argan oil promotes hair growth. However, by reducing dryness and brittleness it protects hair from breakage and thus reduces hair shedding. Reducing breakage and splitting not only keeps the hair healthy-looking and beautiful but also means you don’t have to trim the hair as often, which makes it easier for you to achieve the desired length.

Make sure to always buy a premium 100% pure organic argan oil. Read the ingredients carefully and avoid products with added fillers or fragrances. You really don’t need these extra chemicals to enjoy the awesome benefits of argan oil for your hair.

A smiling girl blowdrying her long healthy hair

Do You Use the Right Brush for Your Hair Extensions?

If you wear hair extensions, you should brush your hair regularly to prevent tangling. Extensions get tangled easily and stubborn tangles can be hard to get out without ripping out your real hair.

If you use an ordinary brush to detangle hair with the extensions, you risk damaging the extension and breaking your real hair.

To prolong the life of your extension and keep your hair healthy, you need to brush the hair gently and use a specially designed tool for that task. Extension-friendly brushes are designed to glide over the bonds and comb your hair comfortably and gently.

Young woman brushing her hair with the extensions in

There are three main types of brushes that you can use for detangling your hair with the extension in it:

  1. Brushes with flexible bristles and rounded tips are a good choice to get the knots out without catching the beads and ripping out your real hair.
  2. Many extension hair brushes are variants of the tangle teaser, a widely known tool for combing tangled hair.
  3. There is also a special type of brush designed for wigs and extensions known as loop brushes. Looped brushes have curved bristles that won’t catch knots and beads.

Today we will browse some of the highly-rated brands of hairbrushes that are safe for your hair extensions.

This post contains links to Amazon. The publisher may get paid if You purchase something through the links without additional costs to You.

1. TANGLE TEEZER The Ultimate Hairbrush

This brush is a variant of the original Tangle Teezer, but unlike the original handle-free version this brush comes with a handle that makes the tool more convenient for use. It is suitable for fusion hair extensions, clip-ins, and weaves, and also for brushing synthetic wig hair.

If you have naturally curly hair, you can untangle your locks with this brush, with little or no breakage and you will need a surprisingly short amount of time for this job.

It can also be used to detangle matted children’s hair.

The downside is that it is not heat resistant, so make sure not to put a blow-dryer right on it.

brunette woman brushing her long hair

2. Wet Brush Pro Detangler

This brush can be used for brushing wet or dry hair and is suitable for brushing hair with extensions as well as wigs. What you will like about this brush is that it causes very little breakage. You will easily and quickly detangle your hair and shorten the time to get ready in the morning. This is a great brush for detangling coarse, natural, and very long hair. A comfortable rubber handle allows for a nice grip while brushing your hair.

3. The Hair Shop Store Black Loop Brush

This looped brush has curved bristles that are easy on extensions. The non-tipped nylon bristles allow for a gliding effect and painless brushing. The rounded tips gently go close to hair roots to get tangles out without grabbing on the bonds and pulling the extensions out.

It is safe for detangling any type of extension including tape-in and micro bead hair extensions. This is also a great brush for detangling synthetic or human hair wigs.

4. RemySoft One Twenty-Three Loops – Loop Brush – Safe for Hair Extensions, Weaves, and Wigs

attractive blonde woman brushes her hair

If you have invested in expensive hair extensions, you may want to consider this high-quality looped brush to increase the life of your extensions and minimize damage to your real hair. Nylon loops effortlessly comb your hair from top to bottom without snagging on your bonds or ripping your real hair. This loop brush is a lifesaver for hair with fusions, weaves, wefts, tape-ins, clip-ins, and micro bead hair extensions. You can also use it as a detangling brush for any hair type and it will work great for brushing wigs.

woman detangling her hair with a wet brush

5. Wet Brush Brush Pro Paddle Detangler

This big paddle brush is great for detangling thick, curly, and long hair. It is designed to work either on wet or dry hair, and you can use it on extensions and wigs. It’s heat resistant, so you can use it for blow-drying. The flexible bristles help to prevent pulling and breaking your hair.

The large paddle surface helps to detangle hair without the need for sectioning.

The possible con is its heaviness which can make your arm tired while blow-drying.

Woman brushes hair with extensions in the bathroom

How to Brush Your Hair with Extensions

Tie your hair in a ponytail in the neck base area. This will protect the bonds from pulling. Start combing from the ends and work your way up to the roots. Gently check the bonds with your fingers.

Try to make it a habit to do this detangling job at least once a day. Braiding the hair overnight will make morning detangling easier.

Detangling Sprays Will Minimize Tangles

The quality detangling product can keep extensions from matting and make the tangles easier to unravel.

B3 Brazilian Bondbuilder Ionic Extension Refresh seals the cuticles reducing the possibility of tangle formation. Make sure to apply it while your hair is still damp.

Final Words

When purchasing a hair brush online, make sure to read the review from people that has the same hair type and length as yours.

It would always be a good idea to go to a store to buy the brush in person. You will be able to get the right impression about its size and feel how it fits in your hand.

a brunette girl brushing her hair with extensions

Guide for Faux Braids and Braided Updos of Your Dreams

So, you’re here, which probably means braiding for beginners and intermediate methods weren’t of interest to you. Perfect! Landing in the Faux Braid section just means you want to get started without the pains of a learning curve, and darling, there is nothing wrong with that.

Steps for a Simple Knotted Faux Braid

  1. This style is best for long hair however, it can be done on medium length as well. The results are incredible so start by brushing your hair and adding in your oil and heat protectant.
  2. You’re going to take a section from the right and left front bang area, assuming those pieces of hair are long enough to pull around the side of the head to the back.
  3. Once you’ve brought you’ve brought both pieces to the back, tie an actual knot.
  4. Secure just underneath the knot with a very small rubber band that matches your hair color.
  5. Repeat this using sections of hair just below the sections you just knotted and incorporating the tail from the knot above.
  6. Each new knot should be tied just below the one above it and secured each time with a rubber band until you reach the lower neck hair line.
  7. You can either tie it off here and leave a low ponytail or you can put it in a rubber band. Then you can split the hair underneath the rubber band and begin tying knots once again until you run out of hair. Always secure with a small rubber band after each knot is created. 
Single knotted faux braid
Single knotted faux braid. Image credit by Andrea Haynes

Steps for the Pull-Through Faux French Braid

  1. What’s perfect about this style is it looks luxurious yet can be given an “un-done” edge by starting with beachy waves and some texture spray, keeping you fresh and modern.
  2. You can start the look anywhere you like, but for this written tutorial we will begin by parting the top section of your head into a mohawk. Then take the “bang area” of your hair towards the front top and secure this with a rubber band.
  3. Secure a section of hair with a second rubber band just behind the first one. Keep them close.
  4. Split the ponytail of the top section in half and bring the ponytail of the second section through the split. Pin it with a clip. Bring the split ponytail hair of the first section down around the hair that’s split through it, and secure it with a band. 
  5. Now slide your fingers on either side of your hair, add in hair and grab the hair that is already there from the ponytail. Combine the added hair with it and secure it with a rubber band.
  6. Continue this pattern and motion of adding in hair as you go until you run out of hair.
  7. Rough it up a bit by pulling small strands loose or loosening the rubber-banded sections of hair just a bit.
  8. Spray with hair spray to hold! 

Steps for the Faux Braid Using Bobby Pins

  1. This look is particularly good as a half-up faux braid look. You can keep your hair smooth with added volume at the root or use texture spray and waves for that “un-done” feel. Begin by taking a section of hair starting near the temples and incorporating the band area. Secure with a small rubber band.
  2. Now take a small section of hair just below where you started on one side of the head. Pull it upright to reach just behind the rubber band that secured the first section. Place a bobby pin on this section of hair you are holding.
  3. Twist it over the rubber band and slide it underneath it.
  4. Now do the same to the other side, making sure to cross over the section you just did before.
  5. Repeat this pattern for several rows, making sure to cross over each time.
  6. It creates a causal, intricate “braided” style.

The horizontal faux braid updo – Video by Andrea Haynes

Faux Braids Continued – The Faux Braided Horiztonal Updo

I’m not sure there is a more beautiful and relatively simple faux braid updo than this one. The first time I created this look, I stood back and held up my hands thinking “did these really just create this?” The results were luxurious yet still somehow down to earth. And the idea that you can do this on yourself with minimal bobby pins? Your friends will be speechless.

the horizontal pull-through braid into an updo
The horizontal pull-through braid into an updo. Image credit by Andrea Haynes

Steps For the Faux Braided Horizontal Updo that Leaves them Speechless

Remember that this look is a “horizontal” updo, not a vertical one. You’re going to be faux braiding “sideways.” The mechanic used to create it may feel a bit unnatural your first or second time, but once your hands understand what to do, you’ll finish in no time.

  1. This look is so gorgeous, it’s good to spend time prepping the hair first. A good method is to tease hair at the root after spraying in a texture spray. Then brush out the tease with a soft brush. You can do this one or two times for the best results. Add in soft waves for texture.
  2. Now take a section of hair just behind the back left ear as if you’re creating a low ponytail. It’s a small section, so leave out most of your hair.
  3. Secure with a rubber band.
  4. Now secure a section small section right next to the first.
  5. Split the first ponytail vertically and pull the second ponytail through it. Pin the ponytail that was pulled through just to keep it out of the way.
  6. Now take the loose hair and add it into a newly created third section, pin.
  7. Keep this pattern going. Now split the ponytail that is first in line, and pull the hair of the ponytail through behind it, through it. pin that out of the way.
  8. Regroup the split hair together and rubber band it into a new section.
  9. Do this until you get from the left ear all the way to the right.
  10. Now you can switch to rubber banding the single ponytail that you have going and pulling each rubber band section through itself.
  11. Now take time to gently expand the “braid.” You’ll pull on every heart-shaped section until it’s wide. Do this evenly to each part of the hair.
  12. Now take the “tail” and pin it underneath the horizontal faux braid so it’s not seen.
  13. And you’re finished! This look will get you through any formal event or holiday party in a luxurious style! Have fun with it and make sure to practice several times.  
the vertical pull-through braid
The vertical pull-through braid. Image credit by Andrea Haynes

The Best Overnight Curlers that Allow You to Sleep Comfortably

Do you want fantastic curls but always end up with dry, damaged hair? Obtaining the curls of your dreams is possible without using hot tools that can damage your hair. All you need are overnight rollers. You put them in your hair before bedtime, and when you take them off in the morning, magical curls appear in your hair.

There are several types of heatless rollers that are comfortable enough to sleep in. People who like switching up their hairstyles will be happy to have them in their bathroom cabinets. These handy hair accessories keep you from using too much heat for styling and can save you time in the morning since you don’t have to use a curling iron before heading out the door.

Today, we are going to introduce the most common types of overnight rollers and related products that are worth your attention.

a blonde woman with loose overnight created curls

1. Hair Curling Headband

These heatless curling accessories work with various textures, but you will get the best results with medium and long hair. The curling rod is made of flexible rubber or rubber foam wrapped in a smooth fabric.

This post contains links to Amazon. The publisher may get paid if You purchase something through the links without additional costs to You.

IENIN Heatless Curling Rod Headband

The kit comes with the curling rod headband, two hair scrunchies, and two claw clips. There are a lot of useful videos on YouTube and TikTok to help you shorten the learning curve.

You need to section your slightly damp hair into two parts. Put the ribbon over your head and fix it in place with the clip. Wrap your hair around the ribbon and secure it with a rubber band. Repeat this process on the other side of your head. Your voluminous curls will be ready in a couple of hours.

It would be more comfortable if you use this curling headband during the day while completing other tasks. If you are going to sleep with it, leave a small gap at the top of your head to reduce pulling the hair when tossing and turning.

Pros:

  • Very portable
  • Doesn’t take much time to put it in
  • You can release curs without any snagging
  • Silky smooth fabric doesn’t cause friction  

Cons:

  • Not very comfortable to sleep in, especially for side sleepers
  • Doesn’t work for short hair    

2. Foam Rollers

foam rollers

These rollers are made of a foam sponge and have a plastic snap that secures the rollers in your hair. Foam rollers are very comfortable to sleep in and don’t pull the hair when you move.

Related Product:

Conair Soft Foam Rollers

This set consists of 48 soft foam rollers packed in a compact case. The rollers come in four different color-coded sizes. The smallest rollers are intended for short hair, while those with a larger diameter form loose curls in long hair and also give more volume to the hair.

You can use the rollers on dry or slightly damp hair. Roll the curler toward the scalp and secure it with the clip. For the best results, use a very small amount of moisture because soaking wet hair will take a very long time to dry.

Pros:

  • Work well on all types of hair
  • Very comfortable to wear and sleep with them in
  • Create bouncy, long-lasting curls
  • The best rollers for vintage hair
  • Sturdier than competitors’ products  

Cons:

  • The fasteners tend to snap off over time
  • Can’t grab and curl very short hair
  • The clamps tend to pull out hair when you are taking the rollers out  

3. Pillow Soft Rollers

These curlers have an inner metal wire core that is wrapped in foam and covered with fabric. The wire gives the curlers flexibility so that you can bend and secure them. They can be used on dry and damp hair, but the effect will be better if your hair is barely damp.      

Related Product:

Aimin Hair Soft Overnight Hair Rollers

You get 30 pillow hair rollers in the package, and they are all the same size and are pretty thin. They can be used on all hair types but work best for creating tight curls. If you want looser curls, you should take two or three curlers and wrap the hair around them.

It is best to apply pillow curlers when your hair is 80%‒90% dry. Twist the hair, wrap it around the roller, and then bend the ends in opposite directions to secure it. It is recommended to put a net or scarf around the curlers to help them stay in place.

Pros:

  • You can sleep comfortably with them in
  • Easy to use on all hair types
  • Create perfectly tight curls
  • Don’t pull your hair when you are taking them out  

Cons:

  • Tend to slide out of the hair
  • Too thin for long hair or loose curls  

4. Satin Pillow Rollers

These curlers are made of foam covered in satin and have a plastic frame to secure them. Satin is the material that is gentlest to the hair. The satin coating helps reduce the drying and damaging effects of foam.

You will get 42 rollers in four different sizes, so you can choose the right roller for the desired size of your curls. If you are looking for a gentle alternative to traditional foam rollers, these might be worth trying.

Pros:

  • Easy to use and comfortable
  • Maintain moisture and protects your ends
  • Make nice shiny curls No tugging or pulling  

Cons:

  • The plastic frame falls apart easily
  • Tend to slide off the hair        

5. Flexible Curling Rods

These rollers consist of iron wire wrapped in a layer of foam, and you can bend them to form different shapes. When you wrap your hair around the rollers and fasten them, you get a nicely defined curl. And, if you already have some curls in your hair, these bendy rollers can give you the definition you want.

FushoP Flexi Rods Set

The 42 flexible rollers in this set come in seven different diameters packed in a convenient zip-top bag. These rollers can be used either on dry or wet hair, but for the best results, it is recommended you slightly dampen your hair with a water mist sprayer.

Thanks to various sizes, they are suitable for all hair types and lengths. If your hair is long, use the largest rollers. For short hair, use rods that are thin in width. They work well on short hair, but your hair needs to be long enough to wrap around each rod.

Pros:

  • Easy to use Fairly long-lasting curls
  • Good for all hair types Plenty of curlers in the package
  • Color coding for different sizes
  • A free shower cap included  

Cons:

  • The rod sizes cannot be customized
  • It takes some time to get used to sleeping with them in
  • Your hair may get caught inside white caps at the end.
foam hair curlers

Lowlights vs Highlights: Are Lowlights Better for Hair?

I’m just going to come right out and say it, lowlights are sexy. They’re sort of the mysterious and understated counterpart to a highlight. Remember in the ’90s when the clothing fashion trend was a short, silky slip dress underneath an oversized blazer? The first thing you saw was the blazer. Chunky and cute, it was the obvious part of the outfit. You couldn’t take your eyes off it. But now and then that silk dress would peek-a-boo each time the wearer took a stride. You’d catch a glimpse of the delicate lace trim lining the sweetheart’s neck. Or maybe you’d see the shiny fabric glimmer with each and every step.

Lowlights do exactly what that slip dress did: they make the whole thing look better using subtle persuasion. They bring depth and intrigue to the hair, which is undeniably sexy. 

client having lowlights in the salon

So, What’s the Difference Between Lowlights and Highlights?

They really are opposites. A highlight is created when a colorist uses a lightener to get the natural color of the hair to go from darker to lighter. Bleach is a common lightener, and it works by entering the hair strand and oxidizing the pigments (colors) already in the hair. For example, dark brown hair color can be lightened with bleach to red, orange, and lighter brown. If you continue to lighten the hair with bleach, you’ll get gold, yellow and pale yellow. If the process continues to remove all of the protein color pigments in the hair, you can get platinum (white blonde).

woman in the salon having highlights

A lowlight on the other hand is created when a colorist takes a product containing color pigments in it and then applies it to the hair to make it darker than it already is. The colors deposit into the cuticle of the hair shaft and change the color you see. For example, if you want to go from blonde to brown, you can use color to lowlight the hair. The color deposits its molecules into the hair, making it darker. You can use a lowlight to make a light blonder a darker blonde or a light brunette a darker brunette. Commonly you’ll see lowlights used to create high-contrast blonde. These are the highlights that are very bright blonde, and the lowlights are a deep brown.

a woman with lowlights in hair

What Exactly Do Lowlights Do?

The goal of a lowlight is to provide depth in the hair. Instead of a solid blonde, imagine the hair is beautifully organized with darker colors intermixed with the blonde. These darker tones can be a shade or two darker than the blonde or can be many shades darker for a more dramatic effect. High-contrast hair like this is often described as having “poppy pieces.” Lowlights make blondes look blonder through an optical illusion.

When you put something bright against a dark backdrop, it makes the light color look even lighter! This trick is so incredible, that colorists everywhere are practicing something called a “Reverse Balayage.” This is when you lowlight the entire head in strategic places and the effect is the hair has these poppy pieces of blonde in the end.

Beautiful smiling woman with lowlights in brown hair

Lowlight Placement

Lowlights are meant to be understated, but that doesn’t detract from what they do in the hair. A very skilled colorist will be able to visualize “shadows” or those darker backdrops mentioned earlier. Knowing exactly where to put a shadow is what increases the brightness effect of the blonde highlights.

There are many different ways to lowlight, so I’ll just cover a couple.

The first is a traditional foil lowlight. There’s this pattern that alternates lows and highs inside the foils. The ratio is more highlights to lowlights. This adds sublet depth to the blonde who wants to be really blonde but has a small amount of depth.

Then there are balayage lowlights. It’s when a thin strand is hand-painted just near and under the hand-painted highlight. This is probably my favorite placement. It’s so natural-looking.

Then there’s a reverse Balayage. This is a form of lowlighting where the placement is approached much like a full balayage. Instead of going lighter, you’re strategically darkening certain pieces typically to make the lighter pieces pop more. Sometimes it’s done to create an overall less blonde effect as well. However it’s used, it is so lovely, relaxed, and natural-looking.

Beauty smiling woman with lowlights in her hair

Do Lowlights Damage Hair?

Deciding when to get lowlights can be done with the help of your colorist. Often, it’s used when someone doesn’t want to be a solid blonde or wants to communicate a beautiful “lived-in” feel. It can also be used when the hair over time becomes too blonde. Adding in lowlights brings the hair back to a more natural feel.

Then there’s the health of the hair to consider. When blondes are highlighted 6-8 weeks apart, the hair can become stressed. There are times when breakage can occur. At this point, many people decide to lowlight to help their hair have a break. Lowlighting during recovery periods helps the hair heal. There’s something so refreshing about painting over damaged blonde hair. You can almost hear the hair say “Ahhh, that’s better.”

If you’re considering lowlights, make sure to check with your colorist about the effect and what you’re going for. Making a mistake in this department isn’t fatal, but you do want to be in good hands as there are unfortunately many things that can go wrong. Don’t let that hold you back though. Remember, lowlights are sexy and healthy for your hair. Kind of a win-win! And who doesn’t need a few of those?

Beauty smiling woman with lowlights in brown hair

What Is the Best Flat Iron for Silk Press?

What is Silk Press?

Silk pressing transforms naturally textured hair into straight, silky, shiny locks without permanently changing hair texture. The result is temporary, and hair will return to its original shape with shampooing. This treatment is perfect for temporarily straightening curly or coiled hair, adding some length without using relaxers or other chemical straightening products. This is also an ideal, non-committing treatment to make you feel fresher for an event or special occasion.

How to Do Silk Press

Consider doing the silk press at a salon because a skilled professional will help you achieve the best results. Plus, if you have thick, coarse hair, your arms will get tired from straightening each small section of hair repeatedly.

Here are the basic steps to perform a silk press treatment.

  1. Start with a clarifying shampoo to remove all impurities and hair product buildup. Follow with a moisturizing shampoo to hydrate your tresses.
  2. Apply deep conditioner for 15–30 minutes to add moisture and strength to your hair. Rinse the conditioner with lukewarm or cold water to close the cuticles.
  3. Apply a thermal hair protector with detangling capabilities to minimize heat damage and give your hair a slippery feel for easy detangling.
  4. Blow-dry your hair in sections with a dryer and round brush or use a hot brush for drying and straightening until hair is completely dry.
  5. Divide hair into 1-inch sections to prepare it for flat ironing. The small sections allow for even heat distribution over each strand.
  6. Use a flat iron to grab the section of your hair near the roots and slide it down to the ends. You may need multiple passes with the flat iron for a smooth and glossy finish.
Beautiful African woman with silk pressed hair

How Long Does a Silk Press Last?

Your hair will stay silky until the next shampooing, and then your natural curls will bounce back. Any moisture like sweating or getting caught in the rain can affect the look of your hair. If you don’t wash your hair for a week or two and do not expose it to water, your hair will remain straight and silky. Since it is not advisable to refrain from washing hair for more than two weeks, this is the maximum lifespan of your silky press.

How to Maintain Silk-Pressed Hair

To ensure that your hair will remain soft, straight, and shiny, you need to protect it from moisture. This means no swimming, walking in the rain, or activities that may cause sweating.

If you need to use a hair straightener, set it at a low heat setting. Also, do not use styling products; these could make your hair look heavy.

Wrap your hair in a silk or satin scarf overnight.

Make sure to wear a shower cap when bathing.

Does Silk Press Damage Your Hair?

If done occasionally and correctly, this treatment will not damage your hair. In the absence of chemicals, the only thing that could damage your hair is excessive heat. That is why you should not use a silk press as a regular treatment. To reduce heat damage, let a hair professional do silk pressing for you.

a beautiful dark-skinned woman with silk-pressed hair

Flat Irons for Silk Pressing

This post contains links to Amazon. The publisher may get paid if You purchase something through the links without additional costs to You.

You may see some hair straighteners described as suitable for silk pressing. But some companies may write these descriptions for marketing purposes. So, you need to know what features a flat iron should have to help you obtain the best results.

1. Plate Material

The plate material should be compatible with your hair type. Titanium plates have the greatest straightening capabilities and are the best option for thick, coarse hair. Flat irons with ceramic plates are better for more delicate hair. Also, look for plates infused with tourmaline, which emits negative ions and gives hair more smoothness and shine.

BaBylissPRO Nano Titanium-Plated Straightening Iron plates will get your hair straight faster than ceramic plates. This is important for individuals with thick, coarse hair as their silk press straightening process takes longer than other curly hair types. With this hair straightener, you only need one pass over each section to make your hair straight, shiny, and soft.

2. Plate Width

The width of the plates should be between 1 and 1.2 inches. If the plates were more narrow, it would be necessary to pass over each section repeatedly, which would take more time to complete the treatment and could cause damage. Narrow plates could be a good option for short hair. Plates wider than 1.2 inches are hard to get close to the root of curly hair, making it impossible to get a pin-straight result.

3. Flexible Temperature Settings

Natural hair requires a straightener with an adjustable temperature setting. Thick, coarse hair needs higher temperatures to get hair straight. Some curly hair types are vulnerable to high heat, so it is necessary to properly set the temperature to avoid damage.

HSI Professional Flat Iron has temperature settings ranging from 140° F to 450° F. This flat iron works well for straightening naturally curly hair. Regardless of your hair thickness, it is easy to find the right setting within this temperature range. Ceramic tourmaline plates emit negative ions that give your hair smoothness and shine, essential for the silky press.

4. Plate Shape

If you plan to buy a hair straightener primarily because of the silk press, it is better to choose one with straight and sharp plates. Rounded plates make the iron suitable for both straightening hair and curling hair. Plates with sharp edges make the iron less versatile but give you straighter hair and are a better option for silk pressing.

A beautiful African woman with short silk-pressed hair

Deogra Silk Press Flat Iron: Does It Work for Silk Pressing

This hair straightener has ceramic tourmaline plates that emit negative ions which help seal the cuticle and leave your hair silky smooth. This feature is a big plus if you are looking for the best flat iron for silk press, especially if your hair is prone to damage.

1 inch is a good plate width for silk press straightening. You can grab sections of your hair close to the roots and smooth the strands from the root to the tip. 

The rounded shape of plates allows you to create beachy waves and bouncy curls, but it is not the best option for silk pressing. As we mentioned before sharp-edge plates will give you straighter hair.

Deogra Silk Press Flat Iron has adjustable temperature settings from 330℉ to 430℉ allowing you to choose the appropriate temperature for your hair. Ceramic plates are a good option if you have fragile hair, and you definitely won’t need a temperature above 430F. This flat iron may not be the best choice for women with very thick coarse hair and they should consider a straightener with titanium plates.

smiling African American woman with silk pressed hair

Are Bamboo Pillowcases Good for Your Hair? Not all of Them

Ever wonder how “bad hair days” come to be? When you have something resembling a tumbleweed sitting on your head, your first instinct is likely to grab the flat iron to correct the mess. Though it often feels like a stroke of bad luck or a sign of worse things to come, it’s really not that deep. One likely reason for your messy hair is your pillowcase.

As harmless as they may seem, pillowcases have the power to affect your skin and hair while you sleep. Think about it: you spend a decent amount of hours every night with your head nestled on a pillowcase. If you often twist in your sleep and use a rough pillowcase, a frizzy head of hair is inevitable. Similarly, if you suffer from hair breakage and split ends, a gentle pillowcase would be a good way to go.

Today, we’re breaking down the benefits of bamboo pillowcases and exploring some options available in the market.

an unhappy girl sitting in bed and touching her messy morning hair

What are the benefits of a Bamboo Pillowcase for Hair?

While traditional cotton pillowcases are more cost-friendly, they tend to absorb natural oils leaving your hair dry and brittle. They also have a rough surface that may cause unwanted friction as you move in your sleep.

Bamboo pillowcases, however, are the superior option for you as they can:

Reduce frizz and tangling: Bamboo pillowcases have a silky-smooth feel, which reduces tension and allows your strands to effortlessly glide over the surface. As a result, you’ll notice less frizz and overall healthier hair. Similarly, if you have textured hair, ditching your cotton pillowcase for one made of bamboo may improve the health of your hair in the long term.

Protect your style: You’ll also notice increased longevity in your hairstyle when using a bamboo pillowcase. For example, that blowout you spent way too much money on at the salon will last longer when you sleep on an ultra-smooth bamboo pillowcase.

Keep you cool and dry: Unlike cotton or silk, which often get warm, bamboo pillowcases make you feel cooler in hot weather. Bamboo fabric is a highly sweat-absorbent material that in addition to cooling properties helps to keep your hairstyle in place.

woman laying on bamboo bedding sheets

Additional Benefits of Bamboo Pillowcases

Bamboo has been emerging in all forms lately: straws, utensils, and toothbrushes – just to name a few. To provide more eco-friendly options, brands are open to making just about anything bamboo. So, if you are environmentally conscious, bamboo likely has already earned your attention.

Bamboo pillowcases do more than just care for your hair. Below are some additional benefits of using a bamboo pillowcase.

Bamboo might be hypoallergenic and antibacterial. Some evidence suggests that bamboo fibers can slow down the growth of odor-causing bacteria. Less microbial and high breathability help protect sensitive skin from inflammation.

Bamboo is low maintenance. Bamboo fabric can go in the washer and dryer. You should wash bamboo pillowcases on a gentle cycle with cold or lukewarm water. They do wrinkle in the dryer. To reduce wrinkling issues, put them to lay flat after the drying cycle or hang them on a drying rack to air dry.

Bamboo pillowcases are vegan-friendly: If you’re vegan, a bamboo pillowcase may be a good alternative to silk for you, as they don’t sacrifice the welfare of animals in production. Plus, bamboo is a highly renewable resource.

Bamboo vs Silk Pillowcase

a blonde girl holding a pillow with a silk-cover

For years, silk pillowcases have been hailed as one of the best solutions for hair damage. Silk fabric has a smooth, luxurious surface, so it’s less likely that your hair will suffer from frizz and tangles.

Unfortunately, good things come at a cost – the same can be said for silk pillowcases. High-quality silk is one of the most expensive fabrics on the market. If you’re trying to save money, a bamboo pillowcase could be a more economical option.

Bamboo pillowcases are easier to maintain. To retain its softness, Silk should be hand washed whenever possible. Bamboo pillowcases can be tossed into the washing machine with your everyday clothes, but make sure to avoid hot water.

Another factor to consider is the production method of silk. Silk pillowcases are made from silkworms, meaning they are not a viable option for vegans or anyone concerned about animal welfare.

Which Bamboo Fabrics are Eco-Friendly?

Well, it depends on how bamboo fibers have been made. The bamboo plant is highly sustainable as a raw material. However, some products made of bamboo aren’t eco-friendly as the production method also matters.

1. Bamboo viscose/rayon: The majority of bamboo pillow covers are made of bamboo viscose, also known as bamboo rayon. The viscose rayon process involves the use of potentially hazardous chemicals and isn’t good for the planet. In addition to that, some manufacturers don’t use ethical labor practices.

2. Bamboo Lyocell is an innovative and high-quality textile for bedding products. Bamboo lyocell fabric is sustainably sourced and is also stronger and softer than bamboo rayon. Ettitude is the first company that makes bedding products from this innovative textile material. Their exclusive line of bamboo bedding is called CleanBamboo.

3. Bamboo Linen: (also known as bast bamboo fiber), is produced mechanically, without chemicals. This bamboo fabric is sustainably manufactured and eco-friendly, but it is slightly coarse and wrinkles easily. The coarse texture makes it a non-suitable option for pillow covers. Another disadvantage is that this bamboo textile requires a lot of maintenance (ironing).

How to Choose the Best Bamboo Pillowcase for Hair?

An Asian girl sleeping on a bamboo pillowcase

When purchasing a pillowcase with your hair in mind, you should pay attention to the type of bamboo fabric used to make the product you are going to buy.

Bamboo pillow covers made of bamboo rayon are prevalent in this market segment. They are soft and gentle on your hair. Plus, they can increase your sleep quality during hot summer nights. However, if you are environmentally conscious, you can’t rest assured that you have purchased a ‘green’ product.

Pillowcases made with bamboo linen fibers are the most environmentally friendly option. However, this fabric doesn’t feel silky and won’t offer any benefit to your hair. That is why bamboo linen fabric is not a good choice for your pillowcase.

Pillowcases made of bamboo lyocell are an ideal option that can meet both the customer demand for a high-quality product and a sustainable production process. They are made from 100% bamboo and add a luxurious touch to your bedroom. Bamboo lyocell tends to be more expensive than bamboo viscose (rayon) fabric, but it will help you put your bad hair days to rest.

Beautiful woman sitting in the bed and holding a pillow

Should Keratin Treatment Come Before or After a Color Service?

Growing up there were so many little sayings my parents had. Probably the one that stuck with me the longest was “work hard play hard.” As a child, I’d try to skip outside unnoticed and get caught. I bet you can guess exactly what my mother liked to say each and every time. Working hard didn’t actually bother me. It was the order I couldn’t stand.

Why work hard, then play hard? Why couldn’t I play first? Of course, my parents knew that any kid who played first usually didn’t do their work after. What I didn’t understand back then was the order of things really matters. Like it’s an incredibly important part to make things flow in just the right way.

Can you Do a Keratin Service on Bleached Hair?

An elegant blonde woman with keratin-treated hair

It’s no different in the world of hairstyling where clients are constantly having to think through hair products, services, and what it is they may need next. I’ll let you in on a secret, the one you need next is formaldehyde-free keratin treatment. I know the word keratin has been a big buzzword for a while, but it’s for good reason.

Keratins are beautiful, restorative treatments that can actually fill in the little “holes” or damaged spots on every hair strand. You might be wondering, how exactly does this kind of damage occur? There are a lot of different reasons, which we can go over some time. For now, I’m going to look at a very significant one: Highlighting your hair.

Yup, you heard right. The service you love the most gets your chestnut-brunette locks to have the perfect sunkissed look, making you the bronde of your dreams. Or for you blondes, it’s that level of tone and brightness that screams “bombshell!” The upside is that you look and feel great after all that bleach has worked its magic. The downside is you need to take special measures to ensure the health of your hair.

Remember the little holes? Unfortunately, they can lead to dryness, brittleness, or even breakage. So what can you do? The classic answer is moisture. Get your foundation chalked full of moisture-encouraging products. This means your shampoo, conditioner, hair oil, and heat protectant (go for a cream one). It helps tremendously. But the better answer is to get keratin.

How does Keratin Treatment Prep Damaged Hair to Take Color?

You see the holes from the bleach deep inside the hair strand. Many surface products just can’t reach them. Now you’re starting to get why they’re such a buzzword. Keratins are designed to heal hair from the inside out. If you are looking to truly restore the amount of protein and strength in your hair, this is it. These treatments get right down to the damage that products just can’t heal. They make each strand stronger from root to tip, shinier, and less frizzy.

Another cool magic trick they do is actually help your color spread more evenly throughout the hair. If you think about it, what if you have one spot near your bang area that is more damaged than say the back of your hair? This is called porosity (think tiny pores all over the hair strand). By reducing hair porosity, keratin treatment helps you get more consistent coloring results. But, don’t hurry.

The color you apply then will affect these areas differently, providing different results at times when you are going for even and seamless. By filling in all the holes, keratins can help your hair take its color evenly, and guess what? It only yields more accurate results and really helps out your stylist!

A beautiful brunette with smooth hair

Can I Get Keratin Treatment Immediately after the Color Service?

I know what you’re thinking at this point, “I’m going to book keratin ASAP. I’m due for color anyway!” Before I can say hold your horses, you’ve already dialed your favorite colorist’s number. How are you this fast? You keep her number on the speed dial of course. “Hello,” she says. But before she can ask how she can help you, you have already squeaked at a rapid pace “book me the keratin right after my color appointment because I heard they are magic and I want the magic!”

She now can get a word in as you sit breathlessly waiting for her yes. But much to your shock, she says “no.” Not to your services, but to the order and the time frame you requested for them.

Why Can’t I Get Color and Keratin Service on the Same Day?

a woman with colored and keratin-treated hair

She goes on to explain, much like my mother, that the order of things matters immensely. It matters so much, I’m going to say ALWAYS book your keratin AFTER your color service. Why you may wonder? Well, each hair strand has this outer shell called the cuticle. The nature of keratin is that it seals this down after the proteins are embedded. This is why it looks so strong and shiny.

But the nature of the bleach your colorist uses to get highlights has a chemical partnered with it that blows open the cuticles for the bleach to get inside. As you can see, keratins and bleach services operate on the hair in exactly opposite ways and your hair needs some time to recover.

How Soon Can I Dye my Hair after Receiving Keratin Treatment?

So once the cuticles are sealed from the keratin, you’ll have to wait 2 weeks before getting a color or color-lightening service done. Once your stylist explains this, your breath returns to you and you say “Then book my color service before my keratin please.” And that’s when your stylist gives you one more small recommendation. Don’t book your keratin and color service on the same day. Why is that? Didn’t we just cover that it’s safe to do keratin BEFORE color? Yes. But there’s something called a clarifying shampoo that is used before each keratin service.

a woman with highlighted and keratin-treated hair

Does Keratin Treatment Lighten your Hair Color?

Clarifying shampoos are very strong and help open the cuticle in order for the keratin proteins to get inside the hair shaft. Let’s say you’ve just had your color put on or your demi-permanent gloss after your highlights. The clarifying shampoo can actually strip off the color that was just added! So, while the keratin complex is safe with color, the clarifying shampoo is a bit too strong. To recap: Get color or highlights before keratin. It’s recommended not to book the same day as the clarifying shampoo is strong and can strip the color.

How to Get Most of your Color and Keratin Service?

Not all keratin products are formulated equally.

Some straightening products (Express Keratin by Keratin Complex, GK HAIR Smoothing Keratin Treatment, and Silk Touch Keratin Treatment by Hair Bar NYC) don’t tend to strip your color. On the contrary, they work to enhance color vibrancy and shine. However, let your color set for at least ten days and then book an appointment for keratin service.

The results are simply lovely. Even lovelier when the first 3 keratins are booked 4 weeks apart, then they can be done seasonally or 4 times a year. Some do it as needed. Whatever way you go with your keratin, always remember that the order of things matters. 

To avoid possible disappointment, consult a hair professional about the product you are going to use and let your stylist do the job for you.

A beautiful woman with long straight blonde colored hair

Anti-Static Hair Brushes: Benefits, Related Products, and Your Questions Answered

Let’s face it, static is no one’s friend. If you’ve ever tangled with frizz or flyaway hairs, you already know how much havoc they can wreak on your favorite hairstyles and your overall look. During the cold and drier months, in particular, you might find that your tresses are harder to tame.

Maybe you’ve tried a host of trendy products and elixirs in an attempt to minimize the effects, or maybe you’ve had those days where you’ve found yourself reaching for a hat to cover up the whole situation.

If this is you, you aren’t the only one. Stylists and hair experts say static electricity is the culprit behind these common woes, causing strands of hair to act like repellent magnets and separate from one another, instead of lying smoothly together. Frequent blow drying or use of heat styling tools can be a factor in amping up static electricity, as can lack moisture or environmental damage.

But before you give up entirely, we’ve got one more solution for you to consider: anti-static hair brushes. If you’ve never tried a brush designed specifically for preventing static, you might be missing out. Here’s what you need to know:

An exited woman with long flyaway hair

How do Hair Brushes Cause Static?

The secret behind anti-static brushes is often in the materials used to create them.

Plastic brushes are definitely the worst choice for hair that is prone to static. When you brush your hair with a plastic brush, negative charges are transferred from the hair to the brush, leaving your hair positively charged. Positively charged hairs repel each other and end up standing out straight from the scalp. Since plastic is not conductive, it cannot help to discharge static electricity from your hair.

Plastic brushes are usually cheap and roughly finished, so they don’t glide smoothly through the hair. In addition to flyaway hair, low-quality plastic brushes can cause damage and breakage.

What Brush Materials Don’t Cause Static?

Brushes with wooden pins don’t create static and can provide you with a relaxing scalp massage. A brush with boar bristles and a wooden handle is not only super gentle on the hair but it can help with the static. Brushes infused with ionic minerals are considered one of the best options for flyaway hair. Other recent innovations related to anti-static brushes include refillable treatment sheets infused with a conditioning formula that works like an anti-static laundry sheet.

With a quality anti-static brush, you can use fewer anti-static hair products. This way you will protect your scalp from chemicals and save money in the long run.

Ready to try this whole static-fighting thing for yourself? Here are a few products we love and recommend to help you get started:

1. Soft on the Hair and Scalp: Wooden Brushes for Flyaway Hair?

Wood brushes have a neutral charge, and they barely create any static. Wooden bristles help distribute natural oils down the shaft and leave hair with a great shine while improving blood circulation in the scalp area.  When purchasing a wood brush, choose one that is completely made of natural materials and has well-polished bristle tips.

Comfortable when detangling: If you have curly hair that easily gets tangled, you may want to consider Bass Brushes. These brushes have widely spaced bamboo bristles that slide through the hair smoothly, which makes them perfect for curly hair that is prone to tangles and static.

Very giftable: TEK wood hair brushes are made in Italy and have a very attractive design. These brushes are FSC certified, hypoallergenic, and antistatic.

a happy woman brushing her hair with a wooden brush

2. Planet-Friendly: Bamboo Hair Brushes

Hair brushes with a bamboo handle and bamboo bristles are earth-friendly styling tools that help reduce the use of plastic. Bamboo bristles don’t create static, while rounded tips gently massage your head, making brushing your hair a pleasant experience.

To prolong the life of a bamboo hair brush, make sure to avoid excessive water exposure.

Hair brushes with a bamboo handle and metal bristles are another option to get rid of staticky hair. A smooth bamboo handle feels comfortable in your hand, while conductive bristles help with releasing static that is already present in the hair.

Comfortable grip and good scalp massage: BFWood Bamboo Hair Brush with Steel Bristles promises to make your smooth and frizz-free while massaging the scalp and stimulating blood flow.

A girl brushing hair with a bamboo hairbrush in front of the mirror

3. Say, “Good-Bye” to Annoying Static: Hair Brushes with Ionic Bristles

Ionic brushes are infused with ionic minerals so that they emit negatively-charged ions during hair brushing. Negative ions tame flyaway hair with a few strokes making your hair look much smoother and shinier than when you are using plastic brushes.

Lightweight detangling brush: Moroccanoil Ceramic Paddle Brush works well for detangling and blow-drying. Your hair will feel luxurious and silky after brushing. Plus, it comes with a little sectioning (and brush cleaning) tool stored inside the handle.

The woman uses an ionic brush to brush her hair

4. Tame your Mane: Anti-Static Brushes with Refillable Treatment Sheets

The ForBabs X-Static is the world’s first anti-static hairbrush with refillable anti-static sheets incorporated into the brush. Fabric layers below the bristles are coated with an anti-static conditioner that helps eliminate static electricity and make hair smoother.

When you brush your strands, anti-static sheets below the bristles work to tame flyaways. Each conditioning sheet will last 3-5 days, depending on how often you brush your hair. After several uses, you can simply remove the top layer revealing another fresh sheet underneath. When sheets run out, remove the used brush head and replace it with the refill brush head that comes with 12 tear-off sheets.

Anti-Static Hair Combs for Shiny, Tangle-Free Hair

In addition to causing snagging and pulling, plastic combs can give you unpleasant “static shock.” The best way to prevent breakage and static is to switch to a plastic-free alternative.

Antistatic hair combs are commonly made of carbon fibers or sandalwood. Both those two options have their advantages.

The wood comb bristles equally distribute natural oils down the hair shaft and provide a massaging effect to your scalp.

Carbon fiber is naturally antistatic, lightweight, and resistant to heat and chemicals.

Although wood combs can look more attractive, carbon fiber combs are easier to use and maintain.

A woman in the batheoom combing hair with a wooden comb

At-Home Keratin Treatments for Frizz-Free and Manageable Hair

During pandemics, there is frequently an increased number of hair straightening products advertised as suitable for use at home. Some manufacturers don’t want to lose customers during pandemics, so they respond to an increased demand for DIY products by offering more at-home keratin treatment kits.

That is good news. However, you should be careful when buying one of those products and make sure to read all important information before purchasing.

How to Buy a Quality At-Home Hair Smoothing Product?

In addition to reading product descriptions to ensure that the product is suitable for use at home, take some additional steps to check the product ingredients to minimize unwanted side effects. Read customer reviews and, if possible, try to spot fake reviews. Ask questions at forums and at customer feedback pages. The most valuable step would be to consult a hair professional.

a dark skinned girl with keratin straightened hair

Avoid products that come abroad with insufficient descriptions and instructions for use. Look for products with detailed instructions and a complete ingredient list. Your safety is the priority when deciding what product to buy.  

The most important consideration is to buy a formaldehyde-free keratin straightening product due to the negative side effects associated with formaldehyde.

Some keratin straightening products come in kits that include all you need for your straightening job. If that is not the case, you can buy a starter tool kit with all the must-have tools for performing keratin treatments.  

Do At-Home Keratin Treatments Work?

Yes, they do, but you shouldn’t expect salon results from home keratin treatments. The keratin straightening procedure requires skillful and experienced hands to perform all the steps correctly. The straightening procedure can be labor-intensive, and your hands may get tired before you complete all the stages. You must be well-organized and patient.

If possible, have a friend help you perform some steps properly, especially the flat ironing stage. It is hard to reach the back of your head with your hands and a few missed strands can result in a less successful outcome.

Products that are formulated for home use usually do not contain strong chemicals that enable keratin protein to bind to the strands. So, you may not be able to obtain a perfect straightening effect. Finally, the life of home keratin treatments may be shorter than the life of salon keratin treatments.  

On the other hand, salon straightening treatments are expensive, and you can save money if you do the job yourself.

At-Home Keratin Treatment Kits

This post contains links to Amazon. The publisher may get paid if You purchase something through the links without additional costs to You.

1. Silk Touch Keratin Treatment by Hair Bar NYC

This DIY Treatment is formulated with botanical and organic plant extracts and is intended to eliminate frizz and make hair more manageable for up to five months. It is not supposed to make your hair completely straight.

In addition to reducing volume and frizz, it strengthens and nourishes hair fibers.

There are several good reasons to consider this treatment if you are in the market for a DIY keratin treatment.

The kit includes a straightening product (in a spray bottle), serum, mask, and clarifying shampoo. So, you have everything you need to start, including all the needed information. 

This home kit comes with detailed instructions tailored to different hair types. In addition, there is an instructional video available on YouTube and the manufacturer’s website.

The company also offers free consultations by phone to assist their first-time users.

This is a good product if you have frizzy, unmanageable, overly voluminous hair and don’t want to eliminate your natural curls.

2. Peter Coppola Keratin Hair Treatment Kit

This keratin treatment kit is formulated to reduce frizz and static and improve the manageability of unruly hair. It can straighten curly hair up to 70%. If you have curly hair and want to make it straight, you might be disappointed with the results. Like many other brands, it will lighten your color, so you shouldn’t perform it on freshly colored hair unless you want to get a lighter shade. There are no strong fumes, but your hair can smell unpleasantly when gets wet within a week or two after application.

Things that make it suitable for use outside of a salon:

  1. The kit includes everything you need including step-by-step instructions.
  2. It is free of formaldehyde, and you can find the ingredient list on the bottle.
  3. The instructions are basically the same as for most traditional keratin treatments, so there is nothing that may confuse you. Watching the video beforehand will make the application easier.
beautiful African American girl with smooth hair sitting on the sofa

3. GK HAIR Smoothing Keratin Treatment

This hair taming system is advertised as a salon professional smoothing treatment that you can use at home. Active ingredient- Juvexin promotes hair smoothness and shine.

This treatment eliminates frizz and loosens your natural curls. The plus is that it won’t strip your color, so you can do it on freshly colored hair. A great convenience is that you don’t have to wait if you want to wash your hair.

Is it Good for Use at Home?

This kit includes all tools you will need for the application plus aftercare shampoo and conditioner for post-treatment care. Another good news is that you can see the ingredients list on the packaging, and there is no formaldehyde on the list. So, you may perform it in your bathroom without worrying about ventilation.

Make sure to strictly follow the instruction as every step might be crucial (even the two washing steps) not only for obtaining the desired results but for keeping your hair healthy also.

If you find the difference between printed instructions and those sent by email (the problem reported by many customers), make sure to contact customer service and they will help you to clarify the confusion by sending the appropriate instructions. GK Hair’s customer service is prompt and supportive.

woman with keratin straightened hair

4. OLEZ Smoothing Keratin Hair Treatment Kit

This kit contains clarifying shampoo and smoothing solution in a spray bottle. The product is advertised to eliminate frizz, control volume, and add shine. It is enriched with proteins and essential oils to nourish and strengthen weak and damaged hair.

The descriptions on Amazon are written in bad English (worse than mine), but the brighter side is that you can read the complete ingredient list on the bottle or if you visit the manufacturer’s website. Plus, there is an instructional video on YouTube.

I don’t like when the seller doesn’t invest time and effort to write a decent product description. Time will tell if this product is worth trying. I wouldn’t buy it yet.

5. Searching Plants Complete Keratin Treatment Kit

The convenient feature of this product is that the packaging contains all the necessary tools you will need. The kit includes pre-treatment clarifying shampoo, professional chocolate keratin treatment, 2 hair clips, comb, application brush, and gloves. The printed instructions are easy to follow.

What is less convenient, you are recommended to wait three days before washing your hair. 

Although formaldehyde is not listed as an ingredient, the solution contains other aldehydes which release formaldehyde into the air during flat ironing.

The seller claims that the levels of formaldehyde are below the acceptable level of permitted formaldehyde. Although I appreciate the seller’s transparency about the ingredients, that wouldn’t convince me to buy this kit.

6. Damila Keratin Treatment

This smoothing treatment is supposed to remove curls and block the effects of humidity. It is advertised to last for about two months when you are using the shampoo and conditioner from the same line.

Although the description says that it can be used at home, this treatment is not very gentle, and you need to do it in a well-ventilated area. I suggest you look for a gentler alternative.

Final Words: Start with Realistic Expectations!

If you go for an at-home keratin treatment, make sure to have realistic expectations. Otherwise, you will be disappointed. What is realistic? To get straight hair you need formaldehyde in the formula. At-home and formaldehyde-free treatments are not great at straightening curls. However, those gentle treatments can eliminate frizz and give you smoother, more manageable hair for several months.

Beautiful woman with straight hairstyle

Workout Shampoos: The Proper Way to Use Them and the Best Products

Do You Use Your Workout Shampoo Properly?

Sellers of hair products suggest using dry shampoo after a workout and force you to buy their products, but they don’t tell you how to properly use dry shampoo to effectively refresh sweaty hair.

If you use dry shampoo to absorb sweat during a workout session, you should apply it to the hair before a workout. Another way to use dry shampoo to manage sweaty post-gym hair is to apply dry shampoo after a workout session. However, for best results, you need to towel dry your hair before application. If you apply dry shampoo to wet hair, your hair will feel powdery and gritty. Try to remove as much moisture as possible and then apply dry shampoo.

However, there is an even better way to deal with sweaty hair after a workout. Dry shampoo mists and foaming dry shampoos work better on sweaty hair than regular dry shampoos. These types of no-rinse shampoos don’t build on your scalp or leave your hair overly dry. After applying them, towel-dry your locks, and then use a blow dryer to refresh your style.

girl wearing ponytail while exercising

In this post, you will learn how to prepare your hair for a workout to minimize the unwanted effects of sweating. You will also discover some dry shampoos and dry shampoo mists formulated especially for absorbing sweat. You will be able to achieve your fitness goals without ruining your hairstyle.

Should you Wash your Hair after every Workout?        

Exercising causes sweating, and sweaty hair is messy, limp, and smells unpleasant. Regular exercising requires frequent hair washing. Daily hair washing takes time because the hair must be dried and styled.

Another problem with frequent hair washing is that chemicals in hair shampoos can strip natural oils and leave your hair dry and vulnerable to damage.

But you don’t have to give up the benefits of physical activity because of the negative effects of sweating on your hair. Instead, you can learn how to minimize the effects of sweating and how to quickly refresh your hairstyle after a workout without shampooing.

a dark-skinned girl with brided hair during workout

How to Prep Your Hair for Exercising

To have as few problems with sweaty hair as possible, it is advisable to prepare your hair before exercising. This makes it easier to exercise and your hair is less exposed to moisture. Sweatbands help absorb sweat, so less moisture remains in your hair. These headbands also look attractive and add style to your fitness outfit.

Another way to reduce exposure to sweat is to put your locks into a protective hairstyle before you start exercising. If you put your hair into braids, it will touch your sweaty skin less during exercise. Low buns or a ponytail are also useful options. If you tie your hair, use covered rubber bands that don’t leave dents or cause breakage.

a young woman with braided hair before a workout

We already mentioned that dry shampoo used before a workout will reduce hair sweating. One of the quality dry shampoos that are formulated to absorb sweat during exercising is Living Proof Perfect hair Day Advanced Clean Dry Shampoo (Available at Sephora).

This post contains links to Amazon. The publisher may get paid if You purchase something through the links without additional costs to You.

How to Refresh Hair After Workout          

1. Dry Shampoos

Although washing your hair after exercise is not necessary, sweaty hair can look greasy and unsightly when it dries. If you use a dry shampoo to refresh your hairstyle, be sure to towel dry your hair well and then apply the dry shampoo to the hair roots. Examples of well-known brands of dry shampoos that are designed for use after workouts are DOVE Go Active Dry Shampoo (Package contains dry conditioner and dry shampoo sheets) and Klorane Detox Dry Shampoo with Aquatic Mint (mint scent and cooling sensation).

girl using dry shampoo after a workout

If your hair is on the dry side frequent use of dry shampoo can make it even drier. Dry shampoos also tend to accumulate on the scalp and may clog scalp pores. So, consider using foaming dry shampoo or dry shampoo mist instead of standard dry shampoo.

2. Dry Shampoo Mists

Dry shampoo mists are a good alternative to dry shampoos if you need to refresh your hair after a workout.

These shampoos can be applied to the hair without thorough towel drying. After applying it, wait several minutes, then use a towel to remove moisture and dirt.

Dry shampoo mists don’t dry out the hair because they contain water and other hydrating ingredients. They also do not leave residues or build-up on the scalp. Your hair feels clean and refreshed, even though you have not washed it in the shower. Make sure to always shake the bottle well before use. One of the most known brands is Bumble and Bumble Pret a Powder Post Workout Dry Shampoo Mist. This liquid mist is formulated specifically to take sweat and smell from the hair after workouts. For people who are sensitive to strong odors, it wouldn’t be the best choice. 

Other liquid mist brands that may be worth your attention are SUNDAY II SUNDAY ROOT REFRESH Micellar Rinse with Apple Cider Vinegar (soothing to the scalp) and SWAIR Showerless Shampoo.

3. Foaming Dry Shampoos

Foaming dry shampoos are a good concept for cleaning and deodorizing sweaty hair but currently available products suffer from serious drawbacks.

a woman exercising yoga at home

Creative Ways to Decorate Your Dreads

Dreads are a fancy hairstyle for anyone to sport and rock with any outfit. They are worn by men and women in different shapes, styles, and sizes. However, many people are interested in cool and attractive ideas on how to decorate dreads. If you’re interested in learning how to add dreadlock accessories to your hair, this article is for you. We’ll be taking a look at how to transform your dreads, whether they are natural, braids, or synthetic dreads.

Let’s begin

The following tips will teach you innovative ways to beautify your dreads:

Look For Dreadlocks Accessories Around You

The great thing about having locs is that there are various hair accessories for dreads. Many of them can even be found around you. Are you short of ideas? Look into your jewelry box, take a trip to the thrift store, or look out for something on the shores of the beach. You may always check the internet for inspiration on loc jewelry.

Beautiful young woman with dreadlocks decorated assorted beads

Don’t hesitate to add any fancy details you find to your loc accessories. Check through your drawer and pick up some of your siblings’ items. You’re free to add anything you want to your hair except if it’s sticky. As long as you can come up with an attractive design, then there is little or nothing to worry about.

Some popular items that can be used as dreadlock jewelry include:

  • Yarn
  • Elastic bands
  • Dread bands or head wraps
  • Seashells
  • Necklaces
  • Strip of fabric
  • Feathers
  • Flowers
  • Craft wire
  • Barrettes, and so on.
Dark skinned girl with dreads decorated with wire

Now that you’re done scavenging for fancy items to add to your hair, it’s time to try out some decoration ideas.

1. Dread Beads

Dread beads are one of the most common items that you can use to decorate or transform the appearance of your locks. The best type of beads to use is usually those made from acrylic, metal, natural stone, and wood. These materials are durable and will take some time before you have to replace them.

young girl with dreadlocks

You can attach dread beads to your hair with your hand. You may also choose to use a hook or braid tool to make the work go faster. All you have to do is insert the hook or tool into the bead and insert your dread into the hook or braid tool. Keep pulling on the hair till it slides through and holds the bead firmly.

To ensure that you don’t misplace your beads by having them slip off, it is a great idea to attach them to the upper parts of your hair. Also, make sure you don’t pull on the hair too much or you may risk damaging it. The way your dreadlocks are formed will hold the bead in place. However, if your hair accessories still manage to slip off, you may add mini elastic bands for extra support.

2. Embroidery Thread or Yarn

You may also wrap your dreads with embroidery threads. The great thing about using yarn is that you will get various options to use in styling your hair when you pay a visit to a sewing shop.

Attractive model with long dreadlocks

The most common pattern adopted by most people who want to decorate their dreads with yarn is to use a criss-cross pattern. To do this, cut a piece of thread that is 2-3 times longer than your loc. Create a knot close to the hair roots, and then proceed to create a criss-cross pattern along with the dread. This criss-cross pattern keeps your hair exposed to air and sunlight. Take care not to use embroidery thread or yarn in your hair for too long because they may rot.

You may also use the embroidery thread or yarn that you have gathered to form tight hair wraps. However, these headwraps for locs may prevent your hair from getting fully dry. Too much moisture in your hair will result in the formation of mildew and other complications. Creating a removable head wrap is a more reasonable solution.

3. Seashells for Dreads

Natural items such as seashells and small bones are a beautiful, inexpensive way to transform your hair, braids, and head wraps. The best thing about adding natural items is that you can always find them in various shapes, designs, and sizes.

Avoid picking materials that may degrade quickly such as leaves. Natural items can come with a load of germs and dirt. Clean and sanitize them with warm soapy water. Soak them in a solution of half alcohol and half hydrogen peroxide. This solution will kill the bacteria or microorganisms found in the item. As an extra measure, you may decide to soak these items in boiling water for a few minutes.

When you have identified and cleaned the natural items you intend to use to transform your hair, the next thing to do is to attach them firmly to your hair. Attach or tie them to your hair with the right type of thread. Some low-quality threads may rot quickly after some time. A good piece of advice would be to pick the threads that will match your hair color and won’t stand out too much.

Takeaway

And that’s all on decorating your dreads. We hope you enjoyed this article and found the information useful. These are amazing dread decoration ideas to give you an all-new, and attractive look.

a young woman with dreadlock jewelry, backside
girl wearing dreads decorated with yarn