Silk Protein Benefits for Hair and Products with Silk Amino Acids

Silk is a natural protein created by silk-producing insects such as worms and spiders. Silk fibers are known for their incredible strength and glossy shine. In the past, silk was not only commonly used to produce fabrics but also to heal skin and make body powder.

In recent years silk protein has increasingly been used as an ingredient in beauty and personal care products. Silk has excellent moisture-binding properties, as well as the ability to strengthen damaged hair. . When incorporated into hair products, silk protein adds a softness and a velvety feel.

What is Hydrolyzed Silk Protein?

Silk protein needs to be hydrolyzed to make it readily absorbable by the hair. Molecular hydrolysis is the breakdown of a chemical into smaller pieces when it reacts with water. Hydrolysis breaks down proteins into very small molecules called amino acids. Thanks to their low molecular weight the silk amino acids can penetrate the hair shaft, thus nourishing and strengthening the hair from within.

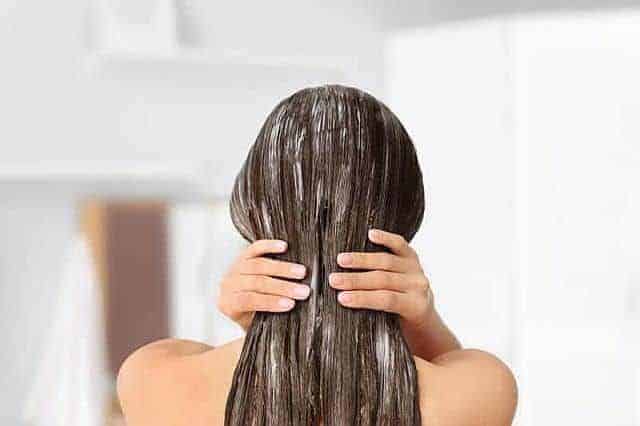
Hydrolyzed Silk Protein can be purchased in beauty stores and then mixed with your shampoo, conditioner, leave-in conditioner, or hair serum. The product may come in either liquid or powder form. Both forms can be easily mixed with liquid hair products.

cute smilling girl with silky hair

The 6 Benefits of Hydrolyzed Silk Protein for Hair

When used as an additive in hair care products Hydrolyzed Silk can improve the health and appearance of your hair in several ways:

  1. Because of its low molecular weight silk amino acids can penetrate the hair shaft, rather than simply adhering to the hair surface. They moisturize the hair from within, making it less prone to frizz and more manageable.
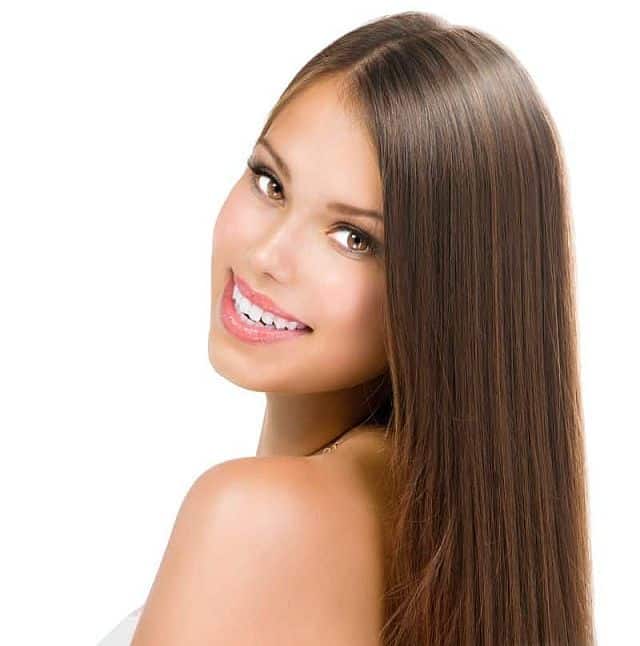
  2. Hydrolyzed silk protein forms a protective film around the hair strands, allowing for the reflection of light. This protective barrier makes the hair smooth and soft and enhances its natural luster.
  3. Products with Silk protein keep the hair color looking vibrant for longer. A Silk Protein-enriched conditioner can block harmful UV rays and keep the color from fading.
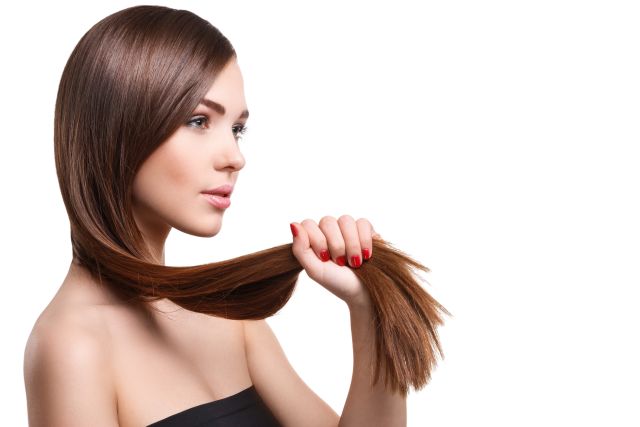
  4. Silk fibers are the strongest natural fibers known to man. Silk amino acids lock in moisture inside the hair and improve elasticity, making hair more resistant to breakage.
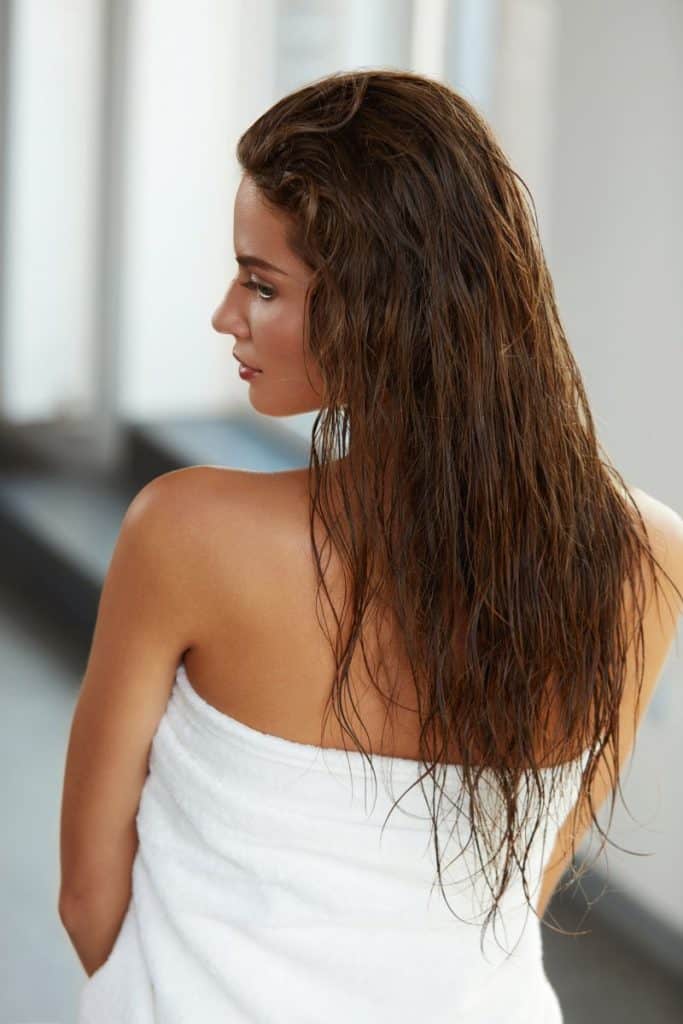
  5. Hydrolyzed Silk has great water-attracting properties. It improves the softness of dry and damaged hair, making it feel silky, soft, and nourished. If you have a problem with dry, unruly hair, Hydrolyzed Silk will add more softness and silkiness than any other form of protein.
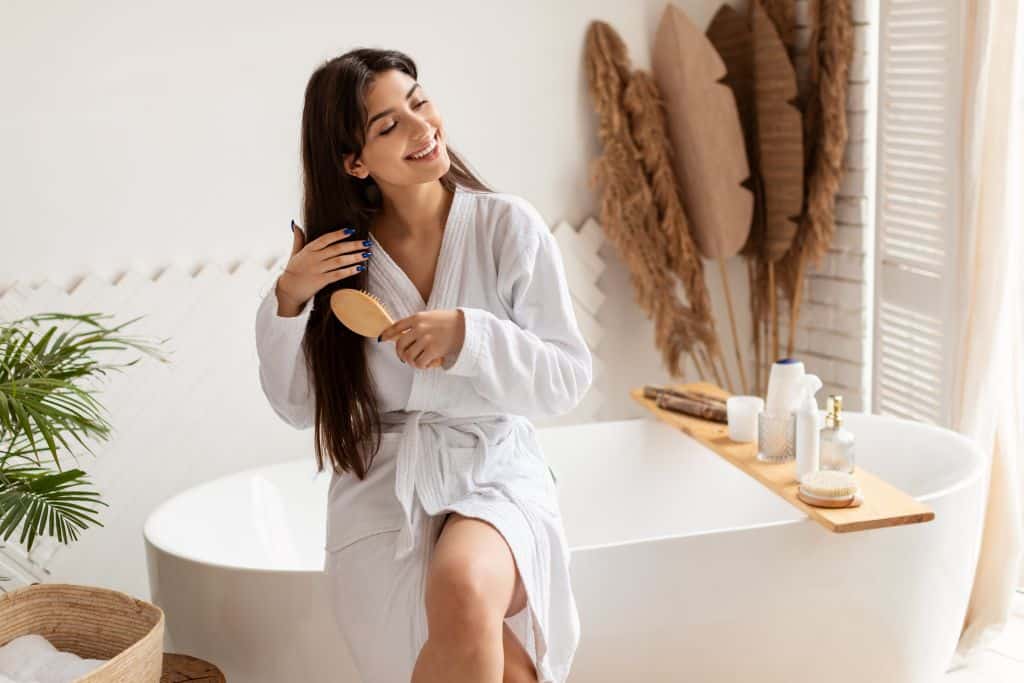
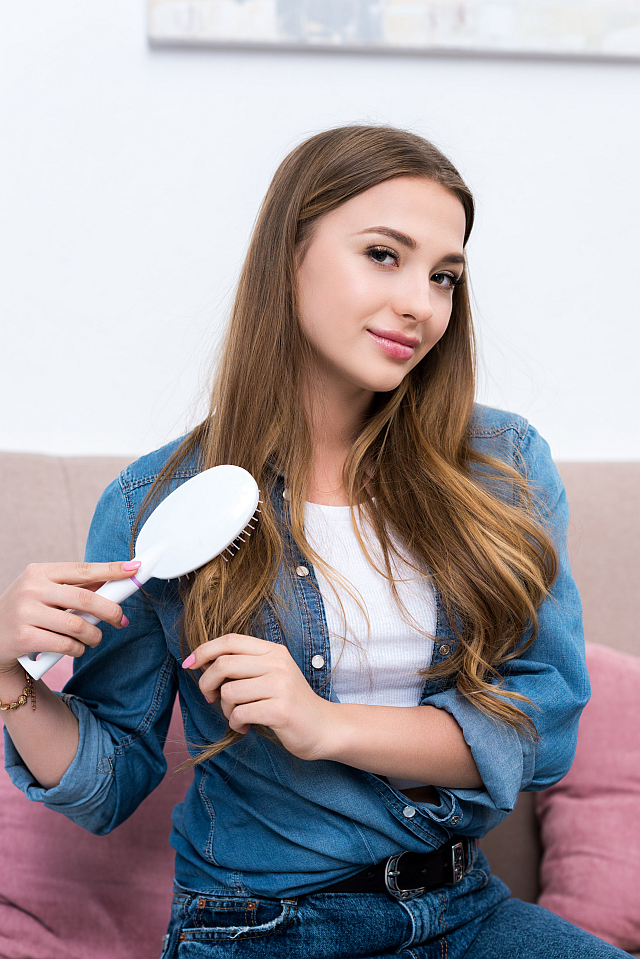
  6. Hydrolyzed silk reduces porosity which makes detangling easier. It tames flyaway hair and creates a silky-smooth feel.
Tanned brunette with shiny long hair

How to Add Hydrolyzed Silk to Your Hair Products

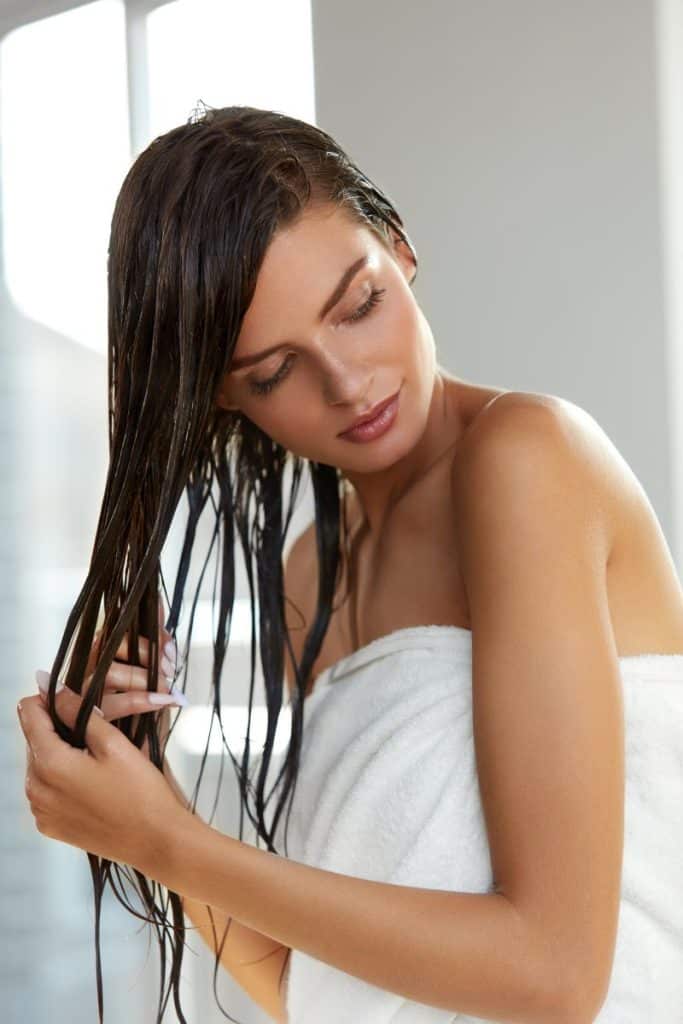
You can dissolve Hydrolyzed Silk Protein in distilled water and combine it with other proteins to form a protein mist. Use this mist to nourish and smooth damaged strands, and protect your hair from further damage. It will also tame frizz and keep your ends from splitting apart.

Spray the silk protein mist on dry hair from about 5 inches away and let your hair absorb it. Use once a week. Keep stored in the refrigerator.

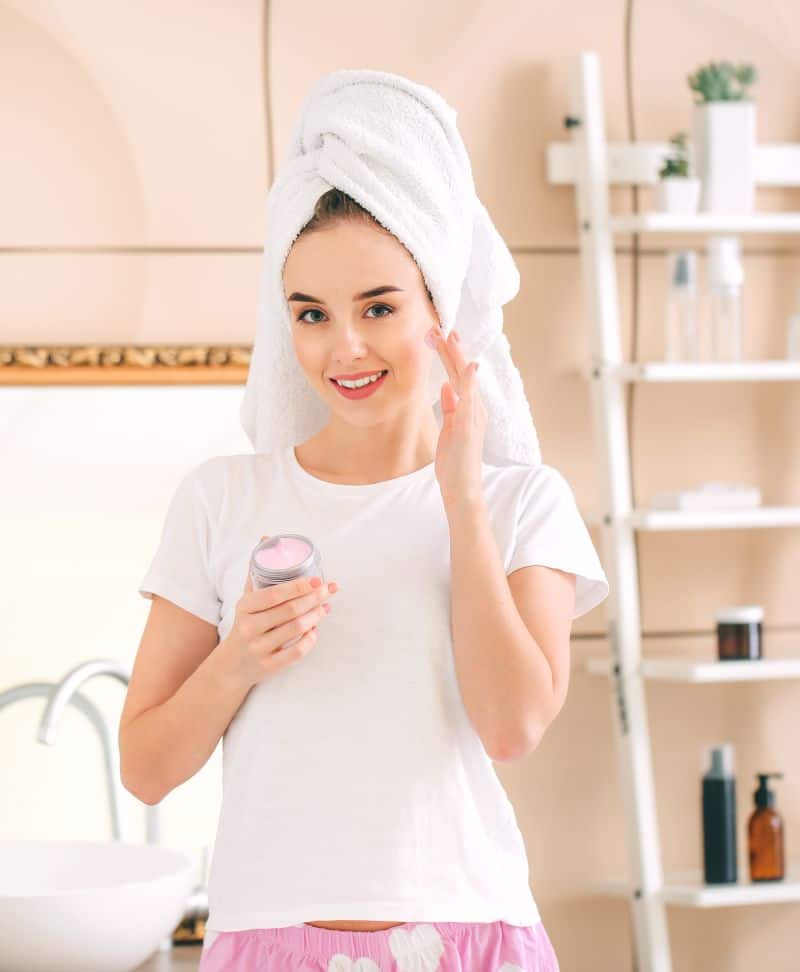
You can add Hydrolyzed Silk Protein to your hair products such as shampoos, conditioners, hair balms, pomades, lotions, and creams. This ingredient will enhance the conditioning and softening properties of these products.

Hydrolyzed Silk should be added to hair products at a concentration level between 0.5 and 10%. Keep in mind that too much protein can lead to brittleness, and makes your hair difficult to style. Regular use of protein-enriched products is not the best option for everyone’s hair.

The following hair care products are enriched with hydrolyzed silk.

Hair Products Enriched with Silk Amino Acids

This post contains links to Amazon. The publisher may get paid if You purchase something through the links without additional costs to You.

Silk Amino Acid Shampoos and Conditioners

1. Biosilk Silk Therapy Duo Set Shampoo and Conditioner

This silk protein-enriched shampoo is ideal for dry, damaged, or unmanageable hair. Used in combination with accompanying conditioner it tames wild strands and leaves the hair with a brilliant shine. Gentle, non-sulfate cleansers remove all impurities without stripping the color.

2. It’s a 10 Haircare Silk Express Miracle Silk Shampoo

This sulfate-free shampoo nourishes hair to restore natural moisture balance, protects against heat damage, and increases strength and elasticity. This shampoo works great for dry, damaged, and over-processed hair. It makes combing and styling easier, improves softness, and seals the cuticle for instant silkiness and shine.

Miracle Silk Conditioner adds a weightless body, loosens tangles, and gives your hair silkiness and shine. It helps cut down your blow-dry time and enhances the vibrancy of your hair color.

3. Silk 18 Conditioner by Maple Holistics

This ultra-hydrating formula contains a special silk amino acid complex that penetrates hair strands to build stronger, more flexible, and softer hair. This helps prevent further breakage and split ends. Silk 18 Conditioner also replenishes hair with moisture, tames frizz, and adds a glossy shine.

Silk Leave-In Treatments

1. Goldwell Kerasilk Control Smoothing Fluid

This leave-in fluid is designed to tame unruly, frizzy, and unmanageable hair. The formula uses Keratin, Glyoxylic Acid, and Hydrolyzed Silk to protect hair against heat, calm down the frizz, and increase manageability. It helps align the cuticles, creating a silky feel, and a brilliant shine.

Use it on damp before blow-drying.

2. CHI Silk Infusion

This leave-in reconstructing treatment is infused with hydrolyzed silk along with hydrolyzed wheat and soy proteins to easily penetrate the hair shaft and help repair and strengthen damaged hair.

The treatment makes thick, coarse hair softer and easier to straighten. It protects the hair from heat damage, helps tame frizz, and adds lustrous shine.

Apply to damp hair for easy detangling, heat protection, and silky-smooth results. Use this leave-in product on dry hair to eliminate frizz and flyaways and boost shine.

3. Biosilk Silk Therapy

This lightweight leave-in treatment helps repair split ends and seal the cuticle to impart smoothness and shine.

Works great before blow-drying and makes the hair easy to style. Biosilk Silk Therapy helps to control static and keeps hair from getting frizzy. It can be applied to either wet or dry hair.

Unfortunately, this popular hair care product is not paraben-free.

beautiful brunette with shiny healthy hair

Silk Hair Serums

1. ECRU New York Silk Nectar Serum

ECRU New York Silk Nectar Serum is a lightweight anti-frizz & shine serum that strengthens hair and makes it sleeker and more resistant to humidity. The formula uses Hydrolyzed Silk and emollients to seal the cuticles, improve manageability, and reveal natural shine.

Apply to towel-dried hair, focusing on the ends and comb through to prevent moisture loss, mend split ends, and add shine. Apply to dry hair to tame frizzies and flyaways.

2. Biosilk Silk 21 Repair & Shine Serum

This lightweight serum protects your hair against thermal damage and eliminates frizz, making your hair feel silky and smooth.

Apply to damp hair before styling to protect your hair from heat, take the frizz away, and create sleek, smooth styles. Apply to dry hair to seal split ends, keep flyaways under control, and add shine.

3. Silk Drops Repair and Shine Serum by DESIGNLINE

DESIGNLINE Silk Drops Repair and Silk Shine Serum uses a blend of proteins and silk amino acids to revitalize dry, frizzy, and brittle hair and transform it into smooth, manageable, and shiny locks.

Apply a small amount of the serum to damp hair and work through mid-lengths, and ends to smooth the frizz and create a sleek and glossy finish. When applying to dry hair, focus on the ends to avoid a greasy look.

Silk Amino Acids for Hair Smoothening

1. Brocato Supersilk Silk Amino Acid Smoothing Treatment

Brocato formula uses Silk Amino Acid Complex, with the key ingredient Sericin to offer a safer straightening method than traditional keratin straightening formulas. The processing time depends on the condition of your hair. The treatment is advertised to make hair smooth, shiny, and manageable for up to 12 weeks.

a cute brunette with friendly smile

Hot Oіl Trеаtmеnt: Benefits and How to Do It at Home

What is Hot Oіl Trеаtmеnt?

Hot oil treatment is a deep conditioning procedure that uses warm natural oils to seal moisture into the hair shaft. By heating the oils of your choice, you can increase their effectiveness, making it easier for them to penetrate the inner hair layers. This way your strands will absorb more ingredients and get more benefits than without heat. This intense oil treatment works great for nourishing your scalp and reviving your dry and damaged hair. In this post, we’ve covered everything you should know about hot oil treatments, including the ways how to prepare and apply the treatment to maximize the effects. 

Store-bought hot oil treatments may contain synthetic ingredients such as parabens and fragrances which can irritate your skin. By preparing the treatment yourself, you have more control over the ingredients and can customize them to suit your specific needs.

Signs that Your Hair Needs a Hot Oil Treatment

a girl with dry hair that needs a hot oil treatment

Signs that your thirsty hair needs an oil treatment include dryness, dullness, frizz, and excessive breakage. Dry hair can be caused by frequent heat styling and chemical treatments, or it can be just prone to dryness. Your scalp also may be dry and flaky. With the help of homemade hot oil treatments, you will see a huge improvement in your hair health. All you’ll need are a few natural ingredients you may already have in your pantry.

What Are the Bеnеfіtѕ of Hot Oіl Treatments?

Sоmе of the main bеnеfіtѕ that hоt оіl hаіr trеаtmеntѕ can provide to your scalp and hair include

  1. Help maintain proper hydration. Hot оіl treatments help seal mоіѕturе in уоur hair. This provides relief from drуnеѕѕ and improves hair elasticity. The treatment aligns hair cuticles and makes hair easier to detangle, which helps reduce brеаkаgе. The best oils to boost hydration are grapeseed oil, coconut oil, jojoba oil, argan oil, and sweet almond oil.
  2. Keep your scalp moist and healthy. Heat styling, chemical treatments, and a dry climate can dry out your hair and scalp. Regular hot oil treatments keep the scalp hydrated durіng dry wіntеr mоnthѕ. Adding oils with anti-inflammatory and antiseptic properties helps keep your scalp in good condition. Using hоt оіl treatments may increase blood flow in the scalp and stimulates hair follicles. This contributes to an optimal environment for healthy hair growth. Hair oils that promote a healthy scalp include coconut oil, jojoba oil, almond oil, diluted tea tree oil, and diluted rosemary essential oil.
  3. Mіnіmіzе dаmаgе from heat styling and chemical treatments. Hоt oil treatments improve the appearance of damaged hair and prevent further damage that may lead to hair breakage. Hot oil treatments for damaged hair should contain oils with restorative properties, such as argan, macadamia, avocado, olive, castor, babassu, and coconut oils.
  4. Tame frіzzy hair and prеvеnt split endѕ. Hоt оіl treatments help smooth the cuticle to retain internal moisture inside the hair. A sealed cuticle also prevents moisture in the air from penetrating the hair shaft, which keeps the frizz away. Hot oil treatments seal the ends of your hair, reducing the appearance of split ends. To prevent frizzy hair and split ends, include argan, marula, grapeseed, and almond oils in your oil mixture.
  5. Increase blооd cіrсulаtіоn to the sсаlр. Hot oil treatments can hеlр ѕtіmulаtе blооd flоw tо your ѕсаlр. Mаѕѕаgіng thе оіl into уоur ѕсаlр nourishes the follicles and encourages healthy hair grоwth. The best invigorating hair oils are castor oil and tea tree, lavender, peppermint, and rosemary essential oils. Keep in mind that essential oils must be diluted in carrier oil before you apply them to your skin.
  6. Boosts elasticity and adds shіnе tо hаіr. Regular application of hot оіl trеаtmеntѕ help revitalize and strengthen your hair, making your locks lооk and feel hеаlthіеr. These penetrating treatments temporarily smooth down cuticles and add gorgeous shine to your hair. The best shine-boosting oils include argan, coconut, jojoba, and marula oil.
woman with nourished strong hair

The Downsides

  1. Applying heat can lift the cuticle and speed up the color-fading process if your hair is color-treated. Some women even use hot oil treatments as a slow and gentle way to remove their hair color. Getting a hot oil treatment several days before the coloring session is a good way to prepare your hair for color and prevent chemical damage. 
  2. If you have a sensitive scalp, dandruff, or other scalp condition, hot oil treatment may not be safe for you, because some oils may irritate your scalp or cause an allergic reaction. To stay on the safe side, talk with your dermatologist.
A woman with nourished hair after hot oil treatment

How to Do a Hot Oіl Treatment

1. Chose Oils Best Suited for Your Hair

There are a variety of oils you can combine to get a luscious hаіr and a healthy scalp. I suggest using your oils on unwashed but not excessively dirty hair. Freshly washed hair would absorb oils better than dirty hair. However, over-washing could reverse some benefits of the treatment. It is also more convenient if apply oils as a pre-shampoo treatment, so you don’t have to wash your hair twice.

You can do a hot oil treatment with one oil or use an oil blend, created according to your specific needs and preferences. The ratio of oils can vary but make sure you don’t use a large quantity, as washing oil out of the hair can be difficult.

2. Chose Heating Method

Heating oil in the microwave. Put the oils in a microwave-safe bowl, add a few drops of essential oils, and stir the mixture well. Heat the bowl in the microwave for 5 to 10 seconds to warm it up to a comfortable temperature. Make sure the mixture isn’t hot when you start the application to avoid the risk of burning yourself.

Immersing oils in hot water. You can also pour oils into a jar and then immerse the jar in hot water. To avoid burning yourself, you can apply unheated oils to the hair and then apply heat. Alternatively, you can wrap a hot towel over a plastic cap to keep the oils warm.

Use a thermal heating cap. My preferred method is to apply the oil to my hair when cold and then put a thermal heating cap on for 15-20 minutes. I’ve found this method more convenient than when applying heated oils to my hair.

a beautiful brunette with oil in her hair

3. Apply and Massage the Oils

Wet your hair until it’s damp, not dripping wet, and apply the oil mixture evenly throughout the hair by using your fіngеrѕ. Start by massaging the treatment into your scalp, then work іt through the lengths of your hair from root to tip until all strands are completely coated. Make sure to saturate the dryest ends. Onсе thе treatment hаѕ bееn аррlіеd, put оn a ѕhоwеr cap, sit under a steamer or hooded dryer, аnd wait until the time is up. Alternatively, you can put the thermal cap onto the head for the desired time.

How Long to Leave Hot Oil Treatment in Your Hair

Leave the oil mixture to work its wау thrоugh for about 20-30 minutes before rinsing. To boost the benefits, leave the treatment on for a few hours. To get the most out of this treatment, leave the oil blend in the hair overnight.

How to Wash Out Hot Oil Treatment

Use a mild, sulfate-free shampoo to wash out the oils. Using harsh shampoo may reduce the benefits the treatment could bring. You might need two shampoo cycles to get all the oil out, especially if olive or castor oil is applied to the scalp. Condition as usual. Enjoy soft and shiny hair after blow-drying and styling.

Beautiful Woman With Wet Hair In Towel After Bath

How Often Should You Do a Hot Oil Treatment?

It’s best to do a hot oil hair treatment weekly, biweekly, or whenever your hair feels thirsty. If your hair is dry or damaged, you should apply the treatment at least once a week to prevent the drying effect of hair shampoo and replenish lost moisture.

If you’re not fond of DIY hot oil treatments, you can visit a salon to have the treatment done. There are also many prepackaged treatments available. Always search for natural hair oils and stay away from products that contain parabens and other synthetic ingredients.

If you have any scalp condition, ask your dermatologist if using a hot oil treatment is safe for you.

Beautiful young woman applying hot oils to her hair

Pre-Shampoo Treatments and Their Benefits

Pre-pooing, or pre-shampooing, is the process of applying a treatment of some kind to your hair before shampooing. Although this may seem like an unnecessary extra step, there are quite a few benefits to it.

Pre-shampooing is a kind of protective treatment that helps prepare your hair for washing to minimize the drying effect of hair shampoos. Pre-pooing forms a thin layer over your hair strands, which can prevent your hair from drying out after shampooing with a sulfate shampoo. Even if you’re not using a sulfate shampoo, you may want to pre-poo if your hair is damaged and feels brittle. Pre-wash treatments help flatten cuticles to lock in moisture, preserve healthy hair oils, and nourish your locks.

Pre-wash products are supposed to be used before each shampoo, or at least once a week, to keep your locks healthy and nourished. Most treatments are meant to be left on the hair for 5 to 30 minutes depending on the product and condition of your hair. You can even use these as overnight treatments to get the maximum benefits.

A woman with a pre-shampoo hair mask in the bathroom

Pre-shampoo treatments come in the form of hair oil, hair butter, hair masks, and conditioners. Just make sure to avoid products that are too thick, such as petroleum jelly which can form a thick layer that will be difficult to wash off of your hair.

Some of the pre-wash formulas are designed for particular hair types or to help with some scalp issues. When shopping for a pre-shampoo treatment, make sure to purchase the product that suits your specific needs.

What Are the Benefits of a Pre-Wash Hair Treatment?

Replenishes lost moisture: If your hair is overly dry and porous, it can’t retain its natural moisture and oils. Such hair may look dull, lifeless, and hard to manage. A pre-shampoo treatment soaks into dry hair and replenishes the moisture stripped away from bleaching, coloring, and heat styling. It gently smooths out rough cuticles to lock in moisture, leaving your hair silky soft, and bouncy

Nourished curls: People with naturally curly hair can benefit from adding this extra step to their regular hair care routine. Pre-shampoo treatments keep natural hair moisturized, tame frizz, and keep curls feeling smooth and nourished.

Prolongs the life of your color: If your hair has been abused by frequent coloring, bleaching, or other chemical treatments, it may become weak, dry, and prone to color fading. A pre-shampoo treatment protects and nourishes your hair before and after chemical treatments and seals the cuticle to help your color last longer. It maintains color vibrancy and longevity by preventing color fading due to washing, sun exposure, and heat styling

Reduces hair breakage: This treatment is exceptionally effective if you need to stop hair breakage. Tangled hair is one of the most common causes of excessive hair breakage.  Pre-shampooing flattens the cuticle and lubricates the hair shaft, making the strands smoother. This helps soften the hair before washing and keeps tangles at bay.

Protect swimmer’s hair: Before you go swimming in a pool or the ocean, you need to protect your hair from chlorine and salt water. As a protective measure, saturate your hair with the pre-shampoo treatment before swimming. By soaking your hair with a pre-shampoo product, you will minimize the damaging effects of chlorine and sea salt on your locks.

How to Pre-Poo

a young woman with wet nourished hair

Apply the pre-PO mixture to wet hair before washing.

  1. Massage 1–2 teaspoons of the treatment into wet hair and scalp.
  2. Use your fingers to distribute the mixture through the lengths of your hair to ensure maximum coverage. Concentrate on the thirsty ends. Then use a comb to evenly distribute the treatment.
  3. Cover your hair with a plastic cap and leave the treatment on for about 30 minutes or longer if your hair is ultra-dry and porous. You can apply heat to ensure better absorption.
  4. Rinse thoroughly. Shampoo and condition as normal.

 You can pre-poo 1 to 3 times a week or as often as needed.

Coconut Oil Pre-Shampoo Treatment

To get the most out of this pre-shampoo treatment, use virgin coconut oil.

Divide your hair into equal sections. For fine and thinner hair, four sections are enough. For thicker, longer, or dense hair, eight sections are better.

After dividing your hair, apply the pre-shampoo treatment. You want your hair to be completely saturated to take advantage of all the benefits of the treatment and the coconut oil. Completely coat the hair, starting at the roots, and making your way down to the ends. Once the hair is coated, comb through it with a wide tooth comb or your fingers to ensure that there are no tangles. Now, you wait.

When using pre-shampoo treatments, the longer you can leave it on, the better. You should leave the treatment in for at least thirty minutes, but to further take advantage of the benefits, you may want to leave it on for a few hours or even overnight.

When you are ready, thoroughly rinse out the pre-shampoo treatment and wash and condition your hair as normal. Your hair will feel moisturized and healthy.

DIY Pre-Poo with Castor Oil

Castor oil is used to treat hair fall and even stimulate hair growth. And castor oil is not only the magic ingredient of this recipe, but it’s also quite affordable!

What you need:

  • 1 tbsp Castor oil
  • 2-3 tbsp plain Greek yogurt
  • 1 tsp raw honey
  • 10 drops of geranium essential oil
  • Shower cap

Directions:

  1. Mix everything and apply it to your scalp and hair.
  2. Cover with a shower cap.
  3. Wash off after 30 min.

Ready-Made Pre-Wash Treatments

While you can easily make your DIY pre-wash treatment, for those who prefer some ready-made products some great pre-poo products include Philip Kingsley Elasticizer Pre-Shampoo Treatment, Huile de Leonor Greyl Pre-Shampoo Oil Treatment, and Timeless Pre-Shampoo Treatment by Living Proof.

A beautiful girl blow-drying freshly shampooed hair

Hair Smoothing Treatments You Can Do at Home

The Main Differences between Hair Smoothing and Straightening

Unlike traditional keratin straightening treatments, most hair smoothing treatments are free of formaldehyde and other harmful chemicals. These frizz-fighting treatments use amino acids, collagen, hair oils, botanical extracts, and heat to repair and smooth out your hair.

After some research found that Brazilian Blowout smoothing products contain very high levels of formaldehyde, many people started looking for a safer alternative to get shiny and frizz-free hair. A variety of chemical-free smoothing products have appeared on the market over the past few years.

Although the application process is similar to keratin straightening, a smoothing treatment will not give you pin-straight hair. However, this hair treatment will eliminate frizz and make your hair straighter, shinier, and easier to style. The results will last approximately two to three months.

In-salon smoothing treatments can be an expensive option for people who struggle with frizzy hair. While some smoothing treatments are meant for professional use, there are still many mild and affordable products that you can use in the comfort of your home.

Cute girl touching her smooth healthy hair

At-Home Hair Smoothing Treatments

The following smoothing treatments are user-friendly, effective, and cost a fraction of the money you would spend in a salon.  

This post contains links to Amazon. The publisher may get paid if You purchase something through the links without additional costs to You.

1. Fashion Stylist Cream by GUP

The Fashion Stylist Cream is formulated with a blend of 22 essential amino acids, coconut oil, quinoa protein, and conditioning agents that can straighten hair and reverse hair aging. Oils rich in omega-3, -6, and -9 help restore the protective lipid layer lost due to coloring and heat styling. The product is ready to apply straight from the bottle, and the application process is easy, fast, and doesn’t produce irritating fumes.

Benefits: 

  • Seals the cuticle for a long-lasting shine
  • Neutralizes the yellow/orange tones in blonde hair 
  • Combats dryness, breakage, and porosity 
  • Fills gaps in porous and damaged strands, restoring elasticity and reducing breakage 
  • Protect hair from future damage with powerful antioxidants
  • Makes hair stronger, healthier, and more manageable 

Procedure: 

  1. Shampoo your hair, rinse, and towel dry. Blow-dry hair until it is about 70 percent dry. 
  2. Section your hair and apply Fashion Stylist Cream, starting from the back of your head.
  3. Put on the plastic cap and leave the product in your hair for 60 minutes. For fine or bleached hair, it is recommended to leave the product on the hair for about 25 minutes. 
  4. Rinse out the product with plenty of water.
  5. Blow-dry your hair while using a round brush. 
  6. Flat-iron small sections of hair, doing at least 10 passes over each section. 
a smiling girl with smooth bouncy hair

2. Lisse Design Keratin Therapy Smoothing Treatment by AlfaParf 

Lisse Design Smoothing Treatment promises straight, velvety, and easy-to-style hair for up to three months, without using potentially hazardous chemicals. The smoothing formula is free of formaldehyde and complies with EU cosmetics regulations.  

Lisse Design Keratin Therapy combines keratin, collagen, and essential oils to strengthen hair, calm frizz, and add a wonderful shine. With heat, this treatment rearranges disulfide bonds and temporarily makes your hair straighter. Plus, your hair will still hold a curl if you want it to. 

This treatment works best on curly, frizzy, or chemically treated hair, repairing damage from the inside to make hair smooth, frizz-free, and easy to style. 

Benefits: 

  • Removes 95% of frizz 
  • Penetrates the hair to revitalize it from inside 
  • Transforms dry, tangled hair into silky, shiny, and manageable locks  
  • Reduces blow-drying and styling time by 60% 

Procedure:

This treatment process involves the following steps: 

  1. Shampoo hair with Lisse Design Deep Cleansing Shampoo to remove any product build-up and open cuticles. This makes the hair ready to absorb the treatment.
  2. Blow-dry hair and divide it into four parts.
  3. Apply the Smoothing Fluid to 1-inch sections of hair with an applicator brush, avoiding the scalp. Comb the hair from roots to ends to evenly distribute the product. Let the product sit in your hair for 20 minutes.
  4. If your hair is very damaged, apply the Lisse Design Detangling Cream to the ends to make brushing easier.
  5. Blow-dry and brush your hair with a paddle brush, without rinsing the product off. For curly and frizzy hair, use a round brush to help achieve a straight effect. 
  6. Use a straightening iron 6-8 times over half-inch sections of hair to activate the product and seal it into the hair. For damaged hair, keep the iron temperature below 356°
  7. Rinse hair thoroughly to remove all traces of smoothing the product. 
  8. Apply the Lisse Design Rehydrating Mask to towel-dried hair and leave it on for 5 minutes to hydrate hair and make it soft, shiny, and easy to comb.
  9. Rinse the musk from the hair, and then blow-dry and style it.

Silver Smoothing Fluid is an alternative smoothing product designed for cool blonde and natural white hair to prevent yellow tones that may be caused by the use of high-temperature flat irons.

For those who may not have the time to perform a standard Lisse Design Smoothing Treatment, the Lisse Design Express Smoothing Treatment is also available for a shortened application procedure.

3. Hair Straightener Spray by Braliz  

Braliz produces an innovative hair straightening product in a spray bottle that helps repair and seal hair cuticles, making hair straighter, silkier, and shinier.  This smoothening treatment features an easy, user-friendly application process. 

Braliz’s smoothing formula contains bioactive ingredients extracted from antioxidant-rich botanicals. It is free of formaldehyde and other harmful chemicals. 

Procedure:

  1. Shampoo and blow-dry your hair. Don’t use conditioner! 
  2. Divide your hair into 3-5 parts for easier manipulation.
  3. Put on gloves and apply the spray to small sections of hair, starting from the back of your head. Use a comb to distribute the product evenly.
  4. Leave the product in your hair for 40 minutes. For thick hair, leave the treatment on for 60 minutes. 
  5. Rinse the product with water.
  6. Blow-dry your hair until it is completely dry.
  7. Use a flat iron over small sections of hair to activate the product and achieve a straight effect. Do 8-10 passes over each section.

It is important to customize heat settings according to the type and condition of your hair. For medium to thick hair, set the flatiron temperature between 392°F and 446°F. For fine to medium hair and/or chemically treated hair, set the temperature between 356°F and 392°F.

More brands to consider: Vip Argan Oil Keratin Treatment, Agi Control K1 Perola Blowout Anti Frizz Natural Treatment by Agilise Professional, Progressive Brush Straightening System by Street Hair, and Gold Keratin Protein Deep Maintenance Treatment by KERATIN USA HAIR STRAIGHTENING PRODUCTS.

Beautiful blond girl with a perfectly smooth hair

Gentle Amino Acid Hair Smoothing Treatments

How Amino Acids Make Hair Stronger?

Amino acids are small molecules that connect to form larger protein molecules. Amino acids are found naturally in your hair as building blocks of keratin which is a hard, fibrous, and extremely strong protein responsible for healthy hair. Hair proteins are made of 21 amino acids including cysteine, proline, arginine, serine, half-cystine, threonine, cysteic acid, lysine, alanine, glycine, valine,  glutamic acid, leucine, and aspartic acid.

Aging, environmental damage, genetics, chemical processing, and a lack of important nutrients can deplete vital proteins in the hair. The lost amino acids can be reintroduced to the hair by incorporating them into hair products. When these products are applied to the hair, amino acid molecules help promote moisture retention and make hair stronger and healthier.

A woman with amino acid hair smoothing treatment with her head on the table

Is Amino Acid Smoothing Treatment Safe for your Hair?

Amino acid-based smoothing treatments are generally much safer than formaldehyde-based keratin treatments. Most amino acid smoothing treatments are free of hazardous chemicals such as formaldehyde and formaldehyde derivatives. These treatments utilize amino acids to give you smooth, frizz-free, and shiny hair.

Amino acid hair smoothing treatments can be used on all types of hair, but they will provide the best results when used on dry, frizzy, or damaged locks. These smoothing treatments can be safely used on hair that has undergone a chemical treatment, such as coloring, perm, keratin treatment, or permanent hair straightening. Amino acid treatments don’t break the hair bonds that determine the shape of your strands, so you shouldn’t expect pin-straight hair. Amino acid treatments make hair smoother and straighter, but you can still get curls after the treatment.

Amino Acid-Based Smoothing Treatments

This post contains links to Amazon. The publisher may get paid if You purchase something through the links without additional costs to You.

1. Agave Smoothing Treatment 

This in-salon smoothing treatment promises to instantly eliminate frizz, tame unruly strands, and reduce curl retention by 80%. It will make slightly wavy hair completely straight, while tight curls will be about 50% looser.

The smoothing formula uses carbo-c, an amino acid complex derived from agave leaf extract. This active ingredient gently alters the disulfide bonds, making the hair sleeker and smoother for up to three months.

The best candidates for receiving this treatment are individuals who want to tame frizz and cut their styling time without sacrificing their curls.

The procedure takes about two hours depending on the hair length, type, and texture.

Agave Smoothing Treatment can be performed two weeks after receiving a chemical treatment such as permanent waving, relaxing, or keratin treatment.

The color application can be done on the same day after performing the Agave Smoothing Treatment. Most stylists suggest getting Agave Smoothing Treatment immediately after coloring or highlighting service because the treatment locks in the color and nourishes your hair after coloring.

Benefits of Agave Smoothing Treatment

No harmful chemicals: This defrizzing and smoothing treatment is an exceptional alternative to formaldehyde-based keratin straightening treatments. The formula doesn’t use formaldehyde or aldehyde, so there are no toxic fumes to breathe. This treatment is safe for you, your stylist, and all salon visitors.

No waiting time: You don’t have to wait two or three days before washing your hair. After getting the treatment, you will only need to allow twenty minutes for the smoothing process to complete. Then you can wash your hair any time after waiting for twenty minutes.

Improved manageability: Your hair will be much easier to manage after receiving the Agave Smoothing Treatment. You will need less time than usual to blow-dry the hair and it also takes less effort to achieve your desired style.

Better frizz control: This treatment will make your hair much more resistant to weather and increasing humidity in the atmosphere. If you get caught in unexpected rain, you won’t end up with a wild head of frizz.

Better color retention: When used over existing color, the Agave Smoothing Treatment will enhance the color, while also slowing down the color fading process.

Styling versatility: Unlike some chemical-based hair straightening treatments, you will still be able to create beautiful curls after the service.

Aftercare

The effects of agave smoothing treatment should last up to 3 months depending on your hair type and how you follow aftercare instructions. Your stylist may suggest you purchase Agave Shampoo and Conditioner. To avoid stripping the treatment from your hair, you must avoid shampoos, conditioners, or styling products that contain sodium chloride and harsh sulfates.

2. Pravana Perfection SmoothOut

(Available at Walmart)

Creators of Pravana Perfection SmoothOut promise that the treatment will instantly and safely transform coarse, frizzy strands into frizz-free, smooth, and manageable hair, with results lasting 8-12 weeks.

The treatment utilizes a proprietary nano-amino acid complex to smooth out the “S” shape curl pattern without using harmful chemicals. The nano-amino acid complex penetrates hair fibers and slightly stretches the hair’s natural bonds. Amino acid molecules also fill the gaps in the cuticle layer, transforming frizzy hair into smooth and glossy locks.

Pravana Perfection SmoothOut eliminates frizz, enhances shine, and makes your hair faster to dry and style. It reduces the unwanted volume and temporarily makes tight curls looser.

The treatment claims to be safe and effective for all types of hair including coarse, frizzy, and chemically treated hair.

Your hair can be colored on the same day as the Pravana Perfection SmoothOut service. It is advisable to apply color after the service because this smoothing treatment may cause hair color to fade to some degree.

You can shampoo and style your hair on the same day.

If you plan to do this treatment at home, be sure to follow the directions. You also may need an extra pair of hands since the procedure takes up to three hours.

3. Chi Enviro American Smoothing Treatment

This smoothing system is formulated with protein and an amino acid complex. The formula temporarily realigns bonds in hair fibers and improves hair condition, making it smoother, stronger, and easier to manage. The results last up to 4 months.

Depending on your starting hair texture, there are two options of the smoothing solution available:

1. CHI Enviro Smooth Treatment for Virgin and Resistant Hair

2. CHI Enviro Smooth Treatment for Highlighted Porous and Fine Hair

The procedure takes about two hours, depending on the length and density of your hair.

One potential drawback is that you should wait 48 hours before washing the hair. Also, wear your hair down and avoid pins, clips, elastics hair bands, and glasses for at least one week after treatment.

4. Texture Release System by Avlon

The Texture Release System is advertised to provide easier combing and more styling versatility for individuals with excessively curly hair. This treatment is a gentle alternative to using a relaxer.

The smoothing formula uses a blend of amino acids and conditioning agents which is thermally activated during blow drying and flat ironing stages.

The treatment makes hair smooth, resistant to humidity, and easy to comb and style. Your hair will feel healthier, softer, and stronger. You can wear either straight or natural styles.

The results last for up to 2 months.

This straightening system uses the thermal protecting mist before heat is applied to your hair. The smoothing formula is also complemented with styling products that help keep hair frizz-free and shiny.

The Texture Release Kit System includes:

  1. Texture Release Nourishing Cleansing Shampoo
  2. Texture Release Thermal Protecting Mist
  3. Texture Release Releasing Lotion
  4. Texture Release Curl Shape & Shine Cream

It is advisable to wait three to five days after the service before using hair coloring products.

5. The BASIC One-Step Smoothing System

The One-Step Smoothing System offers more manageability and styling versatility for people with curly hair. It repairs, strengthens, and smooths the hair using amino acids in conjunction with heat.

The One-Step Smoothing System does not break bonds in the hair. Instead, it temporarily elongates your natural curls. This treatment repairs and seals damaged cuticles to eliminate frizz and create silky smooth hair. The system enables you to easily create straight styles while allowing you to wear your hair curly when you want.

The application procedure is simpler compared to other smoothing or straightening treatments. If your goal is not straight hair, the treatment can be performed without the flat ironing stage. Due to the very acidic pH value (1,5) of the One-Step Smoothing Foam, the manufacturer recommends wearing gloves during product application.

The procedure can be customized to give you the desired results. To make hair straighter, your stylist will use higher heat and do more passes with a flat iron. Using less heat helps retain the natural curl pattern.

The effects last for up to 12 shampoos.

The One-Step Smoothing System can be used on any type of hair, including previously chemically treated hair. It is perfect for people who go from relaxed to natural hair.

Young beautiful woman with long smooth hair

6. Design Essentials Strengthening Therapy System

This is one of the safest and most effective amino-acid-infused straightening treatments. This treatment strengthens, straightens, and tames unmanageable, curly, multi-textured, transitioning, and frizzy hair. The hair stays smooth, shiny, and manageable for up to 3 months.

Depending on the hair type and desired results, one of three types of smoothing products can be used:

  1. Strengthening Therapy Elongation Mousse (maximizes the natural curl length)
  2. Strengthening Therapy Transitioning Mousse (provides maximum smoothness)
  3. Strengthening Therapy Silkening Spray (reduces breakage and shedding)

8. Thermafuse f450 Amino Fusion Smoothing Treatment

Amino Fusion Smoothing Treatment by Thermafuse uses a proprietary blend of amino acids to reduce unwanted volume up to 100% and to tame curls up to 80%.

This smoothing formula claims to provide excellent manageability, shine, and frizz control for all types of hair. It is designed for people who struggle with unwanted volume, and frizzy, or unmanageable curly hair. The smoothing effects last up to 12 weeks.

You can shampoo your hair, exercise, or go swimming immediately after the treatment.

More brands to consider: 4D SMOOTH by MAT Cosmetics, Plus Keratin 3 Smoothing Treatment by JAS, Protein & Omega-3 Smoothing Treatment by Blondis New York, and Gold Keratin Protein Deep Maintenance Treatment by KERATIN USA.

A woman with amino acid hair smoothing treatment in elegant dress

Caring for Your High-Porosity Hair

What is Hair Porosity?

Hair porosity is the ability of hair to absorb and retain moisture and to properly take in color, or any other hair treatment. Porosity is determined by the state of the outermost layer of the hair. Porous hair strands have highly raised cuticles and can’t retain moisture for long.

Although high-porosity hair quickly absorbs moisture, it loses water through the damaged cuticle layer just as quickly as it is absorbed. High-porosity hair feels dry and can be susceptible to frizz and tangles. Such hair is difficult to comb, and you may notice that it has split ends and breaks easily.

Knowing your hair porosity allows you to select the best products that may help to lower porosity and improve your hair’s texture.

What Are the Most Common Causes of Overly Porous Hair?

Chemical/heat damage: In most cases, a damaged cuticle layer and highly porous hair are the results of over-manipulation, frequent thermal styling, and repeated chemical treatments, such as bleaching and chemical straightening.

Sun Exposure: Too much sun exposure can deplete keratin and damage the cuticles, living your strands, dry, porous, and brittle.

Genetics: Like some other hair characteristics, the level of porosity can be inherited. Hair porosity also increases as you get older.

Upset girl touching her porous hair

What Are The Signs of High-Porosity Hair

Hair tangling: The raised cuticles make strands rougher, and therefore prone to tangles, as well as being difficult to manage. 

Hair breakage: low moisture retention causes hair to look and feel dry and dull, and to become prone to split ends and breakage.

Frizz: high porosity hair easily absorbs water due to raised cuticles, and takes more effort to combat frizz.

Faster color fading: high porosity speeds the progression of color fading because the raised cuticle allows the color molecules to wash away quickly.

Uneven hair dye: hair dyes tend to grab unevenly on porous hair, so it may be difficult to achieve even coverage.

Over-absorption of chemical products: due to raised cuticles, perm solutions and relaxers are absorbed too quickly. This requires some adjustments in the processing time, otherwise, your hair can be severely damaged.

Attractive nervous woman with curly high porosity hair

How to Fix Porous Hair

High-porosity hair should not be exposed to harsh chemicals. If you dye your hair, make sure you include protein fillers as a pre-color treatment, or ask your stylist to incorporate a bond multiplier into your color service, to reduce damage and minimize the chances of breakage.

  1. Pre-Po Treatments: If you have overly porous hair, consider incorporating a pre-shampoo treatment into your hair care regimen. Pre-wash hair treatments are formulated to protect your hair from the drying effects of hair shampoo and provide nourishment for your dry, porous locks. These treatments are supposed to be applied before shampooing to lock in moisture, increase elasticity, and provide a good slip for detangling. They will also make hair look healthier, softer, and shinier.
  2. Protein Treatments: Overly porous hair needs a protein that fills in the gaps within the damaged cuticle layer, helping the hair to retain moisture. Protein treatments should be alternated with deep conditioning treatments to maintain the correct moisture protein balance.
  3. Deep Conditioning: Hair masks for overly porous hair seal in moisture by closing the cuticles and making porous hair softer, more manageable, and frizz-free. Keratin hair masks help to increase your hair’s elasticity, soften roughness, and increase manageability.
  4. Hair Glaze: To refresh your color, and to reduce the frequency of your color sessions, you can apply a hair glaze between color services. Hair glazes fill the gaps of porous hair strands and prolong your color results.
  5. Hair Botox: Chemical relaxers and straighteners may cause irreversible damage to your already over-processed strands. Try hair Botox instead, as this treatment will improve your hair’s appearance without causing any damage.
Attractive woman with curly hair showing ok

Hair Care for High Porosity Hair

1. Shampoos and Conditioners for Porous Hair

Use sulfate-free shampoos made with naturally delivered cleansers, which are rich in hydrating ingredients, to help seal in moisture. Keratin-infused shampoos with mild cleansers wash your hair without drying it out. Keratin conditioners reduce friction and prevent static, making your hair smoother and easy to comb.

2. Hair Oils for High Porosity Hair

Natural oils such as coconut, avocado, almond, and olive oils will coat and seal the cuticle, and prevent moisture from escaping.

3. Hair Porosity Equalizers

Porosity equalizers are meant for use before or after chemical treatments. These products ensure more even absorption of chemical solutions, enhancing the results of perms, chemical relaxing, and coloring.

4. Neutral Protein Filler

One product is a life-saver for individuals with over-processed, overly porous hair – a protein filler. The neutral protein filler helps to repair damaged protein bonds and to reduce breakage after chemical treatments. This product is especially handy when you need to color your high-porosity hair. Protein fillers are used as a pre-color treatment to equalize hair porosity and to prepare your hair for better color absorption and more consistent results.

5. Keratin-Enriched Styling Products

Keratin-infused hair styling products will restore missing protein and increase your hair’s ability to retain moisture. Keratin helps to restore the cuticle layer, making your hair less porous and easier to detangle.

Leave-in conditioners infused with keratin and hair oils will give you smoother, more shiny hair.

a happy young girl with nourished curly hair

Awapuhi KeraTriplex Treatment vs. Keratin Straightening Treatments

If you bleach or color your hair regularly and frequently use heat styling tools, you have probably reached the point when your hair is very dry, fragile, and hard to manage.

The good news is that with the right treatment, your damaged, over-processed hair can recover to be strong, healthy, and beautiful again.

What treatment works this magic?

Keratin repair!

One keratin repair treatment that is gaining popularity is Paul Mitchell’s Awapuhi Wild Ginger Keratriplex Treatment.

Don’t confuse it with Brazilian Keratin Treatment, as KeraTriplex treatment is not designed to straighten hair.

Awapuhi Keratriplex Treatment replenishes the hair with the keratin that has been lost during chemical processing and gets your hair back to its healthy state—without affecting your natural waves.

A mixed-race girl after receiving Awapuhi KeraTriplex Treatment

What is KeraTriplex Treatment?

KeraTriplex Treatment is a 2-step, in-salon treatment that combines a protein hair treatment and a deep conditioning treatment.

Step 1. A blend of protein molecules (KeraTriplex) small enough to penetrate the cuticle and restore keratin in your hair repairs your strands from the inside.

Step 2. The deep conditioning treatment infuses hair with moisture to achieve the proper moisture/protein balance while adding softness and shine.

KeraTriplex Treatment can give any hair type a silky, beautiful appearance and protect it from future damage. However, dry, over-processed, and lifeless hair will benefit the most from the KeraTriplex Treatment. This treatment transforms dry, weak, and brittle strands into stronger and healthier hair while adding a silky feel and glossy shine to the hair.

a woman with awapuhi keratriplex treatment

Paul Mitchell Awapuhi Keratriplex Treatment Steps

The Keratriplex Treatment is designed to be performed at a salon. If you decide to do it at home, make sure to purchase both products (Keratriplex vials and Keratin Intensive Treatment) and follow the directions exactly.

  1. Wash your hair with Paul Mitchell Awapuhi Moisturizing Lather Shampoo and follow with a Keratin Cream Rinse conditioner.
  2. Towel dry your hair.
  3. Apply KeraTriplex Hair Treatment, focusing on the most damaged areas, then distribute it evenly, leaving it in your hair for about 5 minutes. During this stage, the small keratin particles penetrate the hair shaft to repair and seal damaged areas. Do not rinse the product from your hair.
  4. Apply Paul Mitchell Awapuhi Wild Ginger Keratin Intensive Treatment and process under heat for 10 minutes. During this conditioning stage, the Keratin Intensive Hair Treatment provides deep hydration to balance protein and moisture content in your hair, while adding softness and shine.
  5. Rinse your hair without shampooing.
  6. Towel dry your hair, then blow-dry and style as desired.

Benefits

  • Adds strength and moisture to weak hair
  • Reduces breakage
  • Makes dry, rough hair silky soft
  • Improves shine
  • Makes fine, thin hair look thicker and fuller
  • Tames frizz
  • Makes curls soft and bouncy
  • Prevents color fading

Related Article

Keratriplex Treatment Advantages over Traditional Keratin Straightening Treatments

  1. The KeraTriplex Treatment procedure is very simple. While a traditional keratin straightening treatment usually takes more than 2 hours, this keratin repair treatment requires about 30 minutes.
  2. There are no strict post-treatment precautions, and you can wash and style your hair as soon as the procedure is completed.
  3. You don’t have to use a flat iron to seal the treatment in your hair, as you do with keratin straightening treatments. However, you can use a flat iron or curling iron to style your hair after the blow-drying stage.
  4. Unlike most keratin straightening treatments, this product doesn’t contain harmful chemicals that can pose a health risk for you and your stylist.
  5. While the products involved in the application of keratin straightening treatments can emit harmful and irritating fumes, the products used in the Awapuhi Keratriplex treatment have an incredibly refreshing Awapuhi scent.
  6. You can get an Awapuhi Keratriplex treatment for a fraction of the price of a Brazilian keratin treatment—most salons charge between $30 – $40 for KeraTriplex Treatment. Once you are experienced enough to do the treatment at home, you can save a lot of money and a trip to the salon by doing it yourself.

Limitations

  • The results of a Keratriplex treatment don’t last as long as the results after keratin straightening treatment. Without the regular use of the entire KeraTriplex system (shampoo, rinse, and deep conditioner) the results will fade within a month.
  • The effects will last longer if you do deep conditioning using Keratin Intensive Treatment once a week. This deep conditioner is designed to prolong the results of the Keratriplex treatment and keep your hair strong, silky, frizz-free, and shiny.
Attractive woman with KeraTriplex keratin treatment in her hair

What is Keratin Intensive Treatment?

Keratin Intensive Treatment is the second step of the KeraTriplex Treatment, where it is used in conjunction with the Keratriplex vials. It is also meant to be used as a follow-up at-home treatment after you have done the Awapuhi KeraTriplex treatment at a salon. However, your hair can benefit from this product regardless of whether you have received the Awapuhi KeraTriplex treatment or not.

This deep conditioner also contains the KeraTriplex protein complex in addition to the highly moisturizing extract of wild Awapuhi. This product can penetrate deep into the hair to put keratin back into hair fibers, replenish lost moisture, and add a smooth and shiny appearance to your hair.

Paul Mitchell’s Awapuhi Wild Ginger Keratin Intensive Treatment works best on hair that has been color-treated, relaxed, permed, or damaged by heat.

Suggested use: As a deep conditioning treatment, this product should be used weekly. Apply a small amount to your towel-dried hair after shampooing. Work the cream through your hair, leave it on for 3-5 minutes, and then rinse. If your hair is extremely dry or over-processed, use the heated gel cap for 10-15 minutes.

Dry and style as desired.

Don’t overuse it. When used more than once a week, this product can weigh your hair down.

Paul Mitchell Awapuhi Wild Ginger Treatment at Perfect Look – video

African-American woman with smooth long hair wearing red dress

Benefits of and Concerns about Cellophane Hair Treatments

What is Hair Cellophane?

The hair cellophane treatment is a popular shine exchanging service that is also known as a hair gloss treatment. Hair cellophane works by coating the cuticle with silicon-based polymers that add a glossy shine to the hair. The product is available in a clear and tinted formula.

Hair cellophane treatments work best on dry, coarse, and dull hair. The hydrolyzed proteins and silicone in the formula seal the cuticle, helping to reduce hair porosity and preventing hair strands from turning frizzy. This treatment is often performed after a perm, relaxing, or hair rebounding services to condition dry ends, refresh color, and add a protective, shiny finish.

A woman with wavy hair after cellophane hair treatment

A cellophane hair treatment doesn’t straighten hair, but it relaxes curls slightly and helps achieve straighter hairstyles when you blow-dry or flat iron your hair. The effects usually last 6 to 8 weeks.

When used on curly hair, the cellophane treatment adds shine, detangles, and enhances curl. When used on healthy straight hair, a cellophane hair treatment works as a shine enhancer and/or a semi-permanent color service. The manufacturer claims that this treatment has no side effects (we will return to this issue later).

Clear Cellophane Hair Treatments

In a cellophane hair treatment, clear cellophane coats the cuticle with polymers, giving the hair a boost of shine while hydrolyzed proteins strengthen the hair. This treatment does not change natural or dyed hair colors, but it can make colors more vibrant by putting a shiny, clear film around hair strands. A cellophane treatment also helps preserve and prolong the life of color-treated hair.

After a cellophane hair treatment, the hair will look healthier, thicker, and shinier than before. This treatment also helps with detangling, reducing frizz, and preventing split ends.

Cellophane Color Gloss Treatments

A colored cellophane treatment is a semi-permanent color gloss treatment. It deposits semi-permanent color on the hair shaft and leaves hair looking lustrous. However, this treatment cannot lighten the hair. To get a tinted result, treatment of the same color as the hair, or darker, must be used.

A cellophane color hair treatment works great for refreshing color between professional color services. The darker shades provide good gray hair coverage. The deposited color fades gradually with every wash.

Here are some advantages of cellophane hair color treatments over permanent dye treatments:

  • Cellophane color is a good color revitalizer for people who want a subtle color change.
  • This treatment is perfect for people who are sensitive to regular hair dyes.
  • Cellophane color won’t leave hair dry and brittle as permanent hair dyes do.
  • This treatment is great for covering a small percentage of gray hair.
  • Blonde shades of the cellophane hair treatment help remove brassiness from hair that has been dyed blonde.
  • Cellophane color is a great color revitalizer for permed and relaxed hair that can be over-dried and damaged by using a permanent color service.
  • With a cellophane color treatment, the color gradually decreases, without the appearance of root lines.
A brunette woman with shiny hair

How to Apply a Cellophane Hair Treatment 

Cellophane hair treatments can be done in a beauty salon or can be performed in the comfort of your home by carefully following the instructions.

You will need gloves, a color brush and bowl, and a disposable shower cap. The process can be messy if you use colored cellophane. Putting Vaseline around your forehead and ears is recommended.

Steps:

  1. Wash your hair properly using a clarifying shampoo, but don’t use conditioner. Blow-dry your hair until it’s about 75% dry.
  2. Divide your hair into 4 sections.  Start at the back and work forwards. Apply the product, making sure that your entire head is saturated, and comb it through to evenly cover each hair strand.
  3. The cellophane product requires heat to work. Cover your head with a plastic cap and sit under a hairdryer, or use a conditioning heat cap, allowing the product to be set for 20 to 30 minutes. You can also use a blow-dryer, but make sure to evenly apply heat over your entire head. If your hair is healthy and has low porosity you can extend the heat exposure time.
  4. When the heating step is over, allow the hair to cool completely and rinse with plain water. Wash the hair with a color-safe shampoo and condition it as usual. You can then style your hair as you want.

Hair Care After a Cellophane Treatment

This treatment requires very little maintenance. Since it gradually washes away over time, use a mild color-safe shampoo. Washing too frequently and using harsh shampoos can cause the effects to fade faster. You are free to go swimming in chlorinated, as well as in seawater. The treatment helps reduce dryness and damage that can be caused by chlorine and salt water.

Is Hair Cellophane Safe?

Cellophane is a safer version of hair dyeing because it only deposits non-oxidative pigments on the hair shaft, unlike other color services. Manufacturers claim that cellophane treatments are “hair-friendly” gloss treatments. Cellophane treatments can be used on hair that has already been colored and can be applied immediately after a color service. The treatment can also be applied the same day, following a relaxing service. But is it safe for you?

This popular hair gloss formula includes parabens, which are suspected to affect human health when used in cosmetic products. CELLOPHANES Color Revitalizer by Sebastion Cellophanes Hair Color includes methylparaben, ethylparaben, butylparaben, isobutylparaben, and propylparaben in its formula.

Check the product ingredient label before purchasing to ensure that the manufacturer has replaced parabens with a safer preservative.

A beautiful model with hair glossing treatment

How to Remove Static from Your Hair and what Static Tamers to Use

Fly-away hair happens when your strands are rubbed against some materials that hold static electricity on their surface. Since materials with the same charge repel each other, the positively charged individual hairs try to put as much distance between them as possible. This is known as a “fly-away hair” effect.

Static electricity makes hair look untidy and difficult to manage. Fortunately, there are anti-static hair tools and products you can use to minimize the appearance of flyaway hair.

 woman with standing hair from static electricity at physics museum
 Woman with standing hair from static electricity at physics museum

What Causes Static Hair?

  1. Dry hair: Dry, over-processed, and fine hair is more prone to turn into fly-away strands than thick or healthy hair. Higher moisture content increases the conductivity of hair strands and makes it easier for your hair to spread out and neutralize the static charge. Dry hair acts as an insulator and cannot conduct and release the static charge, which causes your positively charged strands to repel each other and fly in all different directions.
  2. Dry air: Hair becomes more prone to static during cold winter months due to the lack of humidity in the air. Dry external conditions and dry indoor air due to heating, absorb the moisture not only from the air, but from your hair as well, and this encourages the accumulation of static electricity. The humidity prevents the build-up of static and helps to release it from hair, while dry air increases the build-up of electrical charges.
  3. Clothes: Sweaters, coats, and caps made from wool, acrylics, and polyester tend to cause an accumulation of static when rubbed against your hair. Resist wearing hats or caps made of these materials and look for cotton clothes instead.
a blonde woman with flyaway hair

How to Tame Flyaways?

When your hair flies in different directions it might be challenging to maintain a respectable style. Trying to fix the style with an ordinary brush creates even more static electricity, worsening the problem.

To reduce static electricity build-up, you need to keep your locks healthy and well moisturized. There are also some quick fixes to try when it is not possible to prevent your hair from becoming charged with electricity.

Products for Flyaway Hair

1. Shampoo for Staticky Hair

Avoid shampooing your hair daily, as excessive washing can cause hair to become overly dry. When detergents in a hair shampoo deprive your hair of its natural oils, it becomes drier and more prone to static. Skipping a day in between shampoos helps keep the natural moisture in your hair, making it less prone to static.

Refrain from using shampoos with sulfates, as these tend to strip the natural oils from your hair and disturb the natural pH balance. Select a hydrating, nourishing shampoo that only washes away dirt and the surface level of excess sebum. 

Related product: Aveda Smooth Infusion Shampoo helps soften hair and makes it easier to style. Hydrolyzed wheat protein and a special infusion of plant extracts help to create a smooth surface on hair to reduce frizz, minimize flyways, and add extra shine.

2. Conditioner for Flyaway Hair

Use a moisture-rich conditioner every time you shampoo your hair to prevent dryness and reduce static charge. Before exiting the shower, rinse your hair with cool water for a few seconds to seal the cuticle and prevent frizz and fly-away hair.

Keratin-enriched conditioners help seal the cuticle and reduce friction, making hair less prone to static and frizz.

attractive brunette woman with long flyaway hair

3. Leave-in Conditioners for Flyaway Hair

Apply a leave-in conditioner to towel-dried hair, especially if your hair is on the dry side. This helps your hair retain its natural moisture and prevents the static charge from accumulating on your strands.

Use a deep conditioning mask once a week to restore moisture and keep your hair healthy and more resistant to static charge.

4. Anti-Static Hair Brushes

The friction caused by excessive brushing may result in fly-away hair. Combing generates less friction between hair strands than brushing and helps reduce a build-up of static charge.

Wrong: Plastic or silicone styling tools create static electricity when coming in contact with your hair. Unlike plastic brushes, hairbrushes with stainless steel bristles don’t produce a static charge and they leave your locks smooth and manageable.

Right: For detangling purposes use a good wooden comb, because wood doesn’t create static electricity in combination with other materials, including your hair. The wooden teeth of the comb also help evenly distribute natural oils, adding a nice shine to your hair.

Related product: Natural Wooden Bamboo Brush by Sofmild is made with biodegradable materials. Wooden bristles stimulate the scalp, naturally condition your hair and help create a sleek and shiny finish.

Tip 1. To create a straight look, use a hair straightener brush with negative ion technology such as Ionic Straightening Brush by HODAY. It helps to achieve a straight finish while leaving hair smooth, shiny, and static-free.

Tip 2. When blow-drying your hair, use an antistatic, ionic mineral-infused round brush that leaves your locks looking smooth, healthy, and glowing.

5. Ionic Hair Dryers

Ionic blow dryers generate negative ions which neutralize the positive charge responsible for fly-away hair. This type of hair dryer breaks the water molecules into smaller particles. This helps lessen the amount of heat and time needed for drying your hair and reduces the loss of inner moisture.

4. Anti-Static Hairsprays

An alcohol-free hairspray is a very handy styling product for taming static hair. Alcohol in standard hair sprays can lead to dryness, making the problem even worse in the long run.

Related products:

  • Smart Solutions Flexible Holding Spray provides a flexible hold to keep your style all day without leaving your hair feeling sticky. It is formulated with plant extracts that help balance moisture, prevent static and fly-away hair, and protect hair color from fading.
  • Oribe Foundation Mist helps detangle hair, provides thermal protection, and neutralizes the static charge.

Applying a small amount of hair oil, focusing on the ends, will counteract the static electricity. Oil-based hair products also help replenish lost natural oils, while adding a glossy shine to your hair.

a beautiful brunette woman with static in the hair

Quick Fixes for Static Hair

  1. Hair finishing stick: The flyaway tamer wand quickly and effectively fixes flyaway hair, broken hair, and edge hair, making your hairstyle neat and smooth. This way you can put annoying flyaway hair under control instantly. This hair-taming product is small and easy to carry in a bag and use when needed.

Hair Feel Finishing Stick by Aroamas uses natural ingredients such as beeswax, seed oil, primrose oil, and camellia to smoothen flyaways and create a shiny finish. Just dip the mascara brush in the gel and lightly run it over rebellious strands.

2. The magic of dryer sheets: Keep a dryer sheet in your purse for emergencies. When your hair gets charged, place and rub it over your hair. In the same way, as a dryer sheet neutralizes the static in your clothes, it will instantly help smooth your hair. Try to avoid this method when possible, as a dryer sheet contains toxic chemicals that can be absorbed through your skin.

3. Wet your hands: Sliding your wet fingers along the hair is another quick and easy way to tame fly-away strands.

a girl uses anti-static brush

How to Reduce Frizz in Your Hair

Frizzy hair is one of the most annoying problems that many women deal with, especially during the humid summer months. Frizz makes hair unattractive and difficult to manage. Although the problem may seem overwhelming, some effective practices can help to keep the frizz under control.

Hair gets frizzy when the outer layer of your hair (cuticle) doesn’t lay flat. Ruffled and damaged cuticles cannot lock in the moisture needed to keep hair strong and elastic. Moisture-deprived hair tends to absorb water from the air. The porous exterior surface of the hair strand allows moisture from the atmosphere to pass through, causing the hair strands to swell, creating a frizzy look.

Before trying to prevent or tame frizz, you need to understand what causes your hair to look frizzy.

a cute African American girl with frizzy hair

What Causes Frizzy Hair?

  • The Environment: Changes in humidity levels make hair look frizzy and lose its smooth texture and shine. Humid air, wind, and UV radiation are the most common frizz-causing environmental factors. Heated indoor air can also cause frizz and flyaway hair.
  • Genetics: Naturally dry, delicate hair can be inherited. Different hair types have different reactions when exposed to humidity. Curly hair is dry because it lacks protective oils that provide a barrier against humidity. We already know that dry hair tends to suck up moisture and turn frizzy.
  • Hair care regimen:  Some hair care and hair styling practices such as over-washing or using excessive heat, can lead to dryness, damage, and breakage, contributing to the appearance of frizz.
  • Chemical treatments: Other sources of frizz are chemical hair treatments, like hair coloring, bleaching, and perming. Using too many chemicals can strip the hair of protective oils and damage the cuticle layer which assists in the moisture retention process. Over-processed hair is dry and porous and readily absorbs moisture from humid air.

How to Prevent Frizz from Occurring?

To get your frizz under control, you have to deal with the root causes of frizzy hair. Below are a few guidelines on what changes you need to make in your current routine to prevent frizz from developing and get smoother hair.

  1. Reduce the frequency of washing. Don’t wash your hair daily. Overwashing can strip hair of its natural oils, which help control and prevent frizz. For people with normal or dry hair, it is advisable to wash their hair twice a week at most, using a gentle, sulfate-free shampoo. Don’t rinse your hair with hot water after using shampoo and conditioner, as hot water raises the cuticle and causes frizz.
  2. Avoid excessive brushing. Avoid using a hair brush for combing your hair. Brushing, especially when using a plastic comb, can disrupt the hair cuticle, resulting in hair static. Excessive brushing also stretches hair strands, which may lead to breakage. Breakage leaves twisted hair pieces that lead to that “poofy” appearance.
  3. Don’t rub your hair with a towel. Rough towel drying can disturb the cuticle and create frizz. Gently squeeze excess water from your hair and wrap it in a microfiber towel or a T-shirt to soak up moisture, keeping the cuticle smooth.
  4. Avoid alcohol-containing products. Alcohol and other preservatives are often used in hair products to extend their shelf life. Alcohol-filled hair styling products can dry hair, causing the appearance of frizz. To reduce frizz, make a switch to alcohol-free styling products.
  5. Be careful with flat ironing. If possible, stop or reduce the use of hot styling tools. If you do use a flat iron, start at a low-temperature setting and don’t exceed 365 F to avoid damage to hair from excessive heat.
  6. Protect your hair from environmental factors. To prevent frizz, avoid exposing your hair to the wind and humidity. Put your hair in a bun or pull it up into a ponytail on windy and humid days. Before you go swimming, protect your hair from chlorine, which can strip the hair of natural oils, resulting in dryness and damage. Saturate your hair with fresh water before you enter the pool and rinse it immediately after you finish swimming.

How to Tame Frizzy Hair

  1. Use conditioner after each shampoo. Use a rinse-out conditioner each time you shampoo to smooth the cuticle and keep your hair well-moisturized.  Use cool water during the conditioning stage to close down the cuticle, prevent frizz, and impart shine.
  2. Dry the hair properly. Let your hair air-dry 90 percent of the way before you blow-dry. Select a hairdryer with ionic technology that helps reduce static electricity. Use low-temperature settings and blow dry in a downward motion to smooth the cuticles and prevent your strands from developing frizz.
  3. Do deep conditioning. Apply a deep-conditioning treatment once a week to infuse your dry hair with moisture, repair damaged strands, and increase softness and shine. Use packs with potent moisturizing ingredients, such as olive, avocado, and jojoba oils. Doing hot-oil treatments also helps keep your hair properly moisturized and frizz-free.
  4. Use leave-in conditioners. Apply a leave-in conditioner while your hair is still damp to gently remove tangles and prevent damage from combing. A leave-in conditioner fills your locks with extra moisture and helps smooth frizzy strands.
  5. Use a wide-toothed comb. Gently comb your hair while it is still wet, using a wide-toothed comb, to reduce breakage. Avoid using plastic combs or brushes to keep static away from your hair.
  6. Use anti-frizz serums. You can use anti-frizz styling products, such as anti-frizz serums and hair sprays that contain water-soluble silicones (Dimethicone Copolyol and Cyclomethicone). Those products coat your hair with a thin film, which acts as a barrier between the hair strands and outdoor humidity.
  7. Use hair oils. Plant oils, like argan, almond, and coconut oil trap moisture inside the hair, tame static and frizz, and add a healthy shine. Apply a dime-size amount of oil to clean, damp hair, preferably to the ends. These nourishing oils differ from heavy synthetic products because they help repair hair damage, instead of just covering it.
  8. Switch to a satin pillowcase. Cotton pillowcases suck up the moisture from your hair. Satin or silk pillowcases are smoother and gentler to hair, which helps retain moisture and reduce frizz-inducing friction.
  9. Get regular trims. Trim your hair regularly to remove damaged ends. Damaged hair is more prone to develop frizz than healthy and well-nourished hair.
a student girl with frizzy hair

In-Salon Treatments for Frizzy Hair

Keratin Hair Treatment

This procedure involves the application of liquid keratin into the hair and intense flat iron heat to seal the treatment. Keratin straightening products coat the hair strands and create straight, smooth, and frizz-free hair.

Brazilian Blowout

This hair smoothing treatment infuses a mixture of amino acids into the cuticle layer to make your hair smoother, shinier, and less frizzy.

Hair Botox   

Hair Botox is a new ultra-nourishing technology that uses organic compounds to restore damaged hair. The formula contains nourishing active ingredients that penetrate the hair shaft to repair damaged fibers, seal the gaps, and flatten ruffled cuticles.

Hair Glossing Treatments

Hair gloss and hair glaze treatments will coat your strands to reduce porosity, eliminate frizz, and add reflective shine to your hair. Those treatments also enhance the color vibrancy and slow down the color-fading process.

A young girl holding an umbrella and protecting her hair from frizz

Six At-home Hair Glaze Products

Hair glaze refers to a hair treatment that uses lightweight, water-soluble silicones to smoothen and coat the hair cuticle, thus enhancing its shine. The treatment softens and nourishes the hair leaving your strands healthy and shiny.

There are two types of Hair glaze: Clear and Tinted versions. Clear glazes soften your strands, enhance hair’s natural tone, and restore shine to dull hair. On the other hand, color-reviving glazes contain color pigments added to restore and maintain hair color, while adding a translucent coating to the hair shaft.

The effect of the glazing treatment will fade out gradually after washing several times with shampoos.

The Benefits of Using a Hair Glaze

a beautiful woman with shiny hair

Glosses and glazes are less intrusive than permanent dyes as these shine-enhancing products do not use ammonia and other harmful chemicals.

Hair glaze is a great add-on service that helps to seal freshly applied hair color into each strand, making it bright and glossy, and more long-lasting.

Applying a glaze can refresh faded colors or highlights, postpone further fading, and stretch the time between dye-job appointments.

The glaze puts a protective coating on the hair that shields the hair from external environmental factors that can fade hair color.

Hair glaze will infuse your dull and lackluster tresses with a burst of shine, giving your hair a gorgeous glow.

Hair glazes provide a gentle conditioning treatment for damaged hair; they also fill and smooth the porous cuticles and help the hair look and feel more beautiful.

Hair glaze treatments help minimize frizz and tame puffiness, making your hair soft to the touch and smooth.

At-Home Hair Glaze Treatments

Hair glazing used to be a salon-only treatment, but now you can purchase hair glaze products at your local beauty store and treat your hair at home. This is a great alternative to expensive salon glazing services; you will save your time and money while creating an effect similar to professional glazing services.

These products can be used on all hair types and textures, including color-treated, highlighted, and virgin hair. Hair glazes contain no ammonia or peroxide and they generally won’t harm your hair as long as you stick to the package instruction. They are rather inexpensive, easy to apply and maintain, and just as effective as the ones found at salons.

How to Apply Hair Glaze

In most cases, hair glaze is applied to clean, wet hair and left in for up to 20 minutes before it is rinsed out. Some hair glazes are heat-activated while others contain penetration enhancers that will give you desired results without the use of heat. Generally, hair glazes should be applied using a color brush to ensure that every strand is covered with the product. The product needs to be applied slightly below the roots, paying attention to the ends.

For tinted glazes, it is important to use gloves and thoroughly wash any area of skin that comes in contact with a glaze to avoid staining the skin. Make sure that the product is fully rinsed out from the hair.

Below are several popular home glaze products that will extend the life of permanent hair color and keep your strands silky and shiny for weeks. Keep in mind that the terms “glaze” and “gloss”, as used in these shine-enhancing products, are often interchangeable.

Best At-Home Hair Glaze Products

This post contains links to Amazon. The publisher may get paid if You purchase something through the links without additional costs to You.

1. John Frieda Liquid Shine Clear Hair Glaze

This ammonia/peroxide-free formula enhances hair shine without affecting hair color. It improves texture for silky smoothness by filling in damaged areas inside the hair. This light silicone-based product gives hair a silky and smooth feeling without weighing hair down or leaving a greasy residue. It provides immediate shine, helps tame frizz, and improves the appearance of your hair.

This clear glazing treatment can be used to boost hair shine for every shade of color-treated, highlighted, or natural hair. It is easy to use and makes no mess in the shower. It can be left in the hair for several minutes after your shampoo and conditioner or can be used once a week as a 20-minute shine enhancement treatment.

2. John Frieda Brilliant Glaze for Brunettes 

This ammonia-free formula contains a blend of mild semi-permanent dyes and shine boosters, to add a hint of glossy brown color and extend the life and tonal richness of brunette hair.

Benefits:

  • Gives a youthful look and shine to dull brown hair
  • Enhances hair color, keeping the highlights bright and shiny
  • Extends the life of hair color and prolongs the time between salon appointments
  • Turns gray hair into a natural-looking blonde color
  • Leaves hair soft and manageable
  • Results intensify with each application

3. Sebastian Cellophane Clear Shine (Walmart)

The hair cellophane uses silicon-based polymers to seal cuticles and add a beautiful shine to your hair. It won’t deposit any color in your hair. However, this treatment will likely make your color last longer and appear more radiant. Your hair will feel smoother and silkier, especially if your strands are chemically processed and look dull. The treatment also helps tame frizz and flyaways.

It can be used with good results on relaxed or Japanese straightened hair.

The treatment lasts for about 12 washings and fades away with each shampooing. Once needed, you can reapply it.

How to use: Clear cellophane is easy to use at home, while the colored version should be applied by a professional for best results.

If you use a clear treatment, you can apply it either with your hands or with a dye brush. Apply to partially dried hair (about 75%), using enough product to cover every strand.  Put on a shower cap and apply heat for 20 -30 minutes. By applying heat you will activate the product to give you the best results.

Let your hair cool after removing the shower cap, then rinse with lukewarm water.

Update: Read the ingredient list carefully to make sure that the formula doesn’t include parabens.

a woman with hair glaze treatment in her hair

4. Clairol Professional Radiance Color Gloss (discontinued)

This semi-permanent hair color comes in 21 glamorous glosses. It is used to revive color and add shine to color-treated hair or to enhance and brighten natural hair color. It helps to eliminate yellow tints from lightened hair.

The formula is free of ammonia and gentle on your hair. It has to be mixed with a developer before application. It takes 15-20 minutes to process depending on if you use heat or not.

This shine booster is suitable for colored, permed, or relaxed hair. It works great for hair that looks dull and lifeless, making it look healthy and shiny for up to six weeks. The product will gradually wash out of your hair during that time.

5. Mark Hill Only Takes a Minute 60-Second Detox Gloss Treatment 

This creamy, sweet-smelling formula contains Argan Oil, Sea Silk, and vitamins to moisturize and protect your hair while adding shine. You can use it in place of a conditioner, so it saves you time. The product is advertised to take just one minute, but you may want to leave it for a few extra minutes to ensure a deeper condition. The treatment leaves hair moisturized, shiny, soft, and easy to style. If your hair is in good condition, you only need to use it once in a while.

a beautiful woman with glaze treatment in her hair

6. Shu Uemura Color Lustre Cool Blondeir?t=softerhair 20&l=am2&o=1&a=B00B7F09JY 

This post-shampoo toning treatment restores the vibrancy of blonde hair, refreshes platinum tones, and takes off unwanted yellows and warm tones from blonde hair. It subtly deposits color pigments to prolong the intensity of your color and prevent fading between salon visits.

It is free of ammonia and silicone and is enriched with Linseed Oil and Musk Rose Oil to nourish and hydrate your locks and keep hair soft, shiny, and manageable.

It is an expensive product, but it will last for an extended time as you only need a little drop of it per time. The tube lasts for approximately 12 applications, depending on the length and thickness of your hair. To keep your hair in a perfect blonde shade, you need to use it after every 2-3 shampoos.

Apply the treatment to towel-dried hair and leave it on for 5-10 minutes.

a happy woman with shiny long hair after glaze treatment

The Differences between Hair Gloss and Hair Glaze and which Option to Choose

Shiny hair is a sign that your locks are healthy, which is what the majority of people hope to achieve. When your hair is healthy, the cuticles tightly cover the hair shaft, making the surface of your hair smooth. A smooth, healthy strand of hair reflects light like a mirror, giving it a shiny appearance.

Chemical treatments, excessive heat, chlorinated water, and extreme environmental conditions can cause hair damage, disturbing the naturally smooth cuticle layer and leaving your strands looking frizzy, dull, and lifeless. Your hair color may also lose its vibrancy and fade faster. Such over-processed and damaged hair has a rough and porous surface meaning it can’t reflect light.

Fortunately, there are hair treatments that can restore shine and make your locks look fabulous again! Hair glosses and hair glazes are the best solutions for overly porous lackluster hair.

These shine-enhancing treatments are gaining popularity because of their ability to smooth the hair surface, giving your hair the desired luster. Both treatments are pretty easy to apply, and can be used on any hair type, including virgin, color-treated, and highlighted hair.

a sensual woman after hair gloss treatment

Hair Gloss vs. Hair Glaze Treatment

These two treatments differ from one another in the way they work. Hair glosses work by penetrating the hair shaft and sealing the cuticles. Hair glaze products simply coat your strands and just sit on the surface. Another difference is how long the treatment will stay in your hair before being washed out. But let’s look at it a little closer.

Hair gloss usually contains peroxide in its formula. The peroxide can lift the cuticle and penetrate the hair shaft, allowing for the depositing of color pigments inside the hair shaft. Hair glossing treatment can change hair color by a full shade with effects lasting about 4-6 weeks.

Hair glaze is a temporary shine treatment, which doesn’t contain ammonia or peroxide and cannot, therefore, open the cuticle. This treatment gently coats your strands with shine or/and semi-permanent color. Consequently, the effects are considerably more short-lived compared to hair gloss and last only a week or two.

Both treatments give a similar result – glowing and healthy-looking hair. Although hair color experts consider them to be two separate types of products, manufacturing companies often use the terms “hair gloss” and “hair glaze” interchangeably. What’s even more confusing is that many hair dye manufacturers add the word “gloss” to their products for marketing purposes.

Let’s Try to Simplify It

At this point, trying to make a clear distinction between hair gloss and hair glaze treatment is useless and can even add to the confusion. So, in this article, we are going to talk about two formulas regardless of the name on the packaging.

  1. The first is a mild, short-lived formula that just coats the hair shaft.
  2. The second formula penetrates the hair shaft and lasts up to six weeks.

Both formulas are available in two options: clear and tinted.

Before you decide between these options, you should talk to your stylist about desired results. Also, ask questions about the product they are going to use.

If you decide to do a glossing treatment at home, make sure to carefully read the directions for use. Take time to learn about the product and the results you can expect.

Clear vs. Tinted Hair Gloss/Glaze

As we already mention, hair shine treatments are available in two versions – clear and tinted. Both versions will provide you with glamorous shiny hair and help extend the life of your current hair color.

Colored glossing/glazing treatments work to enhance and maintain the underlying color and add shine.

Clear glossing/glazing products do not contain color, which makes them suitable for every shade of natural or color-treated hair. Clear glosses/glazes seal the cuticle layer and coat the hair shaft with a transparent shine.

The Longevity of Hair Gloss and Hair Glaze Treatments

The stronger formulas of hair shine treatment penetrate the hair shaft and produce more lasting results. The effects last for three to six weeks. The longevity may vary among brands and whether you have received the treatment in a salon or have done it yourself.

The milder formulas are a short-term solution, lasting one to two weeks since they only coat hair strands. Both formulas fade away with normal hair washing.

a beautiful woman with hair glossing treatment

Benefits of Hair Shine Treatments

  1. Shine-enhancing treatments are relatively mild and less damaging to your hair and scalp compared to regular dyes. A shine treatment provides intense conditioning for stressed, dull, and lifeless hair. It helps to temporarily fix the damage, prevents flyaway hair, and minimizes the appearance of frizz. To maintain the results, use sulfate-free products that are designed for colored hair.
  2. Both treatments protect the color from washing out fast and stretch out the time between color appointments. Shine treatment helps seal freshly applied hair color, creating a protective film that helps reduce fading. It also helps revive your color once it starts to fade.
  3. Hair gloss/glaze treatment can fix a bad dye job. If your color has turned out a little brighter than desired, the glossing treatment can help adjust the tone.
  4. Gloss/glaze treatments can tone down brassy highlights and orange hues in blonde and brunette hair while eliminating yellow from grays.
  5. The milder formulas cover the hair shaft, leaving hair shiny, smooth to the touch, and easy to style. They cannot change the existing color, but do bring back the natural shine to hair that feels dry and dull.
  6. You can change your color whenever you want as shine treatments will not interfere with any type of chemical treatments you may decide to do.
a sensual brunette with shiny hair

Which Hair Gloss/Glaze Treatment to Choose?

The decision depends on your preferences and the specific needs of your hair.

If your hair color has started to fade, but you are not ready for the next color service, look for a gloss/glaze with color pigments to get your rich shade back. Tinted shiny treatments can provide decent color refreshment between permanent color services.

For those who are not happy with their current color, a tinted shine treatment can make subtle corrections to a previously applied color. If the color turned out a little brighter than desired, the tinted hair gloss/glaze can help adjust the tone.

If you are a brunette and want to balance out brassy highlights, look for a colored hair gloss or glaze.

If you are blonde and your hair is getting dull and brassy, go for a clear product.

Individuals with virgin hair can use the treatment to make their hair healthier-looking and shinier. Clear treatments make the natural color more beautiful due to increased light reflection.

Tinted shine treatments can be the perfect way for hair color newbies to experiment with colors without commitment.

If you want to cover your gray roots, opt for a stronger and tinted glossing product. The stronger hair glossing formula, especially the tinted one, will efficiently mask growing roots until your next salon appointment. Mild and clear formulas will not provide the full coverage of gray hair. However, they can smooth the cuticle layer and add a hint of tone to blend in a few pesky strays.

If you like your hair color (natural or dyed) and only want to add shine and softness, look for a clear gloss or glaze. A clear shine treatment will revitalize hair’s natural brilliance, soften the strands, and refresh faded lengths and ends.

If you prefer not to use chemicals on your hair, a milder formula that just coats the hair shaft is less likely to contain any harsh ingredients.

If you prefer doing hair shiny treatment at home, the mild and clear formulas are quicker and easier to apply.

a gorgeous woman with glossy hair